How to Add Audio to PowerPoint: The Quick Step-by-Step Guide
- Share on Facebook
- Share on Twitter
By Al Boicheva
in How-To Tutorials
2 years ago
Viewed 842 times
Spread the word about this article:

In most cases, your PowerPoint presentation will serve as a visualization for your main points during your speech. This, however, doesn’t mean you can’t take a break and enrich your presentation with additional media to further immerse your audience . If you’ve landed on this article, you probably already have something in mind and wish to try to diversify your slides with some music, sounds, or narrations. With no further ado, welcome to the quick step-by-step guide on how to add audio to PowerPoint.
📝 Note: In order to record or hear the audio in PowerPoint, make sure you equip your device with headphones and a microphone.

How to Add Audio in PowerPoint from PC
Let’s say you already have some tune in mind that you wish to add to a particular slide. In terms of sounds, PowerPoint allows you to add multiple files to a single slide, so your options are limitless. For this guide, for example, we will create a slide for a presentation on Farm Animals directed at children. We will add a sound responding to each of the animals in the picture.
Go to the ribbon menu in your PowerPoint and choose Insert > Audio .

When you click Audio , PowerPoint will open a dialogue window. From there, navigate to the location where you store your audio files. Once you select the audio file you wish to add to your slide, click Open .

PowerPoint will insert your audio file in the form of a speaker icon with a player that allows you to play your file and adjust its volume. You can drag the icon and place it wherever you find it suitable, and you can also adjust its size .

If you select the speaker icon, the Audio Menu will appear in the main ribbon menu. Select the Audio menu and take a look at the options.

This option allows you to adjust the volume of your audio.
This option reveals a drop-down menu to help you choose how the audio starts. Depending on the version, you can choose the following options. When Clicked On plays audio only when you click the speaker icon. Automatically plays your audio file immediately when you land on the slide where you’ve placed the audio file. In some versions, you will get a third option of In Click Sequence , which plays the file automatically with a click.
Audio Options
In order to choose how the audio plays during your presentation, this drop-down menu gives you the following options.
- Play Across Slides plays the audio files across all the slides.
- Loop Until Stopped allows you to play your audio file on loop until you manually choose to stop or pause it with the respective button in the mini player.
- Hide During Show hides your speaker icon. Use it only if you set your audio to play automatically.
- Rewind After Playing rewind your audio clip more than once while you are still on the same slide that originally contains your audio clip.
Play in Background
This option allows you to have your audio clip play continuously across all slides in the background.
Make sure you test your audio in Slide Show. Now let’s see how our Farm Animals and their sounds presentation works out. We chose to play each sound When Clicked On .
📝 Note: In order to delete an audio clip, select the speaker icon on the slide and press Delete .
How to Record Your Own Audio
You also have the option to record your own audio directly in PowerPoint. In order to do so, go back to the Insert > Audio menu and choose Record Audio .
PowerPoint will open a Record window. Here you type the name of your audio file and click Record before you start speaking to your microphone.

In order to review your record, select Stop and then hit Play to listen.
You can also select Record to re-record your file. Hit OK when you’re satisfied with the clip.
Same as with audio files from your computer, PowerPoint will insert your clip as a speaker icon . Drag the icon where you want it on the slide.
If you select the speaker icon, the Audio Menu will appear in the main ribbon menu. Select the Audio menu and take a look at the options. They are exactly the same for your recording clip as with audio files from your PC.
Final Words
We hope this step-by-step tutorial was useful to you. Now get wild and impress your audience with immersive audio in your presentation.
It seems that you are interested in the subject of Powerpoint. Why don’t you throw a glance at these related articles?
- The Best Free PowerPoint Templates to Download in 2022
- Convert Your PowerPoint Presentation into Google Slides
- 28 Free Technology PowerPoint Templates
- 100+ Free PowerPoint Graphics For Presentations [Free PPT]

Add some character to your visuals
Cartoon Characters, Design Bundles, Illustrations, Backgrounds and more...
Like us on Facebook
Subscribe to our newsletter
Be the first to know what’s new in the world of graphic design and illustrations.
- [email protected]
Browse High Quality Vector Graphics
E.g.: businessman, lion, girl…
Related Articles
The 25 absolute best adobe xd tutorials in 2022, cartoon yourself today with 10+ tools, tutorials & tips, 25 affinity designer tutorials to step up your game in 2022, 21 indesign tutorials to become a great publisher in 2022, how to convert your powerpoint presentation into google slides, enjoyed this article.
Don’t forget to share!
- Comments (0)

Al Boicheva
Al is an illustrator at GraphicMama with out-of-the-box thinking and a passion for anything creative. In her free time, you will see her drooling over tattoo art, Manga, and horror movies.

Thousands of vector graphics for your projects.
Hey! You made it all the way to the bottom!
Here are some other articles we think you may like:

How-To Tutorials
How to design graphics for social media like a guru: tutorials & tips.
by Lyudmil Enchev

How to Make Google Slides Vertical and Change the Perspective?
by Nikolay Kaloyanov
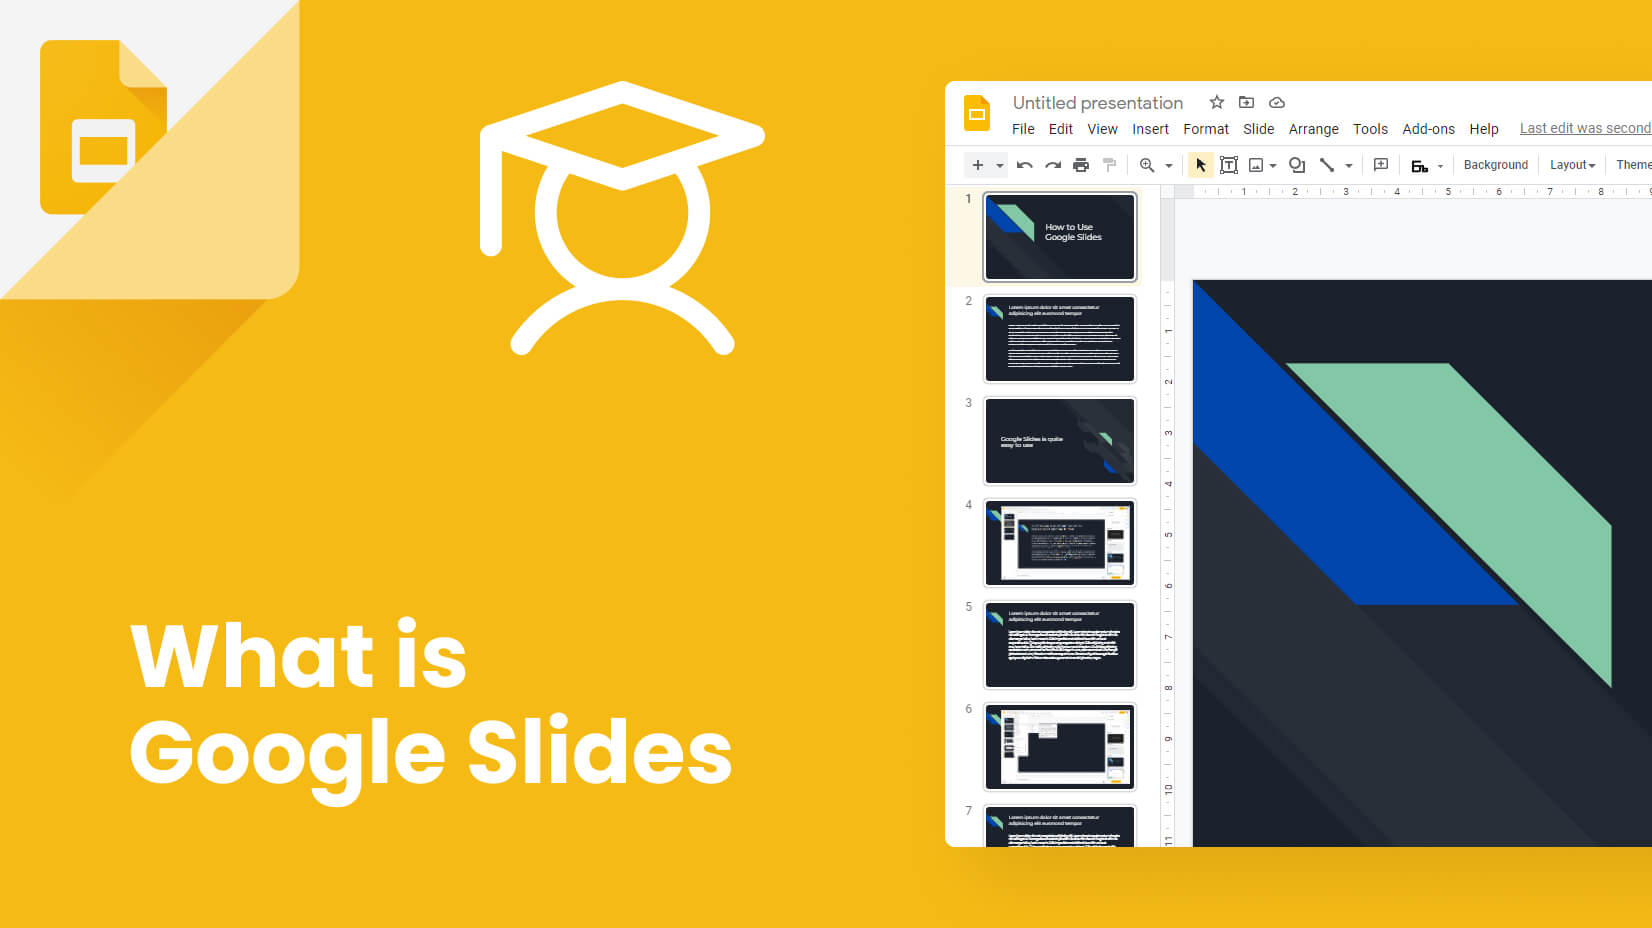
What Is Google Slides and How to Get Started?
Looking for design bundles or cartoon characters.
A source of high-quality vector graphics offering a huge variety of premade character designs, graphic design bundles, Adobe Character Animator puppets, and more.
- Slidesgo School
- PowerPoint Tutorials
How to Add, Record or Edit Audio or Music in PowerPoint

Do you want to set the right mood and keep your audience engaged and entertained during your next presentation? In this new Slidesgo School tutorial, you’ll learn how to add audio or music to your presentations . You’ll also find out how to edit them to your liking .
Adding Audio from your Computer
Recording audio from powerpoint, editing audio, adding online audio, adding music from youtube, playing several clips in succession during your presentation.
- Before we begin, please note the following: in PowerPoint 2010 or older, you should use .wav or .wma files in Windows, and .wav files in Mac. If you’re using a newer version, we recommend that you work with AAC .m4a files.
- Open your PowerPoint presentation and select the slide where you want to add audio.
- On the Insert tab, in the Media group, click the Audio drop-down arrow. You’ll see two options: the first one allows you to add audio from your PC, whereas the second one allows you to record audio (you’ll need to have a microphone set up in your computer).
- Select Audio from My PC. A new window will open, where you have to locate the audio file you want to add to your presentation.
- Once located, click the drop-down arrow next to Insert. You’ll see two options:
- If you choose Insert , the audio will be directly inserted into your presentation, increasing the size of the document.
- If you choose Link to File , a link to the file will be created, reducing the size of the document. However, there could be issues if you use the presentation in a different computer, forcing you to link the audio file to the presentation again.
- Select the option that best suits your needs.
- If you want to export any audio included in your PowerPoint presentation, right-click its icon → Save Media As (you can only do this with audio inserted from your PC).
- Please note that if you want to play a different audio in each slide, you’ll need to add the audio files one by one. You’ll also need to uncheck “Play Across Slides”. You can refer to the “ Editing Audio ” section in this tutorial if you want more information.
- On the Insert tab, in the Media group, click the Audio drop-down arrow. Select Record Audio. A new window will open.
- Enter the name of the audio file you’re about to record.
- Press Record to start recording. To stop, press the Stop button. To play what you’ve recorded, press Play.
- If you’re happy with what you’ve recorded, click OK. If that’s not the case, click Cancel.
- Select the audio whose format you want to adjust. A new set of tabs, called Audio Tools, will appear on the toolbar.
- In the Bookmarks group, you’ll find an option to add bookmarks, which will be visible in the timeline. These can be helpful if you want to quickly find the main points in your audio during the presentation.
- In the Editing group, there are options to add a fade in and a fade out. You’ll also find the Trim Audio option. If you click it, a new window will open, where you can set the start point and the end point of the audio clip.
- In the Audio Options group, you’ll find the following options to adjust the behavior of the audio clip:
- Volume: It allows you to set the volume of the clip.
- Start: Click the drop-down arrow to choose how you want the audio to start. If you’re using Office 2010, you’ll also find an option here to play the audio clip during the entire presentation.
- Loop until Stopped: Once the audio clip finishes, it starts again indefinitely until you stop it.
- Play Across Slides: If you enable this, the audio clip will be played during the entire presentation. If “Loop until Stopped” is enabled too, it won’t stop playing until you reach the end of the presentation.
- Hide During Show: Check this option if you want to hide the icon.
- Rewind after Playing: Check this option if you want the timer of the audio clip to go back to the beginning when it reaches the end.
- If you’re using newer versions of PowerPoint, you’ll find a group called Audio Styles. Choose “No Style” if you don’t want additional effects. Choose “Play in Background” if you want the audio clip to be played in the background during your presentation.
- You can change the icon of the audio clip. To do so, on the Format tab, in the Adjust group, click Change Picture.
- Insert an icon or a picture. We’ll use it to link the online audio. Please refer to the How to Add and Modify Icons tutorial to learn how to insert icons.
- Add the link to the online audio resource. If you don’t know how to do it, please refer to the How to Insert a Hyperlink in PowerPoint tutorial.
- Once added, click the icon of this audio. A new window will open, where you must click the Play button. Some audio platforms, such as Soundcloud, allow you to generate an autoplay sharing link. With that, you just need to click the icon to play the audio automatically.
- If you want to pause the playback, you’ll need to exit the presentation mode and do it manually.
- Insert the video containing the audio or music you want. If you don’t know how, please refer to the How to Add a Video in PowerPoint tutorial.
- Decrease the size of the video and place it outside the visible part of the slide.
- We need to set it to automatically play in presentation mode. To do this, on the Playback tab, in the Video Options group, click the Start drop-down arrow and select “Automatically”. If you need more information, please refer to the How to Add a Video in PowerPoint tutorial.
- Please note that the audio will stop when changing slides.
To create a playlist that plays across all slides during your presentation, you need to use an audio editing software, such as Audacity or Adobe Audition, and edit the clips so that they come one after another. When you’re done, export it as a single audio file, which you can now use in your presentation.
Do you find this article useful?
Related tutorials.

How to print PowerPoint notes
Crafting an impactful PowerPoint slideshow and delivering a captivating presentation are distinct skills. The first focuses on designing appealing visuals to convey a clear message, while the second involves employing effective presentation techniques to ensure the audience grasps the idea. The content of this article will help you with the latter part of this process, guiding future presenters on how to print PowerPoint with speaker notes to enhance your presentations success and effectiveness.

Discover Our Online Presentation Software for Free
We have great news for you today! If you’ve been a Slidesgo fan for years (or months, or weeks, or days, or mere hours, we welcome everyone!), you’ll probably know for now that our templates are available mostly in two formats: for use in Google Slides and PowerPoint.Google Slides is a free tool, since you only need a Google account in order to use it. PowerPoint, on the other hand, is part of the Microsoft Office suite, so it’s not a free program, but that didn’t stop it from being one of the most popular options in the world!What if we...

Webinar: Presentation Audit
With more than 15,000 templates released on Slidesgo and a user base composed of millions of people, we estimate that the total number of presentations created adds up to… um, a lot! Our team of professional designers work very hard to provide you with editable slides so that the only thing you need to do is, well, customize the elements to your liking. Starting from any given template, the results may vary a lot depending on the person who edited the contents.Have you ever wondered “Is my presentation good enough?” and wished that an expert on presentations looked at your template...

How to Change Slides Orientation in Google Slides
A change of perspective is always good! Do you want your public to look at your slides in a new way? Changing slides orientation will do the work. In this tutorial you’re going to learn how to go from horizontal slides, to vertical ones (and vice versa!).

Contribute to the Microsoft 365 and Office forum! Click HERE to learn more 💡
March 14, 2024
Contribute to the Microsoft 365 and Office forum!
Click HERE to learn more 💡
Top Contributors in PowerPoint: Steve Rindsberg - Jim_ Gordon - John Korchok ✅
March 11, 2024
Top Contributors in PowerPoint:
Steve Rindsberg - Jim_ Gordon - John Korchok ✅
- Search the community and support articles
- Microsoft 365 and Office
- Search Community member
Ask a new question
How do i listen to the sound on a powerpoint presentation?
Report abuse.
7 people found this reply helpful
Was this reply helpful? Yes No
Sorry this didn't help.
Great! Thanks for your feedback.
How satisfied are you with this reply?
Thanks for your feedback, it helps us improve the site.
Thanks for your feedback.
Replies (6)
Question info.
- Norsk Bokmål
- Ελληνικά
- Русский
- עברית
- العربية
- ไทย
- 한국어
- 中文(简体)
- 中文(繁體)
- 日本語
- PC & Mobile
- Microsoft Powerpoint
How to Automatically Play Audio in PowerPoint
Jessie Richardson Read more June 12, 2022
Music makes everything better, and PowerPoint presentations – depending on the occasion and their purpose, of course – are no exception.

If you’ve used PowerPoint before, you probably already know that you can insert songs, sound effects, and other audio files in your presentations. But did you know that you can program that audio to play automatically instead of having to start it manually?
Depending on your preference, you can choose to start the audio immediately with the first slide or have it delayed until a specific slide appears. In this article, we will explain how to do both these things.
How Do I Get Audio to Play Automatically in PowerPoint?
Playing audio automatically in PowerPoint is fairly easy to set up, and depending on your needs, you can customize it to better suit your presentation.
Below, we’ll take a look at how to set it up to play audio from the beginning, only for specific slides, and across multiple slides.
Playing Audio from the Beginning
If you want to play an audio file from the very beginning of your presentation, the process is very simple.
Here is what you need to do:

Playing Audio from a Specific Slide
If you want to have your audio play from a specific slide and/or with a predefined time delay, the process is a bit more complicated. Here is how to do it:

Playing Audio Across Multiple Slides
If you’re giving a long lecture and just want random, non-distracting music to play in the background, you can also make it part of your presentation and set it to play across multiple slides.
To do this, follow the next steps:

If the audio you chose is too short to cover the duration of your whole presentation, you can do a test run of the presentation, time it, and insert more audio files on other slides so that there are no silent intervals.
You can also use free audio-editing tools like Audacity or Free Audio Editor to combine two or more audio files into one, thus ensuring that the audio keeps playing for as long as necessary.
Saving Audio Files
If you’re saving your presentation to a flash drive , make sure to keep the audio files and the presentation are in the same folder. Otherwise, PowerPoint won’t be able to locate the files you inserted, and your presentation will be silent as a result.
The only thing to do in such situations would be to edit the path of each audio file in your presentation, which is very time-consuming and therefore best avoided.
Final Thoughts
Microsoft PowerPoint is incredibly flexible and allows you to customize your presentation with a variety of useful tools and features. By taking the steps outlined above, you can easily set up audio to play automatically in PowerPoint. It’s time to shine with your next PowerPoint presentation.
Related Posts

Disclaimer: Some pages on this site may include an affiliate link. This does not effect our editorial in any way.

Lee Stanton February 9, 2024

Lee Stanton September 13, 2023

Lee Stanton July 21, 2023
Send To Someone
Missing device.
Please enable JavaScript to submit this form.

- Tips & Tricks
- PowerPoint Templates
- Training Programs
- Free E-Courses
How To Play Audio in PowerPoint
Home > All Tutorials > PowerPoint Tips > Play Audio in PowerPoint
In this article you will find the range of options to play audio in PowerPoint . Learn how to change volume, play in specific slides, trigger audio etc. This article is part of the series of tutorials on audio files in PowerPoint .
Yes, there are a lot more options to playback audio in PowerPoint than many presenters know. Let us start with going to the Playback tab in the PowerPoint ribbon. To get the tab you need to click on the audio icon on the slide
The options for playback are divided under two groups of tools called Audio Options and Audio Styles.

Audio options and Audio Styles Menu First, let us explore the group under ‘Audio options’ in Playback tab.
#1 Volume Option:
The first option is fairly straight forward. You can choose the level of volume at which you want the audio to play when you go to Slide Show mode.

Set the Volume It helps to always keep it at ‘High’. You can always control the volume from your PC or speakers.
#2 : Play back option
You can choose to start playing the audio automatically when the slide appears in slide show mode or you can choose to play the audio on click.

Unless you use Presenter View or you provide an explicit visual cue on the previous slide – you may not be able to remember the slide with audio. So, to avoid being surprised by the sudden sound, it helps to choose ‘Play on click’ option always.
Note: When you use ‘Play on click’ option, keep the audio icon on the slide where you can easily locate the icon to click on. Don’t place the icon away from the slide area.
Here are 4 options in the audio options menu to choose the method to playback:

#3 : Playing the audio for a fixed number of slides:
When you play audio across slides, it is not necessary that you need to play the audio for all the slides in your presentation. You can choose to limit the play till a fixed number of slides. We will the steps to achieve that here:
In the audio playback option, choose the play across slides option
Go to ‘Animation’ tab in PowerPoint ribbon and click on ‘Animation pane’ option:

In the Animation pane, right click on the music loop and go to ‘Effect options’

In the dialog box that opens up you can define the starting and ending slides for audio playback.

Related : Find more tutorials about using animations in PowerPoint right here.
#4 : Audio Styles option:
In the Playback ribbon, you also have the option to play the music in background.

‘No style’ option allows you to reset all the changes you made to audio clips.
Thus, PowerPoint allows you to play the audio clips in the way you want to suit your specific requirements.
Infographic capturing all audio play options:
You can save the infographic below or pin it, to remember all the options for audio play available in PowerPoint.

If you found this article, please leave us a comment below. You will find 200+ PowerPoint tutorials on this site.
You May Like: Beautiful diverging 3D arrows in PowerPoint
See Main Page for more PowerPoint Tips
Return to Top of Play Audio in PowerPoint Page
Share these tips & tutorials
Get 25 creative powerpoint ideas mini course & members-only tips & offers. sign up for free below:.

How to Add Audio in PowerPoint Presentations

Add Audio in PowerPoint from a File on Your PC or Shared Drive
by Avantix Learning Team | Updated August 25, 2023
Applies to: Microsoft ® PowerPoint ® 2013, 2016, 2019, 2021 and 365 (Windows)
You can add audio in PowerPoint from a file on your PC or from a shared drive. Audio is played during a slide show and you can insert music, sound clips, or voice recordings. Since audio files are copied into PowerPoint presentations by default, they can increase file size and may need to be compressed. To play audio, your computer must be equipped with a sound card and speakers.
Recommended article : How to Compress Video (or Audio) Media in PowerPoint to Reduce File Size
Do you want to learn more about PowerPoint? Check out our virtual classroom or live classroom PowerPoint courses >
PowerPoint 2016 and later versions support common audio formats including mp3, mp4, m4a, wav and wma.
Note: Buttons and Ribbon tabs may display in a different way (with or without text) depending on your version of PowerPoint, the size of your screen and your Control Panel settings. For PowerPoint 365 users, Ribbon tabs may appear with different names. For example, the Audio Tools Playback tab may appear as Audio Playback. Screenshots in this article are from 365 but are similar in previous versions of PowerPoint.
Audio files are typically inserted on slides in Normal View. When you run a slide show, audio will play with settings you have applied on the Audio Tools Playback or Audio Playback tab in the Ribbon.
Insert audio from a file
To insert audio from a file and embed it on a slide:
- In Normal View, navigate to the slide where you want to insert the audio clip. This may be a music file, sound clip, or voice recording.
- Click the Insert tab in the Ribbon.
- Click Audio. A drop-down menu appears.
- Depending on your PowerPoint version, choose Audio My PC. A dialog box appears.
- Navigate to the folder where your audio file is saved and then click the file to select it.
- On the bottom right of the dialog box, click Insert to embed the audio. You can also double-click the audio file. If you click the drop-down menu beside Insert in the dialog box, you can choose Link to File. If you decide to link rather than embed, you may want to copy your audio file to the same folder as your presentation before you insert it on your slide. PowerPoint will place an audio icon in the center of the slide.
- In Normal View, click the audio icon and then click Play in the media controls that appear below the icon to play the audio.
After you insert an audio clip and click the audio icon, two tabs will appear in the Ribbon (AudioTools Playback and Format or Audio Playback and Format) in Normal View.
In the following example, an audio icon is selected in Normal View and media controls appear below the icon:
The Audio Tools Playback or Audio Playback tab appears as follows when you click an audio icon on a slide:

Control the way audio starts
To control the way audio starts during a slide show:
- In Normal View, click the audio icon on the slide.
- Click the Audio Tools Playback or Audio Playback tab in the Ribbon.
- In the Audio Options group, beside Start, choose In Click Sequence, When Clicked On or Automatically from the drop-down menu.
If you select When Clicked On, you must click directly on the audio icon when running a slide show.
The Start Settings appear in the Audio Options group on the Playback tab in PowerPoint:

Control audio volume
To control audio volume:
- In the Audio Options group, click Volume and then choose Low, Medium, High or Mute.
- You can also set the volume of an audio clip using the volume slider on the media controls below the icon.
If audio does not play as expected, you may need to check to be sure volume is on for your device (typically you would click the volume icon in the task bar at the bottom of your screen to turn volume on) or you may need to check the speaker device settings in your Windows Control Panel.
Hide an audio icon
When you run a slide show, you can hide the audio icon. This is common if you are playing audio automatically or the audio is set to start when you click on the slide.
To hide an audio icon during a slide show:
- In the Audio Options group, select the Hide While Not Playing check box.
Loop and rewind audio
To play audio continuously during a presentation, you can loop the audio:
- In the Audio Options group, select the Loop until Stopped check box. You will still be able to click the Play / Pause button to stop the audio file from playing.
To rewind audio after playing:
- In the Audio Options group, select the Rewind after Playing check box.
Fade audio in or out
You can start or end audio with a fade effect for a specific number of seconds.
To start or end audio with a fade effect:
- In the Editing group, under Fade Duration, choose or enter a duration for Fade In or Fade Out. To add a timed fade to the beginning of an audio clip, in the Fade In box, click the up and down arrows to increase or decrease the fade in time. To add a timed fade to the end of an audio clip, in the Fade Out box, click the up or down arrows to increase or decrease the fade out time.
You can trim an audio clip at the beginning and / or end of each clip so you can start at any point and end the clip earlier.
To trim an audio clip:
- In the Editing group, click Trim Audio. A dialog box appears.
- To trim the beginning of the clip, click the start point (a green marker on the far left). When the pointer becomes a two-headed arrow, drag the arrow to the desired starting position.
- To trim the end of the clip, click the end point (a red marker on the right). When the pointer becomes a two-headed arrow, drag the arrow to the desired ending position.
The Trim dialog box appears as follows (both the beginning and the end of the audio clip have been trimmed):

If you compress your PowerPoint file, the trimmed portions of the audio will be permanently deleted.
Show media controls during a slide show
To show media controls during a slide show:
- In Normal View, click the Slide Show tab in the Ribbon.
- In the Set up group, select the Show Media Controls check box.
Show Media Controls appears on the Slide Show tab in the Ribbon:

The Playback options for both embedded audio and video are very similar.
Subscribe to get more articles like this one
Did you find this article helpful? If you would like to receive new articles, JOIN our email list.
More resources
How to Embed a YouTube Video in PowerPoint
How to Get Design Ideas in PowerPoint Using Designer
How to Use Morph in PowerPoint to Design Engaging Presentations
How to Insert Video in PowerPoint (from a File on Your PC or Shared Drive)
PowerPoint Keyboard Shortcuts to Play and Control Video During a Slide Show
Related courses
Microsoft PowerPoint: Intermediate / Advanced
Microsoft PowerPoint: Design for Non-Designers
Microsoft PowerPoint: Accessible PowerPoint Presentations
Microsoft PowerPoint: Animations Bootcamp
Microsoft Excel: Intermediate / Advanced
VIEW MORE COURSES >
Our instructor-led courses are delivered in virtual classroom format or at our downtown Toronto location at 18 King Street East, Suite 1400, Toronto, Ontario, Canada (some in-person classroom courses may also be delivered at an alternate downtown Toronto location). Contact us at [email protected] if you'd like to arrange custom instructor-led virtual classroom or onsite training on a date that's convenient for you.
Copyright 2024 Avantix ® Learning
You may also like

10 Keyboard Shortcuts in PowerPoint's Outline View
The outline has been an integral part of Microsoft PowerPoint for many years. It is dynamically linked to slide placeholders and is organized in a hierarchical way.

How to Change the Thumbnail for a Video in PowerPoint (using the Poster Frame Tool)
If you have inserted a video on a PowerPoint slide, you can display a custom thumbnail (or Poster Frame) for the video during a slide show. The thumbnail will display when you run a PowerPoint slide show and disappears when you start the video. For most videos, the thumbnail that displays is the first frame of the video clip. You can use the Poster Frame command to display a different frame in the video clip or a picture from another source as a thumbnail. A picture thumbnail could be either an image or an icon.

How to Use the Built-in Laser Pointer in PowerPoint (with Shortcuts)
During a PowerPoint slide show, you can change your mouse into a laser pointer to focus attention on a specific area on your slide. You can show or hide the built-in laser pointer using keyboard shortcuts or by using the context menu.
Microsoft, the Microsoft logo, Microsoft Office and related Microsoft applications and logos are registered trademarks of Microsoft Corporation in Canada, US and other countries. All other trademarks are the property of the registered owners.
Avantix Learning |18 King Street East, Suite 1400, Toronto, Ontario, Canada M5C 1C4 | Contact us at [email protected]
Our Courses
Avantix Learning courses are offered online in virtual classroom format or as in-person classroom training. Our hands-on, instructor-led courses are available both as public scheduled courses or on demand as a custom training solution.
All Avantix Learning courses include a comprehensive course manual including tips, tricks and shortcuts as well as sample and exercise files.
VIEW COURSES >
Contact us at [email protected] for more information about any of our courses or to arrange custom training.
Privacy Overview
Pin it on pinterest.
- Print Friendly
- GTA 5 Cheats
- Print on a Chromebook
- Nothing Phone 2 Review
- Best YouTube TV Alternatives
- Asus ROG Ally vs. Steam Deck
- Gameshare on Nintendo Switch
How to add audio to PowerPoint

Slideshows are about more than just what you see. By adding audio like music, voiceover, or sound effects, you can enhance your PowerPoint presentation or make it more useful to your audience.
How to add audio from your computer
How to record audio in powerpoint, how to control the audio playback.
You might include background music that evokes emotion, record your own voice to explain the slides, or add sound effects for that extra bit of flair. We’ll show you how to add audio to PowerPoint so that you can improve your next presentation.
What You Need
Microsoft PowerPoint
Windows or Mac computer
You can insert a saved audio file in your slideshow on both Windows and Mac. This can be a song, voice, or sound effect.
PowerPoint supports these audio file formats: AIFF, AU, MID, MIDI, MP3, MP4 , M4A, WAV, and WMA. Note that versions older than PowerPoint 2013 may not support all listed file types. Visit Microsoft Support for additional details.
Step 1: Open your presentation and head to the slide where you want to insert the audio clip. If you’d like the audio to start immediately and play continuously through the slideshow, select the first slide.
Step 2: Go to the Insert tab and the Media section of the ribbon on the right.
- How to measure your PC’s power use, and why it matters
- How to use the Command Prompt in Windows 10 and 11
- How to use Microsoft Copilot in Teams, Powerpoint, Excel, and more
Step 3: Click Audio to view your options.
- On Windows, choose Audio on My PC .
- On Mac, pick either Audio Browser or Audio from File .
Step 4: Browse for the audio file, select it, and click Insert .
If you use the Audio Browser on Mac, drag the audio file onto the slide instead.
Step 5: You’ll then see the audio icon on your slide with a toolbar of basic controls beneath it.
Click the Play button to listen, rewind or move forward, or adjust the volume.
Maybe you’d like to record your own audio for the presentation. You might want to provide audio instructions or record a sound effect.
You can do this in PowerPoint on Windows and Mac as long as you have a microphone enabled on your computer.
Step 1: Open your presentation and go to the slide where you want to insert the recorded audio.
Step 2: Select the Insert tab and click the arrow next to Audio in the ribbon.
Step 3: Choose Record Audio .
Step 4: Click the round, red Record button and start recording.
- On Windows, you’ll see this display in a pop-up box that also prompts you to name the recording.
- On Mac, you’ll see a Record Audio panel on the right with no option for a name.
As you record, you’ll see the duration, which is helpful if you have to limit the length.
Step 5: When you finish, click the square, red Stop button.
Step 6: You can listen to the recording before you insert it by clicking the Play button. If you’re not happy with the results, you can re-record the audio.
- On Windows, click the Record button again. The new recording will replace the original.
- On Mac, click Discard and then click the Record button to start again.
Step 7: If you like what you hear, click OK on Windows or Insert on Mac to add the audio to the slide.
Like inserting a saved file, you’ll see the audio icon and basic controls to play, forward, rewind, or adjust the volume.
Once you add the audio to your PowerPoint slide, you can adjust several playback settings. Select the Audio icon on the slide and go to the Playback tab.
Here are several helpful ways to customize the playback for your audio:
- Trim Audio : If you want to shorten the audio, select this option. Use the start and end boxes or slider to trim the clip. Then, click OK on Windows or Trim on Mac.
- Fade Duration : Maybe you’d like to start the audio by fading it in or end it by fading it out. Use the Fade Duration section to select the timing.
- Volume : You can set the volume for the audio to low, medium, or high for when it plays during the slideshow .
- Start : Choose how you want the audio to start playing. You can pick In Click Sequence, Automatically, or When Clicked On.
- Play Across Slides : If you want the audio to play continuously through each slide, check this box.
- Loop Until Stopped : To loop the audio until you stop it, check this box.
- Hide During Show : To hide the audio icon on your slide, check this box.
- Rewind After Playing : To rewind the clip to the beginning after it’s played, check this box.
- Play in Background : This option uses both Play Across Slides and Loop Until Stopped.
Whether you want to add a song, the sound of applause, or your own voice, it’s easy to add audio to your PowerPoint slideshow.
For more, take a look at how to add notes to your slides or for other applications, see what’s new in Microsoft Office .
Editors' Recommendations
- How to print a PowerPoint presentation with notes
- Apple’s Vision Pro to get bespoke Microsoft 365 apps at launch
- Best Microsoft Office deals: Get Word, PowerPoint, and Excel for free
- This PowerPoint ploy could help hackers empty your bank account
- PowerPoint will use ChatGPT to create entire slideshows for you
- How-To Guides

Learning how to use Live Captions in Windows 11 can be a great way to better understand the audio you're listening to. Whether it's a film without its own subtitles, a song you've just heard, or your friend's microphone isn't turned up enough, Live Captions are a quick and automated way to subtitle any audio source.
You'll need to have the Windows 11 22H2 update installed, so make sure you've updated recently before giving it a go. Once you're ready, here's how to use Live Captions in Windows 11.
Microsoft has just unveiled the latest update to Windows 11 which has already started rolling out. There are plenty of changes on the horizon, including those involving the ChatGPT-based Bing AI search.
The new update lets Windows 11 users communicate with the AI-powered version of Bing right in their taskbar. The AI model itself also seems to have received an update that might make conversing with it less bizarre.
If you have been particularly bugged by sound problems ever since upgrading to the latest version of macOS, this is the place to be. Let's go through the most common macOS audio problems and show you how a little tinkering with settings can typically set things right.

- Get started with computers
- Learn Microsoft Office
- Apply for a job
- Improve my work skills
- Design nice-looking docs
- Getting Started
- Smartphones & Tablets
- Typing Tutorial
- Online Learning
- Basic Internet Skills
- Online Safety
- Social Media
- Zoom Basics
- Google Docs
- Google Sheets
- Career Planning
- Resume Writing
- Cover Letters
- Job Search and Networking
- Business Communication
- Entrepreneurship 101
- Careers without College
- Job Hunt for Today
- 3D Printing
- Freelancing 101
- Personal Finance
- Sharing Economy
- Decision-Making
- Graphic Design
- Photography
- Image Editing
- Learning WordPress
- Language Learning
- Critical Thinking
- For Educators
- Translations
- Staff Picks
- English expand_more expand_less
PowerPoint Tips - Play Audio Across Your Slide Show
Powerpoint tips -, play audio across your slide show, powerpoint tips play audio across your slide show.

PowerPoint Tips: Play Audio Across Your Slide Show
Lesson 15: play audio across your slide show.
/en/powerpoint-tips/duplicate-your-animations/content/
Play audio across your slide show
Usually when you put audio in a slide show, it stops playing as soon as you change the slide. However, you can make audio play across your entire slide show , creating opportunities for music, narration, or any other idea you may have. Best of all, it can be done quickly and easily.
Watch the video below to learn how to do this step-by-step.
- Click on the Insert tab. Select Audio and then choose Audio on my PC .
- Browse your computer for the audio file you want to use and select it, then click Insert .
- With the audio object selected, go to the Playback tab.
- Select Play in Background from the Audio Options section.
- Start the slideshow to hear how the audio plays across all slides.
Adding a sound file can definitely make your PowerPoint presentation more engaging. This unique tip might even set you apart from other speakers.
We have one more lesson in this section of the tutorial: how to embed Excel charts in a slide.
/en/powerpoint-tips/embed-excel-charts-in-a-slide/content/
How-To Geek
How to add music to your powerpoint presentation.
There are many ways to improve your PowerPoint presentation---adding animations to objects, customizing slide transition styles, and using interesting themes to name a few.
Quick Links
Adding music to your presentation.
There are many ways to improve your PowerPoint presentation---adding animations to objects, customizing slide transition styles, and using interesting themes to name a few. In addition to all that, you can also add music to your presentation.
PowerPoint makes it very simple to add music to your presentation. Adding music to your presentation may be a great idea, but there are also cases where it may be considered unprofessional. We’re not here to tell you when to do it, just how to do it, but make sure it’s appropriate for the situation.
Switch to the "Insert" tab and then click the “Audio” button.
A menu will appear, giving you the option to either upload music from your PC or record your own audio track.
If you’d like to record your own audio, select “Record Audio,” and the “Record Sound” window will appear. Go ahead and give your audio a name, then click the “Record” icon when you’re ready to start.
After the “Record” icon is selected, a timer will start which gives you the total length of the sound being recorded. Once you’re ready to stop recording, press the “Stop” icon. To listen to your recording, you can press the “Play” icon. If you’re happy with what you're recording, select “OK” to insert it into your presentation.
If you prefer to upload music from your PC instead, go back to the audio options menu and select “Audio on My PC.” This will open your PC’s directory. Locate the audio file you’d like to use, then select “Insert” at the bottom-right of the window. PowerPoint supports several popular formats, like MP3, MP4, WAV, and AAC.
Now you’ll see a speaker icon appear in your presentation. Here, you can play the audio, control the volume, and move the audio back or forward 0.25 seconds.
Additionally, the “Playback” tab appears in the ribbon. By default, the “Audio Style” is automatically set to “No Style.” This means that the audio will only play on the slide where you insert it, the icon will appear in the presentation, and the audio will only begin once you click that icon.
But you can change all that. You can use the options here to adjust the default playback volume, choose whether the music starts automatically or on a click, whether it plays across other slides, whether it loops until you stop it, and so on.
We’re going to change this by selecting “Play in Background” in the “Audio Styles” section.
There are a few other options available to you, as well. You can add (or remove) bookmarks for specific times in your audio clip, trim parts of the audio, and give your audio a fade in/out effect.
Use these tools to customize the perfect audio for your presentation.
How to Get Audio to Play Automatically on PowerPoint

Adding audio to your PowerPoint presentations can make them more engaging and memorable for your audience. Whether it’s background music, a sound effect, or narration, audio enhances the viewer experience.
One useful audio trick is setting your audio files to play automatically when each slide appears. This creates a seamless flow without you having to manually start each audio clip.
Here is a step-by-step guide on how to get audio to play automatically in PowerPoint.
Set Audio to Play Automatically from the Beginning
- On the Insert tab, click Audio > Audio on My PC
- Select your audio file and click Insert
- On the Playback tab under Audio Tools , select Play in Background in the Audio Options group.
This will play your audio file automatically from the beginning of the slideshow.
Set Audio on Specific Slides to Play Automatically
- On the slide with the audio, click the audio icon.
- In the Audio Options group, click the dropdown next to Start
- Select Automatically
This will play the audio on that slide automatically when you advance to that slide.
Repeat this for each slide you want audio to play automatically on.
Play Audio Files Across Multiple Slides
- Select your audio file and insert it on any slide.
- On the Animations tab, click Animation Pane .
- On the Timing tab, set Start to On Click
- Set Stop Playing to After: and enter the slide number you want the audio to stop playing
This will play your audio file across multiple slides, from the inserted slide until the stop slide you set.
Adjust Volume of Audio Files
To change the volume of an inserted audio file:
- Select the audio icon on the slide
- In the Audio Options group, click Volume
- Select the desired volume: Low , Medium , High , or Mute
Test the volume by playing the slideshow. Adjust the volume further from your computer’s sound settings if needed.
Fix Audio Not Playing Automatically
If your audio does not play automatically, try the following:
- Check that Play in Background is selected on the Playback tab
- For specific slides, ensure Automatically is selected next to Start under Audio Options
- Check the file format – supported formats include .mp3, .wav, .midi, and .m4a
- Reboot your computer and relaunch PowerPoint
- Ensure no other programs are accessing the audio device during playback
Tips for Adding Audio in PowerPoint
- Choose audio clips that are relevant to your content
- Balance the audio volume with your voice volume if narrating
- Use fade in/out effects for background music
- Test the audio on the presentation equipment prior to the actual presentation
- Bring backup audio files on a USB drive in case of technical difficulties
Adding background music or narration to your PowerPoint slides is an excellent way to amplify engagement. By setting your audio to play automatically, you create a smooth, seamless viewing experience for your audience.
About The Author
Vegaslide staff, related posts.

How to Anchor Pictures to Text in PowerPoint

PowerPoint 2016: Saving Presentations

Open Keynote in PowerPoint on macOS Catalina

Copy Paste Not Working in PowerPoint; Might Make PowerPoint Unstable

3 Simple Ways to Record Audio on PowerPoint Presentations

Sara Wanasek

Enhance your PowerPoint presentations by incorporating music and adding your own narration or unique sound bites. This not only keeps your audience engaged but also complements your written content. Learning how to add and record audio in PowerPoint is a valuable skill, enabling you to create compelling presentations for professional, educational, and personal purposes.
Recording audio in PowerPoint offers significant advantages, especially when delivering remote or asynchronous presentations. You can:
- Record yourself giving the presentation and share the recording for viewers to access at their convenience, or
- Include audio clips to emphasize transitions, key points, or significant moments within your presentation.
Continue reading to discover how to record audio live in PowerPoint on Windows devices, add pre-recorded audio, and find useful tips for editing!
Step-by-step guide: How to Record Audio on PowerPoint
In PowerPoint, you have the capability to record two types of audio:
- Recording for exporting as a video: This method is ideal for narrating your presentation, making it perfect for sharing with others to watch at their own pace.
- Recording short audio clips: This method allows you to incorporate audio into your live presentation.
Let’s walk you through both methods of recording audio directly within PowerPoint:
Option 1: Record Narration for All Slides
Step 1: Open Your PowerPoint Presentation
Launch PowerPoint and open a new or existing PowerPoint file. If your are starting from scratch, make sure to complete the slides with design and interactive elements (make sure your presentation is engaging !) before adding your audio.
Step 2: Choose the Starting Position
- Go to the ‘SlideShow’ tab and click on the arrow next to ‘Record Slide Show.’
- Choose between ‘From Current Slide’ or ‘From Beginning’ based on your requirements.
- This will open the recorder window, where you can make necessary adjustments to the settings.

Step 3: Adjust Settings
You can select the microphone, view your notes, and toggle your camera on or off.

Step 4: Begin Recording
When you are ready, click the ‘Play’ button to begin recording. You will see a 3-second countdown, then the recording will start and you can begin speaking.

Use the side arrows for smooth navigation through your presentation while recording. Pause or stop the recording at any point. To review the recorded audio, click ‘ Replay .’ To delete any recordings, click the ‘x’ next to the speaker icon.
At the bottom left, you’ll find two timers: one for the entire presentation and one for the specific slide, helping you keep track of the recording length.

Step 5: Stop Recording
When done, click the ‘X’ in the top right-hand corner. Your audio recordings will be saved to each slide, indicated by the speaker icon at the bottom right corner of your slide.
Step 6: Share Recording
To share your recording, export the PowerPoint file as a video , selecting ‘Use Recorded Timings and Narrations.’ Then, easily share it via email or add it to a Learning Management System for convenient viewing.

Option 2: Record Audio for Specific Slides
Step 1: Navigate to the Desired Slide
Select the specific slide where you want to record audio. This could be for narration, background music, or sound effects, depending on your presentation’s needs.
Step 2: Insert Audio
To add audio, click the ‘Insert’ tab on your PowerPoint ribbon. Then in the Media section, select ‘Audio’ then ‘Record Audio’.

Step 3: Name Audio Sound
Name the sound uniquely for easy future retrieval.

- Click the red ‘Recording’ button to start.
- Use the green ‘Play’ button to review the audio.
- If it’s satisfactory, click ‘OK.’
- The speaker icon will be added to your slide, and you can reposition it as needed.
Step 5: Set Audio Playback Options
After adding audio to your slide, you can specify how and when you want it to play. Click on the Audio icon and select the ‘Playback’ tab in the PowerPoint ribbon.

In PowerPoint, utilize editing tools to refine your audio. Trim, adjust volume, and apply fade-in or fade-out effects for a professional touch. You can also set the start and stop points for the audio and save it for future use.
Step 6: Test Your Audio
Before your important presentation, test the audio to ensure it works smoothly. Play through your presentation to confirm that everything sounds and plays correctly.
Option 3: Adding Pre-Recorded Audio to PowerPoint
Already have the audio you want to use? No problem! Adding audio to your PowerPoint can be done in 4 simple steps:
Step 1: Navigate to the Slide
Select the slide where you want to addyour pre-recorded audio.
Click the ‘Insert’ tab and choose ‘Audio’ from the Media Section. Select ‘Audio on My PC’ and search for your pre-recorded audio to be uploaded.

Step 3: Configure Playback Options
Customize your playback settings to suit your needs, such as when the audio should start and how it should play.
Step 4: Test it out
Ensure that the audio plays well and syncs up with your slide transitions and animations for a seamless presentation.
Expert Tips for the Best Recording
Use these tips to get the best recording in PowerPoint:
- Choose the Right Microphone: Opt for a high-quality microphone for clear and professional audio. For frequent recordings, consider an external microphone.
- Minimize Ambient Noise: Record in a quiet space to reduce background noise. Close doors and windows, and use noise-canceling software if necessary.
- Prepare Your Narration: Outline your narration to ensure a structured delivery, preventing pauses or monotony. Avoid reading line by line.
- Practice Your Delivery: Practice your narration multiple times for improved flow and clarity. Utilize PowerPoint’s Speaker Coach for help with pace, tone, and filler words.
- Edit Minor Mistakes: Don’t worry about small errors during recording; you can edit them out later using PowerPoint’s editing tools.
- Enhance Accessibility: When recording the entire presentation, add closed captions or subtitles to make it accessible to a broader audience, including those with hearing impairments.
Bonus: Recording Interactive PowerPoint Presentations
Want to take your PowerPoint recordings to the next level? Include interactive elements in your PowerPoint recordings to engage your audience more effectively with ClassPoint.
ClassPoint is an interactive teaching tool that integrates directly into PowerPoint, Coffering live presentation engagement features such as interactive questions , gamification , and presentation tools !
When recording your presentation, use third-party recording software like Zoom, Teams, Loom, or Screencast-O-Matic, and incorporate ClassPoint features alongside your audio narration, like so:
1. Live Annotations
Use Pens , Highlighters , Shapes , and even Text Boxes to add notes and highlight the important information on your slides while recording.
2. Added Whiteboard Slides
Add variety to your presentation by annotating on a blank whiteboard slide of your choosing.
3. Laser Pen
ClassPoint’s laser can be used as a pen with disappearing ink and a spotlight when you press the ‘S’ key on your keyboard, allowing you to guide your audience’s attention more effectively.
4. Draggable Objects
Enhance audience understanding by moving objects on your slide as you explain , emphasize key concepts, and create visual associations.
5. Embedded Browser
If you need to search the web to emphasize a key point or show a video, simply open a browser within your presentation without interrupting your seamless presentation and recording.
6. Timer or Stopwatch
If you want your audience to reflect on a question or complete an activity independently, use the timer or stopwatch to create a brief pause before resuming your recording.
Final Thoughts
Whether you’re narrating a presentation for asynchronous viewing or incorporating audio into a live session, you’re now equipped with the knowledge of how to record audio on PowerPoint in the best way.
With added audio, you can engage your audience in a way that ensures your message resonates, no matter where or when they access your content.
Begin experimenting with these techniques, and see how recording audio on PowerPoint and leveraging ClassPoint can transform your PowerPoint presentations, both live and virtually.
Recommended Readings
3 Ways to Watch & Insert Videos in PowerPoint
How to Add Notes to PowerPoint Presentations: A Comprehensive Guide
About Sara Wanasek
Try classpoint for free.
All-in-one teaching and student engagement in PowerPoint.
Supercharge your PowerPoint. Start today.
500,000+ people like you use ClassPoint to boost student engagement in PowerPoint presentations.
Play music or other sounds in your slides
PowerPoint for the web plays music and other sound effects that you’ve added to your slides using the PowerPoint desktop application, but you can’t add them from within PowerPoint for the web yet.
If you have the PowerPoint desktop application, you can add sound effects there. Here’s how:
In PowerPoint for the web, click the Edit Presentation tab, and then click Edit in PowerPoint .

In the PowerPoint for the web desktop application, use these articles to learn how to add music and sound effects to your presentation:
PowerPoint for Windows
PowerPoint for Mac 2016
Note: When you save the presentation, it is stored to the same location you opened it from in PowerPoint for the web.
More about PowerPoint for the web and the desktop PowerPoint application
PowerPoint for the web is a great way to work on documents in your browser, but you can do even more when you use it alongside the desktop PowerPoint application. Try or Buy the latest version of Office now.

Need more help?
Want more options.
Explore subscription benefits, browse training courses, learn how to secure your device, and more.

Microsoft 365 subscription benefits

Microsoft 365 training

Microsoft security

Accessibility center
Communities help you ask and answer questions, give feedback, and hear from experts with rich knowledge.

Ask the Microsoft Community

Microsoft Tech Community

Windows Insiders
Microsoft 365 Insiders
Was this information helpful?
Thank you for your feedback.
How to embed a video in PowerPoint from YouTube, PC, or Mac

Table of Contents
Videos can transform a plain PowerPoint presentation into a dynamic and memorable experience. They help you explain complex concepts visually, add a touch of emotion, and cater to different learning styles. Whether you choose online videos, YouTube videos, or files from your computer, this guide will show you how to embed a video in PowerPoint in a few easy steps.
How to embed a video in PowerPoint
For this guide, we’ll use screenshots from the free web-based version of Microsoft PowerPoint. Similar steps can be taken for other versions of PowerPoint, so long as they support the mentioned methods and web video links.

💡 Read more about embedding videos in the various versions of PowerPoint on Microsoft’s website.
Option 1: Embed a video from your device
This option works across all Microsoft PowerPoint versions — for Windows, PC, or Mac. Insert videos directly from your device for guaranteed playback and complete control over your presentation delivery.
- Click ‘Insert’ on the main tab/panel.
- Select ‘Video’ → ‘ This Device ’.
- Find the folder and double-click the file to insert the video.
💡Pro tip: Not all Vimeo videos are downloadable, but look for the download button—it means you can embed the video directly.

Option 2: Embed a YouTube video (or from online)
You can embed videos directly from YouTube, SlideShare, Vimeo, Stream, and Flip.
- Find the video you want, and copy the URL from the browser’s address bar. Alternatively, copy the video embed code (if available).
- Go back to PowerPoint and navigate to the slide you want to insert the video.
- From the ‘Insert’ tab, select ‘Video’ → ‘Online Video.’
- Paste the video link or embed code. (from Step 1)
- Click the Insert button.
Finding the YouTube video link for embedding (3 ways)
#1: Copy the URL from the browser address bar:

#2: Under the YouTube video’s ‘Share’ options, then copy the video link.
#3: If you wish to use the embed code, go to ‘Share’ → ‘Embed’ . Click the ‘Copy’ button to copy the entire code.
[Video] How to embed a YouTube video in PowerPoint
Note about using YouTube videos
Unlike videos embedded directly into your presentation file, online videos are hosted externally. You control them through the website’s video player, not PowerPoint’s built-in features (the video format tab will not be available).
Remember, a reliable internet connection is essential for smooth playback of online videos.
💡 Read more: Insert a video from YouTube or another site [Microsoft]
Option 3: Insert a video from Microsoft’s creative content library
For users of PowerPoint for the Web: Microsoft 365 offers a selection of royalty-free stock videos (and images). You can find and insert videos from the online library.
- Select ‘Video’ → ‘Stock Videos’ .
- Find the video you want and click ‘Insert.’

💡 You’ll need a Premium Microsoft Office membership to unlock the entire stock library.
How to play embedded videos in PowerPoint
Ready to rehearse your PowerPoint presentation? Embedded videos won’t start automatically, so you have time to check that the audio settings are correct. When ready, click the ‘Play’ button on the video embed frame.
▶️ Play an uploaded video (from PC, Mac)
Uploaded videos have more playback options than linked web videos. This option also does not require the internet or a stable connection during the presentation. Click on the ‘Play’ icon to start the video.

You’ll see this video playback tab with controls appear:

▶️ Play an embedded online video (from YouTube, Vimeo, etc)
You will need a stable internet connection during your PowerPoint presentation as the embedded video is directly streamed from the video platform. Click on the ‘Play’ icon to start the linked video.

💡 Note: When embedding online or YouTube videos, you’ll primarily use the streaming site’s controls (play, pause, volume). PowerPoint’s advanced editing features won’t work on these web videos.
Tips for embedding videos in PowerPoint
While videos add a powerful element to your presentations, there are some downsides worth considering, such as the risk of technical glitches and a larger PowerPoint file size.
Use these tips to keep your PowerPoint presentation smooth:
- Purpose: Ensure each video serves a clear purpose and enhances your message rather than being a distraction.
- Length: Keep videos short and focused to maintain your audience’s attention.
- Audio: Ensure the video’s audio is clear and at the right volume for your presentation.
- Manage video size: Large video files can make your presentation slow and challenging to share. Use online tools to compress media files without sacrificing significant quality.
- Prioritize reliability: If a smooth presentation is crucial, embed videos directly from your device to avoid internet dependency. Inserting a video from your device guarantees playback even without an internet connection.
- Test and rehearse: Review your presentation beforehand to ensure your videos play seamlessly.
Related article: Don’t Present Without These 16 PowerPoint Dos and Don’ts
Videos are a fantastic addition to your presentation toolbox. Embedding videos into your PowerPoint slideshow makes them more engaging and memorable. Videos grab attention, explain complex ideas, and make your presentation more impactful. They offer a powerful way to complement your core message and keep things interesting.
This short tutorial covers three options: directly from your device or computer, using Microsoft’s stock video library, or pasting a video file link from online platforms like YouTube.
Keep your audience captivated with a variety of content: videos, images, well-crafted text, and engaging delivery. Remember to rehearse beforehand for a smooth, successful presentation!
Frequently Asked Questions (FAQ)
What are the supported video formats.
Recommended: .mp4 (offers the best balance of compatibility, quality, and file size).
For older PowerPoint versions (2010 and earlier): Consider using .wmv for wider compatibility.
Other PowerPoint-supported video formats:
- .avi (may require additional codecs)
- .mpeg or .mpg
- .mov (for Mac users)
Why can’t I add a video to PowerPoint?
Common reasons and solutions:
- Unsupported file format: Make sure your video file is in a PowerPoint-compatible format (.mp4 with H.264 video and AAC audio is the safest bet).
- Outdated PowerPoint: Check and install available updates for your PowerPoint version.
- Incorrect embed code: Double-check you’ve copied and pasted the embed code correctly (beginning from <iframe> and ending with </iframe>). If the issue persists, the video platform may not support embedding.
- Older PowerPoint limitations (Windows only): If you’re using an older PowerPoint version on Windows, you might be restricted to embedding YouTube videos only. Consider updating PowerPoint or embedding the video file directly.
- Internet Explorer issues (Windows only): While not strictly necessary, some older video functionality might rely on Internet Explorer components. Ensure you’re using a supported IE version.
- Broken or removed video link: Verify that the linked video hasn’t been taken down or made private.
💡 Pro tip: Try Option 1 (Embed a video from your device) if the other methods don’t work.
For more info, read Why can’t I embed a video in PowerPoint? [Microsoft]
Can I use an older version of PowerPoint?
Yes, you can use earlier versions of PowerPoint or PowerPoint for the Web (free) . However, remember that limited support is available, potential compatibility issues with newer file formats or online features exist, and new features are missing.
Consider upgrading to Microsoft 365 if you prioritize security and support, need the newest features, or work with collaborators using newer versions.
Related article: Step-by-Step: How To Convert PowerPoint to Google Slides
Save Time and Effortlessly Create Presentations with SlidesAI

TechRepublic
Account information.

Share with Your Friends
How to Record a Video Presentation With Google Slides
Your email has been sent

Google Slides now lets you record a presentation with inset video from your webcam. Each recording may be a maximum of 30 minutes long. No longer do you need to turn to a third-party tool or web meeting app, such as Google Meet , to record a presentation. Instead, you can start and finish the task with nothing more than Google Slides on a laptop.
As of March 2024, slide recordings may be made by customers who use Google Workspace Business Standard or Plus; Enterprise Starter, Essentials, Essentials Plus, Standard or Plus; and Education Plus editions.
How to make a basic slide recording in Google Slides
To create a slide recording, you’ll need to use Google Chrome on a computer that has a camera and microphone.
- Go to Google Slides and open your presentation.
- Select the Rec button in the upper right area, then select the Record new video button ( Figure A ).
The system will switch to the screen recording interface, with recording controls displayed below your slides. By default, the system will display your inset (picture-in-picture) video in medium size in the lower right corner of a slide, since this portion of a slide is often empty.

- Optionally, before you start recording, you might adjust three settings:

- Modify the size of the inset video frame. Select the size icon, found to the right of the video inset location icon, then choose either a small, medium or large video frame size.
- Open speaker notes with the button found to the immediate left of the back slide (<) icon. This will display speaker notes for your reference while recording. (Ideally, you would not need to refer to speaker notes, so that you could instead look directly at the camera as you record.)
- When you are ready to record, select the large red button at the bottom of the screen.
- If prompted, you may need to allow access ( Figure C ) to the tab, along with the camera and microphone. For example, when recording on a Chromebook, you may be prompted to “Allow docs.google.com to see this tab?” and “Also allow tab audio.” Select Allow, if prompted.

In a few cases, you may need to visit the following links in Chrome to adjust permissions for:
- Camera: chrome://settings/content/camera.
- Microphone: chrome://settings/content/microphone.
- A brief countdown should display (i.e., 3, 2, 1), then your recording will begin. Record your video, advancing your slides as desired.
- To pause recording, press the large red button at the bottom of the screen.
- Once paused, you may select from two options ( Figure D ):

After you select Save to Drive, wait a bit until the system indicates the file has been saved. If you leave or close the tab too soon, you may lose your recording.
How to select inset video shapes and sizes
On any slide, you may use the Insert | Speaker spotlight option ( Figure E ), then select a shaped video frame. This inserts a frame where the speaker video will display on that slide. You may reposition or resize the frame: Select the shape, and then drag-and-drop it to move it to a different place on your slide, or select a corner and drag it to resize it.

When you insert a speaker spotlight shape, that supplants the position and size you might have selected on a basic recording. In other words, the speaker’s video will display in one of the corners or the center, and in the small, medium or large shape chosen with the settings — unless you’ve inserted a speaker spotlight shape on a page ( Figure F ). Use the speaker spotlight option to convey the most polished professional effect, since it allows precise control over the shape, size and location of a video frame.

How to play, share and manage slide recordings
You may access slide recordings within Google Slides on a computer. However, unlike recording, which requires you to use Google Chrome, you may access and play existing recordings within Google Slides on a variety of modern browsers. For example, the following steps all work when you use Google Slides within either Google Chrome or Apple’s Safari browser.
To access recordings associated with a Google Slides presentation, follow these steps.
- Select the Rec button in the upper right area. The recordings you’ve made of the presentations will display. Importantly, the system shows both the date and duration of each recording.
- To view, share or download a recording, click anywhere on the playback icon or title of the recording ( Figure G ). It should open in a new tab. Within this tab, you might:
- Select the Play icon in the center of the video image to play the recording.
- Select the Share button in the upper right corner of the screen to modify access settings and give other people access to the file.
- Select the Download icon in the down arrow above a tray icon in the upper right area of the screen to download the file.

- Select the three dot menu to the right of a listed recording to:
- Rename a file something other than the default recording title.
- Remove a previously made recording you no longer need.
- Copy link and obtain the Google Drive URL for the recorded file.
All Google Slides recordings are stored in a Slides recordings folder on Google Drive. The recordings are saved as .webm files, which is a widely supported web video format. You may easily open and play .webm files on both Apple and Android mobile phones. Any recordings you make using Google Slides should be easy to view on almost any device.
Does the ability to record a presentation within Google Slides streamline your workflow? What sorts of video presentations will you create with this new capability? Mention or message me on X ( @awolber ) to let me know how you use screen recording within Google Slides.
Subscribe to the Google Weekly Newsletter
Learn how to get the most out of Google Docs, Google Cloud Platform, Google Apps, Chrome OS, and all the other Google products used in business environments. Delivered Fridays
- How to share video with Google Sites
- How to present Google Slides in Google Meet
- Prezi announces Google Slides integration
- Google Meet: A cheat sheet to the app and platform features
- Google Meet: 3 presenter controls for smoother presentations
- Best software for businesses and end users

Create a TechRepublic Account
Get the web's best business technology news, tutorials, reviews, trends, and analysis—in your inbox. Let's start with the basics.
* - indicates required fields
Sign in to TechRepublic
Lost your password? Request a new password
Reset Password
Please enter your email adress. You will receive an email message with instructions on how to reset your password.
Check your email for a password reset link. If you didn't receive an email don't forgot to check your spam folder, otherwise contact support .
Welcome. Tell us a little bit about you.
This will help us provide you with customized content.
Want to receive more TechRepublic news?
You're all set.
Thanks for signing up! Keep an eye out for a confirmation email from our team. To ensure any newsletters you subscribed to hit your inbox, make sure to add [email protected] to your contacts list.
IMAGES
VIDEO
COMMENTS
In the Animation Pane, make sure your audio clip is in first position at the top of the pane. Click the down arrow to the right of the sound clip, and then click Effect Options. On the Effect tab under Start Playing, select From beginning. Under Stop Playing, select After current slide. On the Timing tab, in the Start list, select With Previous.
How to add audio files from your PC into PowerPoint presentations. The first thing you have to do is open your PowerPoint presentation and select the slide where you want to embed an audio file. PowerPoint, audio, insert. Next, click or tap to select the Insert tab from the ribbon menu on top of the PowerPoint window. PowerPoint, audio, insert.
2:00. To add music or other audio clip to your slide show, select the slide you want and click Insert > Audio.You can add audio to a single slide, play audio automatically when a slide appears, or add a song that plays as background music during your entire presentation.
Add and record audio, such as music, narration, or sound bites, to your PowerPoint presentation and select the playback options. Add audio from your PC. ... To have the audio play continuously across all slides in the background, select Play in Background. Delete audio.
Start in Settings (1) and select the tools you will be using. You have the option to use a microphone, or you can record yourself talking on camera. Choose your microphone and/or camera for recording. Next (2), decide whether you want to have the microphone or camera you selected turned on.
In this video, you'll learn how to play audio across your slide show in PowerPoint. Visit https://www.gcflearnfree.org/powerpoint-tips/play-audio-across-your...
In order to do so, go back to the Insert > Audio menu and choose Record Audio. PowerPoint will open a Record window. Here you type the name of your audio file and click Record before you start speaking to your microphone. In order to review your record, select Stop and then hit Play to listen.
Open your PowerPoint presentation and select the slide where you want to add audio. On the Insert tab, in the Media group, click the Audio drop-down arrow. Select Record Audio. A new window will open. Record Audio option. Enter the name of the audio file you're about to record. Entering the file name.
David Marcovitz. Replied on September 5, 2012. Report abuse. If your sound is working in general, then it might be that the sound wasn't included properly. It might also be that you have to click something, possibly a sound icon, to play the sound. What version was the PowerPoint created in?
Under Audio Tools, click on the Playback tab and select the option Play in Background. In older versions of PowerPoint, you should click on the dropdown box next to the Start option and select ...
In the audio playback option, choose the play across slides option. Go to 'Animation' tab in PowerPoint ribbon and click on 'Animation pane' option: In the Animation pane, right click on the music loop and go to 'Effect options'. In the dialog box that opens up you can define the starting and ending slides for audio playback.
Click the Insert tab in the Ribbon. Click Audio. A drop-down menu appears. Depending on your PowerPoint version, choose Audio My PC. A dialog box appears. Navigate to the folder where your audio file is saved and then click the file to select it. On the bottom right of the dialog box, click Insert to embed the audio.
Step 1: Open your presentation and head to the slide where you want to insert the audio clip. If you'd like the audio to start immediately and play continuously through the slideshow, select the ...
Steps. Click on the Insert tab. Select Audio and then choose Audio on my PC. Browse your computer for the audio file you want to use and select it, then click Insert. Select Play in Background from the Audio Options section. Start the slideshow to hear how the audio plays across all slides. Adding a sound file can definitely make your ...
On the ribbon, select the Animations tab. Near the right end of the toolbar, select Animation Pane. In the Animation pane, double-click the item for your audio clip. In the Play Audio dialog, on the Effects tab, under Stop playing, change the After # slides value to the number of slides that you want music playing over. (The maximum value is 999.)
Locate the audio file you'd like to use, then select "Insert" at the bottom-right of the window. PowerPoint supports several popular formats, like MP3, MP4, WAV, and AAC. Now you'll see a speaker icon appear in your presentation. Here, you can play the audio, control the volume, and move the audio back or forward 0.25 seconds.
You can add audio, such as music, narration, or sound bites, to your PowerPoint presentation. To record and hear any audio, your computer must be equipped wi...
On the Insert tab, click Audio > Audio on My PC. Select your audio file and insert it on any slide. On the Animations tab, click Animation Pane. In the Animation Pane, select your audio name > Effect Options : On the Timing tab, set Start to On Click. Set Stop Playing to After: and enter the slide number you want the audio to stop playing.
To insert your audio file, open your PowerPoint presentation and select a slide. Click Insert > Audio > Audio on my PC to begin selecting your audio file. Locate the file on your PC, select it ...
Step 4: Begin Recording. When you are ready, click the 'Play' button to begin recording. You will see a 3-second countdown, then the recording will start and you can begin speaking. Use the side arrows for smooth navigation through your presentation while recording. Pause or stop the recording at any point.
About Press Copyright Contact us Creators Advertise Developers Terms Privacy Policy & Safety How YouTube works Test new features NFL Sunday Ticket Press Copyright ...
If you have the PowerPoint desktop application, you can add sound effects there. Here's how: In PowerPoint for the web, click the Edit Presentation tab, and then click Edit in PowerPoint. In the PowerPoint for the web desktop application, use these articles to learn how to add music and sound effects to your presentation: Note: When you save ...
Use these tips to keep your PowerPoint presentation smooth: Purpose: Ensure each video serves a clear purpose and enhances your message rather than being a distraction. Length: Keep videos short and focused to maintain your audience's attention. Audio: Ensure the video's audio is clear and at the right volume for your presentation.
This step by step video tutorial for Google Meet that enables user to play a background music, allow PowerPoint presentation with audio and enable microphone...
Select the Play icon in the center of the video image to play the recording. Select the Share button in the upper right corner of the screen to modify access settings and give other people access ...