10 PowerPoint Tips for Preparing a Professional Presentation
Use these Microsoft PowerPoint tips to avoid common mistakes, keep your audience engaged, and create a professional presentation.
Professional presentations are all about making an impact. Your slides should look the part. Once you know what makes a presentation look professional, you can customize any half-decent PowerPoint template or create your own custom slides.
Our PowerPoint tips will help you avoid common mistakes, keep your audience engaged, and create a professional presentation, in form and content.

PowerPoint Slide Design
The design can leave a first and lasting impression. Give it a professional touch to win your audience's trust and attention.
1. Carefully Compose Your Slides
Don't copy and paste slides from different sources. You don't want your presentation to look like a rag rug. What you're aiming for is a consistent look. This will help your audience focus on the essential; your speech and the key facts you're highlighting on your slides.
To that end, use a basic template or make your own . PowerPoint comes with a wide selection of professional PowerPoint presentation templates , but you can also find free ones online.
PowerPoint Tip: When you open PowerPoint, note the search field at the top. One of the suggested searches is "presentations". Click it to see all of PowerPoint's default presentation templates. Choose a category on the right to narrow down your search.
Pick an easy to read font face . It's hard to get this right, but these professional-looking Google fonts are a safe bet. Unless you're a designer, stick to a single font face and limit yourself to playing with safe colors and font sizes.
If you're unsure about fonts, refer to "The 10 Commandments of Typography" shown below for orientation.
Carefully select font sizes for headers and text. While you don't want to create a wall of text and lose your audience's attention, you do want them to be able to read what you've highlighted. So make your fonts large enough.
PowerPoint Tip: PowerPoint offers several different slide layouts. When you add a new slide, choose the right layout under Home > New Slide . To switch the layout of an existing slide, use Home > Layout . By using the default layouts, you can make coherent design changes across your presentation anytime you want.
Leave room for highlights, such as images or take home messages. Some elements should stand out. So try not to bury them in background noise but give them the space they need. This could be a single quote or a single image per page with nothing but a simple header and a plain background.
Decorate scarcely but well. If you have good content, you won't need decoration. Your template will be decoratively enough.
Note: Restrict the room your design takes up, and don't ever let the design restrict your message.
2. Use Consistency
Consistently use font face and sizes on all slides. This one goes back to using a template. If you chose a professional presentation template, the designer would have taken care of this aspect. Stick to it!
Match colors. This is where so many presentations fail. You might have chosen a funky template and stuck to the designer's color profile, then you ruin it all with ugly Excel charts .
Take the time to match your visuals to your presentation design.
Text and Background Colors
A poor choice of colors can ruin your presentation.
3. Use Contrast
Black text on a white background will always be the best, but also the most boring choice . You're allowed to use colors! But use them responsibly.
Keep it easy on the eyes and always keep good contrast in mind. If you're color-challenged, use one of the many online tools to select a good looking color palette. Or just use a template and stick to its default colors.
PowerPoint Tip: Use PowerPoint's Design menu to quickly change the font and color palette of your entire presentation using preset design layouts.
4. Apply Brilliance
Carefully use color to highlight your message! Colors are your friends. They can make numbers stand out or your Take Home Message pop.
Don't weaken the color effect by using too many colors in too many instances . The special effect only works if used scarcely. Try to limit pop colors to one per slide.
Make a brilliant choice: match colors for design and good contrast to highlight your message . Use a professional color palette, to find which color will work best with your theme. Use The 10 Commandments of Color Theory shown below to learn more about colors:
Text on PowerPoint Slides
K eep I t S traight and S imple. That means...
- Keywords only on your slides.
- Absolutely no full sentences!
- And never read your slides , talk freely.
Remember that your slides are only there to support, not to replace your talk! You want to tell a story, visualize your data, and demonstrate key points. If you read your slides, you risk losing your audience's respect and attention.
PowerPoint Tip: Afraid you'll lose your train of thoughts? Add notes to your slides. Go to View and under Show click Notes to make them show up under your slides while editing. When starting your presentation, use PowerPoint's presentation mode (go to Slide Show and under Monitors , check Use Presenter View ), so you can glance at your notes when needed.
6. Take Home Message
Always summarize your key point in a Take Home Message. Ask yourself, if your audience learned or remembered one single thing from your presentation, what would you like it to be? That's your Take Home Message.
The Take Home Message is your key message, a summary of your data or story. If you're giving an hour-long presentation, you might have several Take Home Messages. That's OK. Just make sure that what you think is key, really matters to your audience.
Make your Take Home Message memorable. It's your responsibility that your audience takes home something valuable. Help them "get it" by making your Take Home Message stand out, either visually or through how you frame it verbally.
Presentation Visuals
Images are key elements of every presentation. Your audience has ears and eyes, they want to see what you're talking about, and a good visual cue will help them understand your message much better.
7. Add Images
Have more images in your slides than text. Visuals are your friends. They can illustrate your points and support your message.
But do not use images to decorate! That's a poor use of visuals because it's just a distraction.
Images can reinforce or complement your message. So use images to visualize or explain your story.
Use a sufficient image resolution. Your visuals might look good on your desktop, but once blown up by a projector, low-resolution images will make your presentation look anything but professional. So choose a resolution that matches the projector's resolution. If in doubt, don't go below a resolution of 1024 x 768 pixels (XGA) and aim for 1920 x 1080 pixels (FullHD).
Always maintain your image's aspect ratio. Nothing looks more awkward than a distorted image. Whatever you do, don't stretch images. If you have to resize them, do so with the aspect ratio intact, even if that means dropping slightly above or below your target resolution.
PowerPoint Tip: Need a visual, but don't have one at hand? PowerPoint is connected to Bing's library of online images you can use for your presentations. Go to Insert and under Images select Online Images . You can browse by category or search the library. Be sure to set a checkmark for Creative Commons only , so you don't accidentally violate copyrights.
Note: Yes, a picture is worth a thousand words. In other words, if you don't have time for a thousand words, use a picture!
PowerPoint Animations and Media
In animations, there is a fine line between a comic and a professional impression. But animations can be powerful tools to visualize and explain complicated matters. A good animation can not only improve understanding, it can also make the message stick with your audience.
8. Don't Be Silly
Sparingly use animations and media. You should only use them in one of two cases:
- To draw attention, for example, to your Take Home Message.
- To clarify a model or emphasize an effect.
Embed the media in your presentation and make sure it works in presentation mode. Testing your presentation at home will save you time and avoid embarrassment.
Target Your Presentation Content
Your target, i.e. your audience, defines the content of your presentation. For example, you cannot teach school kids about the complicated matters of the economy, but you may be able to explain to them what the economy is in the first place and why it is important.
9. Keep Your Audience in Mind
When you compile your PowerPoint presentation, ask yourself these questions:
- What does my audience know?
- What do I need to tell them?
- What do they expect?
- What will be interesting to them?
- What can I teach them?
- What will keep them focused?
Answer these questions and boil your slides down to the very essentials. In your talk, describe the essentials colorfully and use your weapons, i.e. text, images, and animations wisely (see above).
Note: If you fail to hit the target, it won't matter how ingenious your design is or how brilliantly you picked colors and keywords. Nothing matters more than your audience's attention.
10. Practice Your Presentation Like a Professional
A well-practiced and enthusiastic talk will help you convince your audience and keep their attention. Here are some key points that define a good talk:
- Know your slides inside out.
- Speak freely.
- Speak with confidence, loud and clear.
- Speak at a steady pace, better too slow than too fast.
- Keep eye contact with your audience.
Bonus: Implement the 10/20/30 Rule
The 10/20/30 rule is a concept brought forward by Guy Kawasaki:
It’s quite simple: a PowerPoint presentation should have ten slides, last no more than twenty minutes, and contain no font smaller than thirty points.
A similar concept is PechaKucha , a storytelling format limited to 20 slides and 20 seconds per slide, i.e. less than seven minutes to conclude the presentation.
Now there's a challenge! Telling your story succinctly, might help you get through to some of the busiest and most distracted people on the planet.
One Final PowerPoint Presentation Tip
I've shown you how to think through your entire presentation, from choosing a design to speaking to your audience. Here's a mind trick: never try to interpret the looks on your listeners' faces. Chances are, you're wrong. Just assume they're focused and taking notes.
You've done your best to create a professional PowerPoint presentation that will help your audience focus on the content and learn new things. The looks on their faces aren't doubt or confusion. It's focus! Well, d'oh! Obviously, you're the expert, and they're the learners. If you can get into this mindset, you can relax and perform at your best.
How-To Geek
8 tips to make the best powerpoint presentations.
Want to make your PowerPoint presentations really shine? Here's how to impress and engage your audience.
Quick Links
Table of contents, start with a goal, less is more, consider your typeface, make bullet points count, limit the use of transitions, skip text where possible, think in color, take a look from the top down, bonus: start with templates.
Slideshows are an intuitive way to share complex ideas with an audience, although they're dull and frustrating when poorly executed. Here are some tips to make your Microsoft PowerPoint presentations sing while avoiding common pitfalls.
It all starts with identifying what we're trying to achieve with the presentation. Is it informative, a showcase of data in an easy-to-understand medium? Or is it more of a pitch, something meant to persuade and convince an audience and lead them to a particular outcome?
It's here where the majority of these presentations go wrong with the inability to identify the talking points that best support our goal. Always start with a goal in mind: to entertain, to inform, or to share data in a way that's easy to understand. Use facts, figures, and images to support your conclusion while keeping structure in mind (Where are we now and where are we going?).
I've found that it's helpful to start with the ending. Once I know how to end a presentation, I know how best to get to that point. I start by identifying the takeaway---that one nugget that I want to implant before thanking everyone for their time---and I work in reverse to figure out how best to get there.
Your mileage, of course, may vary. But it's always going to be a good idea to put in the time in the beginning stages so that you aren't reworking large portions of the presentation later. And that starts with a defined goal.
A slideshow isn't supposed to include everything. It's an introduction to a topic, one that we can elaborate on with speech. Anything unnecessary is a distraction. It makes the presentation less visually appealing and less interesting, and it makes you look bad as a presenter.
This goes for text as well as images. There's nothing worse, in fact, than a series of slides where the presenter just reads them as they appear. Your audience is capable of reading, and chances are they'll be done with the slide, and browsing Reddit, long before you finish. Avoid putting the literal text on the screen, and your audience will thank you.
Related: How to Burn Your PowerPoint to DVD
Right off the bat, we're just going to come out and say that Papyrus and Comic Sans should be banned from all PowerPoint presentations, permanently. Beyond that, it's worth considering the typeface you're using and what it's saying about you, the presenter, and the presentation itself.
Consider choosing readability over aesthetics, and avoid fancy fonts that could prove to be more of a distraction than anything else. A good presentation needs two fonts: a serif and sans-serif. Use one for the headlines and one for body text, lists, and the like. Keep it simple. Veranda, Helvetica, Arial, and even Times New Roman are safe choices. Stick with the classics and it's hard to botch this one too badly.
There reaches a point where bullet points become less of a visual aid and more of a visual examination.
Bullet points should support the speaker, not overwhelm his audience. The best slides have little or no text at all, in fact. As a presenter, it's our job to talk through complex issues, but that doesn't mean that we need to highlight every talking point.
Instead, think about how you can break up large lists into three or four bullet points. Carefully consider whether you need to use more bullet points, or if you can combine multiple topics into a single point instead. And if you can't, remember that there's no one limiting the number of slides you can have in a presentation. It's always possible to break a list of 12 points down into three pages of four points each.
Animation, when used correctly, is a good idea. It breaks up slow-moving parts of a presentation and adds action to elements that require it. But it should be used judiciously.
Adding a transition that wipes left to right between every slide or that animates each bullet point in a list, for example, starts to grow taxing on those forced to endure the presentation. Viewers get bored quickly, and animations that are meant to highlight specific elements quickly become taxing.
That's not to say that you can't use animations and transitions, just that you need to pick your spots. Aim for no more than a handful of these transitions for each presentation. And use them in spots where they'll add to the demonstration, not detract from it.
Sometimes images tell a better story than text can. And as a presenter, your goal is to describe points in detail without making users do a lot of reading. In these cases, a well-designed visual, like a chart, might better convey the information you're trying to share.
The right image adds visual appeal and serves to break up longer, text-heavy sections of the presentation---but only if you're using the right images. A single high-quality image can make all the difference between a success and a dud when you're driving a specific point home.
When considering text, don't think solely in terms of bullet points and paragraphs. Tables, for example, are often unnecessary. Ask yourself whether you could present the same data in a bar or line chart instead.
Color is interesting. It evokes certain feelings and adds visual appeal to your presentation as a whole. Studies show that color also improves interest, comprehension, and retention. It should be a careful consideration, not an afterthought.
You don't have to be a graphic designer to use color well in a presentation. What I do is look for palettes I like, and then find ways to use them in the presentation. There are a number of tools for this, like Adobe Color , Coolors , and ColorHunt , just to name a few. After finding a palette you enjoy, consider how it works with the presentation you're about to give. Pastels, for example, evoke feelings of freedom and light, so they probably aren't the best choice when you're presenting quarterly earnings that missed the mark.
It's also worth mentioning that you don't need to use every color in the palette. Often, you can get by with just two or three, though you should really think through how they all work together and how readable they'll be when layered. A simple rule of thumb here is that contrast is your friend. Dark colors work well on light backgrounds, and light colors work best on dark backgrounds.
Spend some time in the Slide Sorter before you finish your presentation. By clicking the four squares at the bottom left of the presentation, you can take a look at multiple slides at once and consider how each works together. Alternatively, you can click "View" on the ribbon and select "Slide Sorter."
Are you presenting too much text at once? Move an image in. Could a series of slides benefit from a chart or summary before you move on to another point?
It's here that we have the opportunity to view the presentation from beyond the single-slide viewpoint and think in terms of how each slide fits, or if it fits at all. From this view, you can rearrange slides, add additional ones, or delete them entirely if you find that they don't advance the presentation.
The difference between a good presentation and a bad one is really all about preparation and execution. Those that respect the process and plan carefully---not only the presentation as a whole, but each slide within it---are the ones who will succeed.
This brings me to my last (half) point: When in doubt, just buy a template and use it. You can find these all over the web, though Creative Market and GraphicRiver are probably the two most popular marketplaces for this kind of thing. Not all of us are blessed with the skills needed to design and deliver an effective presentation. And while a pre-made PowerPoint template isn't going to make you a better presenter, it will ease the anxiety of creating a visually appealing slide deck.
17 PowerPoint Presentation Tips to Make More Creative Slideshows [+ Templates]
Published: August 16, 2023
Creating a great PowerPoint presentation is a skill that any professional can benefit from. The problem? It’s really easy to get it wrong. From poor color choices to confusing slides, a bad PowerPoint slideshow can distract from the fantastic content you’re sharing with stakeholders on your team.

That’s why it’s so important to learn how to create a PowerPoint presentation from the ground up, starting with your slides. Even if you’re familiar with PowerPoint, a refresher will help you make a more attractive, professional slideshow. Let’s get started.
How to Make a PowerPoint Presentation
- Presentation Tips
PowerPoint Design
I like to think of Microsoft PowerPoint as a test of basic professional skills. To create a passing presentation, I need to demonstrate design skills, technical literacy, and a sense of personal style.
If the presentation has a problem (like an unintended font, a broken link, or unreadable text), then I’ve probably failed the test. Even if my spoken presentation is well rehearsed, a bad visual experience can ruin it for the audience.
Expertise means nothing without a good PowerPoint presentation to back it up. For starters, grab your collection of free PowerPoint templates below.

10 Free PowerPoint Templates
Download ten free PowerPoint templates for a better presentation.
- Creative templates.
- Data-driven templates.
- Professional templates.
You're all set!
Click this link to access this resource at any time.
Tell us a little about yourself below to gain access today.
No matter your topic, successful PowerPoints depend on three main factors: your command of PowerPoint's design tools, your attention to presentation processes, and your devotion to consistent style. Here are some simple tips to help you start mastering each of those factors, and don't forget to check out the additional resources at the bottom of this post.
A presentation is made up of multiple slides, let's delve deeper into PowerPoint's capabilities.
Getting Started
1. open powerpoint and click ‘new.’.
If a page with templates doesn‘t automatically open, go to the top left pane of your screen and click New. If you’ve already created a presentation, select Open then double-click the icon to open the existing file.


That said, you can still use fun and eccentric fonts — in moderation. Offsetting a fun font or large letters with something more professional can create an engaging presentation.
Above all, be sure you're consistent so your presentation looks the same throughout each slide. That way, your audience doesn't become distracted by too many disparate fonts. Check out this example from HubSpot’s company profile templates:
Interested in this presentation template? Download it for free here.
5. Make sure all of your objects are properly aligned.
Having properly aligned objects on your slide is the key to making it look polished and professional. You can manually try to line up your images ... but we all know how that typically works out. You're trying to make sure all of your objects hang out in the middle of your slide, but when you drag them there, it still doesn't look quite right. Get rid of your guessing game and let PowerPoint work its magic with this trick.
Here’s how to align multiple objects:
- Select all objects by holding down Shift and clicking on all of them.
- Select Arrange in the top options bar, then choose Align or Distribute .
- Choose the type of alignment you'd like.
Here’s how to align objects to the slide:
- Select Align to Slide .
- Select Arrange in the top options bar again, then choose Align or Distribute .
6. Use "Format Object" to better control your objects' designs.
Format menus allow you to do fine adjustments that otherwise seem impossible. To do this, right-click on an object and select the Format Object option. Here, you can fine-tune shadows, adjust shape measurements, create reflections, and much more. The menu that will pop up looks like this:

Although the main options can be found on PowerPoint’s format toolbars, look for complete control in the format window menu. Other examples of options available include:
- Adjusting text inside a shape.
- Creating a natural perspective shadow behind an object.
- Recoloring photos manually and with automatic options.
7. Take advantage of PowerPoint's shapes.
Many users don’t realize how flexible PowerPoint’s shape tools have become. In combination with the expanded format options released by Microsoft, the potential for good design with shapes is readily available. PowerPoint provides the user with a bunch of great shape options beyond the traditional rectangle, oval, and rounded rectangle patterns.
Today’s shapes include a highly functional Smart Shapes function, which enables you to create diagrams and flow charts in no time. These tools are especially valuable when you consider that PowerPoint is a visual medium. Paragraphing and bullet lists are boring — you can use shapes to help express your message more clearly.
8. Create custom shapes.
When you create a shape, right click and press Edit Points . By editing points, you can create custom shapes that fit your specific need. For instance, you can reshape arrows to fit the dimensions you like.
Another option is to combine two shapes together. To do so, select the two shapes you’d like to work with, then click Shape Format in the top ribbon. Tap Merge Shapes .
You’ll see a variety of options.
- Combine creates a custom shape that has overlapping portions of the two previous shapes cut out.
- Union makes one completely merged shape.
- Intersect builds a shape of only the overlapping sections of the two previous shapes.
- Subtract cuts out the overlapping portion of one shape from the other.
- Fragment will split your shape into different parts depending on where they overlap.
By using these tools rather than trying to edit points precisely, you can create accurately measured custom shapes.
9. Crop images into custom shapes.
Besides creating custom shapes in your presentation, you can also use PowerPoint to crop existing images into new shapes. Here's how you do that:
- Click on the image and select Picture Format in the options bar.
- Choose Crop , then Crop to Shape , and then choose your desired shape. Ta-da! Custom-shaped photos.
10. Present websites within PowerPoint.
Tradition says that if you want to show a website in a PowerPoint, you should just create a link to the page and prompt a browser to open. For PC users, there’s a better option.
Third party software that integrates fully into PowerPoint’s developer tab can be used to embed a website directly into your PowerPoint using a normal HTML iframe. One of the best tools is LiveWeb , a third-party software that you can install on your PowerPoint program.
By using LiveWeb, you don’t have to interrupt your PowerPoint, and your presentation will remain fluid and natural. Whether you embed a whole webpage or just a YouTube video, this can be a high-quality third party improvement. To install the add-on, simple head to the LiveWeb website and follow the instructions.
Unfortunately, Mac users don’t have a similar option. A good second choice is to take screenshots of the website, link in through a browser, or embed media (such as a YouTube video) by downloading it directly to your computer.
11. Try Using GIFs.
GIFs are looped animated images used to communicate a mood, idea, information, and much more. Users add GIFs to PowerPoints to be funny or quickly demo a process. It's easy to add GIFs to your slides. To do so, simply follow these steps:
- Download and save the GIF you want.
- Go to the slide you want the GIF on.
- Go to the Home tab, and click either Insert or Picture .
- From the Picture drop-down menu, choose Picture from File .
- Navigate to where you saved your GIF and select it. Then, choose Insert .
- It will play automatically the moment you insert it.
PowerPoint Process
12. keep it simple..
PowerPoint is an excellent tool to support your presentation with visual information, graphics, and supplemental points. This means that your PowerPoint should not be your entire presentation. Your slides — no matter how creative and beautiful — shouldn't be the star of the show. Keep your text and images clear and concise, using them only to supplement your message and authority.
If your slides have dense and cluttered information, it will both distract your audience and make it much more likely that you will lose their attention. Nothing in your slides should be superfluous! Keep your presentation persuasive by keeping it clean. There are a few ways to do this:
- Limit bullet points and text.
- Avoid paragraphs and long quotes.
- Maintain "white space" or "negative space".
- Keep percentages, graphs, and data super basic.
13. Embed your font files.
One constant problem presenters have with PowerPoint is that fonts seem to change when presenters move from one computer to another. In reality, the fonts are not changing — the presentation computer just doesn’t have the same font files installed . If you’re using a PC and presenting on a PC, then there is a smooth workaround for this issue.
Here’s the trick: When you save your PowerPoint file (only on a PC), you should click File , then Options, then open up the Save tab. Then, select the Embed fonts in the file check box under Preserve fidelity when sharing this presentation . Now, your presentation will keep the font file and your fonts will not change when you move computers.
The macOS PowerPoint version has a similar function. To embed your fonts on a Mac, do the following:
- Open up your presentation.
- On the top bar, click PowerPoint , then click Preferences .
- Under Output and Sharing , click Save .
- Under Font Embedding , click Embed fonts in the file.
14. Save your slides as a PDF file for backup purposes.
If you’re still scared of your presentation showing up differently when it’s time to present, you should create a PDF version just in case. This is a good option if you’ll be presenting on a different computer. If you also run into an issue where the presenting computer doesn’t have PowerPoint installed, you can also use the system viewer to open up the PDF. No laptop will ever give you trouble with this file type.
The only caveat is that your GIFs, animations, and transitions won’t transfer over. But since the PDF will only work as a backup, not as your primary copy, this should be okay.
To save your presentation as a PDF file, take the following steps:
- Go to File , then click Save as …
- In the pop-up window, click File Format.
- A drop-down menu will appear. Select PDF .
- Click Export .
You can also go to File , then Export , then select PDF from the file format menu.
15. Embed multimedia.
PowerPoint allows you to either link to video/audio files externally or to embed the media directly in your presentation. You should embed these files if you can, but if you use a Mac, you cannot actually embed the video (see note below). For PCs, two great reasons for embedding are:
- Embedding allows you to play media directly in your presentation. It will look much more professional than switching between windows.
- Embedding also means that the file stays within the PowerPoint presentation, so it should play normally without extra work (except on a Mac).
Note: macOS users of PowerPoint should be extra careful about using multimedia files.
If you use PowerPoint for Mac, then you will always need to bring the video and/or audio file with you in the same folder as the PowerPoint presentation. It’s best to only insert video or audio files once the presentation and the containing folder have been saved on a portable drive in their permanent folder. Also, if the presentation will be played on a Windows computer, then Mac users need to make sure their multimedia files are in WMV format. This tip gets a bit complicated, so if you want to use PowerPoint effectively, consider using the same operating system for designing and presenting, no matter what.
16. Bring your own hardware.
Between operating systems, PowerPoint is still a bit jumpy. Even between differing PPT versions, things can change. One way to fix these problems is to make sure that you have the right hardware — so just bring along your own laptop when you're presenting.
If you’re super concerned about the different systems you might have to use, then upload your PowerPoint presentation into Google Slides as a backup option. Google Slides is a cloud-based presentation software that will show up the same way on all operating systems. The only thing you need is an internet connection and a browser.
To import your PowerPoint presentation into Google Slides, take the following steps:
- Navigate to slides.google.com . Make sure you’re signed in to a Google account, preferably your own.
- Under Start a new presentation , click the empty box with a plus sign. This will open up a blank presentation.
- Go to File , then Import slides .
- A dialog box will come up. Tap Upload , then click Select a file from your device .
- Select your presentation and click Open .
- Select the slides you’d like to import. If you want to import all of them, click All in the upper right-hand corner of the dialog box.
- Click Import slides.

When I tested this out, Google Slides imported everything perfectly, including a shape whose points I had manipulated. This is a good backup option to have if you’ll be presenting across different operating systems.
17. Use Presenter View.
In most presentation situations, there will be both a presenter’s screen and the main projected display for your presentation. PowerPoint has a great tool called Presenter View, which can be found in the Slide Show tab of PowerPoint. Included in the Presenter View is an area for notes, a timer/clock, and a presentation display.

For many presenters, this tool can help unify their spoken presentation and their visual aid. You never want to make the PowerPoint seem like a stack of notes that you’re reading off of. Use the Presenter View option to help create a more natural presentation.
Pro Tip: At the start of the presentation, you should also hit CTRL + H to make the cursor disappear. Hitting the "A" key will bring it back if you need it!
Your Next Great PowerPoint Presentation Starts Here
With style, design, and presentation processes under your belt, you can do a lot more with PowerPoint than just presentations for your clients. PowerPoint and similar slide applications are flexible tools that should not be forgotten. With a great template, you can be on your way to creating presentations that wow your audience.
Editor's note: This post was originally published in September 2013 and has been updated for comprehensiveness.
![Blog - Beautiful PowerPoint Presentation Template [List-Based]](https://no-cache.hubspot.com/cta/default/53/013286c0-2cc2-45f8-a6db-c71dad0835b8.png "tips for preparing powerpoint presentation")
Don't forget to share this post!
Related articles.
![How to Write an Ecommerce Business Plan [Examples & Template]](https://blog.hubspot.com/hubfs/ecommerce%20business%20plan.png "tips for preparing powerpoint presentation")
How to Write an Ecommerce Business Plan [Examples & Template]
![How to Create an Infographic in Under an Hour — the 2024 Guide [+ Free Templates]](https://blog.hubspot.com/hubfs/Make-infographic-hero%20%28598%20%C3%97%20398%20px%29.jpg "tips for preparing powerpoint presentation")
How to Create an Infographic in Under an Hour — the 2024 Guide [+ Free Templates]
![20 Great Examples of PowerPoint Presentation Design [+ Templates]](https://blog.hubspot.com/hubfs/powerpoint-presentation-examples.webp "tips for preparing powerpoint presentation")
20 Great Examples of PowerPoint Presentation Design [+ Templates]

Get Buyers to Do What You Want: The Power of Temptation Bundling in Sales

How to Create an Engaging 5-Minute Presentation
![How to Start a Presentation [+ Examples]](https://blog.hubspot.com/hubfs/how-to-start-presenting.webp "tips for preparing powerpoint presentation")
How to Start a Presentation [+ Examples]

120 Presentation Topic Ideas Help You Hook Your Audience
![How to Create the Best PowerPoint Presentations [Examples & Templates]](https://blog.hubspot.com/hubfs/Powerpoint%20presentation.jpg "tips for preparing powerpoint presentation")
How to Create the Best PowerPoint Presentations [Examples & Templates]

The Presenter's Guide to Nailing Your Next PowerPoint
![How to Create a Stunning Presentation Cover Page [+ Examples]](https://blog.hubspot.com/hubfs/presentation-cover-page_3.webp "tips for preparing powerpoint presentation")
How to Create a Stunning Presentation Cover Page [+ Examples]
Marketing software that helps you drive revenue, save time and resources, and measure and optimize your investments — all on one easy-to-use platform
Just $59.95 for a limited time (normally $99.95).

10 Tips for better preparing a PowerPoint presentation
What's one thing every presentation has in common? Their creators always wish they could make them better at getting their point across.
Whether you’re an experienced presenter or about to face an audience for the first time, you should find something helpful in these ten tips for better preparing a PowerPoint presentation .
1. Focus on Your Audience

Your audience is there to learn and needs to know that information revealed during the presentation will be helpful or profitable.
As you develop the presentation, keep your focus on why your audience has decided to listen to what you have to say.
Don’t guess what your audience wants to hear. You can find out specifics by sending out short questionnaires to a few people who will be there on the day.
2. Stick to the Core Message

While creating your presentation, always keep in mind the key message you are trying to deliver.
You don’t want your audience’s attention to wander, so each point should be brief. If what you are planning to say doesn’t contribute to the core message, leave it out of the presentation.
3. Keep Your Slides Clear, Simple, and Uncluttered

A slide with a lot of text will be like turning a switch off as far as keeping your audience engaged. Whether your meeting is online or in front of an audience, short slides that are to the point will always win the day.
Slides are brief reminders about the subject matter, and should only contain the key points. Minimalist designs will always do better at keeping the audience’s attention than text-heavy templates with complex graphics.
4. Use Professional Templates
Animated PowerPoint Template Designs
Coming up with creative designs that won’t drown the message takes skill and experience. You may know a lot about your topic, but a poorly designed presentation won’t be very effective at delivering your expertise to the audience.
Fortunately, you don’t have to spend hours coming up with presentation designs because templates can help you create professional-looking slides in a matter of minutes rather than hours.
There are templates created to suit a wide range of industries, so whether you are speaking on business and finance, or wildlife and nature, there is a template that will perfectly complement your message.
Professional presentation templates from PresenterMedia give you the freedom to focus on your message rather than struggle with the finer points of slide design.
5. Enhance Your Message With Attractive Visuals

Your audience will be more responsive to visual information than a slide full of text.
Use attractive but relevant visuals to drive your point home. Your audience will be more likely to remember what they have seen rather than what they have heard or read.
As with templates, you don’t have to create your visuals from scratch. Online resources can provide every image you need to make your message stand out.
Charts and diagrams are an excellent way to liven up otherwise dull facts, figures, and statistics. Modern presentation software allows you to display this type of information in engaging ways that will deliver them with the impact they deserve. Animate the images for even greater engagement.
6. Use the 10-20-30 Rule
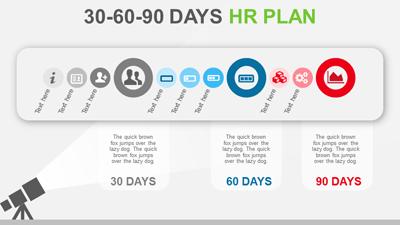
30 60 90 PowerPoint Template
Guy Kawasaki from Apple is well known for this rule about creating presentations that won’t lead the audience to distraction. In short, the law says to create a presentation that:
- Contains no more than ten slides
- Is 20-minutes or less
- Use a font size of 30 points
The last rule deserves more explanation. Not only does a large font size create text that is easy to read, even for people at the back of the room, but it also helps you keep the textual information brief and to the point.
The 10-20-30 rule could be interpreted as less is more. But, what if you have more to say?
You should still keep your presentation simple, but if you’ve got more information to deliver, include it in a handout for after the presentation.
7. Tell a Story

Humans have been telling stories with pictures since the Palaeolithic age. You could say responding favorably to a powerfully delivered presentation is ingrained in our DNA.
A story helps you deliver your points in engaging and exciting ways to which your audience can relate. Each point will be more memorable when there is a relatable narrative attached to it.
8. Make Eye Contact

Great presenters make eye contact with their audience. There’s a lot of psychology behind why eye contact is such an essential part of a presentation.
Eye contact suggests sincerity and is a way of establishing trust and a genuine connection with the audience. It also states that you are comfortable with what you are saying and know it to be true.
This trait can be very persuasive if you’re trying to inspire your audience into following through with a call-to-action at the end of the presentation.
Eye contact is so vital that you should avoid giving your presentation in a darkened room unless it’s a small gathering. You, as the presenter, need to be visible and present as well. And don’t forget to smile.
9. Be Confident
The audience will pick up on a nervous presenter, and while most will be understanding, it can still take the wind out of your delivery.
Like eye contact, confidence will help you forge a greater connection with your audience. Confidence also helps your passion for the subject matter to shine through.
Confidence will show in your body language, so move around, be dynamic, and use open, confident gestures to drive the point home.
10. Research
Your years of experience can carry you a long way, but diligently researching the facts and figures you will be presenting will be reassuring for your audience.
Even expert knowledge goes out of date on occasion, so you want to make sure every fact you present is relevant to today’s world.
It’s a good bet that there will be questions asked after the presentation, so the more you have researched, the more knowledgeable you will appear.
Becoming a great presenter takes practice, but if you can learn to enjoy yourself during your presentations, your audience will respond in kind.
Remember, these ten tips will help shape your presentations for maximum impact and engagement. Your message remains a top key element with the most significant impact on your audience, but adding attractive and engaging graphics will help visually bring your message to life. Implement these presentation tips, explore PresenterMedia's visual designs, and give your audience a better presentation.
Happy Presenting!

Blog Comments (Sign In to Comment):
Categories:
Recent posts:.
- March 2024 Suggestions
- Save and Link a PPSX File in PowerPoint
- PresenterMedia February 2024 Newsletter - Graphics, Updates, News
- New Artwork and Illustrations for February
- Improvements Update: SlideClips Video Maker | February 2024
- PresenterMedia January 2024 Newsletter - Graphics, Updates, News
- January 2024 Suggestions
- How to Convert PPTX to Google Slides and Enhance Your Presentations
- December 2023 Suggestions
- Help! Images have black background in PowerPoint | Get the Fix

Your presentations are going to be amazing! See Plans and Pricing

© 2009-2021 Eclipse Digital Imaging, Inc.
Quality PowerPoint Templates , Animations, videos, and 3D Clipart. PowerPoint® is a registered trademark of Microsoft Corporation.
Notification Title!
This is the message.
Preparing a PowerPoint Presentation: 11 Tips for Guaranteed Success!
In 2022, presentations are part of everyday life for anyone in business. Many people find it difficult to put together presentations that are both target-oriented and interesting, though. Getting the preparation and structuring right from the start is the basis of a successful presentation.
A cogent and professionally presented presentation connects you to your clientele by allowing them to clearly understand your topic. Since good preparation accounts for up to 50% of the success of a presentation , we have compiled 11 tips for you to follow in order to deliver a great presentation and make a good impression.
Preparing presentations thoroughly: Why is it so important?
The best and most successful presentations are based on solid, well-researched and meticulously prepared content. Preparing your presentations properly means you will be faster, more efficient and ultimately more successful in both immediate and future presentations. The most important thing is a good structure – the mainstay of any presentation.
A good structure allows you to deliver a professional and well-thought-out presentation that will resonate with your audience and convince them of your points. A good structure is also vital to you as the presenter, as it provides a common thread to follow throughout your presentation.
Preparing properly will exude professionalism and give you confidence in your delivery.
Preparing a PowerPoint presentation: How much time do I need?
You have a presentation coming up in a few weeks – so when should you start preparing? Unfortunately, there are no hard-and-fast rules. The time you need to prepare depends entirely on what you’re going to be presenting, your knowledge of the subject, your presentation experience and your PowerPoint skills. (Don’t worry; we’re here to help with the latter!)
There is, however, a useful rule of thumb attributed to Wayne Burgraff, an 18th century American philosopher:
“ It takes one hour of preparation for each minute of presentation time.”

So, start your preparation as early as you can. It’s better to finish your preparations a little too early than to start too late and deliver a substandard presentation while feeling panicked.
Preparing a PowerPoint presentation: Questions to ask in advance

Whatever you intend to present, there are a few basic questions that apply regardless of the topic . Part of your preparation should include answering these for yourself. These are:
- What is the goal of your presentation?
- Who is the target audience ? (Level of knowledge, jobs, age, expectations).
- How big will your audience be?
- What is the topic ? What is your core message ?
- How much time do you have for your presentation?
- What is the space you have to present in like? What technology (projector, laptop, microphone) might you use or need to bring? If presenting remotely , have you mastered the form?
- Where can you find any necessary information about your topic?
- Have you planned a good structure ? (Tips here )
- How do you make your slides visually appealing ? (Design, graphics, photos, videos, font size)
- How do you make the presentation interesting ? ( humor , anecdotes, etc.)
- Have you rehearsed your presentation (noting particularly how long it lasts, and how your rehearsal audience reacts)? Where can you shorten it if needs be on the day?
- Are there speaking techniques which might help you when presenting? (Tips here )
- Are you aware of your gestures and facial expressions , and what should you wear to appear as professional as possible? (Tips here )
- How would you deal with technology breaking down ? (Tips here )
- Are you prepared for questions ? Have you factored in time for them?
We’ve compiled 11 tips and tricks to help you answer these questions, ensuring a really professional presentation and a happy audience!
Preparing a PowerPoint presentation: 11 tips for success
1. structure is all-important.

A solid structure is the mainstay of any presentation. It provides a logical, common thread for both your audience and yourself. Structuring your presentation well allows you to communicate your points coherently and professionally. So what do we mean by structure?
The basic outline is elegantly simple:
- Introduction
- First subtopic
- Second subtopic
- Third subtopic
Following your conclusion, you should allow time for questions and be prepared to answer them. This is especially important if one of your goals is networking . More information on networking can be found here.
We’ve written a detailed article covering presentation setup and structure here .
2. What is your core message?
It is important for both you and your audience to deliver your core message effectively.
This means you need to work out in advance what it is. It needs to be as concise as possible, but thoroughly internalized by you, and comprehensible to your audience. Once you know exactly what it is, it will help clarify the structure you need in your presentation.
Tip: Why not try using a mind map to clarify what your core message is? Which are the most important aspects? What are your main arguments, and how are they linked? It’s a really useful exercise, which you can use to crystallize your core message and structure your presentation, by actually seeing how the various aspects of your presentation are interlinked. For more tips on developing a core message, see this post . We’ve also written about how to convey your core message in the headline, with an action title, here .
3. Make sure you have a strong start and finish
An important aspect of preparing a presentation is to formulate a good introduction and a convincing ending . Both are necessary for a well-rounded and coherent presentation.
It’s vitally important, especially at the beginning of a presentation, to get the audience’s attention . If you lose this, it doesn’t really matter what you say during the rest of the presentation as they won’t be listening. This article shows you how to create an interesting introduction; one which doesn’t trot out the usual tired phrases.
It’s also well worth putting preparation time into working out how to finish. Once again, empty phrases will send your audience away dissatisfied, even if they have been with you until then. Take the time to craft an ending that is both purposeful and effective; you may even be able to include a call-to-action. We have more tips and ideas here .
4. Use a good layout and design to get your message over
When putting your presentation together, put yourself in your audience’s shoes: What would make you pay attention? Are your slides in danger of being boring? How can you use the design options offered by PowerPoint to make the most impact?
Taking a bit of time to answer these questions in advance pays off – you can score points with your audience by thinking about these things. No matter how well thought out and professionally delivered your presentation is, if your slides look unprofessional, your audience won’t take your points as seriously. Your presentation needs to be visually appealing to your audience to let them really take notice of your ideas.
So thinking about a good design and layout for your slides, one that visually supports your purposes and your presentation, is a good use of your preparation time.
A variety of slide formats, with an overall coordinated theme, is optimal. There are many options in PowerPoint, and we’ve written about them here . You can incorporate impactful graphics, interesting pictures to make your point, or even play with animations .
5. Prepare a handout
When you’re putting your presentation together, don’t forget to make a handout too. You may think they’re just for academic presentations, but handouts can be really useful for business presentations when used correctly.
A handout should provide added value . Just jotting down a few sentences from your presentation without much thought is counterproductive. A handout should be a brief summary of the presentation that the audience can understand without the presentation .
Think about when and how you want to distribute your handout. You’ll need to take a number of factors into account, so we’ve covered that here , as well as tips on creating effective handouts.
6. Is the necessary technology working?
This is something that many people overlook when preparing presentations. If the technology you need doesn’t work, your lecture and presentation can be as sophisticated as you like, but without being able to present it to your audience, it’s useless.
If possible, visit your presentation venue in advance , to familiarize yourself with how it feels and prepare for any problems or lack of technical equipment.
Make at least two copies of your presentation (for example, one on your laptop and another on a USB stick or similar). This helps avoid disaster on the day of the presentation.
It’s also important to take a spare battery and a charging cable with you. It’s hard to convince your audience when the battery dies in the middle of your presentation and you’re left with a blank screen.
7. Prepare for a question and answer session and indicate your willingness to interact with your audience
If your audience is interested in what you’re saying during your presentation, they will often have questions. Work out in advance when you want to include time for questions ; this can be at the end or as you go along. How much time you include for Q&A depends entirely on your topic, and how knowledgeable your audience is.
Allow enough time to answer all the questions , because the goal of any presentation is to convince your audience. Answer politely and as thoroughly as possible. We have more about how to plan and deliver question-and-answer sessions here .
You might end up with questions or suggestions that overflow the Q&A session, so plan some time after the end of your presentation to be available for interested listeners . This is especially if you are wanting to network or sell a product with your presentation, as you have time to interact with potential customers.
8. Prepare to deliver your presentation

It’s not enough just to plan the contents of your presentation; you also need to think about how you present what you’ve prepared . One of the most important presentation techniques is relaxed improvisation , but this sounds a lot easier than it is, and requires a lot of practise.
One way to help here is to use index cards with bullet points to keep your train of thought on track. Reading the entire speech from index cards, however, is counterproductive.
PowerPoint presenter view is a really useful too here. This featureg lets you follow your presentation on the screen in front of you, but also see the next slide and any notes you’ve made. We write all about presenter view in thi s article.
In general, improvisation works better if you really know your topic and have practiced your presentation a few times in advance. Co-opting a test audience to listen to your rehearsal helps to recreate the situation as authentically as possible.
To make the presentation as relaxed as possible, you can use humor in sparing doses and at appropriate points. Starting with an anecdote is one example; we go into more ways of incorporating humor in this article .
There are also speech techniques that can help you deliver your presentation really effectively. They include stylistic elements such as exaggeration or other rhetorical devices (really not as offputting as they sound!). Practice using your voice, working with the right pitch and emphasis. We’ve put together those and many more speaking technique tips to help you score points in your presentation here . If you happen to make a mistake in your presentation despite all that preparation, it’s not a disaster. It makes you human. You can prepare to laugh it off, or use the techniques that we have collected in this article to sail confidently over the hiccup.
9. More important than you may think: what you wear, your gestures and facial expressions
So you’ve prepared your presentation thoroughly, and taken our tips to heart? Brilliant! Now don’t forget to optimize your body and your gestures and facial expressions to reinforce the points you make so eloquently in your presentation.
Your appearance is, unavoidably, the first thing your audience will notice. If you look unprofessional, or inappropriately dressed for the occasion , you will struggle to convince them of your ideas, so it’s worth planning what to wear beforehand. As a general rule, avoid clothing that is too garish or colorful, as this can distract from your presentation. Tips on choosing the right outfit can be found here and here . Standing lifelessly in front of your audience with your arms hanging down makes you appear listless, while a grimace on your face will turn people off quickly. Underline important aspects with good body language or a smile . You can find really useful tips on body language and gestures in this article .
10. Extra tip: what if you’re presenting online?
So your presentation is going to take place online and not on site? Basically, this doesn’t make any difference in how you prepare your presentation, but there are some minor differences that you should be aware of.
PowerPoint offers a slimmed-down online version of its service. Information on this can be found here . You can of course also fall back on the familiar desktop version.
With an online presentation, the interaction with your audience changes. Because you are not in a room together, you have to deal with your audience differently and also adapt your presentation accordingly. Your content and face is also more in focus due to live screen presentation. This is all covered here .
Technology is even more important here than when presenting on site. Think about which platform you want to share your presentation on and what options you need from it. We compare the various online presentation tools now available here .
11. Another extra tip! Use the AIDA and SMART methods to help you.
Depending on what you want to achieve from your presentation, there are a couple of methods which can help to guide your presentation preparation: the AIDA method and the SMART method.
If you want to sell products with your presentation, the AIDA method is perfect. This model (also known as the AIDA principle) is a step-by-step model developed by Elmo Lewis as long ago as 1898 to optimize advertising.
It is an acronym for the terms describing the four successive phases which everyone goes through before deciding to purchase a product or service:

A = Attention : Grab your audience’s attention and they’ll listen to what you’re trying to say. Make your presentation appealing and stand out from the crowd.
I = Interest : Generate interest in the product.
D = Desire : Awaken the audience’s desire to possess your product. This is where you can use the emotional and cognitive level to make your product more desirable.
A = Action : Get the audience to actually buy the product. You can use call-to-actions for this purpose, for example.
If you want to you can use our AIDA PowerPoint Templates:

If your presentation is more about conveying information , then the SMART principle is tremendously useful. This helps you to define and set concrete presentation goals :

S = Specific: Make your presentation as concrete as possible. Vague statements won’t help your presentation. Concretize your goal in one sentence if possible and build your presentation around it.
M = Measurable: You should be able to assess how well you are achieving your goals at certain points.
A = Action-oriented/attractive: Interact with the audience (e.g., through questions or discussions). This will complement a well-prepared presentation, to help achieve your goals.
R = Realistic: Make sure that everything you plan is actionable.
T = Timed : How much time do you plan to spend on each item?
These five steps, help you to create a focused and engaging presentation. If you want to you can use SMART Goal PowerPoint Templates from PresentationLoad:

Preparing a PowerPoint presentation: Our tips make it easy, efficient and effective!
Now you know how to prepare presentations as effectively as possible. Our tips and tricks make it easy to create a successful presentation that will help you achieve your goals.
So take the time you need to prepare all aspects of your presentation and delivery thoroughly. Remember, good preparation accounts for 50% of success!
Have questions about this article or other aspects of presentations or PowerPoint? Do feel free to contact us via [email protected] . We are always happy to help!
The following articles might also be of interest:
- How to create a presentation: Tips and tricks!
- The best presentation structure
- And much more
Share this post
- share
- save

Design Thinking: Problem Solving with a Difference

Why Corporate Mission Statements Are So Important

7 Tips & Learnings from the Apple Keynote

Basic tasks for creating a PowerPoint presentation
PowerPoint presentations work like slide shows. To convey a message or a story, you break it down into slides. Think of each slide as a blank canvas for the pictures and words that help you tell your story.
Choose a theme
When you open PowerPoint, you’ll see some built-in themes and templates . A theme is a slide design that contains matching colors, fonts, and special effects like shadows, reflections, and more.
On the File tab of the Ribbon, select New , and then choose a theme.
PowerPoint shows you a preview of the theme, with four color variations to choose from on the right side.
Click Create , or pick a color variation and then click Create .

Read more: Use or create themes in PowerPoint
Insert a new slide
On the Home tab, click the bottom half of New Slide , and pick a slide layout.

Read more: Add, rearrange, and delete slides .
Save your presentation
On the File tab, choose Save .
Pick or browse to a folder.
In the File name box, type a name for your presentation, and then choose Save .
Note: If you frequently save files to a certain folder, you can ‘pin’ the path so that it is always available (as shown below).

Tip: Save your work as you go. Press Ctrl+S often or save the file to OneDrive and let AutoSave take care of it for you.
Read more: Save your presentation file
Select a text placeholder, and begin typing.

Format your text
Select the text.
Under Drawing Tools , choose Format .

Do one of the following:
To change the color of your text, choose Text Fill , and then choose a color.
To change the outline color of your text, choose Text Outline , and then choose a color.
To apply a shadow, reflection, glow, bevel, 3-D rotation, a transform, choose Text Effects , and then choose the effect you want.
Change the fonts
Change the color of text on a slide
Add bullets or numbers to text
Format text as superscript or subscript
Add pictures
On the Insert tab, select Pictures , then do one of the following:
To insert a picture that is saved on your local drive or an internal server, choose This Device , browse for the picture, and then choose Insert .
(For Microsoft 365 subscribers) To insert a picture from our library, choose Stock Images , browse for a picture, select it and choose Insert .
To insert a picture from the web, choose Online Pictures , and use the search box to find a picture. Choose a picture, and then click Insert .

You can add shapes to illustrate your slide.
On the Insert tab, select Shapes , and then select a shape from the menu that appears.
In the slide area, click and drag to draw the shape.
Select the Format or Shape Format tab on the ribbon. Open the Shape Styles gallery to quickly add a color and style (including shading) to the selected shape.

Add speaker notes
Slides are best when you don’t cram in too much information. You can put helpful facts and notes in the speaker notes, and refer to them as you present.

Click inside the Notes pane below the slide, and begin typing your notes.

Add speaker notes to your slides
Print slides with or without speaker notes
Give your presentation
On the Slide Show tab, do one of the following:
To start the presentation at the first slide, in the Start Slide Show group, click From Beginning .

If you’re not at the first slide and want to start from where you are, click From Current Slide .
If you need to present to people who are not where you are, click Present Online to set up a presentation on the web, and then choose one of the following options:
Broadcast your PowerPoint presentation online to a remote audience
View your speaker notes as you deliver your slide show.
Get out of Slide Show view
To get out of Slide Show view at any time, on the keyboard, press Esc .
You can quickly apply a theme when you're starting a new presentation:
On the File tab, click New .
Select a theme.

Read more: Apply a design theme to your presentation
In the slide thumbnail pane on the left, select the slide that you want your new slide to follow.
On the Home tab, select the lower half of New Slide .
From the menu, select the layout that you want for your new slide.
Your new slide is inserted, and you can click inside a placeholder to begin adding content.
Learn more about slide layouts
Read more: Add, rearrange, and delete slides
PowerPoint for the web automatically saves your work to your OneDrive, in the cloud.
To change the name of the automatically saved file:
In the title bar, click the file name.
In the File Name box, enter the name you want to apply to the file.
If you want to change the cloud storage location, at the right end of the Location box, click the arrow symbol, then navigate to the folder you want, then select Move here .
On the Home tab, use the Font options:

Select from other formatting options such as Bold , Italic , Underline , Strikethrough , Subscript , and Superscript .
On the Insert tab, select Pictures .
From the menu, select where you want to insert the picture from:

Browse to the image you want, select it, then select Insert .
After the image is inserted on the slide, you can select it and drag to reposition it, and you can select and drag a corner handle to resize the image.
On the slide canvas, click and drag to draw the shape.
Select the Shape tab on the ribbon. Open the Shape Styles gallery to quickly add a color and style (including shading) to the selected shape.

A horizontal Notes pane appears at the bottom of the window, below the slide.
Click in the pane, then enter text.

On the Slide Show tab, select Play From Beginning .

To navigate through the slides, simply click the mouse or press the spacebar.
Tip: You can also use the forward and back arrow keys on your keyboard to navigate through the slide show.
Read more: Present your slide show
Stop a slide show
To get out of Slide Show view at any time, on the keyboard, press Esc.
The full-screen slide show will close, and you will be returned to the editing view of the file.
Tips for creating an effective presentation
Consider the following tips to keep your audience interested.
Minimize the number of slides
To maintain a clear message and to keep your audience attentive and interested, keep the number of slides in your presentation to a minimum.
Choose an audience-friendly font size
The audience must be able to read your slides from a distance. Generally speaking, a font size smaller than 30 might be too difficult for the audience to see.
Keep your slide text simple
You want your audience to listen to you present your information, instead of reading the screen. Use bullets or short sentences, and try to keep each item to one line.
Some projectors crop slides at the edges, so that long sentences might be cropped.
Use visuals to help express your message
Pictures, charts, graphs, and SmartArt graphics provide visual cues for your audience to remember. Add meaningful art to complement the text and messaging on your slides.
As with text, however, avoid including too many visual aids on your slide.
Make labels for charts and graphs understandable
Use only enough text to make label elements in a chart or graph comprehensible.
Apply subtle, consistent slide backgrounds
Choose an appealing, consistent template or theme that is not too eye-catching. You don't want the background or design to detract from your message.
However, you also want to provide a contrast between the background color and text color. The built-in themes in PowerPoint set the contrast between a light background with dark colored text or dark background with light colored text.
For more information about how to use themes, see Apply a theme to add color and style to your presentation .
Check the spelling and grammar
To earn and maintain the respect of your audience, always check the spelling and grammar in your presentation .
Top of Page

Need more help?
Want more options.
Explore subscription benefits, browse training courses, learn how to secure your device, and more.

Microsoft 365 subscription benefits

Microsoft 365 training

Microsoft security

Accessibility center
Communities help you ask and answer questions, give feedback, and hear from experts with rich knowledge.

Ask the Microsoft Community

Microsoft Tech Community

Windows Insiders
Microsoft 365 Insiders
Was this information helpful?
Thank you for your feedback.
Microsoft Office
10 minute read
Top 12 PowerPoint Tips and Hacks for Flawless Presentations

Saikat Basu
Twitter LinkedIn WhatsApp Pocket Email
We’ve all seen our fair share of bad PowerPoint presentations . We can all agree that for a PowerPoint presentation to impress, it needs time and attention to detail.
So how can you ramp up your PowerPoint productivity in the shortest time possible?
That’s where we come in. For starters, follow our proven PowerPoint tips and tricks for business presentations , which are sure to make an impact.
Step up your PowerPoint game
Download our print-ready shortcut cheatsheet for PowerPoint.
1. Keep it simple

Keep your slides simple. It’s the visual backdrop to what you are going to say.
The most recommended PowerPoint tip for your productivity is called simplicity . You may be tempted by the graphical razzmatazz of beautiful images, background, and charts. At the end of the day, PowerPoint is a background visual aid for your talk. It is not the talk.
PowerPoint has lots of bells and whistles. But you don’t have to use them all. For instance, your content may not need the much-maligned bullet points - you can just use one key point per slide instead.
That’s why…
2. Reduce the text

Less is more when it is about the text on your slides.
The average reading speed on a screen is around 100 - 150 words per minute. Too much information on the slide is a distraction and an inattentive audience will lose the message you are trying to convey.
Don’t give them too much to read. Use high-quality pictures and eye-catching graphics instead.
To make information digestible, expert slide designers recommend you write one key idea per slide that is summarized by a clear headline.
Tip: Exploit white space. Create more space between your text, paragraphs, and graphics on your slide.
3. Plan your content first

Think about the message you want to convey and use it to write an outline.
As PowerPoint is such a visual medium, it is easy to get sidetracked with the visuals. So it’s important to chalk out what you want to say and in what order even before you open PowerPoint.
Your slides will come together quickly with the help of PowerPoint design options and you can even choose the right templates if you know your stuff inside out.
Tip: Use brainstorming tools like mind maps, flowcharts, and even storyboards to sketch your content flow.
4. Use PowerPoint Designer for ideas
PowerPoint makes an intelligent guess by looking at the words on your slide and suggests high-quality artwork to complement it. You can pick one of the creative layouts or go back to your own design.
Tip: PowerPoint Designer can also turn lists, processes, or timelines into beautiful graphics too.
5. Use PowerPoint templates

Start with a template to break through any creative blocks.
PowerPoint templates are meant to be the starter plugs when inspiration deserts you or you are design-challenged. PowerPoint ships with a set of readymade templates and there are more available online. Pick one to begin.
Tip: Manpreet Kaur, the head of Corporate Communications at Mercer also suggests you use templates for mining ideas for your own presentation.
Whenever you receive any PowerPoint presentation from any of your clients, business partners, or sellers, make it a point to add them to any folder as a stock for templates for future reference. You can leverage these templates to find inspiration for any icon idea, layout, idea presentation, and number representation on the slides.
6. Edit the Slide Master

To open the Slide Master view, go to the View tab on the Ribbon and select Slide Master .
The first slide on the top is the Slide Master. Any changes to the Slide Master will be applied to all the slides in the presentation.
The Slide Master view also shows all the slide layouts used in PowerPoint. You can also use these Layout Master slides to control the appearance of any group of slides that share a common layout.
Tip: Make changes to the Slide Master before you start filling a presentation with the content.
7. Use PowerPoint Shapes for visuals

PowerPoint Shapes is the most powerful graphical tool in your control.
The multifaceted Shapes feature on the Ribbon gives you infinite ways to use PowerPoint like an illustration program. Look beyond the commonplace rectangle, oval, and rounded rectangle patterns.
Every shape is editable. You can customize any PowerPoint shape and create your own custom designs. They can be formatted with colors, 3-D effects and shadows too.
Tip: Most default shapes are overused. So, you can use your own custom shapes to add interest to a key point or a slide. For instance, you can turn a chevron into a more interesting arrow to illustrate the flow of a process.
8. Choose the right fonts
Choose the right fonts that are modern and pleasing.
It’s well established that fonts have a cognitive impact on how your audience will take in the information.
Sans-serif fonts are preferred for their smooth typefaces. But your typography choices will be influenced by the theme of the content. An artsy presentation can be more liberal with fonts that are decorative.
Also, to create contrast, you can use a technique called font-pairing where two complementary fonts are combined. For instance, use a serif font for titles and pair it with a sans-serif font in the body.
Tip: Want a free font library? Head over to Google Fonts and the collection of 916 free licensed fonts.
9. Use visual metaphors for your data

Visuals help everyone get the context behind data at a faster rate.
Business executives are used to spreadsheets . But that doesn’t mean they will like it in a presentation. Arresting illustrations are far better than bullet points and shoddy SmartArt.
We have talked about shapes and using high-quality photos before. But what if you have to analyze dry data?
Use visual metaphors or analogies to bring out the scale and relationships in the data. Executives can look up numbers, but the right use of an analogy can bring out the context behind it.
For instance, the evolution of man can be used to show the growth of a startup over time.
Tip: When stuck for ideas take inspiration from the best infographics on Slideshare and Pinterest. Infographics are designed to pack a lot of information in a small space.
10. Customize your slides for different audiences

Save yourself a lot of time by reusing your slides for different audiences.
This somewhat lesser-known PowerPoint tip uses a feature called Custom Slideshow to filter what you want your audience to see. Maybe, you want to hide some sensitive information for a lower level of executives while revealing it to those higher up. You do not have to create different slideshows for these two groups.
Create a custom show in five steps.
- On the Ribbon, go to Slide Show > Custom Slide Show , and then select Custom Shows .
- Click the New button in the Custom Shows dialog box.
- In the Define Custom Show box , choose the slides that you want to include in the custom show, and then hit Add .
- You can change the order of the slides with the arrow keys.
- Type a name in the slideshow name box, and then click OK .
Tip: You can also create hyperlinked custom shows that you can jump to from your primary PowerPoint show.
11. Rehearse Your Presentation

Prepare your presentation according to the time allotted.
No PowerPoint tip is useful if you cannot fit the number of slides and the time you take to present them in the schedule. PowerPoint helps you rehearse your presentation before you do it. With the Rehearse Timing feature, you can tweak your delivery according to the time on hand.
A helpful Microsoft Support video walks you through the process.
Tip: Use the timer to check if you're spending too much or too little time on one particular slide. Maybe, explaining the data in a better way can shorten the time.
12. Make your PowerPoint presentations accessible

Go to File > Info > Check for Issues > Check Accessibility
Sharon Rosenblatt, Director of Communications at Accessibility Partners stresses the importance of making presentations more inclusive.
Always use the accessibility checker, and not just if your slideshow is being shared with someone you know has a disability, but you never know where files get sent to.
PowerPoint is all about visuals so it’s more important to finetune the little things that can help make the message easily understood by people who have accessibility challenges.
Tip: Microsoft details the best practices for making all PowerPoint presentations accessible .
The bottom line: Get to the point fast
When you are presenting to busy people, you have to cut the clutter but not lose the message. A successful presentation is about brevity and speed.
A business presentation is also a decision-making tool. So make sure you are presenting the information your audience wants to know. And nothing more.
Yes, they do take some work. But with the help of these PowerPoint tips and tricks, you can start and finish any presentation without losing your sleep.
Want more PowerPoint tips? Then check out these other PowerPoint features that will level up your presentations. Or try taking GoSkills top-rated PowerPoint certification course .
Ready to master Microsoft Office?
Start learning for free with GoSkills courses
Loved this? Subscribe, and join 442,109 others.
Get our latest content before everyone else. Unsubscribe whenever.

Saikat is a writer who hunts for the latest tricks in Microsoft Office and web apps. He doesn't want to get off the learning curve, so a camera and a harmonica claim an equal share of his free time.

Recommended
Should You Switch to Microsoft 365? What You Need to Know in 2024
We break down what Microsoft 365 is, and what makes it different from lifetime licenses.

28 Best Microsoft Office Add Ins in 2024
Supercharge your productivity with our picks of the best Microsoft Office add-ins for Word, Excel, PowerPoint, Outlook and OneNote.

What is Microsoft Teams? Everything You Need to Know in 2024
What is Microsoft Teams? Find out in this introductory guide.
© 2024 GoSkills Ltd. Skills for career advancement
- SUGGESTED TOPICS
- The Magazine
- Newsletters
- Managing Yourself
- Managing Teams
- Work-life Balance
- The Big Idea
- Data & Visuals
- Reading Lists
- Case Selections
- HBR Learning
- Topic Feeds
- Account Settings
- Email Preferences
What It Takes to Give a Great Presentation
- Carmine Gallo

Five tips to set yourself apart.
Never underestimate the power of great communication. It can help you land the job of your dreams, attract investors to back your idea, or elevate your stature within your organization. But while there are plenty of good speakers in the world, you can set yourself apart out by being the person who can deliver something great over and over. Here are a few tips for business professionals who want to move from being good speakers to great ones: be concise (the fewer words, the better); never use bullet points (photos and images paired together are more memorable); don’t underestimate the power of your voice (raise and lower it for emphasis); give your audience something extra (unexpected moments will grab their attention); rehearse (the best speakers are the best because they practice — a lot).
I was sitting across the table from a Silicon Valley CEO who had pioneered a technology that touches many of our lives — the flash memory that stores data on smartphones, digital cameras, and computers. He was a frequent guest on CNBC and had been delivering business presentations for at least 20 years before we met. And yet, the CEO wanted to sharpen his public speaking skills.
- Carmine Gallo is a Harvard University instructor, keynote speaker, and author of 10 books translated into 40 languages. Gallo is the author of The Bezos Blueprint: Communication Secrets of the World’s Greatest Salesman (St. Martin’s Press).
Partner Center
- PowerPoint Themes
- Latest PowerPoint Templates
- Best PowerPoint Templates
- Free PowerPoint Templates
- Simple PowerPoint Templates
- PowerPoint Backgrounds
- Project Charter
- Project Timeline
- Project Team
- Project Status
- Market Analysis
- Marketing Funnel
- Market Segmentation
- Target Customer
- Marketing Mix
- Digital Marketing Strategy
- Resource Planning
- Recruitment
- Employee Onboarding
- Company Profile
- Mission Vision
- Meet The Team
- Problem & Solution
- Business Model
- Business Case
- Business Strategy
- Business Review
- Leadership Team
- Balance Sheet
- Income Statement
- Cash Flow Statement
- Executive Summary
- 30 60 90 Day Plan
- SWOT Analysis
- Flow Charts
- Gantt Charts
- Text Tables
- Infographics
- Google Slides Templates
- Presentation Services
- Ask Us To Make Slides
- Data Visualization Services
- Business Presentation Tips
- PowerPoint Tutorials
- Google Slides Tutorials
- Presentation Resources
19 Tips to Make A Professional-Looking PowerPoint Presentation
Creating impactful presentations is no easy task. It comes with rigorous practice over the years. Get expert guidance and professional presentation tips on how to make a professional PowerPoint and Google Slides presentation.

A PowerPoint presentation is a fantastic tool to communicate vital information. Even though people think it’s simple to put all of your material together and make a presentation, arranging and preparing the template and design takes time to ensure it is impactful and professional. But how to make PowerPoint look professional?
Well, an engaging PowerPoint presentation goes beyond simply exchanging information; it connects with the audience . It must transport the listener on a journey, induce emotions, and leave an unforgettable impression. Lets understand more on how to make a professional presentation with little preparation and ace it!
What Is A Professional Presentation?
A professional presentation is a well-structured and effectively delivered communication that conveys information, ideas, or proposals in a business or formal context. It typically adheres to certain standards and practices to effectively engage and inform the audience. As a result, such presentations can be fairly diverse, and they may be necessary to complete job interviews, provide sales pitches to potential clients, or present project proposals to top management.
EXPLORE: 7,000+ PROFESSIONAL POWERPOINT TEMPLATES
How to Make A Professional PowerPoint Presentation?
Here are some tips for making a professional presentation. Below, we have divided the PowerPoint presentation tips into 3 main parts :
- Content and Slide-Related Tips
- Design-Related Tips
- Delivery-Related Tips
Content and Slide-Related Tips for PowerPoint Presentations
Follow the steps below to make your PowerPoint look professional :
- Start with a title slide
- Add an agenda slide
- Logically arrange the middle slides
- Include a call-to-action slide at the end of your presentation
- Conclude with key takeaways
READ MORE: How to Write A Good Presentation ?
1. Start with a title slide
An eye-catching first slide serves as an introduction to your subject. To make it clear to read across the room, place the title of your presentation in huge letters in the middle of the slide. If your audience doesn’t know you, you can also include your name and title on the slide, depending on the sort of presentation. One of the most underrated and important presentation tips – On the title slide, keep the background simple to avoid drawing attention away from you as you speak.
2. Add an agenda slide
List what the audience can anticipate. Label your slide with “Presentation Agenda” or a phrase to that effect. List the key lessons you want your audience to take away from the presentation. It not only makes it easier for your audience to follow along, but it also clarifies your main objective.
3. Logically arrange the middle slides
For more clarity, identify the presentation’s beginning, middle, and end. Make a list of the facts you want to provide and important points you want your audience to take away from your presentation. Take what you’ve written and arrange the ideas in an outline so that each idea leads naturally into the next. For instance, if you’re making a persuasive presentation, you might begin by providing background information on the subject and then discuss potential solutions before concluding by outlining actions an audience member can take to contribute.
4. Include a call-to-action slide at the end of your presentation
After you finish, inform your audience of the next steps. After reviewing the key points of your presentation, provide a list of actions your audience may take to advance the project. So that your audience has several options for what to do next, try to come up with some concrete ideas.
5. Conclude with key takeaways
Make a summary of your important points so your audience will remember them. Start the last slide with a header at the top that reads “Takeaways” or “Key Points”. Make a final list of bullet points containing the most crucial information you have covered. Ensure to emphasize your previous presentations’ key ideas and speak them aloud to your audience. In this manner, your presentation will leave a lasting effect on the audience, making them more likely to recall what you say.
Content forms the foundation of any presentation. But, if not designed correctly, it can lead to a boring presentation. That’s where an impactful design for a presentation comes into the picture.
Design-Related Tips for PowerPoint Presentations
Now that you know some content and slide-related tips, let’s read about the top design-related tips to make a professional presentation :
- Aim to have about 10 slides
- Make your presentation background consistent
- Select readable fonts
- List the important points in brief bullets
- Include relevant graphics
1. Aim to have about 10 slides
More than 10 concepts at once will be difficult for your audience to recall. Count your slides once you’ve organized your data to check if you have 10 or fewer slides. If you have more than 10, review the content once more to see if you can squeeze anything onto one slide. Decide which ideas need to be covered the most, and eliminate anything that doesn’t seem appropriate or doesn’t fit the style of your presentation.
2. Make your Presentation background consistent
Keeping the same straightforward theme and style for each slide can help you create professional PowerPoint presentations. You can create a background in PowerPoint or explore PowerPoint backgrounds from SlideUpLift. Use easy-to-read layouts that don’t draw attention away from the text or graphics you want to use.
3. Select readable fonts
Keep your fonts large and sans-serif so they can be read across the room. Keep your content between 28 and 40 points because small fonts might be quite difficult to see from a distance. Choose Proxima Nova or Arial rather than Times New Roman or another serifed font to show your content because sans-serif is simpler to read on a screen. Bold, italicize, or highlight the words you want to stand out as particularly important. Throughout the slide, change the font size. For instance, the slide’s headline should be larger than the body content.
READ MORE: Best Presentation Fonts
4. List the important points in brief bullets
Your slides will be easier to follow if they have pointers. On a slide, paragraphs can be very intimidating, and your audience could choose to read them rather than pay attention to you. Keep your slide to a bulleted list of essential phrases or terms rather than writing out every word you plan to speak. Keep your slides to a maximum of 6 bullet points, each with a maximum of 6 words.
5. Include relevant graphics
Select charts and photos of the highest quality to highlight your content. Visuals should only be used if they are essential to the argument you are attempting to make. You can use illustrations, images , infographics , graphs, or charts to display facts or make your point more obvious. To avoid making your presentations appear cluttered, ensure all the images are the same size and resolution, and arrange them in the same spot on each slide. Charts and graphics that are challenging to interpret should have captions. Make one image on a slide stand out by giving it a different hue from the rest of the presentation.
Your PowerPoint presentation is all set once you have the content, and it’s designed to create impact. How you create an impact and engage the audience depends entirely on how you deliver presentations.
Delivery-Related Tips for PowerPoint Presentations
The way you deliver your PowerPoint slides can either make or break your overall presentation. Let’s see some professional presentation tips to help you with presentation delivery:
- Keep your transitions simple
- Practice your presentations out loud
- Practice in front of the crowd
1. Keep your transitions simple
Animations and transitions draw attention away from the material. While adding animations to your slideshow may seem creative to make it stand out, doing so might add a lot of extra time and distract the audience. Have the slides change as soon as the mouse clicks, rather than having the text fly in or the slides animate. Provide the information quickly and simply to make your presentation look stronger and more formal.
2. Practice your presentation out loud
Run the complete presentation to increase your confidence. After practicing your presentation a few times, you’ll feel much more at ease giving it. Practice as if you were presenting to a group of people; raise your voice to the appropriate pitch and volume. Ensure the slides flow together by practicing clicking through them as you speak. Go back and change your slides to make any necessary corrections if you encounter issues. Consider recording your speech to see or listen to it later. You will be able to identify what needs to change as a result.
3. Practice in front of a crowd
Request some early feedback to determine the success of your presentation. Take a group of friends or coworkers and walk them through the full presentation. When you’re done, ask them what they thought of the presentation and whether any points you tried to express confused them. Asking them questions you anticipate your audience will have will allow you to practice providing succinct responses.
Now that you have more than 10 tips for creating professional PowerPoint presentations, knowing how to present your ideas professionally is also vital.
How to Professionally Present Your Ideas?
The professional PowerPoint tips provided below will help you professionally present your ideas:
- Inspire participation from audience
- An emotional connection
- Visual tools
- Images and graphics
One of the most important professional PowerPoint presentation tips is timing. Choosing the right time slot is very important while giving a presentation. It would be preferable to select a mid-morning time slot if you have the option to determine your presentation timetable. The attention of people is better captured in the morning.
2. Be brief
Typically, audiences have a limited attention span. When given lengthy materials to read, people rapidly become bored. Be direct if you want people to pay attention and continue to listen. Avoid including unrelated material because this will just make the presentation longer.
3. Inspire participation from the audience
Keeping the audience interested in what you say is a difficult task. You may engage the audience and get them involved in the topic by making a good first impression in the first 30 seconds. Keep them engaged by injecting humor as you change the slides.
4. An emotional connection
Any professional presentation must emotionally engage the audience, much like in advertising. When communicating your message, use feelings. By doing this, you give the visual aids a human face and make your point more understandable to the audience. Encourage them to act by awakening their emotions.
5. Visual tools
Most people learn best visually. Presenters must be aware that their audience needs visual aids to grasp what they are saying. Make sure that visuals are used to support your claims. The audience will understand your message more clearly if they can visualize it.
6. Images and graphics
Graphics and images back you admirably as you give your speech. Charts and other complex data points can make it difficult to design visualizations. To ensure precise and simple-to-understand details, you can create simple templates. However, if you find it difficult to create to-the-point, detail-oriented graphics, and templates that create an impact, you can outsource your presentations.
When presenting, you are all alone. But you can get help from experts when you are creating one, thanks to Presentation Service providers.
Why Should Organizations Outsource their Presentations to Specialists?
Here are some reasons why outsourcing presentations to professionals is a great idea:
- Improving presentations for external clients
- Assisting graphics team
- Manual efforts and time saved
- Cost saving
- Elevating design excellence
- To support your marketing team with presentations
ALSO READ: Why Consultants Choose to Outsource Presentations ?
1. Improving Presentations For External Clients
Your PowerPoint presentation acts as a virtual handshake with your clients, which makes it an important factor in determining how they will perceive you or your company. For this reason alone, many professionals choose to have their external presentations outsourced.
2. Assisting Graphic Team
It’s likely that your devoted graphic team is always creating different types of visual content. Your in-house designers probably already have their hands full with daily design work. When this happens, outsourcing presentation design seems appealing because it relieves your graphic team’s workload and frees them up to succeed in their primary duties.
3. Manual Efforts and Time are Saved
The possibility of saving time strongly motivates professionals to choose presentation outsourcing. As anybody who has struggled with slides knows, creating an engaging PowerPoint presentation takes time. Professionals can free up their time to work on more important duties or, better yet, to thoroughly rehearse and perfect their message by delegating the creation of presentations to external professionals.
4. Cost Saving
Consulting firms might cut costs by outsourcing presentations to specialists. Outsourcing presentations to an agency costs less than hiring an internal presentation designer. This saved money can be utilized toward other important business objectives while reducing labor expenditures.
5. Elevating Design Excellence
True masters of their trade are presentation designers who work professionally. Their knowledge spans more than just visuals; it also includes the complex art of slide layout and the crucial components that turn a presentation from good to spectacular. For instance, our team at SlideUpLift is proud of its design and presentation services after working with businesses from a variety of industries throughout the world. When creating excellent PowerPoint presentations, this abundance of knowledge is priceless. Beyond just improving the aesthetics, the goal is to use this knowledge to make visually striking presentations that instantly connect with your audience.
6. To Support Your Marketing Team with Presentations
Presentations are in high demand, particularly among marketing consultants. They have to unite their staff, discuss their marketing strategy with the rest of the organization, and win new clients for their enterprises. PowerPoint presentations are a fantastic tool for all of this! A smart marketing presentation can improve communication inside and outside your firm; outsourcing is the best option to achieve that.
In today’s competitive landscape, outsourcing presentations to professionals gives firms a strategic advantage. Outsourcing is appealing due to its time efficiency, access to cutting-edge equipment, brand consistency, new ideas, scalability, and cost savings. Outsourcing presentation companies can make effective presentations that create a lasting impression on the audience by consulting with you.
READ MORE: 10 Best presentation companies and design agencies
The ability to generate professional-looking slides is a skill that may take your message to new heights in the dynamic world of presentations. SlideUpLift has materials and tools to assist you in every aspect of creating presentations:
- If you want to create presentations by yourself, but do not have a starting point, you can download any template from our collection of 40,000+ PowerPoint templates and Google Slides themes . Just download the template you like and make the changes to the content as you need.
- In case you don’t want to make changes to the templates, you can ask us to customize the templates through our custom-slides service. You can expect fast delivery within 1 Business Day.
- If you have multiple presentation needs on a weekly basis, you can try our Presentation Services .
Schedule a call with us if you have any questions or would like to know more.
How do you get ready for your first professional presentation?
With thorough preparation, you can confidently deliver a polished and impactful presentation. Begin by thoroughly researching your topic and understanding your audience’s needs and expectations. Organize your content logically, creating a clear structure with a compelling introduction, main points, and a strong conclusion.
How to design a professional powerpoint presentation?
Some tips for professional PowerPoint presentations include:
- Focus on clear content organization
- Use a consistent and appealing design template
- Incorporate high-quality visuals
- Practice your delivery to ensure a smooth and engaging presentation
- Keep slides concise and avoid clutter to maintain audience interest and understanding.
What are the key elements of a professional-looking presentation?
A professional-looking presentation typically includes well-structured content, visually appealing slides, clear typography, cohesive design elements, and effective use of visuals.
What are some effective strategies for effectively rehearsing and delivering a professional presentation?
Effective rehearsal involves practicing your presentation multiple times, focusing on your tone and pacing, and anticipating questions from the audience.
What are the best professional PowerPoint tips to follow while presenting?
These are the top 10 PowerPoint tips for preparing a professional presentation:
- Add key takeaways and include CTA at the end
- Do not have more than 10 slides
- Add a consistent presentation background
- List important points in bullets
- Keep simple transitions
- Practice your presentations loudly and in front of the crowd.
Table Of Content
Related presentations.

Customer Journey Executive Summary PowerPoint Template

Project Planning Presentation PowerPoint Template

Business Case PowerPoint Template
Related blogs.

10 Bad PowerPoint Slides Examples to Avoid

10 Best Animated PowerPoint Templates

10 Best Business PowerPoint Templates for Presentations

10 Best Business Presentation Topics to Captivate Your Audience
Tags and categories, privacy overview.
Necessary cookies are absolutely essential for the website to function properly. This category only includes cookies that ensures basic functionalities and security features of the website. These cookies do not store any personal information
Any cookies that may not be particularly necessary for the website to function and is used specifically to collect user personal data via ads, other embedded contents are termed as non-necessary cookies. It is mandatory to procure user consent prior to running these cookies on your website.

- Get started with computers
- Learn Microsoft Office
- Apply for a job
- Improve my work skills
- Design nice-looking docs
- Getting Started
- Smartphones & Tablets
- Typing Tutorial
- Online Learning
- Basic Internet Skills
- Online Safety
- Social Media
- Zoom Basics
- Google Docs
- Google Sheets
- Career Planning
- Resume Writing
- Cover Letters
- Job Search and Networking
- Business Communication
- Entrepreneurship 101
- Careers without College
- Job Hunt for Today
- 3D Printing
- Freelancing 101
- Personal Finance
- Sharing Economy
- Decision-Making
- Graphic Design
- Photography
- Image Editing
- Learning WordPress
- Language Learning
- Critical Thinking
- For Educators
- Translations
- Staff Picks
- English expand_more expand_less
PowerPoint Tips - Simple Rules for Better PowerPoint Presentations
Powerpoint tips -, simple rules for better powerpoint presentations, powerpoint tips simple rules for better powerpoint presentations.

PowerPoint Tips: Simple Rules for Better PowerPoint Presentations
Lesson 17: simple rules for better powerpoint presentations.
/en/powerpoint-tips/embed-excel-charts-in-a-slide/content/
Simple rules for better PowerPoint presentations
Have you ever given a PowerPoint presentation and noticed that something about it just seemed a little … off? If you’re unfamiliar with basic PowerPoint design principles, it can be difficult to create a slide show that presents your information in the best light.
Poorly designed presentations can leave an audience feeling confused, bored, and even irritated. Review these tips to make your next presentation more engaging.
Don't read your presentation straight from the slides
If your audience can both read and hear, it’s a waste of time for you to simply read your slides aloud. Your audience will zone out and stop listening to what you’re saying, which means they won’t hear any extra information you include.
Instead of typing out your entire presentation, include only main ideas, keywords, and talking points in your slide show text. Engage your audience by sharing the details out loud.
Follow the 5/5/5 rule
To keep your audience from feeling overwhelmed, you should keep the text on each slide short and to the point. Some experts suggest using the 5/5/5 rule : no more than five words per line of text, five lines of text per slide, or five text-heavy slides in a row.

Don't forget your audience
Who will be watching your presentation? The same goofy effects and funny clip art that would entertain a classroom full of middle-school students might make you look unprofessional in front of business colleagues and clients.
Humor can lighten up a presentation, but if you use it inappropriately your audience might think you don’t know what you’re doing. Know your audience, and tailor your presentation to their tastes and expectations.
Choose readable colors and fonts
Your text should be easy to read and pleasant to look at. Large, simple fonts and theme colors are always your best bet. The best fonts and colors can vary depending on your presentation setting. Presenting in a large room? Make your text larger than usual so people in the back can read it. Presenting with the lights on? Dark text on a light background is your best bet for visibility.

Don't overload your presentation with animations
As anyone who’s sat through a presentation while every letter of every paragraph zoomed across the screen can tell you, being inundated with complicated animations and exciting slide transitions can become irritating.
Before including effects like this in your presentation, ask yourself: Would this moment in the presentation be equally strong without an added effect? Does it unnecessarily delay information? If the answer to either question is yes—or even maybe—leave out the effect.
Use animations sparingly to enhance your presentation
Don’t take the last tip to mean you should avoid animations and other effects entirely. When used sparingly, subtle effects and animations can add to your presentation. For example, having bullet points appear as you address them rather than before can help keep your audience’s attention.
Keep these tips in mind the next time you create a presentation—your audience will thank you. For more detailed information on creating a PowerPoint presentation, visit our Office tutorials .
/en/powerpoint-tips/three-tips-for-beautiful-powerpoint-presentations/content/
Critical PowerPoint Shortcuts – Claim Your FREE Training Module and Get Your Time Back!
How to Make a PowerPoint Presentation (Step-by-Step)
- PowerPoint Tutorials
- Presentation Design
- January 22, 2024
In this beginner’s guide, you will learn step-by-step how to make a PowerPoint presentation from scratch.
While PowerPoint is designed to be intuitive and accessible, it can be overwhelming if you’ve never gotten any training on it before. As you progress through this guide, you’ll will learn how to move from blank slides to PowerPoint slides that look like these.

Table of Contents
Additionally, as you create your presentation, you’ll also learn tricks for working more efficiently in PowerPoint, including how to:
- Change the slide order
- Reset your layout
- Change the slide dimensions
- Use PowerPoint Designer
- Format text
- Format objects
- Play a presentation (slide show)
With this knowledge under your belt, you’ll be ready to start creating PowerPoint presentations. Moreover, you’ll have taken your skills from beginner to proficient in no time at all. I will also include links to more advanced PowerPoint topics.
Ready to start learning how to make a PowerPoint presentation?
Take your PPT skills to the next level
Start with a blank presentation.
Note: Before you open PowerPoint and start creating your presentation, make sure you’ve collected your thoughts. If you’re going to make your slides compelling, you need to spend some time brainstorming.
For help with this, see our article with tips for nailing your business presentation here .
The first thing you’ll need to do is to open PowerPoint. When you do, you are shown the Start Menu , with the Home tab open.
This is where you can choose either a blank theme (1) or a pre-built theme (2). You can also choose to open an existing presentation (3).
For now, go ahead and click on the Blank Presentation (1) thumbnail.

Doing so launches a brand new and blank presentation for you to work with. Before you start adding content to your presentation, let’s first familiarize ourselves with the PowerPoint interface.
The PowerPoint interface

Here is how the program is laid out:
- The Application Header
- The Ribbon (including the Ribbon tabs)
- The Quick Access Toolbar (either above or below the Ribbon)
- The Slides Pane (slide thumbnails)
The Slide Area
The notes pane.
- The Status Bar (including the View Buttons)
Each one of these areas has options for viewing certain parts of the PowerPoint environment and formatting your presentation.
Below are the important things to know about certain elements of the PowerPoint interface.
The PowerPoint Ribbon

The Ribbon is contextual. That means that it will adapt to what you’re doing in the program.
For example, the Font, Paragraph and Drawing options are greyed out until you select something that has text in it, as in the example below (A).

Furthermore, if you start manipulating certain objects, the Ribbon will display additional tabs, as seen above (B), with more commands and features to help you work with those objects. The following objects have their own additional tabs in the Ribbon which are hidden until you select them:
- Online Pictures
- Screenshots
- Screen Recording
The Slides Pane

This is where you can preview and rearrange all the slides in your presentation.
Right-clicking on a slide in the pane gives you additional options on the slide level that you won’t find on the Ribbon, such as Duplicate Slide , Delete Slide , and Hide Slide .

In addition, you can add sections to your presentation by right-clicking anywhere in this Pane and selecting Add Section . Sections are extremely helpful in large presentations, as they allow you to organize your slides into chunks that you can then rearrange, print or display differently from other slides.

The Slide Area (A) is where you will build out your slides. Anything within the bounds of this area will be visible when you present or print your presentation.
Anything outside of this area (B) will be hidden from view. This means that you can place things here, such as instructions for each slide, without worrying about them being shown to your audience.

The Notes Pane is the space beneath the Slide Area where you can type in the speaker notes for each slide. It’s designed as a fast way to add and edit your slides’ talking points.
To expand your knowledge and learn more about adding, printing, and exporting your PowerPoint speaker notes, read our guide here .
Your speaker notes are visible when you print your slides using the Notes Pages option and when you use the Presenter View . To expand your knowledge and learn the ins and outs of using the Presenter View , read our guide here .

You can resize the Notes Pane by clicking on its edge and dragging it up or down (A). You can also minimize or reopen it by clicking on the Notes button in the Status Bar (B).
Note: Not all text formatting displays in the Notes Pane, even though it will show up when printing your speaker notes. To learn more about printing PowerPoint with notes, read our guide here .
Now that you have a basic grasp of the PowerPoint interface at your disposal, it’s time to make your presentation.
Adding Content to Your PowerPoint Presentation
Notice that in the Slide Area , there are two rectangles with dotted outlines. These are called Placeholders and they’re set on the template in the Slide Master View .
To expand your knowledge and learn how to create a PowerPoint template of your own (which is no small task), read our guide here .

As the prompt text suggests, you can click into each placeholder and start typing text. These types of placeholder prompts are customizable too. That means that if you are using a company template, it might say something different, but the functionality is the same.

Note: For the purposes of this example, I will create a presentation based on the content in the Starbucks 2018 Global Social Impact Report, which is available to the public on their website.
If you type in more text than there is room for, PowerPoint will automatically reduce its font size. You can stop this behavior by clicking on the Autofit Options icon to the left of the placeholder and selecting Stop Fitting Text to this Placeholder .
Next, you can make formatting adjustments to your text by selecting the commands in the Font area and the Paragraph area of the Home tab of the Ribbon.

The Reset Command: If you make any changes to your title and decide you want to go back to how it was originally, you can use the Reset button up in the Home tab .

Insert More Slides into Your Presentation
Now that you have your title slide filled in, it’s time to add more slides. To do that, simply go up to the Home tab and click on New Slide . This inserts a new slide in your presentation right after the one you were on.

You can alternatively hit Ctrl+M on your keyboard to insert a new blank slide in PowerPoint. To learn more about this shortcut, see my guide on using Ctrl+M in PowerPoint .
Instead of clicking the New Slide command, you can also open the New Slide dropdown to see all the slide layouts in your PowerPoint template. Depending on who created your template, your layouts in this dropdown can be radically different.

If you insert a layout and later want to change it to a different layout, you can use the Layout dropdown instead of the New Slide dropdown.
After inserting a few different slide layouts, your presentation might look like the following picture. Don’t worry that it looks blank, next we will start adding content to your presentation.

If you want to follow along exactly with me, your five slides should be as follows:
- Title Slide
- Title and Content
- Section Header
- Two Content
- Picture with Caption
Adding Content to Your Slides
Now let’s go into each slide and start adding our content. You’ll notice some new types of placeholders.

On slide 2 we have a Content Placeholder , which allows you to add any kind of content. That includes:
- A SmartArt graphic,
- A 3D object,
- A picture from the web,
- Or an icon.
To insert text, simply type it in or hit Ctrl+C to Copy and Ctrl+V to Paste from elsewhere. To insert any of the other objects, click on the appropriate icon and follow the steps to insert it.
For my example, I’ll simply type in some text as you can see in the picture below.

Slides 3 and 4 only have text placeholders, so I’ll go ahead and add in my text into each one.

On slide 5 we have a Picture Placeholder . That means that the only elements that can go into it are:
- A picture from the web

To insert a picture into the picture placeholder, simply:
- Click on the Picture icon
- Find a picture on your computer and select it
- Click on Insert
Alternatively, if you already have a picture open somewhere else, you can select the placeholder and paste in (shortcut: Ctrl+V ) the picture. You can also drag the picture in from a file explorer window.

If you do not like the background of the picture you inserted onto your slide, you can remove the background here in PowerPoint. To see how to do this, read my guide here .
Placeholders aren’t the only way to add content to your slides. At any point, you can use the Insert tab to add elements to your slides.
You can use either the Title Only or the Blank slide layout to create slides for content that’s different. For example, a three-layout content slide, or a single picture divider slide, as shown below.

In the first example above, I’ve inserted 6 text boxes, 3 icons, and 3 circles to create this layout. In the second example, I’ve inserted a full-sized picture and then 2 shapes and 2 text boxes.
The Reset Command: Because these slides are built with shapes and text boxes (and not placeholders), hitting the Reset button up in the Home tab won’t do anything.
That is a good thing if you don’t want your layouts to adjust. However, it does mean that it falls on you to make sure everything is aligned and positioned correctly.
For more on how to add and manipulate the different objects in PowerPoint, check out our step-by-step articles here:
- Using graphics in PowerPoint
- Inserting icons onto slides
- Adding pictures to your PowerPoint
- How to embed a video in PowerPoint
- How to add music to your presentation
Using Designer to generate more layouts ideas
If you have Office 365, your version of PowerPoint comes with a new feature called Designer (or Design Ideas). This is a feature that generates slide layout ideas for you. The coolest thing about this feature is that it uses the content you already have.
To use Designer , simply navigate to the Design tab in your Ribbon, and click on Design Ideas .

NOTE: If the PowerPoint Designer is not working for you (it is grey out), see my troubleshooting guide for Designer .
Change the Overall Design (optional)
When you make a PowerPoint presentation, you’ll want to think about the overall design. Now that you have some content in your presentation, you can use the Design tab to change the look and feel of your slides.
For additional help thinking through the design of your presentation, read my guide here .
A. Picking your PowerPoint slide size
If you have PowerPoint 2013 or later, when you create a blank document in PowerPoint, you automatically start with a widescreen layout with a 16:9 ratio. These dimensions are suitable for most presentations as they match the screens of most computers and projectors.
However, you do have the option to change the dimensions.
For example, your presentation might not be presented, but instead converted into a PDF or printed and distributed. In that case, you can easily switch to the standard dimensions with a 4:3 ratio by selecting from the dropdown (A).
You can also choose a custom slide size or change the slide orientation from landscape to portrait in the Custom Slide Size dialog box (B).

To learn all about the different PowerPoint slide sizes, and some of the issues you will face when changing the slide size of a non-blank presentation, read my guide here .
B. Selecting a PowerPoint theme
The next thing you can do is change the theme of your presentation to a pre-built one. For a detailed explanation of what a PowerPoint theme is, and how to best use it, read my article here .
In the beginning of this tutorial, we started with a blank presentation, which uses the default Office theme as you can see in the picture below.

That gives you the most flexibility because it has a blank background and quite simple layouts that work for most presentations. However, it also means that it’s your responsibility to enhance the design.
If you’re comfortable with this, you can stay with the default theme or create your own custom theme ( read my guide here ). But if you would rather not have to think about design, then you can choose a pre-designed theme.
Microsoft provides 46 other pre-built themes, which include slide layouts, color variants and palettes, and fonts. Each one varies quite significantly, so make sure you look through them carefully.
To select a different theme, go to the Design tab in the Ribbon, and click on the dropdown arrow in the Themes section .

For this tutorial, let’s select the Frame theme and then choose the third Variant in the theme. Doing so changes the layout, colors, and fonts of your presentation.

Note: The theme dropdown area is also where you can import or save custom themes. To see my favorite places to find professional PowerPoint templates and themes (and recommendations for why I like them), read my guide here .
C. How to change a slide background in PowerPoint
The next thing to decide is how you want your background to look for the entire presentation. In the Variants area, you can see four background options.

For this example, we want our presentation to have a dark background, so let’s select Style 3. When you do so, you’ll notice that:
- The background color automatically changes across all slides
- The color of the text on most of the slides automatically changes to white so that it’s visible on the dark background
- The colors of the objects on slides #6 and #7 also adjust, in a way we may not want (we’ll likely have to make some manual adjustments to these slides)

Note: If you want to change the slide background for just that one slide, don’t left-click the style. Instead, right-click it and select Apply to Selected Slides .
After you change the background for your entire presentation, you can easily adjust the background for an individual slide.

Inside the Format Background pane, you can see you have the following options:
- Gradient fill
- Picture or texture fill
- Pattern fill
- Hide background
You can explore these options to find the PowerPoint background that best fits your presentation.
D. How to change your color palette in PowerPoint
Another thing you may want to adjust in your presentation, is the color scheme. In the picture below you can see the Theme Colors we are currently using for this presentation.

Each PowerPoint theme comes with its own color palette. By default, the Office theme includes the Office color palette. This affects the colors you are presented with when you format any element within your presentation (text, shapes, SmartArt, etc.).

The good news is that the colors here are easy to change. To switch color palettes, simply:
- Go to the Design tab in the Ribbon
- In the Variants area, click on the dropdown arrow and select Colors
- Select the color palette (or theme colors) you want
You can choose among the pre-built color palettes from Office, or you can customize them to create your own.
As you build your presentation, make sure you use the colors from your theme to format objects. That way, changing the color palette adjusts all the colors in your presentation automatically.
E. How to change your fonts in PowerPoint
Just as we changed the color palette, you can do the same for the fonts.

Each PowerPoint theme comes with its own font combination. By default, the Office theme includes the Office font pairing. This affects the fonts that are automatically assigned to all text in your presentation.

The good news is that the font pairings are easy to change. To switch your Theme Fonts, simply:
- Go to the Design tab in the Ribbon
- Click on the dropdown arrow in the Variants area
- Select Fonts
- Select the font pairing you want
You can choose among the pre-built fonts from Office, or you can customize them to create your own.
If you are working with PowerPoint presentations on both Mac and PC computers, make sure you choose a safe PowerPoint font. To see a list of the safest PowerPoint fonts, read our guide here .
If you receive a PowerPoint presentation and the wrong fonts were used, you can use the Replace Fonts dialog box to change the fonts across your entire presentation. For details, read our guide here .
Adding Animations & Transitions (optional)
The final step to make a PowerPoint presentation compelling, is to consider using animations and transitions. These are by no means necessary to a good presentation, but they may be helpful in your situation.
A. Adding PowerPoint animations
PowerPoint has an incredibly robust animations engine designed to power your creativity. That being said, it’s also easy to get started with basic animations.
Animations are movements that you can apply to individual objects on your slide.

To add a PowerPoint animation to an element of your slide, simply:
- Select the element
- Go to the Animations tab in the Ribbon
- Click on the dropdown arrow to view your options
- Select the animation you want
You can add animations to multiple objects at one time by selecting them all first and then applying the animation.
B. How to preview a PowerPoint animation

There are three ways to preview a PowerPoint animation:
- Click on the Preview button in the Animations tab
- Click on the little star next to the slide
- Play the slide in Slide Show Mode
To learn other ways to run your slide show, see our guide on presenting a PowerPoint slide show with shortcuts .
To adjust the settings of your animations, explore the options in the Effect Options , Advanced Animation and the Timing areas of the Animation tab .

Note: To see how to make objects appear and disappear in your slides by clicking a button, read our guide here .
C. How to manage your animations in PowerPoint

The best way to manage lots of animations on your slide is with the Animation Pane . To open it, simply:
- Navigate to the Animations tab
- Select the Animation Pane
Inside the Animation Pane, you’ll see all of the different animations that have been applied to objects on your slide, with their numbers marked as pictured above.
Note: To see examples of PowerPoint animations that can use in PowerPoint, see our list of PowerPoint animation tutorials here .
D. How to add transitions to your PowerPoint presentation
PowerPoint has an incredibly robust transition engine so that you can dictate how your slides change from one to the other. It is also extremely easy to add transitions to your slides.
In PowerPoint, transitions are the movements (or effects) you see as you move between two slides.

To add a transition to a PowerPoint slide, simply:
- Select the slide
- Go to the Transitions tab in the Ribbon
- In the Transitions to This Slide area, click on the dropdown arrow to view your options
- Select the transition you want
To adjust the settings of the transition, explore the options in the Timing area of the Transitions tab.
You can also add the same transition to multiple slides. To do that, select them in the Slides Pane and apply the transition.
E. How to preview a transition in PowerPoint

There are three ways to preview your PowerPoint transitions (just like your animations):
- Click on the Preview button in the Transitions tab
- Click on the little star beneath the slide number in the thumbnail view
Note: In 2016, PowerPoint added a cool new transition, called Morph. It operates a bit differently from other transitions. For a detailed tutorial on how to use the cool Morph transition, see our step-by-step article here .
Save Your PowerPoint Presentation
After you’ve built your presentation and made all the adjustments to your slides, you’ll want to save your presentation. YOu can do this several different ways.

To save a PowerPoint presentation using your Ribbon, simply:
- Navigate to the File tab
- Select Save As on the left
- Choose where you want to save your presentation
- Name your presentation and/or adjust your file type settings
- Click Save
You can alternatively use the Ctrl+S keyboard shortcut to save your presentation. I recommend using this shortcut frequently as you build your presentation to make sure you don’t lose any of your work.

This is the standard way to save a presentation. However, there may be a situation where you want to save your presentation as a different file type.
To learn how to save your presentation as a PDF, see our guide on converting PowerPoint to a PDF .
How to save your PowerPoint presentation as a template
Once you’ve created a presentation that you like, you may want to turn it into a template. The easiest – but not technically correct – way, is to simply create a copy of your current presentation and then change the content.
But be careful! A PowerPoint template is a special type of document and it has its own parameters and behaviors.
If you’re interested in learning about how to create your own PowerPoint template from scratch, see our guide on how to create a PowerPoint template .
Printing Your PowerPoint Presentation
After finishing your PowerPoint presentation, you may want to print it out on paper. Printing your slides is relatively easy.

To open the Print dialog box, you can either:
- Hit Ctrl+P on your keyboard
- Or go to the Ribbon and click on File and then Print

Inside the Print dialog box, you can choose from the various printing settings:
- Printer: Select a printer to use (or print to PDF or OneNote)
- Slides: Choose which slides you want to print
- Layout: Determine how many slides you want per page (this is where you can print the notes, outline, and handouts)
- Collated or uncollated (learn what collated printing means here )
- Color: Choose to print in color, grayscale or black & white
There are many more options for printing your PowerPoint presentations. Here are links to more in-depth articles:
- How to print multiple slides per page
- How to print your speaker notes in PowerPoint
- How to save PowerPoint as a picture presentation
So that’s how to create a PowerPoint presentation if you are brand new to it. We’ve also included a ton of links to helpful resources to boost your PowerPoint skills further.
When you are creating your presentation, it is critical to first focus on the content (what you are trying to say) before getting lost inserting and playing with elements. The clearer you are on what you want to present, the easier it will be to build it out in PowerPoint.
If you enjoyed this article, you can learn more about our PowerPoint training courses and other presentation resources by visiting us here .
🔒 Unlock the PowerPoint Shortcuts Trusted by Industry Leaders KKR, American Express, HSBC, and More!
Join over 114,880 professionals from diverse fields including consulting, investment banking, advertising, marketing, sales, and business development who have supercharged their PowerPoint game with our proven methods.
✅ Customize compelling presentations effortlessly.
✅ Master time-saving techniques for faster deck creation.
✅ Boost your career prospects with top-notch PowerPoint skills.
Get FREE access to the Critical PowerPoint Shortcuts module of our premium training course by entering your name and email below.
DISCLAIMER: PC Users Only!
We respect your privacy and will keep your info safe and confidential.
About The Author

Popular Tutorials
- How to Strikethrough Text (l̶i̶k̶e̶ ̶t̶h̶i̶s̶) in Word, Excel & PowerPoint
- How to Make Animated Fireworks in PowerPoint (Step-by-Step)
- Strikethrough Shortcut (l̶i̶k̶e̶ ̶t̶h̶i̶s̶) for Word, Excel & PowerPoint
- How to Create a Flash Card Memory Game in PowerPoint (Like Jeopardy)
- Keyboard Shortcuts Not Working: Solved
PowerPoint Tutorial Categories
- Strategies & Opinions
- Shortcuts & Hacks
- Pictures, Icons, Videos, Etc.
- New Features
- Miscellaneous
- Charts & Data Viz
We help busy professionals save hours and gain peace of mind, with corporate workshops, self-paced courses and tutorials for PowerPoint and Word.
Work With Us
- Corporate Training
- Presentation & Template Design
- Courses & Downloads
- PowerPoint Articles
- Word Articles
- Productivity Resources
Find a Tutorial
- Free Training
- For Businesses
We help busy office workers save hours and gain peace of mind, with tips, training and tutorials for Microsoft PowerPoint and Word.
Master Critical PowerPoint Shortcuts – Secure Your FREE Training Module and Save Valuable Time!
⌛ Master time-saving expert techniques.
🔥 Create powerful presentations.
🚀 Propel your career to new heights.
We value your privacy – we keep your info safe.
Discover PowerPoint Hacks Loved by Industry Giants - KKR, AmEx, HSBC!
Over 114,880 professionals in finance, marketing and sales have revolutionized their PPT skills with our proven methods.
Gain FREE access to a full module of our premium PowerPoint training program – Get started today!
We hate spam too and promise to keep your information safe.
You are currently viewing a placeholder content from Facebook . To access the actual content, click the button below. Please note that doing so will share data with third-party providers.
You’re using an older browser version. Update to the latest version of Google Chrome , Safari , Mozilla Firefox , or Microsoft Edge for the best site experience.
- eLearning Blog
- eLearning Basics
- Instructional Design
- Corporate Training
- Course Selling
- Manufacturing
- Products iSpring Suite iSpring Learn
- Use Cases Onboarding Compliance Training Induction Training Product Training Channel Partner Training Sales Training Microlearning Mobile Learning
- Company About Us Case Studies Customers Partnership Course Development Contact Us Academy Blog Webinars Guides
- Community Academy Blog Webinars Guides Experts on iSpring
- Language EN English Français Deutsch Español Italiano Nederlands Português Polski 中文 日本語 العربية Indonesia
- Shopping Cart
Free Online eLearning Conference | May 2nd–3rd
iSPRING DAYS 2024
Seize the human-centric future of learning
12 PowerPoint Tips to Make Your Slides More Effective

The design of your PowerPoint presentation is often underestimated. Everyone knows the saying, “a picture is worth a thousand words,” but in PowerPoint land, it seems to be quite the contrary.
“A thousand words are worth a single picture” would seem to be a more fitting slogan. Slides are often filled to the brim with text, which the presenter literally reads out loud. And that’s why PowerPoint has a reputation for being dusty and static. A missed opportunity!
A well-designed PowerPoint presentation can help deliver your message to the audience. We talked to PowerPoint expert Ferry Pereboom, who shared 1 2 PowerPoint tips and tricks to help you steer your presentation in the right direction.
You can go through the following list to improve your entire presentation quickly with these tips. It’s a good idea to use it as a checklist to ensure that your slides are alright in three major aspects: text, design, and navigability.
Now, let’s cover recommendations for each of these aspects in more detail.
Texts on slides support your oral presentation and aim to emphasize the key points. It’s common knowledge that using too much text on slides is a sure sign of a bad PowerPoint presentation.
However, many speakers still try to cram a truckload of information into their slideshows. That makes it especially important to do a good job on the text aspect in the first place.
1. Keep it short and to the point
As mentioned, one of the most important things to remember is that PowerPoint is a tool made to support your story. So, it’s wise to avoid putting the entire text on the screen, because your audience will prefer listening to, and not reading the things you plan to say.
Instead, try to reduce the text, shorten your bullet points, and keep them short and sweet. You can use the 5×5 rule as a reference: have up to 5 text lines on each slide, each of them with no more than 5 words per line.
Keeping your texts concise will help engage your audience and make them focus on you instead of the slides on the screen.

Pro tip : Optimize the use of white space – that’s what we call empty space, that’s devoid of any color, text, and other elements. Keeping it empty helps to direct the viewer’s gaze.
In the realm of texts, you can bring a breath of fresh air to your slides by adding extra margins, splitting up long paragraphs, and generally trying to place objects in no more than half of the slide.
2. Choose the appropriate font
Try to pick a classic font instead of a creative one. Choosing the wrong font can easily make your text unreadable to your audience. And besides, if the computer you are presenting on doesn’t have the font you used installed, PowerPoint will replace it with another one at random.
Sans serif fonts like Verdana, Calibri, and Helvetica are all safe choices. These fonts are quite popular and available on all computers.

3. Enhance readability with the proper font size
Generally, for more effective PowerPoint presentations, it’s always a good idea to make important lines of text and facts look bigger, bolder, and brighter than the others. Fonts can help with this as well. But picking the right font size can be difficult.
On the one hand, your audience needs to be able to read the slide. And on the other hand, you don’t want your text to dominate the space, as you’d probably like to add some visuals to your slide as well.
Still, there are quite precise font sizes that you can refer to in order to make good PowerPoint presentations.
For headers, the minimum is around 20pt, while for the body you can have a minimum of 18pt. With these sizes, you can be assured your text will be legible in every situation. Learners will feel comfortable viewing your presentation on laptops, computers, tablets, TVs, and large screens.

Pro tip : You can manage the hierarchy of headings and subheadings on your slides with the Slide Master feature. Here you can also apply color schemes and a logo to any number of slides and achieve a consistent, unified look.

Design
Simple, yet brilliant design can enhance your message and facilitate communication. So, when you design your slides, try to find balance and remember that less is more.
It’s always better to use 3 or a maximum of 4 colors that you know will combine well, instead of an entire palette, and align objects to establish symmetry.
Below are a few more simple PowerPoint design tips that will help you create a good presentation.
4. Increase contrast
Besides the look and size of your font, it is important to take contrast into account to facilitate reading. It’s natural to use dark text on a light background, and vice versa. But if you’re using text on a photo, things can get a little more tricky.
It’s a good idea to either place a border or cast a shadow around the text to ensure that it’s readable. Or you can place text in one of the PowerPoint shapes.

5. Use coloring wisely
Colors are often used to give the slide some ‘flair’ and manage attention. When picking colors, it’s important to keep your audience in mind and define the purpose of the actual presentation.
For instance, it’s good to use vibrant colors in a presentation for a primary school. However, if you prepare your presentation for business professionals to deliver it in a formal setting, you’ll need to define your colors according to your target audience.

6. Select relevant, adequate visuals
When people are talking about a car, we often see that the first picture is taken from Google images, or even worse, that clip art is being used.
This results in inconsistency because some images tend to be illustrations and drawings, making your presentation look unprofessional or simply ruining the viewer’s impression of it.
To make your PowerPoint presentations effective, don’t use low-quality visual aid. Make sure you select good quality images that support your message.

7. Use mock-ups instead of screenshots and diagrams
Diagrams, schemes, and screenshots usually don’t help your presentation. Although this information is usually quite important to your story, it can be excessive.
To turn the slides into a good PowerPoint presentation, it’s a good idea to combine the diagram, scheme, or screenshot with an image, such as an image of an iPad, laptop, digital projector, or computer.
In the example below, you can see that the slide looks much tidier when an image is added.

8. Present data visually as much as possible
Whenever your presentation contains a lot of data, it might be easier to communicate this data by using visual formats instead of just using text.
Graphs might give you the results you’re looking for. PowerPoint offers a wide variety of ‘doughnut’ charts, which are ideal for making comparisons.
For example, pick the doughnut graph to show your percentages in the middle of the graph. That way, your audience immediately understands your message.

9. Simplify your tables as much as possible
Tables are usually crammed with information and numbers. This causes a slide to look crowded and chaotic. In this case, it is important to make the tables as simple as possible.
Delete unnecessary outlines, colors, and borders. Again, “keep it simple” and “less is more” are key phrases to keep in mind when designing tables.

Navigability
Navigability applies more to the way you deliver slides to the audience and manipulate the playback. However, you need to plan this in advance as well, and pay attention to transitions, notes, animation, and other aspects that will result in an effective slideshow and save you time.
Here are a few essential PowerPoint tips for easy navigation in your presentation slides.
10. Minimize the variety of transitions in your PowerPoint presentation
After creating a PowerPoint slide show, people usually conclude that the presentation comes across as boring or static. So, they start to use transitions. Different transitions are then used to ‘breathe life’ into the presentation.
However, this is not the way to go. PowerPoint offers the most diverse transitions, which are usually experienced as distracting and unsophisticated. A simple ‘fade’ effect to segue from slide to slide is sufficient.
11. Rely on Presenter View in PowerPoint
Presenter View can help you greatly when delivering your presentation to viewers. With this functionality, you don’t have to keep everything in your head or question your own presentation skills.
When presenting to the audience with Presenter View activated, you’ll be able to see what’s on the next slide, keep track of the time, use a laser pointer and/or pen, and be able to see your speaker notes.
You can also paste your script or lecture notes here and avoid making your slides text heavy.

12. Provide an outline of the presentation
Giving an outline at the beginning of your presentation will help you start off on the right foot, especially if it’s long or you deliver it with other speakers. It’s good form to include at least these three types of slides:
- Welcome slide . Presenters typically place the title and description of the presentation and their credentials here.
- Menu slide . You can place the contents of your presentation here to jump to the needed part quickly when needed (e.g., to refer to a particular idea during a Q&A session).
- Summary slide . This will summarize the ideas you’ve presented and will be of great help when you’re wrapping up your presentation.
Here are a few more effective tips to structure your presentation – check them out.
Unlock Learner Engagement with iSpring
Over the years, PowerPoint presentations have made their way out of classrooms and conference rooms to different audiences and evolved into truly informational products that people download, study, and share. That’s why searching for the best PowerPoint presentation tips is as relevant as ever.
If you rely heavily on PowerPoint in your work, you can improve your slides greatly with iSpring Suite – an authoring toolkit that works in Microsoft PowerPoint.

iSpring Suite can replace several design tools and PowerPoint add-ins at once. It provides hundreds of design templates, color schemes, and visual elements, allowing you to create compelling presentations and gain and maintain an audience’s attention. The software comes with Content Library, which offers access to over 89,000 slide templates, backgrounds, and characters.

In addition to the pre-designed characters, iSpring Suite also allows you to create your own unique ones. You can change their hairstyles, pick accessories, and choose clothing that matches your brand or storyline and resonates with your learners.

Since you already know how to use PowerPoint, it won’t take much time at all to master iSpring Suite and create an engaging presentation or a full-fledged online course. You can populate it with quizzes, interactions, web objects, quality audio narrations, and videos in a breeze.
Also read: How to Convert PowerPoint to MP4 Video on Windows & macOS
With iSpring Suite, you can convert your slides into HTML5 format, so your audience can view them online, right in their browsers, with no downloading necessary. You can also share your presentation as a YouTube video in a click.
Try iSpring Suite and create a stellar presentation now!
FAQ on How to Make an Effective PPT Presentation
People often look for some ready-made formulas of a great PowerPoint presentation on the Internet. We’ve found several of them for your quick reference. Feel free to use these rules along with our tried-and-true PowerPoint tips.
What is the 5–5–5 rule in PowerPoint presentations?
The 5-5-5 rule stands for having a maximum of 5 text lines on a slide with no more than 5 words in each, and up to only 5 slides in a row that use that format. Apparently, this encourages creators to reflect on the way they’re making slides, be concise, and do so knowingly.
What is the 5–second rule in PowerPoint?
The five-second rule prescribes that it should take no more than 5 seconds to grasp the idea of a slide. You can ensure that this happens by using brief and clear text lines, and convincing design.
What is the 10-20-30 rule in a presentation?
The 10-20-30 rule is a fun rule that Guy Kawasaki, a Silicon Valley venture capitalist, introduced after watching hundreds of exhausting presentations and pitches. The rule says that a presentation should be strictly 10 slides and 20 minutes long, with a 30-point font size. Learn more about this rule and how it was devised on Kawasaki’s website .
Which PowerPoint tips and tricks do you know? Which one is your favorite? Feel free to share with us below!
About the author
Ferry Pereboom is co-founder of PPT Solutions, a design agency in the Netherlands.
The company specializes in developing inspiring PowerPoint presentations. PPT Solutions has approximately 1,500 clients, and 28 PowerPoint specialists, and delivers work to clients in about twelve countries around the globe. Ferry is mainly responsible for helping both new and existing clients overcome their presentation challenges.
Please check the website www.pptsolutions.nl for more information on professional PowerPoint tips.
Fast course authoring toolkit
Create online courses and assessments in record time.

Content creator:
Paulina Fox
Passionate about design and tech, Paulina crafts content that helps customers delve deeper into iSpring products.
You might also like this

Subscribe to our blog
Stay tuned to get our latest eLearning tips and tricks!
By clicking “Subscribe”, you agree to our Privacy Policy . All emails include an unsubscribe link, so that you can opt-out at any time.
We use cookies to give you the best possible experience on our website and also for analytics and marketing purposes. You can enable or disable optional cookies as desired. See our Cookie Policy for more details.
Manage your cookies
Essential cookies are always on. You can turn off other cookies if you wish.
Essential cookies
Analytics cookies
Social media cookies

How it works
Transform your enterprise with the scalable mindsets, skills, & behavior change that drive performance.
Explore how BetterUp connects to your core business systems.
We pair AI with the latest in human-centered coaching to drive powerful, lasting learning and behavior change.
Build leaders that accelerate team performance and engagement.
Unlock performance potential at scale with AI-powered curated growth journeys.
Build resilience, well-being and agility to drive performance across your entire enterprise.
Transform your business, starting with your sales leaders.
Unlock business impact from the top with executive coaching.
Foster a culture of inclusion and belonging.
Accelerate the performance and potential of your agencies and employees.
See how innovative organizations use BetterUp to build a thriving workforce.
Discover how BetterUp measurably impacts key business outcomes for organizations like yours.
A demo is the first step to transforming your business. Meet with us to develop a plan for attaining your goals.

- What is coaching?
Learn how 1:1 coaching works, who its for, and if it's right for you.
Accelerate your personal and professional growth with the expert guidance of a BetterUp Coach.
Types of Coaching
Navigate career transitions, accelerate your professional growth, and achieve your career goals with expert coaching.
Enhance your communication skills for better personal and professional relationships, with tailored coaching that focuses on your needs.
Find balance, resilience, and well-being in all areas of your life with holistic coaching designed to empower you.
Discover your perfect match : Take our 5-minute assessment and let us pair you with one of our top Coaches tailored just for you.

Best practices, research, and tools to fuel individual and business growth.
View on-demand BetterUp events and learn about upcoming live discussions.
The latest insights and ideas for building a high-performing workplace.
- BetterUp Briefing
The online magazine that helps you understand tomorrow's workforce trends, today.
Innovative research featured in peer-reviewed journals, press, and more.
Founded in 2022 to deepen the understanding of the intersection of well-being, purpose, and performance
We're on a mission to help everyone live with clarity, purpose, and passion.
Join us and create impactful change.
Read the buzz about BetterUp.
Meet the leadership that's passionate about empowering your workforce.
For Business
For Individuals
How to give a good presentation that captivates any audience

Elevate your communication skills
Unlock the power of clear and persuasive communication. Our coaches can guide you to build strong relationships and succeed in both personal and professional life.

Jump to section
What are the main difficulties when giving presentations?
How to create an effective presentation, after that, how do i give a memorable presentation, how to connect with the audience when presenting.
If you’ve ever heard someone give a powerful presentation, you probably remember how it made you feel. Much like a composer, a good speaker knows precisely when each note should strike to captivate their audience’s attention and leave them with a lasting impression.
No one becomes a great public speaker or presenter without practice. And almost everyone can recall a time one of their presentations went badly — that’s a painful part of the learning process.
Whether you’re working within a small creative team or a large organization, public speaking and presentation skills are vital to communicating your ideas. Knowing how to present your vision can help you pitch concepts to clients, present ideas to your team, and develop the confidence to participate in team meetings.
If you have an upcoming presentation on the horizon and feel nervous, that’s normal. Around 15-30% of the general population experience a fear of public speaking . And, unfortunately, social anxiety is on the rise, with a 12% increase in adults over the last 20 years .
Learning how to give a good presentation can dismantle your fears and break down these barriers, ensuring you’re ready to confidently share your point of view.
It’s the week before your presentation, and you’re already feeling nervous . Maybe there’ll be an important mentor in the room you need to impress, or you’re looking for an opportunity to show your boss your value. Regardless of your countless past presentations, you still feel nervous.
Sharing your vision and ideas with any sized group is intimidating. You’re likely worrying about how you’ll perform as a presenter and whether the audience will be interested in what you offer. But nerves aren’t inherently negative — you can actually use this feeling to fuel your preparation.

It’s helpful to identify where your worries are coming from and address your fears. Here are some common concerns when preparing for an upcoming presentation:
Fear of public speaking: When you share your ideas in front of a group, you’re placing yourself in a vulnerable position to be critiqued on your knowledge and communication skills . Maybe you feel confident in your content, but when you think about standing in front of an audience, you feel anxious and your mind goes blank.
It’s also not uncommon to have physical symptoms when presenting . Some people experience nausea and dizziness as the brain releases adrenaline to cope with the potentially stressful situation . Remember to take deep breaths to recenter yourself and be patient, even if you make a mistake.
Losing the audience’s attention: As a presenter, your main focus is to keep your audience engaged. They should feel like they’re learning valuable information or following a story that will improve them in life or business.
Highlight the most exciting pieces of knowledge and ensure you emphasize those points in your presentation. If you feel passionate about your content, it’s more likely that your audience will experience this excitement for themselves and become invested in what you have to say.
Not knowing what content to place on presentation slides: Overloading presentation slides is a fast way to lose your audience’s attention. Your slides should contain only the main talking points and limited text to ensure your audience focuses on what you have to say rather than becoming distracted by the content on your slides.
Discomfort incorporating nonverbal communication: It’s natural to feel stiff and frozen when you’re nervous. But maintaining effective body language helps your audience stay focused on you as you speak and encourages you to relax.
If you struggle to incorporate body language into your presentations, try starting small by making hand gestures toward your slides. If you’re working with a large audience, use different parts of the stage to ensure everyone feels included.
Each presenter has their own personal brand and style. Some may use humor to break the ice, while others might appeal to the audience’s emotional side through inspiring storytelling.
Watching online presentations, such as TED talks, is an excellent way to expose yourself to various presentation styles and develop your own. While observing others, you can note how they carry themselves on stage and learn new ways to keep your audience engaged.
Once you’ve addressed what’s causing your fears, it’s time to prepare for a great presentation. Use your past experience as inspiration and aim to outshine your former self by learning from your mistakes and employing new techniques. Here are five presentation tips to help you create a strong presentation and wow your audience:
1. Keep it simple
Simple means something different to everyone.
Before creating your presentation, take note of your intended audience and their knowledge level of your subject. You’ll want your content to be easy for your intended audience to follow.
Say you’re giving a presentation on improving your company’s operational structure. Entry-level workers will likely need a more straightforward overview of the content than C-suite leaders, who have significantly more experience.
Ask yourself what you want your audience to take away from your presentation and emphasize those important points. Doing this ensures they remember the most vital information rather than less important supporting ideas. Try organizing these concepts into bullet points so viewers can quickly identify critical takeaways.
2. Create a compelling structure
Put yourself in your audience member’s shoes and determine the most compelling way to organize your information. Your presentation should be articulate , cohesive, and logical, and you must be sure to include all necessary supporting evidence to strengthen your main points.
If you give away all of your answers too quickly, your audience could lose interest. And if there isn’t enough supporting information, they could hit a roadblock of confusion. Try developing a compelling story that leads your audience through your thought processes so they can experience the ups and downs alongside you.
By structuring your presentation to lead up to a final conclusion, you’re more likely to keep listeners’ attention. Once you’ve reached that conclusion, you can offer a Q&A period to put any of their questions or concerns to rest.
3. Use visual aids
Appealing to various learning styles is a great way to keep everyone on the same page and ensure they absorb your content. Visual aids are necessary for visual learners and make it easier for people to picture your ideas.
Aim to incorporate a mixture of photos, videos, and props to engage your audience and convey your key points. For instance, if you’re giving a presentation on anthropology subject matter, you could show your audience an artifact to help them understand how exciting a discovery must have been.
If your presentation is long, including a video for your audience to watch is an excellent way to give yourself a break and create new jumping-off points for your speech.
4. Be aware of design techniques and trends
Thanks to cutting-edge technology and tools, you have numerous platforms at your disposal to create a good presentation. But keep in mind that although color, images, and graphics liven things up, they can cause distraction when misused.
Here are a few standard pointers for incorporating visuals on your slides:
- Don’t place blocks of small text on a single slide
- Use a minimalistic background instead of a busy one
- Ensure text stands out against the background color
- Only use high-resolution photos
- Maintain a consistent font style and size throughout the presentation
- Don’t overuse transitions and effects
5. Try the 10-20-30 rule
Guy Kawasaki, a prominent venture capitalist and one of the original marketing specialists for Apple, said that the best slideshow presentations are less than 10 slides , last at most 20 minutes, and use a font size of 30. Following this strategy can help you condense your information, eliminate unnecessary ideas, and maintain your audience’s focus more efficiently.
Once you’re confident in creating a memorable presentation, it’s time to learn how to give one. Here are some valuable tips for keeping your audience invested during your talk:
Tip #1: Tell stories
Sharing an anecdote from your life can improve your credibility and increase your relatability. And when an audience relates to you, they’re more likely to feel connected to who you are as a person and encouraged to give you their full attention, as they would want others to do the same.
Gill Hicks utilized this strategy well when she shared her powerful story, “ I survived a terrorist attack. Here’s what I learned .” In her harrowing tale, Hicks highlights the importance of compassion, unconditional love, and helping those in need.
If you feel uncomfortable sharing personal stories, that’s okay. You can use examples from famous individuals or create a fictional account to demonstrate your ideas.
Tip #2: Make eye contact with the audience
Maintaining eye contact is less intimidating than it sounds. In fact, you don’t have to look your audience members directly in their eyes — you can focus on their foreheads or noses if that’s easier.
Try making eye contact with as many people as possible for 3–5 seconds each. This timing ensures you don’t look away too quickly, making the audience member feel unimportant, or linger too long, making them feel uncomfortable.
If you’re presenting to a large group, direct your focus to each part of the room to ensure no section of the audience feels ignored.

Tip #3: Work on your stage presence
Although your tone and words are the most impactful part of your presentation, recall that body language keeps your audience engaged. Use these tips to master a professional stage presence:
- Speak with open arms and avoid crossing them
- Keep a reasonable pace and try not to stand still
- Use hand gestures to highlight important information
Tip #4: Start strong
Like watching a movie trailer, the first seconds of your talk are critical for capturing your audience’s attention. How you start your speech sets the tone for the rest of your presentation and tells your audience whether or not they should pay attention. Here are some ways to start your presentation to leave a lasting impression:
- Use a quote from a well-known and likable influential person
- Ask a rhetorical question to create intrigue
- Start with an anecdote to add context to your talk
- Spark your audience’s curiosity by involving them in an interactive problem-solving puzzle or riddle
Tip #5: Show your passion
Don’t be afraid of being too enthusiastic. Everyone appreciates a speaker who’s genuinely excited about their field of expertise.
In “ Grit: The Power of Passion and Perseverance ,” Angela Lee Duckworth discusses the importance of passion in research and delivery. She delivers her presentation excitedly to show the audience how excitement piques interest.
Tip #6: Plan your delivery
How you decide to deliver your speech will shape your presentation. Will you be preparing a PowerPoint presentation and using a teleprompter? Or are you working within the constraints of the digital world and presenting over Zoom?
The best presentations are conducted by speakers who know their stuff and memorize their content. However, if you find this challenging, try creating notes to use as a safety net in case you lose track.
If you’re presenting online, you can keep notes beside your computer for each slide, highlighting your key points. This ensures you include all the necessary information and follow a logical order.

Tip #7: Practice
Practice doesn’t make perfect — it makes progress. There’s no way of preparing for unforeseen circumstances, but thorough practice means you’ve done everything you can to succeed.
Rehearse your speech in front of a mirror or to a trusted friend or family member. Take any feedback and use it as an opportunity to fine-tune your speech. But remember: who you practice your presentation in front of may differ from your intended audience. Consider their opinions through the lens of them occupying this different position.
Tip #8: Read the room
Whether you’re a keynote speaker at an event or presenting to a small group of clients, knowing how to read the room is vital for keeping your audience happy. Stay flexible and be willing to move on from topics quickly if your listeners are uninterested or displeased with a particular part of your speech.
Tip #9: Breathe
Try taking deep breaths before your presentation to calm your nerves. If you feel rushed, you’re more likely to feel nervous and stumble on your words.
The most important thing to consider when presenting is your audience’s feelings. When you approach your next presentation calmly, you’ll put your audience at ease and encourage them to feel comfortable in your presence.
Tip #10: Provide a call-to-action
When you end your presentation, your audience should feel compelled to take a specific action, whether that’s changing their habits or contacting you for your services.
If you’re presenting to clients, create a handout with key points and contact information so they can get in touch. You should provide your LinkedIn information, email address, and phone number so they have a variety of ways to reach you.
There’s no one-size-fits-all template for an effective presentation, as your unique audience and subject matter play a role in shaping your speech. As a general rule, though, you should aim to connect with your audience through passion and excitement. Use strong eye contact and body language. Capture their interest through storytelling and their trust through relatability.
Learning how to give a good presentation can feel overwhelming — but remember, practice makes progress. Rehearse your presentation for someone you trust, collect their feedback , and revise. Practicing your presentation skills is helpful for any job, and every challenge is a chance to grow.
Elizabeth Perry, ACC
Elizabeth Perry is a Coach Community Manager at BetterUp. She uses strategic engagement strategies to cultivate a learning community across a global network of Coaches through in-person and virtual experiences, technology-enabled platforms, and strategic coaching industry partnerships. With over 3 years of coaching experience and a certification in transformative leadership and life coaching from Sofia University, Elizabeth leverages transpersonal psychology expertise to help coaches and clients gain awareness of their behavioral and thought patterns, discover their purpose and passions, and elevate their potential. She is a lifelong student of psychology, personal growth, and human potential as well as an ICF-certified ACC transpersonal life and leadership Coach.
6 presentation skills and how to improve them
3 stand-out professional bio examples to inspire your own, how to write a speech that your audience remembers, how to make a presentation interactive and exciting, tell a story they can't ignore these 10 tips will teach you how, reading the room gives you an edge — no matter who you're talking to, writing an elevator pitch about yourself: a how-to plus tips, your ultimate guide on how to be a good storyteller, 18 effective strategies to improve your communication skills, similar articles, the importance of good speech: 5 tips to be more articulate, the 11 tips that will improve your public speaking skills, 30 presentation feedback examples, how to not be nervous for a presentation — 13 tips that work (really), how the minto pyramid principle can enhance your communication skills, 8 clever hooks for presentations (with tips), stay connected with betterup, get our newsletter, event invites, plus product insights and research..
3100 E 5th Street, Suite 350 Austin, TX 78702
- Platform Overview
- Integrations
- Powered by AI
- BetterUp Lead
- BetterUp Manage™
- BetterUp Care™
- Sales Performance
- Diversity & Inclusion
- Case Studies
- Why BetterUp?
- About Coaching
- Find your Coach
- Career Coaching
- Communication Coaching
- Life Coaching
- News and Press
- Leadership Team
- Become a BetterUp Coach
- BetterUp Labs
- Center for Purpose & Performance
- Leadership Training
- Business Coaching
- Contact Support
- Contact Sales
- Privacy Policy
- Acceptable Use Policy
- Trust & Security
- Cookie Preferences
Find the images you need to make standout work. If it’s in your head, it’s on our site.
- Images home
- Curated collections
- AI image generator
- Offset images
- Backgrounds/Textures
- Business/Finance
- Sports/Recreation
- Animals/Wildlife
- Beauty/Fashion
- Celebrities
- Food and Drink
- Illustrations/Clip-Art
- Miscellaneous
- Parks/Outdoor
- Buildings/Landmarks
- Healthcare/Medical
- Signs/Symbols
- Transportation
- All categories
- Editorial video
- Shutterstock Select
- Shutterstock Elements
- Health Care
- PremiumBeat
- Templates Home
- Instagram all
- Highlight covers
- Facebook all
- Carousel ads
- Cover photos
- Event covers
- Youtube all
- Channel Art
- Etsy big banner
- Etsy mini banner
- Etsy shop icon
- Pinterest all
- Pinterest pins
- Twitter all
- Twitter Banner
- Infographics
- Zoom backgrounds
- Announcements
- Certificates
- Gift Certificates
- Real Estate Flyer
- Travel Brochures
- Anniversary
- Baby Shower
- Mother’s Day
- Thanksgiving
- All Invitations
- Party invitations
- Wedding invitations
- Book Covers
- Editorial home
- Entertainment
- About Creative Flow
- Create editor
- Content calendar
- Photo editor
- Background remover
- Collage maker
- Resize image
- Color palettes
- Color palette generator
- Image converter
- Contributors
- PremiumBeat blog
- Invitations
- Design Inspiration
- Design Resources
- Design Elements & Principles
- Contributor Support
- Marketing Assets
- Cards and Invitations
- Social Media Designs
- Print Projects
- Organizational Tools
- Case Studies
- Platform Solutions
- Generative AI
- Computer Vision
- Free Downloads
- Create Fund

9 Tips for Making Beautiful PowerPoint Presentations
Ready to craft a beautiful powerpoint presentation these nine powerpoint layout ideas will help anyone create effective, compelling slides..
How many times have you sat through a poorly designed business presentation that was dull, cluttered, and distracting? Probably way too many. Even though we all loathe a boring presentation, when it comes time to make our own, do we really do any better?
The good news is you don’t have to be a professional designer to make professional presentations. We’ve put together a few simple guidelines you can follow to create a beautifully assembled deck.
We’ll walk you through some slide design tips, show you some tricks to maximize your PowerPoint skills, and give you everything you need to look really good next time you’re up in front of a crowd.
And, while PowerPoint remains one of the biggest names in presentation software, many of these design elements and principles work in Google Slides as well.
Let’s dive right in and make sure your audience isn’t yawning through your entire presentation.
1. Use Layout to Your Advantage
Layout is one of the most powerful visual elements in design, and it’s a simple, effective way to control the flow and visual hierarchy of information.
For example, most Western languages read left to right, top to bottom. Knowing this natural reading order, you can direct people’s eyes in a deliberate way to certain key parts of a slide that you want to emphasize.
You can also guide your audience with simple tweaks to the layout. Use text size and alternating fonts or colors to distinguish headlines from body text.
Placement also matters. There are many unorthodox ways to structure a slide, but most audience members will have to take a few beats to organize the information in their head—that’s precious time better spent listening to your delivery and retaining information.
Try to structure your slides more like this:

And not like this:

Layout is one of the trickier PowerPoint design concepts to master, which is why we have these free PowerPoint templates already laid out for you. Use them as a jumping off point for your own presentation, or use them wholesale!
Presentation templates can give you a huge leg up as you start working on your design.
2. No Sentences
This is one of the most critical slide design tips. Slides are simplified, visual notecards that capture and reinforce main ideas, not complete thoughts.
As the speaker, you should be delivering most of the content and information, not putting it all on the slides for everyone to read (and probably ignore). If your audience is reading your presentation instead of listening to you deliver it, your message has lost its effectiveness.
Pare down your core message and use keywords to convey it. Try to avoid complete sentences unless you’re quoting someone or something.
Stick with this:

And avoid this:

3. Follow the 6×6 Rule
One of the cardinal sins of a bad PowerPoint is cramming too many details and ideas on one slide, which makes it difficult for people to retain information. Leaving lots of “white space” on a slide helps people focus on your key points.
Try using the 6×6 rule to keep your content concise and clean looking. The 6×6 rule means a maximum of six bullet points per slide and six words per bullet. In fact, some people even say you should never have more than six words per slide!
Just watch out for “orphans” (when the last word of a sentence/phrase spills over to the next line). This looks cluttered. Either fit it onto one line or add another word to the second line.

Slides should never have this much information:

4. Keep the Colors Simple
Stick to simple light and dark colors and a defined color palette for visual consistency. Exceptionally bright text can cause eye fatigue, so use those colors sparingly. Dark text on a light background or light text on a dark background will work well. Also avoid intense gradients, which can make text hard to read.
If you’re presenting on behalf of your brand, check what your company’s brand guidelines are. Companies often have a primary brand color and a secondary brand color , and it’s a good idea to use them in your presentation to align with your company’s brand identity and style.
If you’re looking for color inspiration for your next presentation, check out our 101 Color Combinations , where you can browse tons of eye-catching color palettes curated by a pro. When you find the one you like, just type the corresponding color code into your presentation formatting tools.
Here are more of our favorite free color palettes for presentations:
- 10 Color Palettes to Nail Your Next Presentation
- 10 Energizing Sports Color Palettes for Branding and Marketing
- 10 Vintage Color Palettes Inspired by the Decades
No matter what color palette or combination you choose, you want to keep the colors of your PowerPoint presentation simple and easy to read, like this:

Stay away from color combinations like this:

5. Use Sans-Serif Fonts
Traditionally, serif fonts (Times New Roman, Garamond, Bookman) are best for printed pages, and sans-serif fonts (Helvetica, Tahoma, Verdana) are easier to read on screens.
These are always safe choices, but if you’d like to add some more typographic personality , try exploring our roundup of the internet’s best free fonts . You’ll find everything from classic serifs and sans serifs to sophisticated modern fonts and splashy display fonts. Just keep legibility top of mind when you’re making your pick.
Try to stick with one font, or choose two at the most. Fonts have very different personalities and emotional impacts, so make sure your font matches the tone, purpose, and content of your presentation.

6. Stick to 30pt Font or Larger
Many experts agree that your font size for a PowerPoint presentation should be at least 30pt. Sticking to this guideline ensures your text is readable. It also forces you, due to space limitations, to explain your message efficiently and include only the most important points. .

7. Avoid Overstyling the Text
Three of the easiest and most effective ways to draw attention to text are:
- A change in color
Our eyes are naturally drawn to things that stand out, but use these changes sparingly. Overstyling can make the slide look busy and distracting.

8. Choose the Right Images
The images you choose for your presentation are perhaps as important as the message. You want images that not only support the message, but also elevate it—a rare accomplishment in the often dry world of PowerPoint.
But, what is the right image? We’ll be honest. There’s no direct answer to this conceptual, almost mystical subject, but we can break down some strategies for approaching image selection that will help you curate your next presentation.
The ideal presentation images are:
- Inspirational

These may seem like vague qualities, but the general idea is to go beyond the literal. Think about the symbols in an image and the story they tell. Think about the colors and composition in an image and the distinct mood they set for your presentation.
With this approach, you can get creative in your hunt for relatable, authentic, and inspirational images. Here are some more handy guidelines for choosing great images.
Illustrative, Not Generic
So, the slide in question is about collaborating as a team. Naturally, you look for images of people meeting in a boardroom, right?
While it’s perfectly fine to go super literal, sometimes these images fall flat—what’s literal doesn’t necessarily connect to your audience emotionally. Will they really respond to generic images of people who aren’t them meeting in a boardroom?
In the absence of a photo of your actual team—or any other image that directly illustrates the subject at hand—look for images of convincing realism and humanity that capture the idea of your message.
Doing so connects with viewers, allowing them to connect with your message.

The image above can be interpreted in many ways. But, when we apply it to slide layout ideas about collaboration, the meaning is clear.
It doesn’t hurt that there’s a nice setting and good photography, to boot.
Supportive, Not Distracting
Now that we’ve told you to get creative with your image selection, the next lesson is to rein that in. While there are infinite choices of imagery out there, there’s a limit to what makes sense in your presentation.
Let’s say you’re giving an IT presentation to new employees. You might think that image of two dogs snuggling by a fire is relatable, authentic, and inspirational, but does it really say “data management” to your audience?
To find the best supporting images, try searching terms on the periphery of your actual message. You’ll find images that complement your message rather than distract from it.
In the IT presentation example, instead of “data connections” or another literal term, try the closely related “traffic” or “connectivity.” This will bring up images outside of tech, but relative to the idea of how things move.

Inspiring and Engaging
There’s a widespread misconception that business presentations are just about delivering information. Well, they’re not. In fact, a great presentation is inspirational. We don’t mean that your audience should be itching to paint a masterpiece when they’re done. In this case, inspiration is about engagement.
Is your audience asking themselves questions? Are they coming up with new ideas? Are they remembering key information to tap into later? You’ll drive a lot of this engagement with your actual delivery, but unexpected images can play a role, as well.
When you use more abstract or aspirational images, your audience will have room to make their own connections. This not only means they’re paying attention, but they’re also engaging with and retaining your message.
To find the right abstract or unconventional imagery, search terms related to the tone of the presentation. This may include images with different perspectives like overhead shots and aerials, long exposures taken over a period of time, nature photos , colorful markets , and so on.

The big idea here is akin to including an image of your adorable dog making a goofy face at the end of an earnings meeting. It leaves an audience with a good, human feeling after you just packed their brains with data.
Use that concept of pleasant surprise when you’re selecting images for your presentation.
9. Editing PowerPoint Images
Setting appropriate image resolution in powerpoint.
Though you can drag-and-drop images into PowerPoint, you can control the resolution displayed within the file. All of your PowerPoint slide layout ideas should get the same treatment to be equal in size.
Simply click File > Compress Pictures in the main application menu.

If your presentation file is big and will only be viewed online, you can take it down to On-screen , then check the Apply to: All pictures in this file , and rest assured the quality will be uniform.

This resolution is probably fine for proofing over email, but too low for your presentation layout ideas. For higher res in printed form, try the Print setting, which at 220 PPI is extremely good quality.
For large-screens such as projection, use the HD setting, since enlarging to that scale will show any deficiencies in resolution. Low resolution can not only distract from the message, but it looks low-quality and that reflects on the presenter.
If size is no issue for you, use High Fidelity (maximum PPI), and only reduce if the file size gives your computer problems.

The image quality really begins when you add the images to the presentation file. Use the highest quality images you can, then let PowerPoint scale the resolution down for you, reducing the excess when set to HD or lower.
Resizing, Editing, and Adding Effects to Images in PowerPoint
PowerPoint comes with an arsenal of tools to work with your images. When a picture is selected, the confusingly named Picture Format menu is activated in the top menu bar, and Format Picture is opened on the right side of the app window.

In the Format Picture menu (on the right) are four sections, and each of these sections expand to show their options by clicking the arrows by the name:
- Fill & Line (paint bucket icon): Contains options for the box’s colors, patterns, gradients, and background fills, along with options for its outline.
- Effects (pentagon icon): Contains Shadow, Reflection, Glow, Soft Edges, 3-D Format and Rotation, and Artistic Effects.
- Size & Properties (dimensional icon): Size, Position, and Text Box allow you to control the physical size and placement of the picture or text boxes.
- Picture (mountain icon): Picture Corrections, Colors, and Transparency give you control over how the image looks. Under Crop, you can change the size of the box containing the picture, instead of the entire picture itself as in Size & Properties above.
The menu at the top is more expansive, containing menu presets for Corrections, Color, Effects, Animation, and a lot more. This section is where you can crop more precisely than just choosing the dimensions from the Picture pane on the right.
Cropping Images in PowerPoint
The simple way to crop an image is to use the Picture pane under the Format Picture menu on the right side of the window. Use the Picture Position controls to move the picture inside its box, or use the Crop position controls to manipulate the box’s dimensions.

To exert more advanced control, or use special shapes, select the picture you want to crop, then click the Picture Format in the top menu to activate it.

Hit the Crop button, then use the controls on the picture’s box to size by eye. Or, click the arrow to show more options, including changing the shape of the box (for more creative looks) and using preset aspect ratios for a more uniform presentation of images.

The next time you design a PowerPoint presentation, remember that simplicity is key and less is more. By adopting these simple slide design tips, you’ll deliver a clear, powerful visual message to your audience.
If you want to go with a PowerPoint alternative instead, you can use Shutterstock Create to easily craft convincing, engaging, and informative presentations.
With many presentation template designs, you’ll be sure to find something that is a perfect fit for your next corporate presentation. You can download your designs as a .pdf file and import them into both PowerPoint and Google Slides presentation decks.
Take Your PowerPoint Presentation to the Next Level with Shutterstock Flex
Need authentic, eye-catching photography to form the foundation of your PowerPoint presentation? We’ve got you covered.
With Shutterstock Flex, you’ll have all-in-one access to our massive library, plus the FLEXibility you need to select the perfect mix of assets every time.
License this cover image via F8 studio and Ryan DeBerardinis .
Recently viewed
Related Posts

The Ultimate Guide to Creating a Website Color Scheme (Plus 20 FREE Color Palettes)
Unleash the power of color psychology with this complete guide…

Movie Poster Design Ideas for 2024
It’s time to build some buzz, filmmaker! Check out these movie poster ideas for 10 popular genres and get must-know tips to make your own.

In The Wild : TurboSquid’s 3D Designs Behind the House of Kardshian Title Sequence
Explore the process of creating House of Kardashian‘s opening sequence.…

What Is Stock Photography?
Need professional, budget-friendly images for your next project? We’ve got…
© 2023 Shutterstock Inc. All rights reserved.
- Terms of use
- License agreement
- Privacy policy
- Social media guidelines
Featured Topics
Featured series.
A series of random questions answered by Harvard experts.
Explore the Gazette
Read the latest.

Herbert Chanoch Kelman, 94

Exploring generative AI at Harvard
Everett irwin mendelsohn, 91, yes, it’s exciting. just don’t look at the sun..

Niles Singer/Harvard Staff Photographer
Anne J. Manning
Harvard Staff Writer
Lab, telescope specialist details Harvard eclipse-viewing party, offers safety tips
Those who miss this one could need to wait 20 years to get another chance.
A total solar eclipse will cross Mexico, the U.S., and Canada on April 8, bringing millions of North Americans a striking celestial spectacle. The next total solar eclipse to cross the continental U.S. will be in 2044.
Allyson Bieryla , astronomy lab and telescope manager at the Center for Astrophysics | Harvard & Smithsonian (CfA), tells us what to expect, and how to view this natural wonder safely.
What should local eclipse-viewers expect?
Cambridge is not in the path of totality, but locally people will experience close to a 93 percent partial eclipse, which will start at 2:16 p.m. and end at 4:39 p.m., with maximum coverage occurring at 3:29 p.m.
During maximum, you will see just a sliver of the sun remaining. It won’t get completely dark like it would in a total eclipse, but it will still be a spectacular sight.
Over the course of the event, you will see a “bite” of the sun being eclipsed by the moon that will grow to cover most, but not all, of the sun. And then it will wane away.

And what is actually happening?
A total solar eclipse happens when the moon passes in front of the sun, casting a shadow on the Earth. The shadow only falls on a small portion of the Earth, so you are very lucky if it happens to fall where you live.
The “total” part is when the sun is completely blocked by the moon. For those that are able, whether it is this one or a future eclipse, traveling to the path of totality is worth every effort it takes. It is the most unnatural natural experience.
What opportunities for scientific discovery does a total solar eclipse offer?
A total solar eclipse allows people to view the corona, or the sun’s outermost atmosphere. Because the sun’s surface is so bright, we don’t normally get to see the corona because it is so much dimmer. There is still a lot that astronomers would like to learn about the corona.
What activities is the CfA hosting for local eclipse-viewing?
There will be a public event taking place in the Science Center Plaza from 2-5 p.m. There will be solar telescopes, free eclipse glasses, and a bunch of activities, including pinhole cameras, cyanotype prints of the sun, and a live feed of the totality.
We will also have LightSound devices converting the brightness of the sun into sound as the light dims, providing a nonvisual way for people to experience the eclipse.
Rules for safe eclipse-viewing?
Observing the sun is safe if you have the correct equipment. It is never safe to look directly at the sun without proper eclipse glasses or filters, unless you are in the path of totality and in the brief moments of totality. Then, and only then, can you safely look at the sun without protection.
Cambridge is not in the path of totality, so it will never be safe to look at the sun without your eclipse glasses. It is also not okay to point a telescope, binoculars, or a camera at the sun without proper filters.
We will have all the proper equipment and experts on site at the Science Center to guide you safely looking at the sun during the eclipse. Trust me, it is worth it!
Share this article
You might like.
Memorial Minute — Faculty of Arts and Sciences

Leaders weigh in on where we are and what’s next
Forget ‘doomers.’ Warming can be stopped, top climate scientist says
Michael Mann points to prehistoric catastrophes, modern environmental victories
Navigating Harvard with a non-apparent disability
4 students with conditions ranging from diabetes to narcolepsy describe daily challenges that may not be obvious to their classmates and professors
Suggestions or feedback?
MIT News | Massachusetts Institute of Technology
- Machine learning
- Social justice
- Black holes
- Classes and programs
Departments
- Aeronautics and Astronautics
- Brain and Cognitive Sciences
- Architecture
- Political Science
- Mechanical Engineering
Centers, Labs, & Programs
- Abdul Latif Jameel Poverty Action Lab (J-PAL)
- Picower Institute for Learning and Memory
- Lincoln Laboratory
- School of Architecture + Planning
- School of Engineering
- School of Humanities, Arts, and Social Sciences
- Sloan School of Management
- School of Science
- MIT Schwarzman College of Computing
- Q&A: Tips for viewing the 2024 solar eclipse
Q&A: Tips for viewing the 2024 solar eclipse
Press contact :.

Previous image Next image
On Monday, April 8, the United States will experience a total solar eclipse — a rare astronomical event where the moon passes directly between the sun and the Earth, blocking out the sun’s light almost completely. The last total solar eclipse in the contiguous U.S. was in 2017, and the next one won’t be until 2044.
If the weather cooperates, people across the United States — from northeastern Maine to southwestern Texas — will be able to observe the eclipse using protective eyewear. Those in the path of totality , where the moon entirely covers the sun, will have the best view, but 99% of people in the continental U.S. will be able to see a partial eclipse. Weather permitting, those on the MIT campus and the surrounding area will see 93 percent of the sun covered, with the partial eclipse starting at 2:15 p.m. and reaching its peak around 3:29 p.m. Gatherings are planned at the Kresge Oval and the MIT Museum , and a live NASA stream will be shown in the Building 55 atrium .
Brian Mernoff , manager of the CommLab in the Department of Aeronautics and Astronautics, is an accomplished astrophotographer and science educator. Mernoff is headed to Vermont with his family to experience the totality from the best possible angle — but has offered a few thoughts on how to enjoy the eclipse safely, wherever you are.
Q: What should viewers expect to see and experience with this solar eclipse?
A: When you’re watching TV (the sun) and your toddler, dog, or other large mammal (the moon) blocks your view, you no doubt move over a bit to try to get a partial or full view of the TV. This is exactly how the path of totality works for an eclipse. If you are exactly in line with the moon and sun, it will be completely blocked, but if you start moving away from this path, your view of the sun will start to increase until the moon is not in the way at all.
The closer you are to the path of totality, the more of the sun will be blocked. At MIT, about 93 percent of the sun will be blocked. Those in the area will notice that things around you will get slightly darker, just like when it starts to become overcast. Even so, the sun will remain very bright in the sky and solar glasses will be required to view the entirety of the eclipse. It really goes to show how incredibly bright the sun is!
Within the narrow path of totality, the moon will continue to move across the sun, reaching 100 percent coverage. For this short period of time, you can remove your glasses and see a black disk where the sun should be. Around the disk will be wispy white lines. This is the corona, the outermost part of the sun, which is normally outshone by the sun’s photosphere (surface). Around the edges of the black disk of the moon, right as totality begins and ends, you can also see bright spots around the edges, known as Bailey’s Beads, caused by sunlight shining between mountains and craters on the moon.
But that’s not all! Although you will be tempted to stare up at the sun throughout totality, do not forget to observe the world around you. During totality, it feels like twilight. There is a 360-degree sunset, the temperature changes rapidly, winds change, animals start making different sounds, and shadows start getting weird (look into “shadow bands” if you have a chance).
As soon as totality ends, and you start to see Baily’s Beads again, put your solar glasses back on as it will get very bright again very fast as the moon moves out of the way.
Q: What are the best options for viewing the eclipse safely and to greatest effect?
A: No matter where you are during the eclipse, make sure you have solar glasses. These glasses should be ISO-approved for solar viewing. Do not use glasses with scratches, holes, or other damage.
If you are unable to obtain solar glasses in time, you can safely view the eclipse using a home-made projection method , such as a pinhole camera or even projecting the image of the sun through a colander.
The best view of the eclipse will be from within the path of totality, but even if you are not within it, you should still go outside to experience the partial eclipse. Use the NASA Eclipse Explorer to find the start, maximum, and end times, and then find a nice spot outside — preferably with some shade — put on your glasses, and enjoy the show.
For a closer view of the sun, find a friend that has a telescope with the correct ISO-certified solar filter. This will let you see the photosphere (or chromosphere if it is an H-alpha scope) in a lot more detail. If you do not have access to a telescope, NASA plans to livestream a telescope view throughout the eclipse. [The livestream will be displayed publicly on a large screen in Building 55 at MIT, rain or shine.]
The only time you can look at or image the sun without a filter is during 100 percent totality. As soon as this period is done, glasses and filters must be put back on.
After the eclipse, keep your glasses and filters. You can use them to look at the sun on any day (it took me an embarrassing amount of time to realize that I could use the glasses at any time instead of lugging out a telescope). On a really clear day, you can sometimes see sunspots!
Q: How does eclipse photography work?
A: This year I plan to photograph the eclipse in two ways. The first is using a hydrogen-alpha telescope. This telescope filters out all light except for one wavelength that is given off by hydrogen. Because it blocks out most of the light from the sun’s surface, it allows you to see the turbulent upper atmosphere of the sun, including solar prominences that follow magnetic field lines.
Because this telescope does not allow for imaging during totality as too much light is blocked, I also plan to set up a regular camera with a wide-angle lens to capture the total eclipse with the surrounding environment as context. During the 2017 eclipse, I only captured close-ups of the sun using a regular solar filter and missed the opportunity to capture what was going on around me.
Will it work? That depends on if we get clear skies, and how many pictures of my 1.5-year-old need to be taken (as well as how much chasing needs to be done).
If you would like to take pictures of the eclipse, make sure you protect your camera sensor. The sun can easily damage lenses, sensors, and other components. Here are some examples of solar damaged cameras . The solution is simple, though. If using a camera phone, you can take pictures through an extra pair of solar glasses, or even tape them to the phone. For cameras with larger lenses, you can buy cardboard filters that slide over the front of your camera or even buy ISO-approved solar film and make your own.
Q: Any fun, unique, cool, or interesting science facts about this eclipse to share?
A: If you want to get even more involved with the eclipse, there are many citizen science projects that plan to collect as much data as possible throughout the eclipse.
NASA is planning to run several experiments during the eclipse , and researchers with MIT Haystack Observatory will also be using four different technologies to monitor changes in the upper atmosphere , both locally and across the continent.
If you are interested in learning more about the eclipse, here are two of my favorite videos, one on “ unexpected science from a 0.000001 megapixel home-made telescope ” and one on solar eclipse preparation .
Share this news article on:
Related links.
- Brian Mernoff
- AeroAstro Communication Lab
- Department of Aeronautics and Astronautics
Related Topics
- Space, astronomy and planetary science
- Aeronautical and astronautical engineering
- Earth and atmospheric sciences
- Photography
- Cambridge, Boston and region
- Science communications
Related Articles

MIT Haystack scientists prepare a constellation of instruments to observe the solar eclipse’s effects

Solar eclipse caused bow waves in Earth's atmosphere

Q&A: Richard Binzel on tips for observing the 2017 solar eclipse
Previous item Next item
More MIT News

This 3D printer can figure out how to print with an unknown material
Read full story →

For Julie Greenberg, a career of research, mentoring, and advocacy

Reevaluating an approach to functional brain imaging

Propelling atomically layered magnets toward green computers

Researchers 3D print key components for a point-of-care mass spectrometer
- More news on MIT News homepage →
Massachusetts Institute of Technology 77 Massachusetts Avenue, Cambridge, MA, USA
- Map (opens in new window)
- Events (opens in new window)
- People (opens in new window)
- Careers (opens in new window)
- Accessibility
- Social Media Hub
- MIT on Facebook
- MIT on YouTube
- MIT on Instagram
Advertisement
Supported by
Psychedelic Rock and Tammy’s Lunch Box: A Small City’s Big Eclipse Plans
Let the big cities have their eclipse mega-events. In Plattsburgh, N.Y., success looks different for everyone stopping to look up.
- Share full article

By Michael Wilson
Michael Wilson reported from Plattsburgh, N.Y., as part of The Times’s coverage of the April 8 eclipse , the last time a total solar eclipse will be visible in most of North America for 20 years.
There were five cars in the crowded driveway, one for each of the young men in the cramped basement running through their band’s new songs. Their last real gig was on New Year’s Eve, and now it was late March. The keyboard player was keeping an eye on the time because he had to get to a piano lesson soon. He’s the teacher.
Here in Plattsburgh, N.Y., people seem set in their ways with music. If only the psychedelic rock band could break through. Just one right-place, right-time, honest-to-God show where newcomers might actually hear their stuff.
And suddenly, there they are, in the emphatically, improbably, shockingly right place — Plattsburgh — at precisely and cosmically the right time, when the moon is projected to pass across the face of the sun in a perfect eclipse.
And their band, Ursa and the Major Key , has been chosen to perform April 8 as the opening act.
“We’re making sure to breathe,” said Nelson Moore, 28, the band’s drummer, adding: “I sometimes get a little bit of stage fright.”
The crowd size remains a guess. “I’ve heard people say get gas, or get stocked up on food,” said his brother, Eli Moore, 25, a vocalist. “This could be something.”
The eclipse’s path of totality looks like a sash across the United States, stretching from its shoulder to its opposite hip, with countless towns and citizens holding viewing parties large and small, in parks and on mountaintops and in backyards. Plattsburgh, population 20,000 and smack in that path, is bracing for several times that number of tourists.
The city, close enough to Montreal that one might hear as much French spoken as English in the summer months, is nearly large enough to survive all the visitors, but small enough to harbor a little bit of collective optimism, that this fluke of light and shadow could lead to something bigger.
A nearby hotel took a reservation for the eclipse seven years ago, in 2017, with a pen and paper because the computer couldn’t book rooms that far ahead. But last-minute preparations are everywhere, many focused on the main event: a public viewing party at the Plattsburgh City Beach .
The beach is normally closed in April and doesn’t open until Memorial Day. On a recent visit, a frigid wind blew through the rib-cage frame of an empty gazebo, past a brick cabana bar and public restrooms with no running water because the pipes could still freeze.
Scott Dubrey, 45, grew up coming here with his parents and siblings. “It was busy back then, super, super busy,” he said. “You couldn’t move on this beach.”
As the recreation leader for the city, he’s in charge of fixing it up for the eclipse. A recent snowstorm halted work for a couple days, but it soon resumed.
“We have a tractor with two rakes,” he said, looking at the damp, cool sand. “We have what we call a York rake and a surf rake. The surf rake can nitpick all the stones and sticks and stuff.”
Standing in the sand, facing away from the lake and toward the empty cabana area, he thought of those summers here as a boy, and allowed himself to imagine what this eclipse party might lead to. Maybe a full-time food vendor. This could be something.
“It doesn’t have to be much,” he said. “Hot dogs and hamburgers.”
On the day itself, visitors will be fed primarily by a food truck called Tammy’s Lunch Box, a mainstay at high school games, the parking lot of a hospital and weekend breakfasts at a maple farm known for its syrup. The truck’s owner and namesake, Tammy Deno, has no comparable event to look back on for guidance. She flipped a big wall calendar to last April — blank.
She pulled up a web page for the beach event. “Right now it’s 800-something interested and 47 people going,” she said, shaking her head. “Facebook crap.”
She’s keeping it simple, leaving behind popular items like taco boats in favor of staples: hamburgers and hot dogs, including a local variety with meat sauce called a Michigan.
And what about traffic? When a food truck runs low on supplies, it goes and gets more. But when it’s trapped in a crowded parking lot on a beach, it’s not really a food truck anymore. It’s just a tiny kitchen that’s out of burgers.
“It’s almost like talking to me about my grandchildren that I don’t have,” she said. “You pray for the best.” As for the once-in-a-lifetime total eclipse: “Doesn’t thrill me at all. I probably won’t even get to see it.”
She bristles at reports of area hotels jacking up their rates for the night. And yet, she softens a little at the thought of her bottom line. “If it turns out great, it will be a leg up,” she said.
For Ed Guenther, 62, an outdoor guide, scoutmaster and amateur astronomer, it is as if life has led him to this day.
“My default is to go outside and look up,” he said. “This is something I learned how to do when I was 4. I used to go hunting with my dad — my dad was a navigator in World War II. He did everything by the stars.”
He watched a total eclipse in Oregon in 2017, and can still hear the audible awe — the “whoa” — that swept the surrounding crowd. Eclipse-chasing friends from that day are gathering for this one in Texas, where the skies are likely to be clear. Plattsburgh is often overcast this time of year, sometimes for hours, sometimes for days.
But Mr. Guenther is stubbornly staying put, and will be at the beach with his large telescope and powerful solar filter.
“We get some incredibly clear skies out here,” he said defiantly on the beach in late March. “I was able to see 104 separate areas of the sun at one time. I’ve never been able to do that.”
To prove his point, year after year since the Oregon eclipse, he has gone outside on April 8 at around 3 p.m. to check and photograph the conditions. It’s as if the 4-year-old boy inside the 62-year-old man is willing the sky to be clear.
“It’s a blue sky, every year,” he said. “Hopefully I haven’t cursed myself.”
For Ursa and the Major Key, preparing for a gig of unknown size, the set list is taking shape. They will perform on a wooden stage delivered to the beach on wheels.
“We’ve played on that stage before,” said Tyler Bosley, 29, the guitarist. “But not at that location.”
“At the Naked Turtle?” Eli Moore asked.
“The sewage plant!” corrected his brother, Nelson. They went back to rehearsing an on-point Pink Floyd cover. (“I’ll see you on the dark side of the moon.”)
The notion that they could be noticed on Monday, that it could all lead somewhere, is a powerful daydream, and Eli is quick to pump the brakes.
“This concept of the big break in the music industry — not to be pessimistic, but it doesn’t really work like that,” he said. “Somebody came up to me and was like, ‘This is huge they’re having you do it!’ And I was like, ‘Is it?’”
Maybe not. But it could be something.
Michael Wilson , who covers New York City, has been a Times reporter for more than two decades. More about Michael Wilson
Our Coverage of the Total Solar Eclipse
Dress for the Occasion: What should you wear for the eclipse? Our fashion critic weighs the options , including an unexpected suggestion from scientists.
Free to View: Six inmates in upstate New York prisons who sued the state won their lawsuit to view the eclipse , arguing it “is a religious event.” But a statewide prison lockdown during the eclipse will remain in place.
Hearing the Eclipse: A device called LightSound is being distributed to help the blind and visually impaired experience what they can’t see .
Sky-High Hotel Prices: One Super 8 hotel in the eclipse’s path is charging $949 a night . Its normal rate is $95.
Animal Reactions : Researchers will watch if animals at zoos, homes and farms act strangely when day quickly turns to night.
A Rare Return: A total solar eclipse happens twice in the same place every 366 years on average. But people in certain areas will encounter April 8’s eclipse about seven years after they were near the middle of the path of the “Great American Eclipse.”
No Power Outages: When the sky darkens during the eclipse, electricity production in some parts of the country will drop so sharply that it could theoretically leave tens of millions of homes in the dark. In practice, hardly anyone will notice a sudden loss of energy.
Eclipse tourists should plan for overloaded cell networks
Tips to prepare in case a surge of visitors bogs down mobile service.

If you witness nature’s majesty and can’t live-stream it on TikTok or post in your group chat, did it even happen?
In places around the United States where people will flock to see next week’s solar eclipse , some local officials have warned that mobile service could temporarily flake out .
Cellular networks sometimes bog down when people in one place all call, text, stream or post at once — like at a packed football game or, in this case, an opportunity to view a potentially once-in-a-lifetime total solar eclipse.
These congestion hiccups to cellular networks are far less common than they used to be. But just as eclipse tourists might want to prepare for traffic jams and portable toilet shortages , it couldn’t hurt to plan ahead for potential mobile disruptions, too.
Here are some tips:
2024 total solar eclipse

Download, print or write down driving directions ahead of time
In case you don’t have mobile service for turn-by-turn directions, have a hard copy of driving instructions to wherever you’re going before or after your eclipse viewing.
Some apps including Apple Maps and Google Maps also let you download maps before your trip to find your way even without mobile service.
For Google Maps , put in the location where you’re going. Select your profile picture or initials in the upper-right corner of the screen. Pick “Offline maps” and then “Select your own map.”
Zoom in or out until you’ve highlighted the area you want to save. Tap “Download.”
Find that saved map again by following the same instructions. You can access turn-by-turn directions if your destination is in the downloaded map area.
For Apple Maps , search for the area where you’re traveling. Tap “Download” and zoom in or out to highlight the area you want to save.
You can access turn-by-turn directions even when you don’t have cell service. The only feature that won’t work without mobile reception is real-time traffic information.
Waze has more limited directions if you lose an internet connection during your drive.
Have a backup plan for emergency calls
Jacob Saur, administrator of Arlington County Public Safety Communications and Emergency Management in Virginia, suggested texting 911 in areas where that’s an option. He said texts are not typically as affected by wireless phone congestion.
Or if you can, call emergency services from a landline or a VoIP line that carries calls over the internet . If you’re in the range of a WiFi network, you can also route any mobile calls that way.
Lastly, some phone models have built-in options for using satellites to contact emergency services . Find out the options for your device before your eclipse trip.
This might not be necessary, but it doesn’t hurt to plan for emergencies.
Have cash handy
Some payment terminals for swiping your debit or credit card use the same mobile networks as your phone.
It’s possible they could stop working if you’re somewhere with a flock of visitors on their phones. In case that happens, have some cash on you.
Plan ahead to entertain the kids (and yourself)
Some digital entertainment apps let you download videos or music that work fine even when you’re not connected to the internet.
You can find download instructions for Netflix , YouTube , Disney Plus , Spotify and Prime Video . (Amazon founder Jeff Bezos owns The Washington Post.)
You need to be a paying subscriber to Spotify’s and YouTube’s premium services to use those apps’ download features.
You can also download podcasts, e-books and audiobooks to your phone that will work without mobile service. ( We love Libby for free e-books and audiobooks from some public libraries.)
Or ditch the devices and brush up on rules for the I Spy road trip game .
Why do mobile networks flake during temporary surges in use?
Phone companies have spent a fortune, especially in the past five years , expanding and modernizing mobile networks, including for sudden spikes of mobile use.
Still, in eclipse tourist zones, you might have service, but it could be far slower than you’re used to.
Patrick Halley, president and CEO of the Wireless Infrastructure Association, compared it to a wedding if there are five times the number of expected guests. You might have to slice the cake into tiny pieces that won’t satisfy anyone.
But many local officials have planned for eclipse-related mobile phone surges.
Some areas in the eclipse’s path have brought in scaled-down cellphone towers to handle more network use. (Delightfully, these are referred to by animal shorthand: COWs and COLTs , for cell towers on wheels and cell towers on light trucks.)
Everything could work fine. Officials in Carbondale, Ill., which was in the path of an eclipse in 2017 and again this year , were worried seven years ago about overloaded water and sewage systems, overwhelmed emergency rooms and strained mobile networks, said Steven Mitchell, Carbondale’s economic development director.
But while visitors from Chicago sat in terrible traffic on their way home after the 2017 eclipse, most of the worst case scenarios didn’t happen. “Cell service was not impacted at all,” Mitchell said.
If overloaded networks do stop you from posting your selfies immediately, Halley had some philosophical advice: “Maybe put the phone down and enjoy the eclipse.”
- Just pointing your phone at the eclipse will produce a terrible photo. Here’s what you need to take a good eclipse picture with your phone .
- The cloud forecast for eclipse viewing areas
- Options to contact 911 if you don’t have cell reception
- Your ultimate guide to the total solar eclipse, its path and how to watch April 4, 2024 Your ultimate guide to the total solar eclipse, its path and how to watch April 4, 2024
- Here’s what not to do to safely watch the total solar eclipse April 5, 2024 Here’s what not to do to safely watch the total solar eclipse April 5, 2024
- Eclipse tourists should plan for overloaded cell networks April 2, 2024 Eclipse tourists should plan for overloaded cell networks April 2, 2024

Your last-minute guide to Monday's total solar eclipse

A total solar eclipse will cross North America on Monday , offering millions a rare opportunity to see afternoon skies temporarily darken as the moon blocks the face of the sun.
Tune into NBC News NOW as Lester Holt hosts a two-hour special at 2 p.m. ET Monday from Indianapolis Motor Speedway.
The eclipse's path fortuitously cuts across Mexico, 15 U.S. states and a small part of eastern Canada. In all other states in the continental U.S., viewers will be treated to a partial solar eclipse, with the moon appearing to take a bite out of the sun and obscuring part of its light.
Here’s everything you need to know about the rare celestial event.
What is a solar eclipse?
Solar eclipses occur when the sun, moon and Earth align. The moon passes between Earth and sun, temporarily blocking the sun’s light and casting a shadow on Earth.
A total solar eclipse is when the moon fully obscures the sun, whereas a partial solar eclipse means it blocks just a portion of the sun’s face.
Solar eclipses occur only with the new moon. Because the moon’s orbit around Earth is tilted, the three bodies don’t always line up in a way that creates an eclipse.
“Imagine if the moon’s orbit were in the plane of Earth’s orbit around the sun — if that were the case, then every new moon, you’d have a total solar eclipse and every full moon, you’d have a lunar eclipse,” Neil DeGrasse Tyson, director of the Hayden Planetarium at the American Museum of Natural History, told NBC News. “So, because things don’t always align, it lends to the rarity of the event and the specialness of the event.”
Where and when will the eclipse be visible?
This year’s eclipse will follow a slightly wider path over more populated areas of the continental U.S. than other total solar eclipses have in the recent past.
NASA estimates that 31.6 million people live within what’s known as the path of totality, where the total solar eclipse will be visible. An additional 150 million people live within 200 miles of the path, according to the agency.
The path travels through Texas, Oklahoma, Arkansas, Missouri, Illinois, Kentucky, Indiana, Ohio, Pennsylvania, New York, Vermont, New Hampshire and Maine. Tiny parts of Michigan and Tennessee will also be able to witness totality if conditions are clear.
After the eclipse crosses into Canada, it will pass over southern Ontario, Quebec, New Brunswick, Prince Edward Island and Cape Breton, at the eastern end of Nova Scotia.
Those outside the path of totality can still take part in the astronomical event by viewing a partial solar eclipse — visible throughout all 48 states of the contiguous U.S. — or a NASA livestream.
The timing, including how long totality lasts, depends on the location, but some spots will see the moon fully cover the sun for up to 4 minutes and 28 seconds.
Below is a list of timings for some cities along the path of totality, as provided by NASA . A number of other resources, including NationalEclipse.com and TimeandDate.com , can also help people plan.
- Dallas: Partial eclipse begins at 12:23 p.m. CT and totality at 1:40 p.m.
- Little Rock, Arkansas: Partial eclipse begins at 12:33 p.m. CT and totality at 1:51 p.m.
- Cleveland: Partial eclipse begins at 1:59 p.m. ET and totality at 3:13 p.m.
- Buffalo, New York: Partial eclipse begins at 2:04 p.m. ET and totality at 3:18 p.m.
- Lancaster, New Hampshire: Partial eclipse begins at 2:16 p.m. ET and totality at 3:27 p.m.

How to safely view a solar eclipse
It is never safe to gaze directly at the sun, even when it is partly or mostly covered by the moon. Special eclipse glasses or pinhole projectors are required to safely view solar eclipses and prevent eye damage. Failing to take the proper precautions can result in severe eye injury, according to NASA .
Eclipse glasses are thousands of times darker than normal sunglasses and specially made to enable wearers to look at the sun during these kinds of celestial events.
Sky-watchers should also never view any part of the sun through binoculars, telescopes or camera lenses unless they have specific solar filters attached. Eclipse glasses should not be used with these devices, as they will not provide adequate protection.
However, during the few minutes of totality, when the moon is fully blocking the sun, it is safe to look with the naked eye.

Beware of fake eclipse glasses. On legitimate pairs, the lenses should have a silver appearance on the front and be black on the inside. The manufacturer’s name and address should be clearly labeled, and they should not be torn or punctured. Check, as well, for the ISO logo and the code “IS 12312-2” printed on the inside.
If you don’t have eclipse glasses, you can make a homemade pinhole projector, which lets sunlight in through a small hole, focuses it and projects it onto a piece of paper, wall or other surface to create an image of the sun that is safe to look at.
All you need is two pieces of white cardboard or plain white paper, aluminum foil and a pin or thumbtack. Cut a 1- to 2-inch square or rectangle out of the center of a piece of white paper or cardboard. Tape aluminum foil over that cut-out shape, then use a pin or thumbtack to poke a tiny hole in the foil.
During the eclipse, place a second piece of white paper or cardboard on the ground as a screen and hold the projector with the foil facing up and your back to the sun. Adjusting how far you hold the projector from the second piece of paper will alter the size of the image on the makeshift screen.
What to look for while viewing the total solar eclipse
For people along the path of totality, there are some fun milestones to keep track of as the total solar eclipse unfolds.
As the eclipse progresses and the sun gets thinner in the sky, it will start to get eerily dark, according to Tyson.

When the last beams of sunlight are about to become obscured, look out for the “diamond ring effect”: The sun’s atmosphere will appear as an illuminated halo, and the last light still visible will look like the diamond of a giant ring.
As the sunlight decreases even further, an effect known as Baily’s beads will be created by the moon’s rugged terrain. Tiny “beads” of light will be visible for only a few seconds around the dark moon, as the last bits of sunlight peer through the moon’s mountains and valleys.
When the moon is fully blocking the sun, it is safe to remove eclipse glasses and look at the total solar eclipse with the naked eye.

Some lucky sky-watchers may even catch a glimpse of a comet .
Comet 12P/Pons-Brooks — nicknamed the “ devil comet ” because an eruption last year left it with two distinct trails of gas and ice in the shape of devil horns — is currently visible from the Northern Hemisphere as it swings through the inner solar system.
The comet can be seen in the early evenings by gazing toward the west-northwest horizon. During the eclipse, when skies darken during totality, it may be possible to see the comet near Jupiter, but its visibility will depend on whether it’s in the middle of an outburst and thus brighter than normal.
Most likely, all eyes will be on the alignment of the moon and sun.
“Most people won’t even notice,” Tyson said. “But if you know to look, it’s there.”
When is the next solar eclipse?
The next total solar eclipse will be in 2026, but it will mostly pass over the Arctic Ocean, with some visibility in Greenland, Iceland, Portugal and northern Spain. In 2027, a total solar eclipse will be visible in Spain and a swath of northern Africa.
The next total solar eclipse visible from North America will be in 2033, but only over Alaska. Then in 2044, a total solar eclipse will cross Montana, North Dakota, South Dakota, parts of Canada and Greenland.
The next total solar eclipse to cross the continental U.S. coast-to-coast in will occur in 2045. The path of totality for that eclipse will cut through California, Nevada, Utah, Colorado, New Mexico, Oklahoma, Kansas, Texas, Arkansas, Missouri, Mississippi, Louisiana, Alabama, Georgia and Florida.
Denise Chow is a reporter for NBC News Science focused on general science and climate change.
Lucas Thompson is a content producer for the NBC News Climate Unit.
Bluey is back with a lesson about preparing kids for change
Bluey is back much to the delight of anyone with small people in their life.
And, in the new episode, Bluey and the Heeler family are faced with a topic many parents and carers navigate.
If you haven't watched Ghostbasket yet (you can stream it now on iview ) then be warned — small spoiler ahead!
The episode ends with Bandit and Chilli thinking about selling the family home.
So when Bluey begs Bandit not to sell the Heeler house, the pup's sadness and anxiety are unmistakable.
The plaintive look Bandit gives Chilli following Bluey's declaration will be familiar to any parent who has struggled to come up with the right things to say.
Big life changes can arrive unannounced, wreak havoc and sometimes even leave lifelong scars, so helping children work through them is important.
Compiled below are a number of practical tips to help a child with change, but it's also important to know why change can be especially hard on kids.
What happens to children when confronted with a big life change? And how can you help them when things get too much?
What are the big life changes most children will experience?
According to developmental psychologist Yael Clark, who has worked with children and their families for over 20 years, some of the most common life changes children will encounter include:
- Moving house
- Starting school
- The arrival of a new sibling
- Divorce and
- Death in the family
How a child handles the accompanying stress often comes down to their temperament, history and neurotype.
"We need to support the child through it and support ourselves through it as parents too, because if we're not regulated, then we're not going to be able to regulate our children," Ms Clark says.
"We want parents to feel they are doing a good job and then they can in turn be that security for their children, which is what they need – security above all."
Why do children struggle with change?
According to mental health social worker Heidi Langley, our struggles with change often stem from fear of the unknown.
Coupled with a lack of control, the prospect of change can become frightening.
"As adults, we can be really excited about moving house," Ms Langley says.
"But that is not the case for kids, as they usually don't have control over it, or a choice in the matter, and that can make them feel confused, anxious, angry and sad," Ms Langley says.
And our brains don't fully develop until the age of 25, so children react to change with emotion rather than the cognitive skills needed to understand what is happening.
Children often develop a script in their mind — it's a sequence of events that then gives them the ability to organise their experiences.
"The world is busy so we hold on to these organised scenarios to make sense of the world, to make it predictable and to make it secure," Ms Clark explains.
"When you take one of those steps away you are effectively pulling the rug out from under them."
How can we help children prepare for a big life change?
While every situation is different, giving your child the time to prepare for change while arming them with the knowledge they'll need to make sense of it is perhaps the best thing you can do for them.
"Reading books or stories together about it helps," Ms Langley says.
"For example, if there's a new sibling coming, read stories about other families who have also had a new sibling.
"Or if you're moving house, read stories about other people moving house."
And just as important is telling them what will stay the same.
"They need to have the same routine where possible because children need stability and predictability when circumstances change," Ms Langley adds.
"They need to know that their relationship with you is going to be the same and that you still love them, and that you're the parent and you'll care about them no matter what is changing."
It's also important to listen to their concerns – don't assume what their experience will be or what they're thinking about it – and, where relevant and appropriate, allow them some choice.
"Give them some sense of control because with change they often feel like they're losing control over the situation," Ms Langley says.
"For example, if you're moving house let them have a choice in how they want to decorate their room."
Lastly, Ms Clark believes it's important not to project adult sensitivities onto a child.
"A lot of parents move into what we call overbright mode – jollying them along – and that's so out of sync," she says.
"As their parent you want to cheer them up and rescue them but actually that prevents them from processing the change that's taking place and it can communicate to them that you're not ready to talk about it or feel it.
"But we want them to [talk about it] while feeling safe and soothed.
"Validate where they are at and what their feeling is: 'I see you, I hear you and I'll meet you there. You are safe because we have each other'."
How long does it take a child to adjust to change?
This depends on how big the change is as well as the temperament of the child.
"A child who is sensitive or a thinker will require more support and processing opportunities", Ms Clark says.
If the family has experienced loss, it generally takes a minimum of a year – until all the "firsts", such as a birthday or Christmas without the person, have come to pass.
"But when is it a psychological problem? We would look at how they are functioning – are they able to eat, sleep, play with friends?" Ms Clark adds.
"If those things are not happening, I would be concerned."
And don't be surprised if a child wants to revisit the change and refine and develop the narrative.
"As children get older, they revisit it but from a different angle," Ms Clark says.
Eight ways to help your child cope with big life changes
- Maintain routine to help make your child feel safe and secure
- Read relevant storybooks ahead of time
- Ensure your child feels heard and listened to
- Normalise change by pointing out it is a normal part of life
- Work on their strengths and coping abilities while reassuring them that they will get through this
- Role model how to deal with change
- Broaden your focus. For example, can extended family or friends help provide support?
- Assist your child to develop a clear story that organises their experience and helps them make sense of the change
Stream the new Bluey episode Ghostbasket on ABC iview now , and catch Bluey's 28-minute special The Sign at 8am on Sunday 14 April on ABC iview .
- X (formerly Twitter)
Related Stories
Hooray these are the top five bluey episodes as voted by you.
Why some children fear dogs and how to help them overcome it
'Like being in a Bluey episode': Bluey's World set to open in Queensland
In a world overwhelmed by work, “Bluey” reminds us of the ethical importance of play
- Death and Dying
- Mental Health
IMAGES
VIDEO
COMMENTS
Get your main point into the presentation as early as possible (this avoids any risk of audience fatigue or attention span waning), then substantiate your point with facts, figures etc and then reiterate your point at the end in a 'Summary'. 2. Practice Makes Perfect. Also, don't forget to practice your presentation.
Tips for creating an effective presentation. Tip. Details. Choose a font style that your audience can read from a distance. Choosing a simple font style, such as Arial or Calibri, helps to get your message across. Avoid very thin or decorative fonts that might impair readability, especially at small sizes. Choose a font size that your audience ...
PowerPoint Slide Design. The design can leave a first and lasting impression. Give it a professional touch to win your audience's trust and attention. 1. Carefully Compose Your Slides. Don't copy and paste slides from different sources. You don't want your presentation to look like a rag rug.
Consider choosing readability over aesthetics, and avoid fancy fonts that could prove to be more of a distraction than anything else. A good presentation needs two fonts: a serif and sans-serif. Use one for the headlines and one for body text, lists, and the like. Keep it simple.
Getting Started. 1. Open PowerPoint and click 'New.'. If a page with templates doesn't automatically open, go to the top left pane of your screen and click New. If you've already created a presentation, select Open then double-click the icon to open the existing file. Image Source.
6. Use the 10-20-30 Rule. 30 60 90 PowerPoint Template. Guy Kawasaki from Apple is well known for this rule about creating presentations that won't lead the audience to distraction. In short, the law says to create a presentation that: Contains no more than ten slides. Is 20-minutes or less. Use a font size of 30 points.
Microsoft PowerPoint is a presentation design software that is part of Microsoft 365. This software allows you to design presentations by combining text, images, graphics, video, and animation on slides in a simple and intuitive way. Over time, PowerPoint has evolved and improved its accessibility to users.
Make your friends talk over each-other, practice without notes, or put some loud music on. Whatever it is that distracts you the most. Try to remember your presentation in full detail in those conditions before you come out in front of an audience. This is a surefire way to radiate confidence during your delivery.
7) Limit bullet points. Keep your bullet points to a maximum of 5-6 per slide. In addition, the words per bullet point should also be limited to 5-6 words. It's also wise to vary what you present in each slide, such as alternating between bullet points, graphics, and graph slides, in order to sustain the interest and focus of your audience.
Preparing a PowerPoint presentation: 11 tips for success. 1. Structure is all-important. A solid structure is the mainstay of any presentation. It provides a logical, common thread for both your audience and yourself. Structuring your presentation well allows you to communicate your points coherently and professionally.
Under Drawing Tools, choose Format. Do one of the following: To change the color of your text, choose Text Fill, and then choose a color. To change the outline color of your text, choose Text Outline, and then choose a color. To apply a shadow, reflection, glow, bevel, 3-D rotation, a transform, choose Text Effects, and then choose the effect ...
1. Keep it simple. Keep your slides simple. It's the visual backdrop to what you are going to say. The most recommended PowerPoint tip for your productivity is called simplicity. You may be tempted by the graphical razzmatazz of beautiful images, background, and charts. At the end of the day, PowerPoint is a background visual aid for your talk.
Here are a few tips for business professionals who want to move from being good speakers to great ones: be concise (the fewer words, the better); never use bullet points (photos and images paired ...
Follow these steps to create an engaging presentation using Microsoft PowerPoint: 1. Change the template design. Instead of using a pre-made template from PowerPoint, customize it to fit your needs. Try different fonts, colors and designs to help differentiate it from common templates.
One of the most underrated and important presentation tips - On the title slide, keep the background simple to avoid drawing attention away from you as you speak. 2. Add an agenda slide. List what the audience can anticipate. Label your slide with "Presentation Agenda" or a phrase to that effect.
Follow the 5/5/5 rule. To keep your audience from feeling overwhelmed, you should keep the text on each slide short and to the point. Some experts suggest using the 5/5/5 rule: no more than five words per line of text, five lines of text per slide, or five text-heavy slides in a row.
Note: Before you open PowerPoint and start creating your presentation, make sure you've collected your thoughts. If you're going to make your slides compelling, you need to spend some time brainstorming. For help with this, see our article with tips for nailing your business presentation here. The first thing you'll need to do is to open PowerPoint.
Here are a few essential PowerPoint tips for easy navigation in your presentation slides. 10. Minimize the variety of transitions in your PowerPoint presentation . After creating a PowerPoint slide show, people usually conclude that the presentation comes across as boring or static. So, they start to use transitions.
4. Keep Things Simple. "People don't need to go all out or over the top when they build presentations. Simplicity is a better choice," Liu says. Some tips to keep things simple include recycling ...
Use strong eye contact and body language. Capture their interest through storytelling and their trust through relatability. Learning how to give a good presentation can feel overwhelming — but remember, practice makes progress. Rehearse your presentation for someone you trust, collect their feedback, and revise.
Stick with this: And avoid this: 3. Follow the 6×6 Rule. One of the cardinal sins of a bad PowerPoint is cramming too many details and ideas on one slide, which makes it difficult for people to retain information. Leaving lots of "white space" on a slide helps people focus on your key points.
2. Font Tips: Keep the font sizes of your title lines greater than 42 points and of your general text at 36 point or larger. On occasion, you can run your text size down to as low as 32 points. In general, it is good to have your titles running around 60 points if possible.
Lab, telescope specialist details Harvard eclipse-viewing party, offers safety tips. Those who miss this one could need to wait 20 years to get another chance. A total solar eclipse will cross Mexico, the U.S., and Canada on April 8, bringing millions of North Americans a striking celestial spectacle. The next total solar eclipse to cross the ...
The path of totality and partial contours crossing the U.S. for the 2024 total solar eclipse occurring on April 8, 2024. On Monday, April 8, the United States will experience a total solar eclipse — a rare astronomical event where the moon passes directly between the sun and the Earth, blocking out the sun's light almost completely.
Published 1:00 PM EDT, Sat April 6, 2024. Link Copied! Network providers are preparing for a surge in cell usage during the April 8 total solar eclipse. Klaus Vedfelt/Digital Vision/Getty Images ...
Scott Dubrey, 45, grew up coming here with his parents and siblings. "It was busy back then, super, super busy," he said. "You couldn't move on this beach.". Scott Dubrey, Plattsburgh ...
Tips to prepare in case a surge of visitors bogs down mobile service. By Shira Ovide. April 2, 2024 at 12:30 p.m. EDT (Illustration by Elena Lacey/The Washington Post; iStock) Listen.
Solar eclipses occur when the sun, moon and Earth align. The moon passes between Earth and sun, temporarily blocking the sun's light and casting a shadow on Earth. A total solar eclipse is when ...
Bluey is back much to the delight of anyone with small people in their life. And, in the new episode, Bluey and the Heeler family are faced with a topic many parents and carers navigate.