- Skip to primary navigation
- Skip to main content
- Skip to primary sidebar


How To Craft the Perfect Travel Photo Essay (from the Pros)
Published/Updated: Nov 16, 2021 · Laura Kiniry · 4 minute read
A picture is worth a thousand words, so imagine what a series of images can convey.
Photographic storytelling—or what we know as photo essays—can say so much about a subject. It might be the visual narrative of a Berlin neighborhood undergoing gentrification through a minimalist café or capturing the delight of a Midwest summer carnival through a couple riding the carousel (or the close-up decadence of deep-fried Oreos).
There’s no need to be a professional photographer to lay out a captivating tale. Whether it’s using an iPhone camera to snap pics or exploring drone imagery , these tips from award-winning, renowned travel National Geographic and New York Times photographers will help you capture great photos and the story behind them.
It’s not only about telling a story that’s eye-catching, but also buzz-worthy. Mark Edward Harris , a photographer who has led workshops for Nikon and B&H, points out, “Look for stories that you relate to or have some personal interest in before looking outwards. Many of the best stories are in our own backyards.”
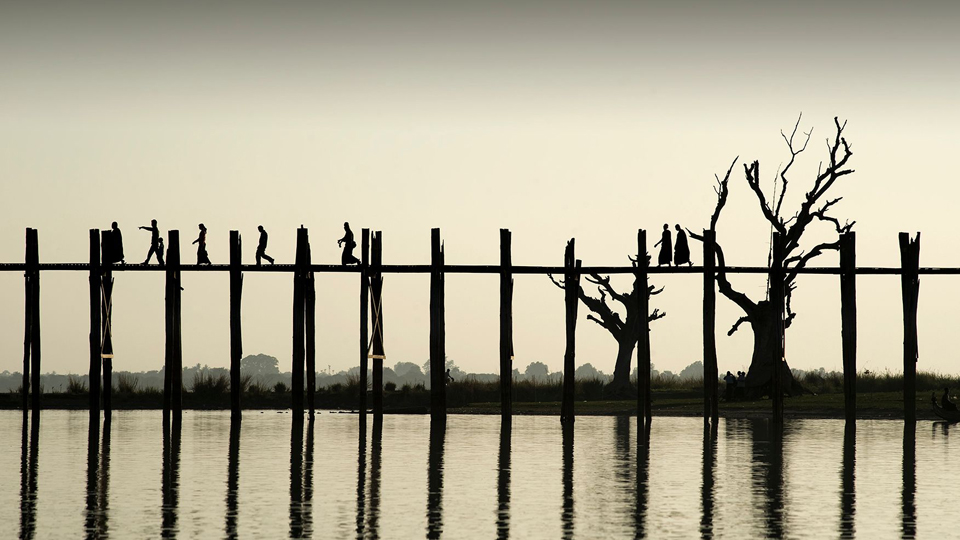
Remember, a location is not a story.
(Courtesy of Mark Edward Harris)
“There’s no real equation or instruction manual for photographic storytelling,” says editorial photographer James Wasserman , whose work has graced The New York Times, Forbes and Fortune.
He does say, don’t be afraid to let loose.
Think about the story you’re interested in sharing. Perhaps it is about documenting the history of a place like Philadelphia's Old City, or telling the story of a popular Parisian restaurant from start-to-finish on a busy night.
Remember, a location is not necessarily a story. This is the mantra that travel and documentary photographer Mark Edward Harris , author of The Travel Photo Essay Describing a Journey Through Images and whose work has appeared in Condé Nast Traveler and National Geographic, follows.
Its meaning: Dig deeper into a place for a story rather simply skimming the surface.
For instance, Harris recently visited Lubbock, Texas, and while there, discovered it was the birthplace of rock and roll legend Buddy Holly. So, in tandem, he created a photo essay on how the city was memorializing Holly. In doing so, Harris captured the spirit of Lubbock (click to see contact sheet).
For other examples, see below.
Choosing and establishing a sense of place.
When it comes to connecting with a subject, Wasserman is a pro.
Take Old City, Philadelphia , a neighborhood where he’s lived on and off for years. “I was walking past the buildings here multiple times a day,” he says, “and watching them change. I developed a relationship to them.”
Start getting to know the places and people around you. Pay attention. Ask questions.
Take note of things, like the way a local bodega owner might leave a bowl of water out for the neighborhood cat each evening. Or how a parking lot transforms into an impromptu concert venue on Thursday nights.
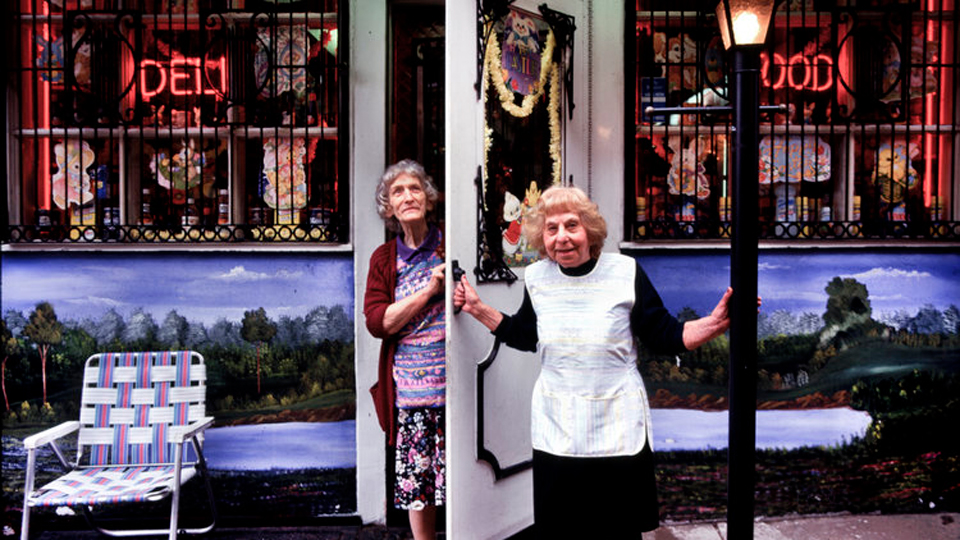
Windows of time. (James Wasserman / Old City)
Businesses come and go; places change, notes Wasserman. “But often, the most compelling images are ones that become windows into another time.”
They also capture a sense of place. A good example is Wasserman's Chengdu Eats , which features the story of Chengdu, China, recently designated as a UNESCO City of Gastronomy.
To do this, Wasserman looked at what makes Chengdu’s culinary scene so great. He visited a local cooking school, explored the energy of its farmers’ markets, and familiarized himself with the dishes themselves. Like everywhere from Mexico to Morocco, Chengdu's food and its culture are undeniably linked.
Conveying this kind of connection will make your images that much more powerful.
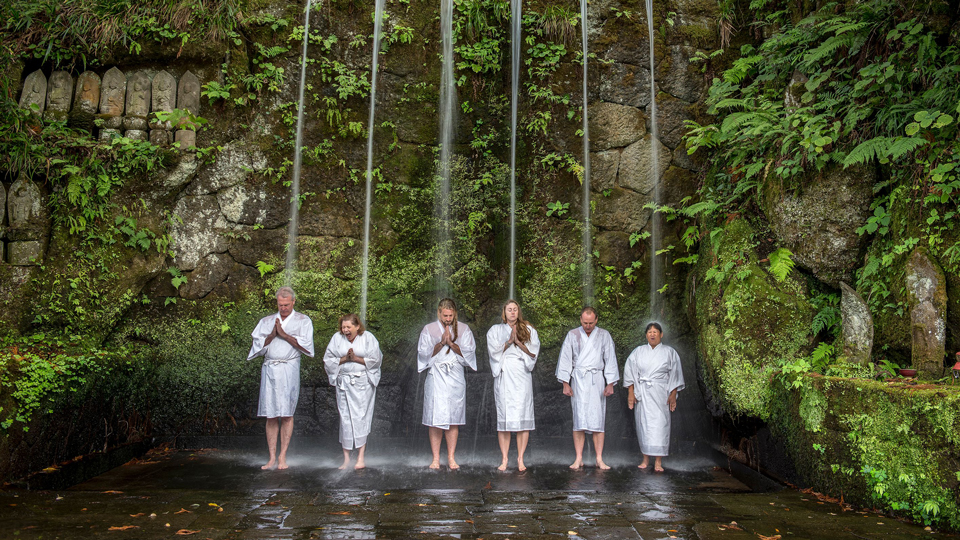
Other examples could be kimchi-making parties in South Korea, or a typical workday of Japanese Ama, the female deep-sea divers who search for sea cucumbers and abalone. Telling these stories through different viewpoints will help them become more whole.
It's always helpful to have a shot list so that you know beforehand what types of images you'd like to include. But leave room for spontaneity: Some photos can occur spur-of-the-moment. Other photos might be arranged shots.
It's OK to include both.
Harris tries to go into new situations with what he calls an “empty cup,” filling it up with interesting ideas and asides as he goes. “That said, I do some basic research before I head out to a location,” he says.
Contemplating the range of images.

Cooking school. (James Wasserman / Chengdu Eats)
Once you have an idea in your mind of the overall theme, start looking at it from a range of different angles.
For example, says Wasserman, “If it's a person whose story you want to convey, ask yourself: Where does that person reside? Where do they work? What are the environments that are important to them?”
If something interests you, snap a pic. Snap more than several pictures, and do so from multiple angles and distances. Shoot wide angles from above (this is a time where that drone could come in handy), and zoom in close.
Take action shots and portraits. In particular, Harris loves the camera’s ability to freeze a moment in time, using a fast-enough shutter speed “to capture a bear catching a salmon at Brooks Falls, Alaska, ” he says, “or an officer directing traffic in Pyongyang, North Korea .”
Basic images should include a strong establishing shot , some detail shots , and a closing shot , says Harris.
If it’s a story about food, this might mean capturing images of chefs cooking it, people eating it, and close-ups of the dishes themselves.
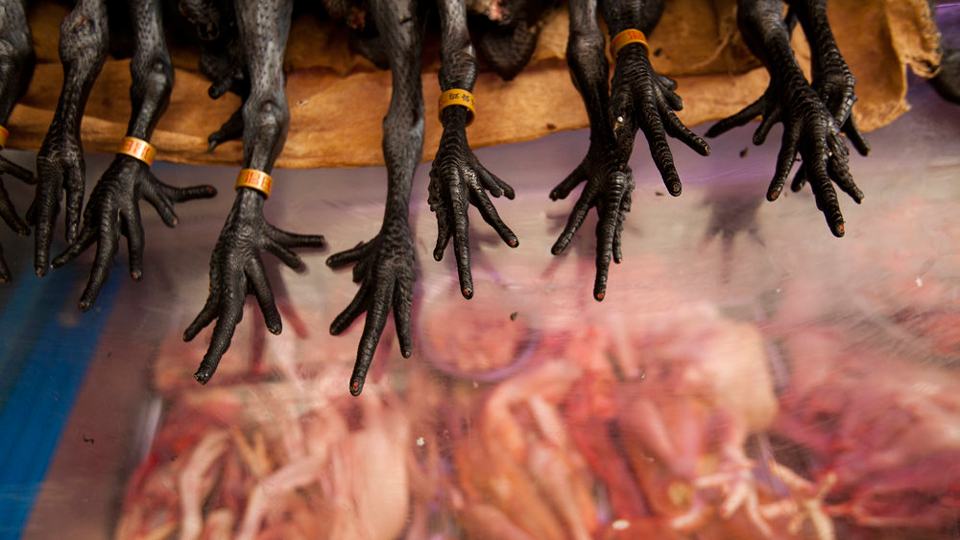
Chicken feet. A great example of a close-up shot. (James Wasserman / Chengdu Eats)
In the case of the Buddy Holly story, one of Harris’s detail shots is a photo of Holly’s famous eyeglasses. “[It was also the same] pair of glasses Holly was wearing when his plane crashed on that freezing, wintery night in 1959,” he says. (Holly died in the plane crash.)
Environmental portraits, or a portrait of a person in a place they’re connected with [ like this image of Bruce Springsteen in Asbury Park, NJ ], are also a key element to photographic storytelling.
Curating, and presenting, the story.
Though it’s both expected and encouraged that different angles, varying subjects, and a range of foci will be included in the story’s universal theme, fight the urge to include everything .
Seriously. As much as you might be dying to feature all 150 photos from a visit to Alcatraz Island, don’t. An onslaught of images is boring, and the story gets lost within them.
“The viewers are always creating their own stories,” says Wasserman. Allow them the chance.
“If you study the classic LIFE magazine photo essays by photographers such as W. Gene Smith, Alfred Eisenstaedt, Margaret Bourke-White, and Gordon Parks,” Harris points out, “a strong story should be able to be told in a dozen photos or so.”
Once you decide on the images you’re going to use, arrange them in an order that makes sense. Begin with a strong establishing shot, such as the cooking school from Wasserman’s Chengdu Eats story.
Then end with a closing shot: One like the pile of rubble in Harris’s Vanity Fair photo essay on the aftermath of the 2015 Nepal Earthquake. Use the in-between to fill in the blanks.
After all, that is where the magic happens.
(Backroads / Mark Edward Harris)
Popular Posts

Baggage Restrictions You Probably Don’t Know About Amtrak
Can You Rent a Car Without a Driver's License?
The leading authority in photography and camera gear.
Become a better photographer.
12.9 Million
Annual Readers
Newsletter Subscribers
Featured Photographers
Photography Guides & Gear Reviews

How to Create an Engaging Photo Essay (with Examples)
Photo essays tell a story in pictures. They're a great way to improve at photography and story-telling skills at once. Learn how to do create a great one.
Learn | Photography Guides | By Ana Mireles
Photography is a medium used to tell stories – sometimes they are told in one picture, sometimes you need a whole series. Those series can be photo essays.
If you’ve never done a photo essay before, or you’re simply struggling to find your next project, this article will be of help. I’ll be showing you what a photo essay is and how to go about doing one.
You’ll also find plenty of photo essay ideas and some famous photo essay examples from recent times that will serve you as inspiration.
If you’re ready to get started, let’s jump right in!
Table of Contents
What is a Photo Essay?
A photo essay is a series of images that share an overarching theme as well as a visual and technical coherence to tell a story. Some people refer to a photo essay as a photo series or a photo story – this often happens in photography competitions.
Photographic history is full of famous photo essays. Think about The Great Depression by Dorothea Lange, Like Brother Like Sister by Wolfgang Tillmans, Gandhi’s funeral by Henri Cartier Bresson, amongst others.
What are the types of photo essay?
Despite popular belief, the type of photo essay doesn’t depend on the type of photography that you do – in other words, journalism, documentary, fine art, or any other photographic genre is not a type of photo essay.
Instead, there are two main types of photo essays: narrative and thematic .
As you have probably already guessed, the thematic one presents images pulled together by a topic – for example, global warming. The images can be about animals and nature as well as natural disasters devastating cities. They can happen all over the world or in the same location, and they can be captured in different moments in time – there’s a lot of flexibility.
A narrative photo essa y, on the other hand, tells the story of a character (human or not), portraying a place or an event. For example, a narrative photo essay on coffee would document the process from the planting and harvesting – to the roasting and grinding until it reaches your morning cup.
What are some of the key elements of a photo essay?
- Tell a unique story – A unique story doesn’t mean that you have to photograph something that nobody has done before – that would be almost impossible! It means that you should consider what you’re bringing to the table on a particular topic.
- Put yourself into the work – One of the best ways to make a compelling photo essay is by adding your point of view, which can only be done with your life experiences and the way you see the world.
- Add depth to the concept – The best photo essays are the ones that go past the obvious and dig deeper in the story, going behind the scenes, or examining a day in the life of the subject matter – that’s what pulls in the spectator.
- Nail the technique – Even if the concept and the story are the most important part of a photo essay, it won’t have the same success if it’s poorly executed.
- Build a structure – A photo essay is about telling a thought-provoking story – so, think about it in a narrative way. Which images are going to introduce the topic? Which ones represent a climax? How is it going to end – how do you want the viewer to feel after seeing your photo series?
- Make strong choices – If you really want to convey an emotion and a unique point of view, you’re going to need to make some hard decisions. Which light are you using? Which lens? How many images will there be in the series? etc., and most importantly for a great photo essay is the why behind those choices.
9 Tips for Creating a Photo Essay
Credit: Laura James
1. Choose something you know
To make a good photo essay, you don’t need to travel to an exotic location or document a civil war – I mean, it’s great if you can, but you can start close to home.
Depending on the type of photography you do and the topic you’re looking for in your photographic essay, you can photograph a local event or visit an abandoned building outside your town.
It will be much easier for you to find a unique perspective and tell a better story if you’re already familiar with the subject. Also, consider that you might have to return a few times to the same location to get all the photos you need.
2. Follow your passion
Most photo essays take dedication and passion. If you choose a subject that might be easy, but you’re not really into it – the results won’t be as exciting. Taking photos will always be easier and more fun if you’re covering something you’re passionate about.
3. Take your time
A great photo essay is not done in a few hours. You need to put in the time to research it, conceptualizing it, editing, etc. That’s why I previously recommended following your passion because it takes a lot of dedication, and if you’re not passionate about it – it’s difficult to push through.
4. Write a summary or statement
Photo essays are always accompanied by some text. You can do this in the form of an introduction, write captions for each photo or write it as a conclusion. That’s up to you and how you want to present the work.
5. Learn from the masters
How Much Do You REALLY Know About Photography?! 🤔
Test your photography knowledge with this quick quiz!
See how much you really know about photography...

Your answer:
Correct answer:
SHARE YOUR RESULTS
Your Answers
Making a photographic essay takes a lot of practice and knowledge. A great way to become a better photographer and improve your storytelling skills is by studying the work of others. You can go to art shows, review books and magazines and look at the winners in photo contests – most of the time, there’s a category for photo series.
6. Get a wide variety of photos
Think about a story – a literary one. It usually tells you where the story is happening, who is the main character, and it gives you a few details to make you engage with it, right?
The same thing happens with a visual story in a photo essay – you can do some wide-angle shots to establish the scenes and some close-ups to show the details. Make a shot list to ensure you cover all the different angles.
Some of your pictures should guide the viewer in, while others are more climatic and regard the experience they are taking out of your photos.
7. Follow a consistent look
Both in style and aesthetics, all the images in your series need to be coherent. You can achieve this in different ways, from the choice of lighting, the mood, the post-processing, etc.
8. Be self-critical
Once you have all the photos, make sure you edit them with a good dose of self-criticism. Not all the pictures that you took belong in the photo essay. Choose only the best ones and make sure they tell the full story.
9. Ask for constructive feedback
Often, when we’re working on a photo essay project for a long time, everything makes perfect sense in our heads. However, someone outside the project might not be getting the idea. It’s important that you get honest and constructive criticism to improve your photography.
How to Create a Photo Essay in 5 Steps

Credit: Quang Nguyen Vinh
1. Choose your topic
This is the first step that you need to take to decide if your photo essay is going to be narrative or thematic. Then, choose what is it going to be about?
Ideally, it should be something that you’re interested in, that you have something to say about it, and it can connect with other people.
2. Research your topic
To tell a good story about something, you need to be familiar with that something. This is especially true when you want to go deeper and make a compelling photo essay. Day in the life photo essays are a popular choice, since often, these can be performed with friends and family, whom you already should know well.
3. Plan your photoshoot
Depending on what you’re photographing, this step can be very different from one project to the next. For a fine art project, you might need to find a location, props, models, a shot list, etc., while a documentary photo essay is about planning the best time to do the photos, what gear to bring with you, finding a local guide, etc.
Every photo essay will need different planning, so before taking pictures, put in the required time to get things right.
4. Experiment
It’s one thing to plan your photo shoot and having a shot list that you have to get, or else the photo essay won’t be complete. It’s another thing to miss out on some amazing photo opportunities that you couldn’t foresee.
So, be prepared but also stay open-minded and experiment with different settings, different perspectives, etc.
5. Make a final selection
Editing your work can be one of the hardest parts of doing a photo essay. Sometimes we can be overly critical, and others, we get attached to bad photos because we put a lot of effort into them or we had a great time doing them.
Try to be as objective as possible, don’t be afraid to ask for opinions and make various revisions before settling down on a final cut.
7 Photo Essay Topics, Ideas & Examples

Credit: Michelle Leman
- Architectural photo essay
Using architecture as your main subject, there are tons of photo essay ideas that you can do. For some inspiration, you can check out the work of Francisco Marin – who was trained as an architect and then turned to photography to “explore a different way to perceive things”.
You can also lookup Luisa Lambri. Amongst her series, you’ll find many photo essay examples in which architecture is the subject she uses to explore the relationship between photography and space.
- Process and transformation photo essay
This is one of the best photo essay topics for beginners because the story tells itself. Pick something that has a beginning and an end, for example, pregnancy, the metamorphosis of a butterfly, the life-cycle of a plant, etc.
Keep in mind that these topics are linear and give you an easy way into the narrative flow – however, it might be difficult to find an interesting perspective and a unique point of view.
- A day in the life of ‘X’ photo essay
There are tons of interesting photo essay ideas in this category – you can follow around a celebrity, a worker, your child, etc. You don’t even have to do it about a human subject – think about doing a photo essay about a day in the life of a racing horse, for example – find something that’s interesting for you.
- Time passing by photo essay
It can be a natural site or a landmark photo essay – whatever is close to you will work best as you’ll need to come back multiple times to capture time passing by. For example, how this place changes throughout the seasons or maybe even over the years.
A fun option if you live with family is to document a birthday party each year, seeing how the subject changes over time. This can be combined with a transformation essay or sorts, documenting the changes in interpersonal relationships over time.
- Travel photo essay
Do you want to make the jump from tourist snapshots into a travel photo essay? Research the place you’re going to be travelling to. Then, choose a topic.
If you’re having trouble with how to do this, check out any travel magazine – National Geographic, for example. They won’t do a generic article about Texas – they do an article about the beach life on the Texas Gulf Coast and another one about the diverse flavors of Texas.
The more specific you get, the deeper you can go with the story.
- Socio-political issues photo essay
This is one of the most popular photo essay examples – it falls under the category of photojournalism or documental photography. They are usually thematic, although it’s also possible to do a narrative one.
Depending on your topic of interest, you can choose topics that involve nature – for example, document the effects of global warming. Another idea is to photograph protests or make an education photo essay.
It doesn’t have to be a big global issue; you can choose something specific to your community – are there too many stray dogs? Make a photo essay about a local animal shelter. The topics are endless.
- Behind the scenes photo essay
A behind-the-scenes always make for a good photo story – people are curious to know what happens and how everything comes together before a show.
Depending on your own interests, this can be a photo essay about a fashion show, a theatre play, a concert, and so on. You’ll probably need to get some permissions, though, not only to shoot but also to showcase or publish those images.
4 Best Photo Essays in Recent times
Now that you know all the techniques about it, it might be helpful to look at some photo essay examples to see how you can put the concept into practice. Here are some famous photo essays from recent times to give you some inspiration.
Habibi by Antonio Faccilongo
This photo essay wan the World Press Photo Story of the Year in 2021. Faccilongo explores a very big conflict from a very specific and intimate point of view – how the Israeli-Palestinian war affects the families.
He chose to use a square format because it allows him to give order to things and eliminate unnecessary elements in his pictures.
With this long-term photo essay, he wanted to highlight the sense of absence and melancholy women and families feel towards their husbands away at war.
The project then became a book edited by Sarah Leen and the graphics of Ramon Pez.

Picture This: New Orleans by Mary Ellen Mark
The last assignment before her passing, Mary Ellen Mark travelled to New Orleans to register the city after a decade after Hurricane Katrina.
The images of the project “bring to life the rebirth and resilience of the people at the heart of this tale”, – says CNNMoney, commissioner of the work.
Each survivor of the hurricane has a story, and Mary Ellen Mark was there to record it. Some of them have heartbreaking stories about everything they had to leave behind.
Others have a story of hope – like Sam and Ben, two eight-year-olds born from frozen embryos kept in a hospital that lost power supply during the hurricane, yet they managed to survive.

Selfie by Cindy Sherman
Cindy Sherman is an American photographer whose work is mainly done through self-portraits. With them, she explores the concept of identity, gender stereotypes, as well as visual and cultural codes.
One of her latest photo essays was a collaboration with W Magazine entitled Selfie. In it, the author explores the concept of planned candid photos (‘plandid’).
The work was made for Instagram, as the platform is well known for the conflict between the ‘real self’ and the one people present online. Sherman started using Facetune, Perfect365 and YouCam to alter her appearance on selfies – in Photoshop, you can modify everything, but these apps were designed specifically to “make things prettier”- she says, and that’s what she wants to explore in this photo essay.
Tokyo Compression by Michael Wolf
Michael Wolf has an interest in the broad-gauge topic Life in Cities. From there, many photo essays have been derived – amongst them – Tokyo Compression .
He was horrified by the way people in Tokyo are forced to move to the suburbs because of the high prices of the city. Therefore, they are required to make long commutes facing 1,5 hours of train to start their 8+ hour workday followed by another 1,5 hours to get back home.
To portray this way of life, he photographed the people inside the train pressed against the windows looking exhausted, angry or simply absent due to this way of life.
You can visit his website to see other photo essays that revolve around the topic of life in megacities.
Final Words
It’s not easy to make photo essays, so don’t expect to be great at it right from your first project.
Start off small by choosing a specific subject that’s interesting to you – that will come from an honest place, and it will be a great practice for some bigger projects along the line.
Whether you like to shoot still life or you’re a travel photographer, I hope these photo essay tips and photo essay examples can help you get started and grow in your photography.
Let us know which topics you are working on right now – we’ll love to hear from you!

Check out these 8 essential tools to help you succeed as a professional photographer.
Includes limited-time discounts.
You'll Also Like These:

Ana Mireles is a Mexican researcher that specializes in photography and communications for the arts and culture sector.
Penelope G. To Ana Mireles Such a well written and helpful article for an writer who wants to inclue photo essay in her memoir. Thank you. I will get to work on this new skill. Penelope G.
Herman Krieger Photo essays in black and white
Leave a Comment Cancel Reply
👋 WELCOME TO SHOTKIT!

🔥 Popular NOW:

Unlock the EXACT blueprint to capture breathtaking iPhone photos!
Shotkit may earn a commission on affiliate links. Learn more.
18 Immersive Photo Essay Examples & Tips
By Tata Rossi 13 days ago, Professional photography

A photo essay tells a story or evokes emotion through a series of photographs. The essays allow you to be creative and fully explore an idea. Such essays exist in a variety of forms – from photos only to images with brief comments or written essays accompanied by shots. Choose a photo essay example that you can easily do based on your professional level and the equipment you use.
1. Protests
- View the “Resistance” photo essay by David Moore .
A great idea for photo essays for students is to shoot the protest to show its power. You can capture people with signs and banners to demonstrate what they are standing for. Besides, you can learn how to capture moving subjects. Use the best example of photo essay and don’t forget about angles, composition, and framing.
To create a photo essay , go up to the front and photograph the leader of the protesters walking forward. After that, go back to the end of the group to take pictures of families joining the protest. As a result, you will gain experience shooting big groups of people in motion.
2. Transformation
- View the “A Self-Portrait Every Day” photo essay by Noah Kalina .
This idea is all about capturing the way a person changes. You may take photos of a pregnant woman and then capture the same model with a child. By documenting the development of the child for several years, you can tell a great story in the form of a photo essay.
However, you can also create a photo essay about the transformation of different objects. For instance, you can create a time-lapse series to capture the history of a renovated building. While you will have to take a lot of similar photos to bring this idea to life, it will allow you to achieve an impressive result.
3. Local Event
- View the “Monday Marathon” photo essay by Quinn G. Perini .
Whether you are a resident of a large city or a small town, you can find an opportunity to visit a local event, like a marathon or a festival. This is a nice chance to follow modern photography trends and bring photo essay ideas to life.
You can capture the before-and-after stages of the event. Arrive earlier and take pictures of the preparation activities, then shoot the actual event starting with the official beginning.
Keep photographing even when the event is over and capture the cleaning up and disassembling processes.
4. Photowalk
- View the “Empty Campus” photo essay by Elise Trissel .
Explore the location where you live and find interesting objects to capture in the vicinity. Using the most interesting photo essay examples, you can decide how to make the best decisions. Don’t hurry and try to discover which angles you can use to capture the unique atmosphere of each place.
If you live in the city, you may capture architectural details, wide shots of busy streets, or just take photos of passersby and street signs. Think about the details that make every location unique. For instance, you can try capturing reflections to see how they allow you to see the city from an unusual angle. You can find reflections everywhere, so be sure to pay attention to mirrored buildings, puddles, and fountains.
5. Place Over Time
- View the “At Home in the Ozarks” photo essay by Kylee Cole .
If you want to document changes and show how the streets, buildings, and parks in your city change over time, select your favorite locations and start to visit them regularly to capture the way they look during different seasons.
- View the “Last Moments” photo essay by Ross Taylor .
You don’t necessarily have to focus on profound photo essay topics to evoke emotions. Capturing pets enjoying their worry-free and untroubled life seems like an easy but interesting activity.
Choose any animal – from a domestic bird to a dog, cat, or horse. For more emotional images, use such pet photography ideas when your pet is still a baby and recreate these shots when it is older or is in its final days.
7. Street Style
- View the Tribal Street Photography photo essay by Hans Eijkelboom .
People often express themselves with the help of clothes. The way passers-by on the streets are dressed may reflect the clothing style of a whole society. That’s why you can travel around the world and capture people’s outfits in various areas. When taking portrait photos in the streets, you can also include some of the surroundings to put them in the context.
You can ask people in the streets to pose for you or try to capture them in movement. Select a suitable location for taking photos and create a photo essay to document what kinds of people one can meet in this location. When doing urban photography , you should ask people for permission before taking photos of them. You can ask their contacts and send them your photos later.
8. Abandoned Building
- View the “Lost Collective” photo essay by Bret Pattman .
Old buildings are excellent architecture photography essay topics for students since you can capture a large number of elements. They allow you to imagine what a particular street looked like in the past. You may use a photo essay example for students as references.
Get approval before going in, but mind that such places are far from being totally safe. Bring various lenses: the macro lenses – for details and the wide-angle one – when you want to include many elements in one shot.
9. Alternative Lifestyles
- View the “Last Nomad Hippies” photo essay by Roberto Palomo .
Some people decide to lead a lifestyle that differs from the one generally accepted by society. Explore different areas and look for people with an unusual way of living. You can capture candid photos of regular people or take pictures of a person with an unusual hobby.
Take pictures of those, who reside in extraordinary conditions, representatives of various subcultures, or the LBGTQ community. These photo essay topics show other people that it is okay to go out of their comfort zone and run against the wind.
10. Social Issues
- View the “Juveniles in Prison” photo essay by Isadora Kosofsky .
The best photo essay examples for students are related to social issues, like unemployment, domestic violence, gender discrimination, and more. Address the topic carefully and look for a proper perspective.
Your shots may draw the people’s attention to a truly burning and relevant matter and have a stronger effect than any text.
11. Behind the Scenes
- View the “Follow Me” photo essay by Marius Masalar .
If you are going to visit an event, get ready to take some behind-the-scenes photos. For instance, you can document the preparations for a festival. Capture the work of the lead event planner and other professionals to tell the story of the festival from an unusual angle.
Alternatively, you can capture the events happening backstage during a drama production. Take pictures of actors and actresses when they are getting ready for the performance. Try capturing the emotions of the main lead and show how stage workers make final preparations. You can also document the work of designers and makeup professionals.
12. Landmarks
- View the “Volte-Face” photo essay by Oliver Curtis .
The pictures of landmarks are typically taken from a certain spot. One of the best photo essay ideas is to try shooting sights from various angles. You will also have an opportunity to improve your composition and your framing skills.
If you take a look at any pictorial essay example, you will see that the variety of perspectives is endless: through the streets, in the morning, afternoon, and evening, with a drone or including reflections.
• View the “Family” photo essay by Olivia Moore .
You can capture the way family members interact with each other and demonstrate the strong connection they share. In some cases, it makes sense to focus on capturing candid photos when doing family photography .
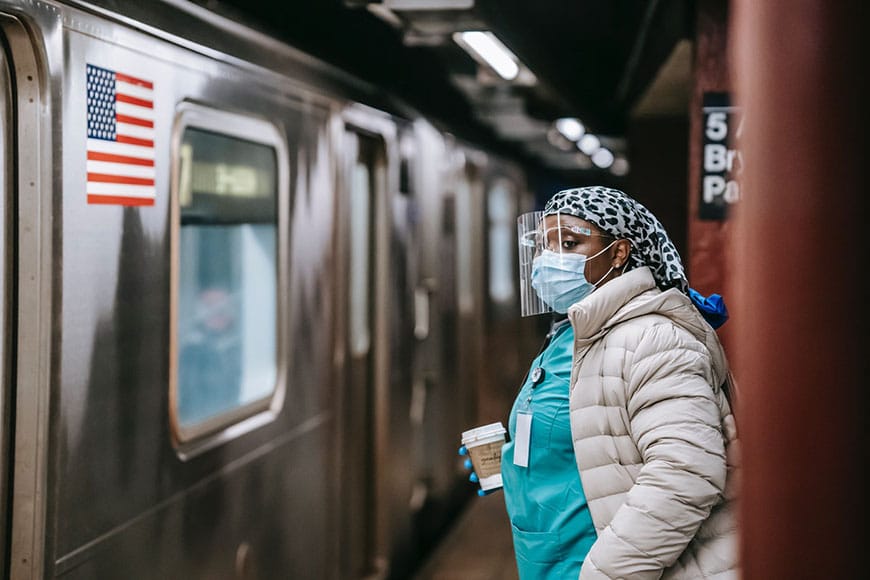
However, you may also opt for a different approach and focus on more difficult social topics. For instance, if you want to examine the issue of immigration, you can take pictures of a family from another country. In addition, you may show how families cope with other social issues, including poverty or unequal access to healthcare.
14. A Day in the Life
- View the “A Day in the Life of Carlos Gaytan” photo essay by Sandy Noto .
One of the best photo essays concepts is related to a day in a person’s life. The main character can be any person – a relative, family member, teacher, writer, or policeman.
People are generally interested in finding out facts about the lives and daily routines of others. The life of every human is incredible, especially if you learn it in more detail. This idea is especially suitable for taking documentary photos. For instance, you can select any photo essay sample you like and then capture a portrait of a person with the tools they use for their work.
15. Education
- View the “School Day” photo essay by Nancy Borowick .
You can also take great photos in the classroom capturing the interactions of teachers and their students. Avoid distracting them, as it will be easier for you to take natural shots. Using a variety of settings, you can make your photo essay more engaging. For instance, you may visit chemistry labs, capture teachers during a break, and take photos in other locations.
- View the “Meals From the Motherland” photo essay by James Tran .
You can also focus on specific meals to create a professional photo essay about food. To make it more attention-grabbing, try using different food photography ideas .
For instance, you can take photos of popular meals, capture the meals made by a specific person, or document cooking traditions in different countries. When taking photos in a restaurant, pay attention to the surroundings as well to capture the unique atmosphere of a place.
17. Capture the Neighbors
- View the “Our Neighbors” photo essay by Jeanne Martin .
Regardless of the place where you live, you have to establish good relationships with your neighbors. People who live nearby can also be great models for professionals who specialize in portrait photography. To implement this idea, make sure to capture people at home or in front of their houses to include some of the surroundings in your photo essay.
You will discover many interesting facts about people who live nearby. Shooting a photo essay will allow you to learn them better and establish a strong connection with them. This way, you can create a sense of community and discover what holds its members together.
18. Climate Change
- View the “Effects of Climate Change” photo essay by Sanya Gupta .
It is possible to a variety of photo story ideas bring to life examining the impact of climate change. Travel to places most affected by climate change, for instance, glaciers or famous resorts.
Capture the way the continuous drought has influenced the environment, animals, and the inhabitants. As an alternative, take pictures of environmentalist protests or inexhaustible energy sources.
Photo Essay Tips for Students
Explore your topic . An in-depth exploration of the main topic of your photo essay will help you find the best ideas for conveying your message. You can also find some sources for inspiration and useful materials. This stage allows you to learn more about your subject and select the best way of organizing your photo essay.
Create a storyboard . Using a storyboard, you can better understand what shots you need to take and what order can help you to tell a story in the best way. It will also allow you to create the right mood.
Take as many pictures as you can . To create a compelling story, make sure to take a lot of photos. It will allow you to choose the best pictures for your photo essay. Besides, you will always have backup photos if some of your pictures get damaged.
Experiment with different techniques . By changing the angle and using a variety of editing techniques, you can transform the way your photos look. When taking photos, try using different angles to capture the subject in the best way. You can also try changing the distance from the model, using black-and-white film, or employing a range of developing methods.
Add text . While some photographers create photo essays without text, it can still help you bring your point across more clearly and make it easier for a viewer to understand what you imply. By providing extra information, such as some facts, you can change the perception of your image. If you don’t know how to write descriptions, you can hire a professional writer to perform this task.
Enhance your photos . To edit your pictures, make sure to use professional photo editing software like Adobe Lightroom or Photoshop. Using the available tools, you can improve and change your photos. They allow you to fix issues with lighting, adjust WB, make colors richer, crop your pics to improve the composition, and perform other tasks. In case you need to edit your photos in a consistent style, you can use Photoshop Actions or Lightroom Presets.
In some cases, your pictures may require more advanced editing. If you see that your skills are insufficient or if you don’t have enough time, you can outsource the task of enhancing your photos to the FixThePhoto team. They will professionally enhance your pictures for a budget price. Their prices start from $1.50 per photo.
Want to Get a Professionally-Retouched Photo Essay?
The editing team at FixThePhoto specializes in delivering personalized and artistically enhanced photo essay, making sure to meet all your preferences. They can assist with different tasks, whether it's selecting the best shots or doing detailed retouching work.
Bonus Tools
To streamline your workflow and quickly edit your essay photos like a pro, make sure to apply these actions to your photos. Even if you use a photo essay example when taking pictures, you can utilize these actions to give your images a professional feel, tweak colors, edit lighting, and improve the overall look of your pics.
In this bundle, you will find actions created by experienced professionals who used recent photo enhancement trends to create convenient editing tools. Here, you will find a collection of brushes, patterns, overlays, and other effects for editing your photos in a realistic way.
- Photo essay examples
- Photo essay tips
- Bonus tools

- Video Editing Services
- Virtual Staging Services
- Outsource Photo Editing
- Retouching Tips
- Photo Editing Freebies
- Free Raw Images for Retouching
- Free Photoshop Actions
- Free Lightroom Presets
- Affiliate Program
- Privacy Policy
- Cookie Policy

Student Sign In
How to Create a Photo Essay in 9 Steps (with Examples)
Photo Editing , Tutorials

This post contains affiliate links. If you use these links to buy something, we may earn a commission at no additional cost to you. We only recommend products we fully support or use ourselves. Our full disclaimer
What is a photo essay?
- Photo essays vs photo stories
- How photo essays help you
- 9 Steps to create photo essays
How to share your photo essays
Read Time: 11 minutes
Gather up a handful of images that seem to go together, and voila! It’s a photo essay, right? Well… no. Though, this is a common misconception.
In reality, a photo essay is much more thoughtful and structured than that. When you take the time to craft one, you’re using skills from all facets of our craft – from composition to curation.
In this guide, you’ll learn what makes a photo essay an amazing project that stretches your skills. You'll also learn exactly how to make one step by step.
- Photo essay vs photo story
A photo essay is a collection of images based around a theme, a topic, a creative approach, or an exploration of an idea. Photo essays balance visual variety with a cohesive style and concept.
What's the difference between a photo essay and a photo story?
The terms photo essay and photo story are often used interchangeably. Even the dictionary definition of “photo essay” includes using images to convey either a theme or a story.
But in my experience, a photo essay and a photo story are two different things. As you delve into the field of visual storytelling, distinguishing between the two helps you to take a purposeful approach to what you’re making .
The differences ultimately lie in the distinctions between theme, topic and story.
Themes are big-picture concepts. Example: Wildness
Topics are more specific than themes, but still overarching. Example : Wild bears of Yellowstone National Park
Stories are specific instances or experiences that happen within, or provide an example for, a topic or theme. Example: A certain wild bear became habituated to tourists and was relocated to maintain its wildness
Unlike a theme or topic, a story has particular elements that make it a story. They include leading characters, a setting, a narrative arc, conflict, and (usually) resolution.
With that in mind, we can distingush between a photo essay and a photo story.
Themes and Topics vs Stories
A photo essay revolves around a topic, theme, idea, or concept. It visually explores a big-picture something .
This allows a good deal of artistic leeway where a photographer can express their vision, philosophies, opinions, or artistic expression as they create their images.
A photo story is a portfolio of images that illustrate – you guessed it – a story.
Because of this, there are distinct types of images that a photo story uses that add to the understanding, insight, clarity and meaning to the story for viewers. While they can certainly be artistically crafted and visually stunning, photo stories document something happening, and rely on visual variety for capturing the full experience.
A photo essay doesn’t need to have the same level of structured variety that a photo story requires. It can have images that overlap or are similar, as they each explore various aspects of a theme.

Photo essays can be about any topic. If you live in a city, consider using your nature photography to make an essay about the wildlife that lives in your neighborhood .
The role of text with photos
A photo story typically runs alongside text that narrates the story. We're a visual species, and the images help us feel like we are there, experiencing what's happening. So, the images add significant power to the text, but they're often a partner to it.
This isn’t always the case, of course. Sometimes photo stories don’t need or use text. It’s like reading a graphic novel that doesn’t use text. Moving through the different images that build on each other ultimately unveils the narrative.
Photo essays don’t need to rely on text to illuminate the images' theme or topic. The photographer may use captions (or even a text essay), or they may let the images speak for themselves.
Definitions are helpful guidelines (not strict rules)
Some people categorize photo essays as either narrative or thematic. That's essentially just calling photo stories “narrative photo essays” and photo essays “thematic photo essays.”
But, a story is a defined thing, and any writer/editor will tell you themes and topics are not the same as stories. And we use the word “story” in our daily lives as it’s defined. So, it makes far more sense to name the difference between a photo essay and a photo story, and bask in the same clarity writers enjoy .
Photo stories illustrate a particular experience, event, narrative, something that happened or is happening.
Photo essays explore an idea, concept, topic, theme, creative approach, big-picture something .
Both photo essays and photo stories are immensely powerful visual tools. And yes, the differences between them can certainly be blurred, as is always the case with art.
Simply use this distinction as a general guideline, providing extra clarity around what you’re making and why you're making it.
To dig into specific types of images used to create powerful photo stories, check out this training: 6 Must-Have Shots for a Photo Story.
Meanwhile, let’s dig deeper into photo essays.

Photo essays are a chance to try new styles or techniques that stretch your skills and creativity. This image was part of an essay exploring simplicity and shape, and helped me learn new skills in black and white post-processing.
How photo essays improve your photography
Creating photo essays is an amazing antidote if you’ve ever felt a lack of direction or purpose in your photography. Photo essays help build your photographic skills in at least 3 important ways.
1. You become more strategic in creating a body of work
It's easy to get stuck in a rut of photographing whatever pops up in front of you. And when you do, you end up with a collection of stand-alone shots.
These singles may work fine as a print, a quick Instagram post, or an addition to your gallery of shots on your website. But amassing a bunch of one-off shots limits your opportunities as a photographer for everything from exhibits to getting your work published.
Building photo essays pushes you to think strategically about what you photograph, why, and how. You're working toward a particular deliverable – a cohesive visual essay – with the images you create.
This elevates your skills in crafting your photo essay, and in how you curate the rest of your work, from galleries on your website to selecting images to sell as prints .
2. You become more purposeful in your composition skills
Composition is so much more than just following the rule of thirds, golden spirals, or thinking about the angle of light in a shot.
Composition is also about thinking ahead in what you’re trying to accomplish with a photograph – from what you’re saying through it to its emotional impact on a viewer – and where it fits within a larger body of work.
Photo essays push you to think critically about each shot – from coming up with fresh compositions for familiar subjects, to devising surprising compositions to fit within a collection, to creating compositions that expand on what’s already in a photo essay.
You’re pushed beyond creating a single pleasing frame, which leads you to shoot more thoughtfully and proactively than ever.
(Here’s a podcast episode on switching from reactive shooting to proactive shooting.)
3. You develop strong editing and curation skills
Selecting which images stay, and which get left behind is one of the hardest jobs on a photographer’s to-do list. Mostly, it’s because of emotional attachment.
You might think it’s an amazing shot because you know the effort that went into capturing it. Or perhaps when you look at it, you get a twinge of the joy or exhilaration you felt the moment you captured it. There’s also the second-guessing that goes into which of two similar images is the best – which will people like more? So you’re tempted to just show both.
Ultimately, great photographers appear all the more skilled because they only show their best work. That in and of itself is a skill they’ve developed through years of ruthlessly editing their own work.
Because the most powerful photo essays only show a handful of extraordinary images, you’re bound to develop the very same critical skill (and look all the more talented because of it).
Photo essays are also a great stepping stone to creating photo stories. If you’re interested in moving beyond stand-alone shots and building stories, shooting photo essays will get your creative brain limbered up and ready for the adventure of photo stories.

A photo essay exploring the natural history of a favorite species is an exciting opportunity for an in-depth study. For me, that was a photo essay on emotive images of the American dipper (Cinclus mexicanus) as it hunts in streams.
9 Simple steps to create your photo essays
1. clarify your theme.
Choose a theme, topic, or concept you want to explore. Spend some time getting crystal clear on what you want to focus on. It helps to write out a few sentences, or even a few paragraphs noting:
- What you want the essay to be about
- What kinds of images you want to create as part of it
- How you’ll photograph the images
- The style, techniques, or gear you might use to create your images
- What “success” looks like when you’re done with your photo essay
You don’t have to stick to what you write down, of course. It can change during the image creation process. But fleshing your idea out on paper goes a long way in clarifying your photo essay theme and how you’ll go about creating it.
2. Create your images
Grab your camera and head outside!
As you’re photographing your essay, allow yourself some freedom to experiment. Try unusual compositions or techniques that are new to you.
Stretch your style a little, or “try on” the style of other photographers you admire who have photographed similar subjects.
Photo essays are wonderful opportunities to push yourself outside of your comfort zone and grow as a photographer.
Remember that a photo essay is a visually cohesive collection of images that make sense together. So, while you might stretch yourself into new terrain as you shoot, try to keep that approach, style, or strategy consistent.
Don’t be afraid to create lots of images. It’s great to have lots to choose from in the editing process, which comes up next.
3. Pull together your wide edit
Once you’ve created your images, pull together all the images that might make the cut. This could be as many as 40-60 images. Include anything you want to consider for the final essay in the wide edit.
From here, start weeding out images that:
- are weaker in composition or subject matter
- stand out like a sore thumb from the rest of the collection
- Are similar to other stronger images in the collection
It's helpful to review the images at thumbnail size. You make more instinctive decisions and can more easily see the body of work as a whole. If an image is strong even at thumbnail size to stand out from similar frames while also partnering well with other images in the collection, that's a good sign it's strong enough for the essay.
4. Post-process your images for a cohesive look
Now it’s time to post-process the images. Use whatever editing software you’re comfortable with to polish your images.
Again, a photo essay has a cohesive visual look. If you use presets, filters, or other tools, use them across all the images.
5. Finalize your selection
It’s time to make the tough decisions. Select only the strongest for your photo essay from your group of images.
Each image should be strong enough to stand on its own and make sense as part of the whole group.
Many photo essays range from 8-12 images. But of course, it varies based on the essay. The number of images you have in your final photo essay is up to you.
Remember, less is more. A photo essay is most powerful when each image deserves to be included.
6. Put your images in a purposeful order
Create a visual flow with your images. Decide which image is first, and build from there. Use compositions, colors, and subject matter to decide which image goes next, then next, then next in the order.
Think of it like music: notes are arranged in a way that builds energy, or slows it down, surprise listeners with a new refrain, or drop into a familiar chorus. How the notes are ordered creates emotional arcs for listeners.
How you order your images is similar.
Think of the experience a viewer will have as they look at one image, then the next, and the next. Order your images so they create the experience you want your audience to have.
7. Get feedback
The best photographers make space for feedback, even when it’s tough to hear. Your work benefits from not just hearing feedback, but listening to it and applying what you learn from it.
Show your photo essay to people who have different sensibilities or tastes. Friends, family members, fellow photographers – anyone you trust to give you honest feedback.
Watch their reactions and hear what they say about what they’re seeing. Use their feedback to guide you in the next step.
8. Refine, revise, and finalize
Let your photo essay marinate for a little while. Take a day or two away from it. Then use your freshened eyes and the feedback you received from the previous step to refine your essay.
Swap out any selects you might want to change and reorder the images if needed.
9. Add captions
Even if you don’t plan on displaying captions with your images, captioning your images is a great practice to get into. It gives context, story, and important information to each image. And, more than likely, you will want to use these captions at some point when you share your photo essay, which we dive into later in this article.
Add captions to the image files using Lightroom, Bridge, or other software programs.
Create a document, such as a Google or Word doc, with captions for each image.
In your captions, share a bit about the story behind the image, or the creation process. Add whatever makes sense to share that provides a greater understanding of the image and its purpose.

Photo essays allow you to explore deliberate style choices, such as a focus on shapes, patterns, textures, and lines. Since each photo is part of a larger essay, it encourages you to be bold with choices you might not otherwise make.
5 Examples of amazing nature photo essays
1. “how the water shapes us” from the nature conservancy.

This gorgeous essay, crafted with the work of multiple photographers, explores the people and places within the Mississippi River basin. Through the images, we gain a sense of how the water influences life from the headwater all the way to the Gulf of Mexico. Notice how each photographer is tasked with the same theme, yet approaches it with their own distinct style and vision. It is a wonderful example of the sheer level of visual variety you can have while maintaining a consistent style or theme.
View it here
2. “A Cyclist on the English Landscape” from New York Times’ The World Through A Lens series

This photo essay is a series of self-portraits by travel photographer Roff Smith while “stuck” at home during the pandemic. As he peddled the roads making portraits, the project evolved into a “celebration of traveling at home”. It’s a great example of how visually consistent you can be inside a theme while making each image completely unique.
3. “Vermont, Dressed In Snow” from New York Times’ The World Through A Lens series

This essay by aerial photographer Caleb Kenna uses a very common photo essay theme: snow. Because all images are aerial photographs, there’s a consistency to them. Yet, the compositions are utterly unique from one another. It’s a great example of keeping viewers surprised as they move from one image to the next while still maintaining a clear focus on the theme.
4. “Starling-Studded Skies” from bioGraphic Magazine

This beautiful essay is by Kathryn Cooper, a physicist trained in bioinformatics, and a talented photographer. She used a 19th century photographic technique, chronophotography, to create images that give us a look at the art and science of starling murmurations. She states: “I’m interested in the transient moments when chaos briefly changes to order, and thousands of individual bodies appear to move as one.” This essay is a great example of deep exploration of a concept using a specific photographic technique.
View it here (Note: must be viewed on desktop)
5. “These Scrappy Photos Capture the Action-Packed World Beneath a Bird Feeder” from Audubon Magazine

This photo essay from conservation photographer Carla Rhodes explores the wildlife that takes advantage of the bounty of food waiting under bird feeders . Using remote camera photography , Rhodes gives viewers a unique ground-level perspective and captures moments that make us feel like we’re in conversation with friends in the Hundred Acre Woods. This essay is a great example of how perspective, personality, and chance can all come into play as you explore both an idea and a technique.
25 Ideas for creative photo essays you can make
The possibilities for photo essays are truly endless – from the concepts you explore to the techniques you use and styles you apply.
Choose an idea, hone your unique perspective on it, then start applying the 9 simple steps from above.
- The life of a plant or animal (your favorite species, a species living in your yard, etc)
- The many shapes of a single species (a tree species, a bird species, etc)
- How a place changes over time
- The various moods of a place
- A conservation issue you care about
- Math in nature
- Urban nature
- Seasonal changes
- Your yard as a space for nature
- Shifting climate and its impacts
- Human impacts on environments
- Elements: Water, wind, fire, earth
- Day in the life (of a person, a place, a stream, a tree…)
- Outdoor recreation (birding, kayaking, hiking, naturalist journaling…)
- Wildlife rehabilitation
- Lunar cycles
- Sunlight and shadows
- Your local watershed
- Coexistence

As you zero in on a photo essay theme, consider two things: what most excites you about an idea, and what about it pushes you out of your comfort zone. The heady mix of joy and challenge will ensure you stick with it.
Your photo essay is ready for the world! Decide how you’d like to make an impact with your work. You might use one or several of the options below.
1. Share it on your website
Create a gallery or a scrollytelling page on your website. This is a great way to drive traffic to your website where people can peruse your photo essay and the rest of the photography you have.
Putting it on your website and optimizing your images for SEO helps you build organic traffic and potentially be discovered by a broader audience, including photo editors.
2. Create a scrollytelling web page
If you enjoy the experience of immersive visual experiences, consider making one using your essay. And no, you don’t have to be a whiz at code to make it happen.
Shorthand helps you build web pages with scrollytelling techniques that make a big impression on viewers. Their free plan allows you to publish 3 essays or stories.
3. Create a Medium post
If you don’t have a website and want to keep things simple, a post on Medium is a great option.
Though it’s known for being a platform for bloggers, it’s also possible to add images to a post for a simple scroll.
And, because readers can discover and share posts, it’s a good place for your photos to get the attention of people who might not otherwise come across it.
4. Share it on Instagram
Instagram has changed a lot over the last couple of years, but it’s still a place for photographers to share their work thoughtfully.
There are at least 3 great ways to share your photo essay on the platform.
– Create a single post for each image. Add a caption. Publish one post per day until the full essay is on your feed. Share each post via Instagram Stories to bring more attention and interaction to your photo essay.
– Create a carousel post. You can add up 10 photos to a carousel post, so you may need to create two of them for your full photo essay. Or you might create a series of carousel posts using 3-4 images in each.
– Create a Reel featuring your images as a video. The algorithm heavily favors reels, so turning your photo essay into a video experience can get it out to a larger audience.
I ran a “create a reel” challenge in my membership community. One member created a reel with her still images around a serious conservation issue. It gathered a ton of attention and landed her opportunities to share her message through YouTube and podcast interviews and publishing opportunities. Watch it here.
5. Exhibit it locally
Reach out to local galleries, cafes, pubs, or even the public library to see if they’re interested in hanging your photo essay for display. Many local businesses and organizations happily support the work of local artists.
6. Pitch your photo essay to publications
One of the best ways to reach an audience with your work is to get it published. Find publications that are a great fit for the theme and style of your photo essay, then pitch your essay for consideration. You gain a fantastic opportunity to share your work widely and can earn a paycheck at the same time.
Remember that if you want to get your photo essay published, you may want to hold back from sharing it publicly before you pitch it to publications.
PIN THIS FOR LATER

What’s your hidden storyteller personality as a nature photographer?
Take my FREE quiz to discover your storyteller super-strengths AND get a custom action plan based on your results

Jaymi Heimbuch
Next up….

Portrait vs. Landscape Orientation: The Biggest Differences to Know
Discover the impact of portrait & landscape orientation on your photography. Learn the key differences and how to choose the right orientation for your subject.

7 Best Ways to Sell Nature Photos Online (2024)
Photography Business , Tutorials
Discover the top 7 strategies for selling your stunning nature photos online. Learn how to sell your photos and reach a wider audience.

Camera Lens Hoods: When & How to Use Them for Better Photos
Photo Accessories , Gear , How to Use Photo Gear
Get better photos with camera lens hoods. Learn what it is, when to use it (or ditch it), and why it’s essential for nature photographers.
WHAT DO YOU WANT TO READ TODAY?
POPULAR SEARCHES: Best Cameras | Location Guide | Best Lenses | Wildlife
Take The Quiz
Get super clear on exactly what to focus on right now to grow your photography skills fast..
Take the FREE Full Frame Ecosystem Assessment ™ to crack the code on your roadblocks so you can hop into the creativity express lane with personalized action steps!
Ready to level up your awesome?
Start your next learning adventure.
")
52 Week Creativity Kit
A year of weekly bite-sized nature photography concepts and challenges that strengthen your camera skills and provide endless inspiration.

6 Must-Have Shots for a Photo Story
New to photo stories? Start by learning how to create a powerful photo story with the 6 essential images that all photo editors want to publish.

Photo Stories for Nature
Master how to photograph impressive photo stories and effectively share them so they make an impact.

Conservation Filmmaking 101
Master how to craft powerfully moving films that create conservation impact.
Get The Most Popular Free Resources
Make leaps forward in your visual storytelling download three of our most valuable free resources for photographers..

Ready to take better photos?
Get all the good things delivered.
Photography how-to guides, expert interviews, behind-the-scenes insights & more all delivered to your inbox weekly.
Privacy Overview

- Student Successes
- My Learning
10 Vacation Photography Tips for Capturing Better Memories

You can also select your interests for free access to our premium training:
A great trip abroad with your loved ones is an amazing chance for unique vacation photography.

If you buy a product through one of our referral links we will earn a commission (without costing you anything). Prices last updated on .
As an Amazon Associate, I earn from qualifying purchases. Product prices and availability are accurate as of the date/time indicated and are subject to change. Any price and availability information displayed on Amazon at the time of purchase will apply to the purchase of this product.
The Top 10 Tips For Vacation Photography
Continue reading to learn how to get the best photographs from your vacation.
10. Find the Best Spots of Your Destination
Even if you’re not planning to do any photography, learning about the location you’re traveling to will enhance your experience.
Aim for a plan that keeps you on track with places to visit , but is also loose enough to allow you to go off the beaten path a bit.
How are you going to find out about the photos you could be taking?
- Local knowledge —Is there a way you can reach out to local photographers before visiting a place? It’s a good idea if you can. Joining Facebook groups for the destination you’re visiting is one possible way of gaining a contact .
- Friends —Do you have a friend who has already visited the place? They may be able to give you some tips.
- Photography websites —If you’re looking to be independent on your trip, you can still get an idea of the photos taken at your destination. Websites like 500px, Flickr , or Instagram allow you to search photos by location.
- Tourism websites —Tourism websites will show you where the famous places to visit are. You can often use this to plan some of the photos you’re going to take.

9. Don’t Overpack
The right selection of equipment and a good travel bag to carry it are vital for a photography trip . Like your trip, your bag should allow a split between photography and other things.
You’ll want enough additional space in your bag to carry items like water and sun cream. Which photography equipment should also go in your bag then?
- Camera body —A decent camera body. The trend is towards the smaller and lighter weight mirrorless cameras . As size and weight matters when you travel, the mirrorless camera is a good option.
- Wide-angle lens —This is vital for so many photos you’ll take during your holiday. Photos of your family in front of famous locations? Big epic landscape photos? Interior architecture photography with impact? These all require a good quality wide angle lens.
- Prime lens for portraits – It’s great to have a lens with a large aperture. You can use it for portraits. Ideal for low light and street photography , the optimum focal length will be 50mm .
- Tripod —You’ll need this to get top level landscape photos, and in the evening or indoors. Tripods will also allow you to take group photos with yourself in the frame. Today, many manufacturers make lightweight and compact tripods that are perfect for traveling.
- Strobe —A few modifiers to go with it like the Rogue Flashbender 2 , and ideally radio triggers and receivers for remote flash. You can really get amazing portrait results. And your food photography will be massively enhanced.

8. Wake Up Early to Avoid the Crowds
There are a lot of good reasons for waking up early for holiday photography . This is your holiday as well. So get the balance right so you don’t need a holiday after your holiday!
Here are the reasons you’ll be up at the crack of dawn for the best holiday photography.
- Sunrise —There are some location that are best photographed at sunrise. You’ll likely need to wake up at least an hour before sunrise. And it’s best to plan where you’ll photograph from the afternoon before.
- Local life —Even though you’ll be a tourist yourself, you’ll want to avoid photographing other tourists in your holiday travel photography. To do this, waking up early while other tourists are still sleeping is a great idea. At this time of day, you’ll get a real idea of how local life is lived, which is great for street photography !
- Me time —Perhaps the most compelling reason to get up early is that it guarantees you some “me time.” You’ll be able to join your family for the rest of the day, having already taken some amazing photos while they were still sleeping.

7. How to Make the Most of Available Light on a Holiday
A lot of holiday photography means you’ll be photographing in imperfect light. That’s because you’ll be following the schedule of your family, not the schedule of a photographer.
There may be times where you just happen to be at the right place when the light is perfect, but it’s unlikely to be planned.
How often do you think you’ll get to photograph the evening blue hour , when that time overlaps with dinner time?
Unless you’re traveling alone or with another photographer, you’ll have to compromise.
- Hard light —Most photographers avoid photographing during the middle of the day, mainly to avoid this very strong hard light . Is it possible to work with this type of light? Of course it is, but you may need to adapt your subject matter. You can use this light for strong, high-contrast and low-key street portraits. Even landscapes can work. CPL and GND filters will help here.
- Photographing into the light —Photographing into the light can be tough. Learn techniques like digital blending, or perhaps try photographing for silhouettes .
- Low light —Blue hour is the photographer’s choice of low light. When on holiday, you might not get to photograph in this light. Learning to photograph when it’s dark will help. For interior and portrait photos , learn to use a flash and to bounce this off walls or ceilings. Photographing landscapes may prove more difficult. A good tripod and the acceptance of more contrast in your photo will help you get good results.

6. Ideas to Help You Avoid Cliche Holiday Photos
Holiday photos can result in quite a few cliched scenes. The most obvious one of all is standing in front of main tourist attractions, a forced smile, and essentially just recording the fact that you where there.
As someone who has probably brought multiple lenses, and a nice camera body with them, you’ll want something more diverse than this.
That doesn’t mean to avoid portraits in front of famous places, but be more creative. Don’t be afraid of trying techniques others have used either. Use your own interpretation of that technique.
- Jumping photos —These can be a lot of fun, and you’ll get more natural expressions.
- Forced perspective —Pushing back the leaning tower of Pisa? Holding the top of the Taj Mahal? Try your own forced perspective with a long focal length.
- Crystal ball —Turn the world upside down and photograph a scene with a different lens objective.
- Alternative poses —There are plenty of ways to pose beyond the standard line-up. How will you set up a group of people? Will it be the Beatles walk?
- Silhouettes —This can be an interesting challenge. Just ensure you photograph from a low angle to ensure the full silhouette of the person or object. You will, of course, be photographing into the light.

5. Balance Out Portraits and Landscapes
The majority of people will gravitate to either portrait photography or landscape photography . Look at the holiday photos you’ve taken after day one. Is there a dominant genre in there?
If that is the case, make a conscious effort to get a more balanced set of photos. Even if you normally concentrate on one area of vacation photography, challenge yourself to get the whole story. Getting the whole story means a mix of portrait and landscape photos.

4. Include Your Family
Taking photos of your family , or fellow holiday makers, should be the main focus of your time. It’s great to have had some me time, and perhaps wake up early in the morning while they’re still sleeping. But questions will be asked if they’re not included!
See how you can get some great photos of them. You’ve already learned some ideas to get creative with these portrait photos.

3. Capture the Local Culture Through Food
The food you eat is a big part of the trip! It’s going to be as big a part of the local culture as the people in local markets, and the grand architectural masterpieces you’ll photograph.
Get some great food holiday photos, and your friends at home will be jealous and hungry when they see them!
Remember to respect the restaurant. Some might not like you taking photos. Be quick as well. No one enjoys waiting to eat while you’re composing your shot.
When it’s possible to get nice photos though, keep the following in mind.
- Natural light —If you can sit next to a window, this type of side light can work nicely for food photography .
- Strobes —Provided you can use a flash in the restaurant , bounce the flash off the ceiling. If you can use off-camera flash and a soft box, then aim the light on top of the food and slightly to the back.
- Angle —The angle you take food photos at can vary. The typical photo is at about a 30 degree angle and includes some background. More overhead angles can also be interesting.
- Background —Keep the background clean by choosing a relatively high aperture . If you’re photographing down onto the food, look for an interesting textured surface.

2. Photograph the Location at Night
One of the main periods of down time you’ll get during a holiday is at night . If you’re on a beach holiday, you may have permanent downtime. But other trips will typically be active during the day. That means that nighttime is a good opportunity to get out and take some photographs.
- Have fun —Look for fun ways to photograph. Do that and you can persuade your family to join your photography!
- Use a tripod —A lot of night photography is long exposure . You’ll need a tripod for this.
- Light painting —A great long exposure technique is light painting . It’s creative, fun, and you can involve your family.
- Use the light —Get out and use ambient light for street photography . Alternatively, experiment with your own light and use a flash.

1. Go Through Your Images Everyday to Self-Critique
It’s tempting to take many photos during your trip. This spray and pray approach isn’t really a useful way of getting the best photos though. And it can slow your improvement as a photographer.
Instead it’s best to review your work on a daily basis. Use a critical eye, and decide which photos really worked. Select the best photos you’ve taken that day.
At the end of the trip, edit your selection by choosing the best of the best. Look to keep this selection to around 20 or 30 images.

Vacation photography can be a lot of fun. This guide will help you prepare for your trip. Once you’re on the trip, it will help you get the balance right between pure travel photography, and time spent photographing with your family.
Now all that’s left to do is book those flights, and then make those memories!
Check out our Next Stop: Travel Photography ebook to make the most out of your travels!
Popular Content

The How and Why of Making a Travel Photo Essay
Instagram, in particular, is full of high-quality travel photography — there's no end to it. But if you want to tell a personal story from your adventuring or pique the interest of a commercial entity with the hope of landing a new photography client, then you need to be able to produce a cohesive set of images.
In this video, travel and adventure photographer, Brian Lackey, explains the how and why of making a travel photo essay. He neatly condenses his tips for how to go about this process into six steps. As for the why; he alludes to it at the start of the video by explaining how taking an epic golden-hour shot of a landscape doesn't really tell the viewer anything about the place other than the fact that there might be some great views there. One could say that it isn't really travel photography, it's just landscape photography.
Most of the time, locations or destinations are more than just their landscapes — it's about people, culture, food, etc. There's nothing wrong with going to locations to explicitly take landscape photos but if you want to tell the story of a place you need to factor in all these different elements. Lackey's six tips are a great guide for getting started and you don't even need to hop on a plane or go on a big road trip. You can practice using your own local area or the next nearest point of interest.
Have you considered creating a series of photos to tell a story instead of shooting single, stand-alone images?

Mike is a landscape and commercial photographer from, Co. Kerry, Ireland. In his photographic work, Mike tries to avoid conveying his sense of existential dread, while at the same time writing about his sense of existential dread. The last time he was in New York he was mugged, and he insists on telling that to every person he meets.

- PRO Courses Guides New Tech Help Pro Expert Videos About wikiHow Pro Upgrade Sign In
- EDIT Edit this Article
- EXPLORE Tech Help Pro About Us Random Article Quizzes Request a New Article Community Dashboard This Or That Game Popular Categories Arts and Entertainment Artwork Books Movies Computers and Electronics Computers Phone Skills Technology Hacks Health Men's Health Mental Health Women's Health Relationships Dating Love Relationship Issues Hobbies and Crafts Crafts Drawing Games Education & Communication Communication Skills Personal Development Studying Personal Care and Style Fashion Hair Care Personal Hygiene Youth Personal Care School Stuff Dating All Categories Arts and Entertainment Finance and Business Home and Garden Relationship Quizzes Cars & Other Vehicles Food and Entertaining Personal Care and Style Sports and Fitness Computers and Electronics Health Pets and Animals Travel Education & Communication Hobbies and Crafts Philosophy and Religion Work World Family Life Holidays and Traditions Relationships Youth
- Browse Articles
- Learn Something New
- Quizzes Hot
- This Or That Game New
- Train Your Brain
- Explore More
- Support wikiHow
- About wikiHow
- Log in / Sign up
- Education and Communications
- College University and Postgraduate
- Academic Writing
How to Make a Photo Essay
Last Updated: September 27, 2023 Fact Checked
This article was co-authored by Heather Gallagher . Heather Gallagher is a Photojournalist & Photographer based in Austin, Texas. She runs her own photography studio named "Heather Gallagher Photography" which was voted Austin's Best Family Photographer and top 3 Birth Photographers in 2017, 2018, and 2019. Heather specializes in family Photojournalism and has over 15 years of experience documenting individuals, families, and businesses all over the world. Her clients include Delta Airlines, Oracle, Texas Monthly, and her work has been featured in The Washington Post and The Austin American Statesman. She is a member of the International Association of Professional Birth Photographers (IAPBP). There are 11 references cited in this article, which can be found at the bottom of the page. This article has been fact-checked, ensuring the accuracy of any cited facts and confirming the authority of its sources. This article has been viewed 287,549 times.
Photo essays are an increasingly popular medium for journalists, bloggers, and advertisers alike. Whether you’re trying to show the emotional impact of a current news story or share your hobby with friends and family, images can capture your topic in a personal, emotional, and interesting way. Creating a photo essay can be as easy as choosing a topic, getting your images, and organizing the essay.
Things You Should Know
- Reflect long and hard on your topic, considering your audience, current events, and whether to go for a thematic or narrative approach.
- Create an outline, including your focus image, establishing shot, clincher, and other image details.
- When you finally take your photos, remember to take more photos than you think you need and don't be afraid to let the project change as you create it.
Finding Your Topic

- Offer a photo essay of your place of business as a training tool.
- Use a photo essay about your business as a sales or social tool by publishing it on your website or social media page.
- Create a how to photo essay to help others learn about your hobby, so they can take it up as well. [4] X Research source

- Thematic subjects are big ideas including things like local gun laws, at-risk youth, or welcoming home soldiers.
- Narrative essays can include a day in the life, how to tutorials, or progression series that show changes over time such as tracking a building project.
- If you have been given a commission or specific publication to work with, you may need to choose a topic that will fit a thematic or narrative approach as outlined by the publication. Make sure you are aware of any publication guidelines in advance.
Organizing Your Shoot

- Consider how difficult it will be to get permission to photograph your subjects. If you already have relationships established, it will be easier. If not, allow for extra time to get permission and/or waivers.
- Schools, daycares, and other places with kids typically have more regulations on who can be photographed and for what purposes. You’ll usually need to get parental approval, in addition to permission from those in charge. [7] X Research source

- Consider doing interviews with people involved prior to the shoot. Ask things like, “What’s the most interesting thing you do during this event?” or “How long have you been involved with this organization?”
- These interviews are also a great opportunity to ask for permission and get waivers.
- If you’re going to visit a job site, charitable event, or other large group activity, ask the person or persons in charge to explain what you’re doing to everyone before you arrive. [8] X Research source

Capturing Your Images

- Many new photographers stay away from high ISO shots because they allow more light through producing a “busy” image. However, these images are often easier to edit later as there’s more information to work with. [11] X Research source
- If it’s very bright in your location or you’ve set up artificial lighting, a low ISO is likely adequate, For darker areas, you’ll likely need to use a higher ISO.
- If you need one second to capture an image with a base ISO of 100, you’ll need one eighth of a second to capture with an ISO of 800. [13] X Research source

- Even snapping candid shots, which you may need to capture quickly, take a few moments to think about how objects are placed to make the most impact.
- Always think about how the main subject’s surroundings play into the overall image, and try to create different levels and points of interest.
- You can change composition as part of the editing process in some cases, so if you can’t line up the shot just right, don’t let it deter you from capturing the image you want. [14] X Research source

Organizing the Essay

- If you’re doing a day in the life photo essay about a frustrated person working in an office, an image of that person struggling to open the front door against the wind might be an apt focus shot.
- If your essay is about the process of building a home, your focus image may be something like a contractor and architect looking at blue prints with the framed up home in the background.
- If your essay is about a family reunion, the focus image may be a funny shot of the whole family making faces, pretending to be fighting, or a serious photo of the family posed together. Capture whatever seems natural for the family. [18] X Research source

- Regardless of essay type, you’ll need a focus image to grab attention.
- Use an overall shot to give context to your essay. Where is it, when is it happening, who’s involved, what’s going on, and why should someone be interested? The five “W’s” of journalism are a great way to determine what your overall shot should capture.
- Find your final image. This should be something provocative that asks your viewer to think about the topic.
- Between the focus and overall shot and ending image, include a series of images that move the viewer from the lead-in shots to its result. Use images that build in intensity or draw the viewers further into the essay.

- If the images aren’t telling the story, ask your friends to look at your other photos and ask, “I wanted this image to make this point. You got a different idea. Would any of these images make this point to you more clearly?”
- If the others like the images you’ve chosen, you may still want to ask them to look at your other photos and tell you if they think any of the images you didn’t include should be added in. They may see something you missed. [20] X Research source

- If you're commissioned to add photos to an essay, you should make sure images reflect the written word, but also add emotion and context the writing could not capture. For example, an essay on poverty may include an image of a child and parent living on the street could capture more emotional context.
- Captions should only include information the viewer could not derive from the photo itself. For instance, you can include a date, the subject’s name, or a statistic relevant to your subject in the caption.
- If you choose not to have any text or just a title and some introductory and/or closing words, make sure you convey all necessary information succinctly. [21] X Research source
Expert Q&A

- Be creative with your topics. However, something as simple as "things I like" will suffice so long as you stay creative. Thanks Helpful 0 Not Helpful 0
- Make sure you're familiar with your camera. It will make the photo composition a lot easier. Thanks Helpful 0 Not Helpful 0
- Don't get discouraged. It may take several tries to get the desired results in your photos. Thanks Helpful 1 Not Helpful 0
You Might Also Like

- ↑ http://digital-photography-school.com/5-photo-essay-tips/
- ↑ Heather Gallagher. Professional Photojournalist & Photographer. Expert Interview. 8 April 2020.
- ↑ http://improvephotography.com/30816/10-ideas-creative-photo-essays/
- ↑ http://www.apogeephoto.com/how-to-create-a-photo-essay/
- ↑ https://petapixel.com/how-to-create-a-photo-essay/
- ↑ http://photo.journalism.cuny.edu/week-5/
- ↑ http://clickitupanotch.com/2010/12/creating-a-photo-essay/
- ↑ https://photographylife.com/what-is-iso-in-photography
- ↑ https://wiredimpact.com/blog/how-to-make-a-photo-essay-nonprofit/
- ↑ http://digital-photography-school.com/5-tips-for-creating-a-photo-essay-with-a-purpose/
- ↑ https://www.format.com/magazine/resources/photography/how-to-make-photo-essay-examples
About This Article

To make a photo essay, start by selecting a subject that is easy to capture and that inspires you, like a friend or a family pet. Then, decide if you want to present your photo essay as thematic, which shows specific examples of a big idea, or narrative, with a beginning, middle, and end. Next, create an outline of your essay to determine which photos you’ll need, like an establishing shot. Finally, take your photos, select which images you want to use in your essay, and organize them according to your theme before adding text to explain the essay. To learn how to capture the best images, keep scrolling! Did this summary help you? Yes No
- Send fan mail to authors
Reader Success Stories
Aug 3, 2016
Did this article help you?
Sep 24, 2023
Christopher Ulloa Abarua
Mar 16, 2018

Featured Articles

Trending Articles

Watch Articles

- Terms of Use
- Privacy Policy
- Do Not Sell or Share My Info
- Not Selling Info
Get all the best how-tos!
Sign up for wikiHow's weekly email newsletter

How to Take Good Holiday Photos: 5 EASY Photography Tips
It’s the most wonderful time of the year and that means plenty of opportunities for holiday photos. You may be like my husband and dread the family photos. There is so much pressure to get the perfect shot. And the kids usually lose it after 5 minutes of trying.
But you don’t have to dread holiday photos! There are easy photography tips to help you take good holiday photos without all the stress and tears.
I remember growing up our Christmas card picture was always a big production. With three kids in the family one of us was bound to be in tears by the end of the photo shoot. Looking back it now makes us laugh, but in the moment we were not happy.
Now that we have a family of our own I understand why my mom wanted the perfect Christmas picture.
Each year we try something a bit different and try to have fun with the experience. I hope we can pass on the holiday cheer to your family this year!
So here it goes, my best photography tips for taking your children’s holiday photos.
Don’t miss an awesome Christmas Giveaway for $500 at the end of the post.
5 Easy Photography Tips to Take Good Holiday Photos!

This post contains affiliate links.
First, find natural light.
One of the easiest things to do is find a space with plenty of natural light. I’m not a big fan of flashes. At ALL. They gives off an artificial feel to your photos and it can also give you the dreaded red eye. Have you heard of the golden hour? It’s the hour or so right before sunset when the light is softer. You don’t get any of those harsh shadows, no squinty eyes and no need for a flash.
So find a space and time of day with the best natural light.
Second, consider your camera.
If you hire a professional photographer you won’t have to worry about this, but if you want to start taking better photos I’d consider investing in a nice camera. Sure there are ways to get great photos with an iPhone. Though it makes it so much easier when you have a camera that does the work for you.
I currently use a Nikon D7100 . It was an investment for our family. Though to save a bit of money I bought a refurbished one and it’s been perfect. I also have a nice lens where I can lower F-Stop to 1.8. Which leads me to my next point.
Third, freshen up on your photography knowledge.
There are so many videos and articles out there to boost your photography skills. Take one afternoon and educate yourself on the difference between aperture and F-Stop. You will be on your way to using manual mode in no time.
I also shoot in RAW. I used to be scared of this, thinking “I have no idea what that means or what I’m doing.”
Essentially, when you shoot in RAW it saves a lot more information on your camera. You get more data per pixels which means if you need to do some major editing on the photo, it won’t completely lose the resolution. The RAW setting gives you the highest level of quality and gives you the most flexibility when editing. Though it will increase the size of your files.

I use mostly Adobe Photoshop and Lightroom to edit my photos. You can get a subscription through the Creative Cloud for only $9.99 a month. There are also a ton of editing apps. I like using Snapseed on my iPhone.
Fourth, consider the image you want to capture.
Good holiday photos are so much more than just a crystal clear photo. Before you take holiday photos, consider what you are going to wear and where you are going to take the photos. So often there are so many distractions in photos that take away from the important aspects. I’ve found simple backgrounds to be the least distracting.
I’m going to be honest and tell you it took us about two years to get a family photo of the four of us where we were all looking and smiling at the camera!
Remember, good holiday photos don’t have the be perfect. Sometimes the best photos are candid. They look more natural and aren’t as staged looking. Be flexible and if you need to take a break, for everyone’s sanity take a break!
You may also want to consider props. When our daughter was one we used dried potato flakes as “snow” in a few images. As you can see the photos weren’t take in the best light (it wasn’t the golden hour and there were a few harsh shadows). But she loved it and it created a fun dynamic in the photos.
Lastly, take a lot of photos.
Chances are, you aren’t going to get the perfect shot right away. I try to take as many photos as possible increasing the chances of capturing smiles. Sometimes it takes 20 or even 50 photos to get 1 or 2 good ones. Don’t be discouraged. Many cameras have burst mode where you can take multiple photos quickly.
So there it is, 5 easy ways to make your holiday photos better this year!
Now A SUPER AMAZING GIVEAWAY!
I’m also excited to share with you!!! I’ve gotten together with some pretty awesome bloggers to give TWO families some CASH in the 5th annual Christmas Blessings Giveaway – $500 cash (delivered via Paypal).
We hope that the prize will be a blessing to the winning families and help them to fulfill their kids’ Christmas wishes, pay off some bills, or to save for a rainy day. Whatever the money ends up being used for, our prayer is that it helps to lessen any financial burden and/or fills a specific need.

There are lots of entry options in the Rafflecopter form below – the more you enter, the better your chance of winning! I know it can seem tedious and time consuming to go through all the entries, but isn’t a chance at $500 worth it? I think it is! Plus, all of these generous bloggers donated their own money toward the cash prizes and this giveaway wouldn’t be possible without them. So I hope you’ll take the time to check out each one. Who knows, maybe you will find your new favorite blog.
The giveaway will run from Monday, November 12th through Wednesday, November 21st (ends at 11:59pm EST). Winner will be notified by email shortly after the giveaway ends and will have 48 hours to respond to claim the prize or another winner will be drawn. You must have a Paypal account to win. Please be sure to read the Rafflecopter terms and conditions upon entering.
Similar Posts

Christmas 2014 Recap

Finding Jesus in Christmas

How to Keep Baby Warm at Night! Sleep Without a Blanket

My Favorite 10 Gifts This Year! A Holiday Gift Guide

Christmas Decorations House Tour

At Home with Graco®
- Pingback: Baby's First Christmas: 5 Ways to Celebrate - Heart of Deborah
They make me remember my past moments
reminds me of my good times I had together with my friends
Leave a Reply Cancel reply
Your email address will not be published. Required fields are marked *
Save my name, email, and website in this browser for the next time I comment.
How-To Geek
How to take good travel photos.
Whether you want to document a family holiday or aspire to shoot for National Geographic, there are some simple things you can do to take better travel photos.
Quick Links
What makes a good travel photo, the technical stuff, other tips and tricks.
A good travel photo is about a place or event, or even a small aspect of a place or event like the people or the food. It captures the feeling the photographer had when they were there. Maybe it captures the history of a city, the tranquility of an almost deserted island, some tiny detail that’s exclusive to the area where you are, or even just your friends and family relaxed and having fun.
Travel photography is a really broad style. When you shoot, you might be combining elements of portraiture , landscape photography , street photography, sports photography and many other disciplines. The best travel photos rarely stand on their own, they’re normally part of a small series of related images. All the photos in this article come from a trip I made to New Orleans.
Related: How to Take Good Landscape Photos
Travel photography is often unpredictable. You’re walking around a new city, camera in hand, and something happens. Some combination of light and subject create a wonderful moment you need to capture. Your camera needs to be ready for this.
Related: How to Buy Your First High-Quality Camera
First, you need to select an appropriate lens. Although a telephoto lens can take great sports photos and portraits, it’s unwieldy for travel photography. You need something with a wider angle. The traditional focal length for this kind of photography is 35mm on a full frame camera (about 22mm on a APS-C camera), although anything between about 16mm and 50mm can work. Fortunately, the kit lens that comes with most cameras covers a lot of this range and smartphone cameras generally have the equivalent of a 35mm prime, so there’re no excuses for not having the right gear.
For the camera settings, we once again turn to the always reliable aperture priority mode . Arthur “Weegee” Fellig famously said---at least supposedly---that the secret to good street photography was “f/8 and be there.” In other words, if your aperture is set to f/8, all that’s required from you is to be in the right location to press the shutter button and you’ll capture almost any moment. It’s just up to you to find the moments and locations worth capturing.
With that in mind, set your aperture to f/8, turn on autofocus, and set your ISO to around 400 (this guarantees a fast enough shutter speed for any daylight shoots).
Related: Get Out of Auto: How to Use Your Camera's Shooting Modes for Better Photos
If you’re working in low light you’ll need to compromise on these settings a bit. Check out our guides on taking good photos at night and taking good sunset photos . Find the balance between the three guides that works best for your situation.
There are two main kinds of travel photography: the type where you wander around experiencing the location, taking photos as you go, and the type where you go out with a specific shot, or series of shots in mind. Neither is inherently better, and you should switch between them. Spend your first day or two wandering aimlessly, and once you’ve got the lay of the land and found a shot or two you want to take, go out and do it.
You can also scout locations in advance. Use things like Flickr , Google Maps , and Instagram to work out where there are good photos to be had. Just be careful about capturing the same images as everyone else. You need to put your own unique spin on things if you want your images to stand out.
Even when you’re on your wanderings, one of the best ways to get great travel photos is to find an awesome location and just wait for something to happen. Maybe someone will wander by doing something interesting, or perhaps a dog will run through the scene. Whatever happens, if you’ve got a great location, you should be able to take a great image.
As I mentioned earlier, good travel photos rarely stand on their own---they’re part of a series. Don’t try and capture the one perfect photo; instead, use it as an opportunity to create eight or ten or thirty related photos that stand together to fully capture the spirit of a place.
Weegee’s “f/8 and be there” is a really powerful rule for a lot of different styles of photography, but you should always be willing to break it. If you need a faster shutter speed or shallow depth of field for a portrait, widen your aperture up to f/3.5 or f/1.8. If you want more depth of field, tighten it down to f/16. Great travel photographers are able to adapt on the go.
One major concern with travel photography is weight. It’s tiring to lug around a heavy camera, four lenses and a tripod. If all your camera gear won’t fit in your carry-on baggage, it could get damaged in the cargo hold if you’re flying to your location. You should travel as light as possible. Any time I’m going somewhere with my camera, I bring two lenses: a Canon 17-40 f/4L for almost everything and a Canon 85mm f/1.8 for portraits and sports. In truth, the 17-40 rarely ever leaves my camera. Find a lens that works for you and just stick with it. It might be a 24-70 or even a 35mm prime lens, but travel photography is much easier if you’re not fussing about changing lenses.
Robert Capa , a Hungarian war photographer who landed with the first wave on Omaha Beach, claimed that, “if your pictures aren’t good enough, you’re not close enough.” When you’re taking travel photos, you should be in the thick of things, experiencing them. Standing back, shooting from afar doesn’t work. It’s one of the main reasons I use such a wide lens: it lets me get really close. If your images just aren’t working, try going with a wider lens and getting more involved with what’s going on.
If you’re documenting the same group of people—like your family or friends—for an entire trip, get your camera out early and keep it out. After a couple of hours of you constantly shooting, they’ll be so used to the camera that they won’t even think about it. This is when you’ll get your most natural travel photos. Candid photos work so much better than staged ones.
Travel photography covers a lot, from dedicated photo trips to far off cities to family vacations to a near by beach. Whatever the situation, the keys to great photos remain the same: be a part of things, and be ready for anything.
Holiday Photography: 5 Tips for Magical Holiday Photos
A Post By: Simon Ringsmuth

Do you want to capture beautiful holiday photos of your children , family, and friends?
Holiday photography can be so rewarding – if you know what to do. Unfortunately, without the right approach, you’ll likely look back at some of your pictures after the holiday season has passed, only to wonder why they’re all blurry, out of focus, or just not that interesting.
That’s where this article comes in handy.
Below, I’ll share the essential techniques you need for magical images of the holidays…
…so that, no matter your equipment, you can be satisfied with your photos this holiday season.
Let’s dive right in, starting with my very first tip:
1. Get down on eye level with the kids
Holiday photos of children are classics: kids playing games, kids opening gifts, kids sleeping beside the Christmas tree.
But beginners often make the mistake of photographing kids from high above, looking down, which gives a boring, distant snapshot, plus it fails to capture the wonder and magic of childhood.
That’s why you should always, always, always get down on eye level with the little ones.
Yes, it might feel a bit strange to squat down or sit on the floor, at least at first. But you’ll get used to it over time, and the results will be well worth it. Your shots will be more personal, more interesting, and far memorable.
Also, if you get down on a kid’s level, they’ll be more likely to open up to you (whereas you’ll likely feel much more intimidating when photographing from up above).

My friend and her daughter before a Thanksgiving feast. I had to crouch down to get on eye level with the girl, but the angle made for a much more interesting picture.
2. Adjust the ISO instead of using the flash
Most holiday events take place indoors, so you’ll have very little light to work with.
You may be tempted to use your camera’s flash – in fact, if you leave your camera on Auto mode, the flash may go off automatically.
But here’s the problem:
Direct flash from your camera looks, well, bad . It washes out colors, it gives a bright, deer-in-the-headlights effect for portrait subjects, and it casts unnatural shadows across people’s faces. Also, if you’re photographing religious ceremonies, a Thanksgiving concert, or even a family dinner, the participants probably won’t appreciate the constant flashing.
So what do you do? Well, if you switch your camera to Program mode and turn off the flash, then your photos will turn out either very dark or very blurry because of the limited light.
Instead, turn off your flash, and – using the Program mode I mentioned above – boost your camera’s ISO .
You see, the higher the ISO, the brighter the image becomes, and the sharper the image becomes, too, because a high ISO will allow your camera to increase its shutter speed .
Don’t boost your ISO too much, though; a high ISO produces image noise, also known as grain, which doesn’t look very nice. Fortunately, most modern cameras do a fine job even at ISO settings as high as 3200 or 6400, particularly if you just want to share the photos online or print at smaller sizes like 4×6.
So don’t worry too much about keeping a low ISO, but don’t go wild with it, either.

Using a flash would ruin this photo of a candle-lit Christmas Eve service. I got this shot by bumping the ISO up to 3200.
In fact, I recommend you practice beforehand. You can determine the limits of your camera, and you’ll become comfortable setting the ISO in the process.
Bottom line: When used carefully, adjusting the ISO instead of using the flash can result in much better holiday photos. And there’s an added bonus, too: you won’t blind your guests or need to deal with red-eye corrections later on.

Also, if you really want to use your camera to its full potential, ditch Auto or Program mode entirely and try shooting in Aperture Priority (A or Av) mode . Aperture Priority lets you choose the ISO and the lens aperture , while your camera calculates the best shutter speed. The wider (lower) the aperture setting, the brighter your images will become – just the same as if you boosted the ISO – except that you’ll also get a lovely blurred-background effect.
I would recommend getting lots of practice with these modes before the holidays, though. You don’t want to try something new for the first time when everyone is opening presents!
3. Shoot moments, not poses
It might be tempting to run around with your camera at holiday parties barking out orders like “Smile!” “Look here!” and “Say Cheese!”
But a better option? Be a little more discreet and shoot moments instead of poses . Ditch the pose-speak, and try to capture the essence of what people are doing: talking, laughing, opening presents, or sharing a drink.
In my experience, this makes for much more interesting photos as well as better memories in years to come.
Of course, there is certainly nothing wrong with posed photos. And there’s nothing wrong with photos of people looking at you and smiling while you take their picture, either.
But aside from people’s clothes and their immediate surroundings, these images tend to lack context. When looking back at photos, you’ll often have tons of questions: What else was happening? Who else was present? What sort of activities were people doing? A posed photo probably won’t offer up many answers.
Candid holiday photos, however, will capture people just being themselves, generally with plenty of context. So by taking a documentary-style approach and shooting casual images, you’ll capture memories that will strike a chord years down the road.

This picture of a game of cards over the holidays carries a great deal more meaning to me than if I had told everyone to look at the camera and smile.
4. Know when to put your camera down
This might sound counterintuitive for an article about how to get better holiday photos, but as the saying goes, there is a time for everything under the sun . This includes a time to shoot pictures – as well as a time to just be with friends and family.
So rather than capturing 100 photos of your family opening presents, just take a handful and use the rest of your time to simply be with your loved ones and enjoy your time together. Try to be intentional when taking fewer photos, and you’ll end up with more keepers, rather than dozens and dozens of images that look exactly the same.

Don’t take a boatload of present-opening photos. Just a handful will likely suffice, and the rest of your time can be used to visit, laugh, and share memories.
5. Invest in a prime lens
If you are still shooting with the kit lens that came with your camera, now is a fantastic time to spend a little money on a prime lens (and get familiar with it before the rush of the holiday season).
While prime lenses don’t zoom in and out, they feature an ultra-wide aperture (often f/2.8, f/1.8, or even f/1.2). A wide aperture lets in so much more light (especially compared to a kit lens); you can capture beautiful, bright exposures, even at low ISO values. You’ll also get the added bonus of smooth, blurry backgrounds that’ll make even the most mundane subjects interesting.

The Nikon 35mm f/1.8 is a fantastic choice, as is the Canon 24mm f/2.8 , and there are plenty of other options to suit your needs depending on your camera and shooting style. I’d recommend picking a semi-wide lens (24-35mm) or a standard lens (50mm); anything longer will require significant cash and can be overkill when shooting in a house, while anything shorter will be difficult to handle.
Holiday photography tips: final words

Hopefully, you now feel ready to capture some stunning holiday photos! I highly recommend you pick up your camera and practice ahead of time (and if you’re going to purchase a prime lens, do it soon!).
That way, you’ll capture magical holiday images right from the get-go.
Now over to you:
Which of these tips is your favorite? Do you have any holiday photos that you’re proud of? Share them in the comments below!

Read more from our Tips & Tutorials category

is an educational technology specialist at Oklahoma State University and enjoys sharing his enthusiasm for photography on his website and podcast at Weekly Fifty. He and his brother host a monthly podcast called Camera Dads where they discuss photography and fatherhood, and Simon also posts regularly to Instagram where you can follow him as @sringsmuth.
- Guaranteed for 2 full months
- Pay by PayPal or Credit Card
- Instant Digital Download

- All our best articles for the week
- Fun photographic challenges
- Special offers and discounts
How to take the best holiday photos ever!

It's that time of year again — the holidays are here! Whether you're celebrating Hanukkah, Chanukah, Christmas, or anything else, one thing is guaranteed: time with friends, family, and other loved ones. There will be plenty of opportunities for photographs too, as these are moments that you want to capture and cherish for years to come.
But how do you take the best holiday photos that you can? Here are some tips to help you out!
Understand your camera

The first tip is the most important: you should take some time to understand your camera. With just a basic understanding of the camera, whether it's a point-and-shoot, DSLR, or even your iPhone camera, you'll be able to get some good shots through trial-and-error. After all, even with an iPhone as your camera, there are a lot of things that you can do with it, and just having a basic understanding will go far in terms of the kinds of photos you'll be producing.
Camera App: The Ultimate Guide
It's all about lighting

Even though each holiday is different, there is one thing that they all have in common: lights! No matter what you're celebrating this season, each holiday has their own unique decorations and lighting to go with it.
With this in mind, you should definitely take advantage of these distinctive lighting situations for your photographs. Play around with the lights and the light that they produce, because these aren't around all year.
If you want some ideas, try getting a portrait of a candlelit Menorah, wrap a buddy up in a string of Christmas lights for a silly snapshot, use the light from a cozy fireplace, or take some closeups of your own Christmas tree! The possibilities are limitless, and you're bound to get something special.
Master your iPhone in minutes
iMore offers spot-on advice and guidance from our team of experts, with decades of Apple device experience to lean on. Learn more with iMore!
Avoid flash, use Night mode

With that said, you should avoid using flash on your camera. The built-in flash on digital cameras or your smartphone can create photos that end up looking flat, unnatural, overexposed, and have harsh and unwanted shadows. Instead, try getting photos in natural daylight if you can, but since it's winter and there's more dark than light, there are some other alternatives.
Circling back to the topic of lighting, holidays have interesting lighting options (lamps, candles, Christmas lights, firelight, etc.), so you should use them to your advantage whenever possible. Plus, these various light sources can create something magical or whimsical, thus adding to the overall tone and mood of your photos.
Other tips include using a tripod to help stabilize your camera, increasing the ISO settings manually, using slower shutter speeds so that more light is captured, and shooting with a wide aperture.
For those of you with an iPhone 11 or iPhone 11 Pro, then this is the perfect time to make use of the Night mode feature. It kicks in automatically if the light threshold is low enough, or you can always toggle it manually by tapping the Night mode button (next to flash). Night mode has proven to take incredible photos in low-light situations , and are sure to impress your friends and family this holiday.
How to get great Night mode photos on your iPhone 11: iPhone Photography Tips & Tricks
It's all about angles and perspective

While you can take photos using basic composition, sometimes just taking a photo front-and-center is boring. I mean, anyone can do that, and it isn't offering anything new or interesting. That's why you should look for more interesting perspectives and angles.
I mean, yeah you can take a photo of your decorated Christmas tree up front and center, but you can do so much more. Try going low and getting a view of what the tree looks like from the bottom-up. Or snap a photo of your cool tree topper and the rest of the tree from the top-down.
And if you really want to try something different, get up close and personal with your subject, especially if you have a macro lens accessory. There's a lot of detail in holiday decorations that you could capture in macro or closeups, so don't miss out on those distinctive takes.
Know what your focus point is

As with any good photo, you'll need to make sure that your subject is in focus. Otherwise, you'll end up with a blurred subject, and well, that's just a bad photo.
Make sure you always tap your focus point on the iPhone camera to set it, and even tap-and-hold to lock it. Try to not move after getting your focus point, and if you do, just make sure to tap to focus again. With all of the holiday lights, it's the perfect chance to use Portrait mode for a focused subject with blurred depth-of-field with bokeh effects.
Regardless of how what you're photographing this holiday, just make sure the picture is focused the way you want it to be.
How to get the most sharp and focused photos: iPhone Photography Tips and Tricks
Take fun, candid group photos

If you don't want your holiday photos to look manufactured, forcing everyone to pose and smile, then you may want to consider just taking some candid photos of everyone. It's pretty hard to get everyone to look at the camera sometimes, and even if they do, someone may end up blinking, or some other mishap. Instead of aiming for the "perfect" posed picture, go for more natural ones of everyone in the holiday setting. It's going to be a better memory than something that is made up for the sake of perfection.
I mean, yeah, you should try to get that big group photo, but make sure to take some casual ones throughout the holidays as well.
Experiment with lenses and accessories

With all of the lights and decor for the holidays, it's the perfect time to do some experimenting with photography accessories, especially lenses .
As mentioned earlier, you can capture some unique closeup images with a macro lens, which will reveal details that you don't notice with the naked eye. There are also fisheye lenses that can provide a warped but interesting field of view, or you can capture more of a scene with a super wide angle lens. It's like experimenting with a DSLR and the different gear, but with your iPhone — the possibilities you can produce are endless.
And if you're still having trouble with lighting, there are iPhone accessories out there that add studio lighting for cheap , or you can grab a tripod to help out with stabilization . Even a selfie stick can come in useful if you want to get some group shots together.
- Best iPhone Lens Kits in 2019
- Best Lighting Accessories for iPhone Photography in 2019
- Best Tripods for Photographing in Night Mode on iPhone 11 in 2019
Play with a third-party camera and photo editing app

Though Apple's own Camera app is the fastest way to get a picture taken, it can be lacking in other departments. There's no way to manually adjust ISO or shutter speed, and you can't shoot in RAW. Fortunately, there are third-party developers that take care of the shortcomings of Apple's Camera app.
Halide Camera ($6) is one of my personal favorites, and it's packed a ton of great features. It was designed with one-handed use in mind, so you never have to fumble around accessing all of the settings. You get quick manual focus, exposure adjustment, manual ISO, various white balance settings, live histogram, and much more. You can even shoot in RAW with Halide, and Potrait mode images are fast to switch to, no waiting around.
Another good camera app that is handy to have is Moment - Pro Camera ($6) . It's similar to Halide with features like full manual control for photos, histograms, RAW support (even for burst photos), slow shutter adjustment, and manual focus. Moment also produces their own lenses and phone cases to go with them, so this app is a perfect complement to Moment fans.
And once you shoot your photos, you may want to edit them to look even better. You can edit photos directly with the Photos app, but you may be limited to what you can do.

A favorite of mine is Darkroom , because the interface is elegant and streamlined, and the app packs in a ton of powerful photo editing tools at your disposal. You can make Portrait mode adjustments, adjust curve levels, edit RAW files, create custom filter mixes, and so much more. You can download it for free to try out, and if you like it, the in-app purchase to unlock everything is worth a look.
Or you can go with an app like Camera+ 2 ($5) , which is both a camera app replacement and has built-in editing tools. You get the convenience factor with this one, but it may lack more powerful features you'll find in other apps.
Best Lenses and Lens Kits for Shooting Video on Your iPhone in 2019
Capture the magic of the holidays
These are just a few tips for getting some great holiday photos this season with your friends and family. Do you have any tips you have for getting great holiday photos? Do share them in the comments!
○ Best iPhone for photographers ○ How to use Portrait Lighting ○ Best iPhone tripods ○ Tips for shooting great Stage Light Portraits ○ Night Mode tips and tricks ○ Camera app: The ultimate guide ○ Photos: The ultimate guide ○ Best digital cameras

Christine Romero-Chan was formerly a Senior Editor for iMore. She has been writing about technology, specifically Apple, for over a decade at a variety of websites. She is currently part of the Digital Trends team, and has been using Apple’s smartphone since the original iPhone back in 2007. While her main speciality is the iPhone, she also covers Apple Watch, iPad, and Mac when needed. When she isn’t writing about Apple, Christine can often be found at Disneyland in Anaheim, California, as she is a passholder and obsessed with all things Disney, especially Star Wars. Christine also enjoys coffee, food, photography, mechanical keyboards, and spending as much time with her new daughter as possible.
TikTok ban signed into law by President Biden — ByteDance now on the clock to sell, or 170 million Americans will lose the app
Apple Fitness Plus cycling workouts vs outdoors: Which is better?
M4 MacBook Pro: Everything you need to know
Most Popular
- 2 Apple accused of using blood minerals from a region 'devastated by grave violations of human rights' in its products
- 3 Did Apple just email you to say your trade-in is canceled? Don't panic, it's a glitch
- 4 On-device iOS 18 AI features tipped as Apple makes new open source LLM tools available online
- 5 This Australian iPhone can use the EU's third-party app stores and more, but it's a messy workaround you probably shouldn't try
📒 FREE FOCUS ASSESSMENT : All-New → Get Started!
Capture Your Ideas : Learn Ulysses → Brand New Course!
💌 NEW: Calm Inbox : Less Email, More Focus → Get Access
📒 NEW: 2023 Digital Planner : Made for iPad → Yes, Please!
FREE! Plan Your Ideal Week : Bonus Workshop + Planner → Get the Workshop
NEW! All the Things : Productivity Course → Check it Out
Productivity Workshop : The 4-Part Flywheel → GET ACCESS!
Bundle Up and Save : 25% discount on all app courses → Learn More
Simplify Your Time Management : New Course → Finally!
🧠 To Obsidian and Beyond : All-New Course → GET ACCESS
How to Take Great Holiday Photos

Holiday photos are all about mood. It’s a warm and bright season with so many fun get-togethers, events, colors, and lights. In many places around the world, it’s also colder and darker, which means shooting lots of photos indoors. Here are my tips to capturing beautiful memories that reflect this cozy and festive time of year.
Tip 1: Turn off Overhead Lights

When shooting around competing indoor lights, whether they’re artificial overhead, from a fire, or strings of lights, due to varying light temperatures and directions, it can be difficult to get a shot that isn’t too cool or warm in color temperature. I turn off overhead lights almost all of the time when I shoot indoors, whether it’s night or day, and no matter which camera I use.

Aside from temperature troubles, direct overhead light can also create shadows on faces that aren’t flattering. (An off-camera flash can fill shadows and fix this, if you have one.) If it’s daytime indoors, turn your subject so that their face is toward a window and let the natural light fall on it, expose for their face and the light will be beautiful, natural, and flattering. If it’s dark, turn your subject toward a light source, like a lit-up tree as in the photo below, and again expose for their face.

Even when you do these things, your shot may end up a bit blue in overall color. This is easy to fix: simply adjust the white balance when you edit. Slide until anything blue that should be white in the photo looks white (or even a bit creamy if you want a warmer feel to your image). Be careful not to go too warm, and always make sure that the skin tone looks natural as you adjust!

If the lighting in your shot is tough (for example, if you have both warm and white lights competing), a black and white conversion will remove that editing struggle and, as an added bonus, add a timeless feel.
Get Our Best Photography Tips & Workflows
Transform your photos and edits from average to awesome with our in-depth, mobile photography course. It’s jam-packed with training, ideas, and lessons that can literally transform your photography overnight.
Tip 2: Use the Drama of the Darkness

If it’s dark, there are so many interesting things you can do with light, and lack thereof. The first thing to do is expose for the light source you do have, so that the light itself isn’t blown out (lacking detail in the bright spots). When you expose for light in a dark setting, you instantly create a dramatic mood. Pay attention to angle as well — if you move lower or higher, can you get more light by way of a reflection on the floor, table, picture frame, etc? Unexpected light is always visually interesting.

I always shoot RAW with my Fujifilm XT-1, but I usually don’t with my iPhone because I almost always use the native camera app. However, when it’s very dark, as in the iPhone image above, I use Halide to shoot a RAW image and retain more data (details) in the photo. Shooting RAW makes editing easier because it allows you to recover details a JPEG doesn’t record. It gives you smoother tone transitions, higher dynamic range, and an overall higher-quality image. Yes, RAW will make the image flatter (less contrast) and less sharp, but those are things you can fix easily when you edit. Because details are already more difficult to capture in the dark, shoot RAW and you’ll have much more control over the edit of your image.

Now that the iPhone 11 Pro has Night Mode, I find myself needing to shoot RAW even less. I shot this image below with Night Mode in the complete dark except for the lit candles. It was so bright and detailed that I darkened it significantly in my edit (by -2.05 exposure).

Keep in mind that photos taken in the dark will have grain, sometimes a lot, and that’s OK. Grain gives a photo more feeling because it feels like film, and it adds texture and life. If you don’t like how much grain is in a shot, try converting it to black and white — grain looks different and very natural in black and white.

If there isn’t already some nice dark drama to work with, you can always create it! If it’s snowing at night, take some photos under a street light, or turn your headlights on to backlight your subject and shoot through the snow. You can also use a flashlight or shop light to back light, as I did in the photo above.
Tip 3: Framing The Shot

Shooting inside comes with all kinds of things to think about when framing a shot. Always consider what you want to be part of your story in your frame and try to shoot thinking that you won’t crop later. There are also lines everywhere from walls, beams, Christmas trees, candles, wood flooring, picture frames, windows, etc. Be sure to watch your angle as you set up to capture your shot that those kinds of lines aren’t crooked. This is so important in low-light situations where the image quality may already be compromised. You don’t want to shoot without thinking about this and possibly lose some of your image in straightening and cropping when you edit.
It’s fun to literally frame your shot, as in create a frame around your subject (like in the photo above) where the window makes a snowy frame around the silhouette, or in the photo below where her face is framed in a circle of Christmas lights.

You can even go outside and shoot through a window to the inside! You can create frames with almost anything: lights, branches, people’s arms — you can even hold a paper towel roll up to your lens and shoot through it! The possibilities for creativity, to narrow down the focus to your subject with a frame, are endless.

Tip 4: Be Creative

Along the lines of playing with your light source and learning to use it in interesting ways, taking photos in the dark allows you to play with slower shutters. Try light painting: have your subject hold any (safe) light source, such as a flashlight, a string of lights, or even a sparkler if they can do so safely and outside, and quickly move it as you take the photo. The magic in this is you won’t know exactly what you will get until you’ve shot it! Little ones seem to be especially willing participants in these fun shots.

Another creative trick is shooting purposefully out-of-focus. This is easy with a DSLR — just shoot in manual and out-of-focus. With iPhone, it’s trickier because of the autofocus feature, but you can do it using any app that allows you to manually focus with iPhone. For the above iPhone image, I used an app called Manual .

Speaking of purposeful blur, something I do for about half of my holiday images is freelensing. An intentionally out-of-focus image isn’t everyone’s cup of tea, but I love it. To freelens, use your camera in manual mode, set your focus to infinity, and keep your aperture fairly wide (lower numbers). Sometimes I freelens at f1.2 for super-bokeh blur, but often I’ll shoot at closer to f2.8-4 so that I have a slightly wider line of focus. Then, remove your lens from your camera, but hold it so that it’s basically still on the camera, and ever-so-slightly, tilt it. (Warning: doing this can damage your sensor and should be done at your own risk.) You’ll see exaggerated blur with just a tiny line of focus, and the way you tilt, up, down, or side-to-side will change where that line falls. How much you tilt your lens will change how much blur you achieve. A tiny adjustment goes a long way with freelensing, and it’s a bit of a learning curve, but the dreamy feel it creates can be magical.
Tip 5: Shoot Outside

Of course, light is always best outside during the daytime. Take some holiday photos outside if you can, but just be creative to make sure your outside shots look festive. Shoot by a door with a wreath on it, next to your house lit up with lights, or next to a window with a menorah or Christmas tree lit up inside. You can even add lights to an outdoor tree, have your subject hold fairy lights, or (if you’re lucky) use existing snow for an extra festive look!

In shooting snow, you’ll get amazing bokeh if you can shoot while the snow is falling. The wider open you can shoot, the better the snowflake bokeh. Be sure to underexpose a touch to avoid blowing out details in the bright white snow.
Tip 6: Capture Emotion

At its heart, each holiday celebrated during this time of year comes down to love and togetherness. Holiday photos are about these feelings, capturing them, and the cozy mood they evoke.

In addition to using your dramatic light to visually express that mood, snuggles, hot cocoa, fires in fireplaces, holiday PJs, and anything that feels just a touch saccharine is completely what this time of year is about. Embrace it!

To get kids to cooperate, I have a few tricks up my sleeve. I often tell my girls a joke, or have them whisper a joke to each other, hug, touch their noses together. Sometimes I’ll let them jump on the bed, untangle lights, hang an ornament, or (of course) open presents, and then I just sit back and capture what naturally unfolds.

The photos I end up loving the most are those where my subjects aren’t looking at me and smiling, but instead are interacting or reacting as I capture a genuine emotion. A lot of times these shots aren’t technically perfect, but they’re full of emotion and perfect to me. In the end, that’s what counts.
Tip 7: Get in the Frame

Use the drama and emotion, see the light as a tool, capture with your heart, get in there, and enjoy this holiday season as you create memories to keep forever.
FREE 2 DAY DELIVERY ON ORDERS $399+
Ten Tips for Better Holiday Photos
Tips for Better Holiday Photos - Watch the video to learn 10 simple tips for making better holiday photos of your kids this year.
I n this video, professional lifestyle portrait photographer and Nikon Ambassador Tamara Lackey shows you how to make great portraits of your kids this holiday season. You’ll be able to create wonderful lasting photographic memories in a short time by following these 10 simple tips:
Think about the light
The first thing you’ll want to do is think about the light in the location you’re taking the pictures. If you’re taking photos indoors, is there window light streaming into the room or do you have to use lamps or other light fixtures. This may determine where in the room that you place your subjects.
Coordinate the clothing
When photographing more than one person, coordinate their clothing. You want your subject’s clothing to compliment not clash with each other or the background if possible.
Brighten the light with a Speedlight
If there isn’t enough light in the room, add a Speedlight onto the hot-shoe of the camera. It's the quickest and easiest way to add more light to your photograph.
Bounce light off the ceiling
For a softer look to the lighting, bounce the light off of the ceiling. To do this, tilt the flash head upwards. When taking a vertical photograph, you’ll want to swivel the flash and tilt it so it is still bouncing off of the surface of the ceiling. Remember, if you’re taking color photographs to make sure that the ceiling is white. If the ceiling color is another color, the bounced light will pick up that color and introduce it into your photograph.
Watch for distracting backgrounds
Watch the background to make sure no distracting elements are getting into the photograph. You want to make sure that there’s nothing “growing out of your subject’s heads”. You also want to make sure that the background compliments your subjects. If you need to move something, go right ahead and do so.
Pose your subjects
Try posing your subject how you want them to be within the photograph. You can do this by clearly explaining how you'd like them to sit or stand, or by showing them yourself.
Arrange your subjects
If you don’t want your subjects to feel posed, simply place them where you want them in the photograph and as you take photos, talk them through making slight adjustments to get a more natural look.
Change your angle
Kids on the floor, get down with them or shoot from high above with them looking directly at the camera. Placing them on a chair or ottoman, change your level as well.
Interact and connect with your subjects
Have fun and connect with your subjects by talking with them throughout the photo session. Make silly faces or sounds to make children giggle. If you’re adventurous and add a pet into the photograph, you’ll have to keep its attention as well so get ready to whistle or call him by name to get him to look at the camera with ears perked up.
Keep their attention
Most likely you’re going to be taking photographs for a short time, maybe 10 or 20 minutes or even longer and you need to keep the attention of your subjects throughout. Connecting with them so they enjoy themselves will make it easier for you to continue taking photographs.
More from Nikon

Learn photo & video terms

Nikon School
Check out Nikon School.

Check out the Nikon apps.

NEW Mentors online course
Fashion photography with Dixie Dixon, Visual Storytelling with Joe McNally, Wedding photography with Jerry Ghionis and Sports photography with Rod Mar

Nikon Ambassadors
Check out the Nikon Ambassadors.
Stay connected to Nikon.
By clicking Sign Up, you are opting to receive promotional, educational, e-commerce and product registration emails from Nikon Inc. You can update your preferences or unsubscribe any time.
Thanks for signing up!
How to Take the Perfect Holiday Photo at Home
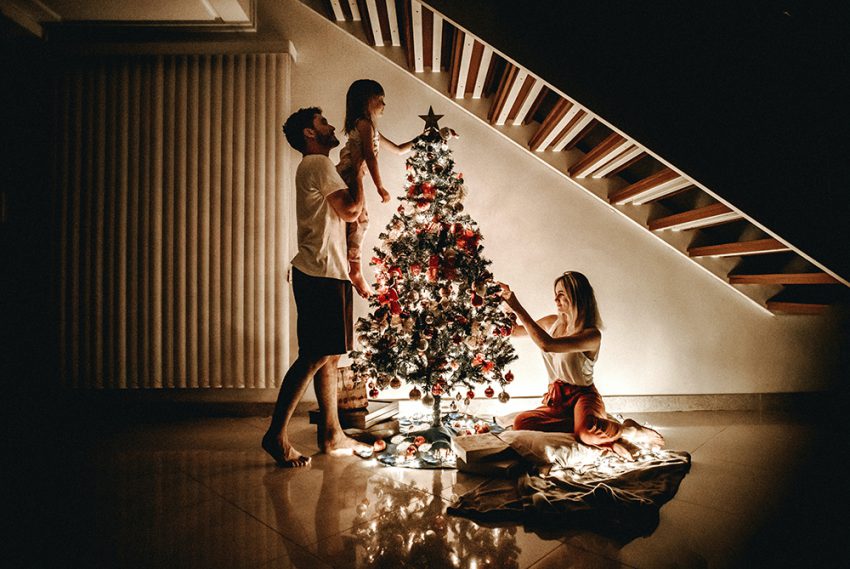
If asked to pare it down to one word, “unique” might be how we’d choose to describe 2020. With obstacles and curveballs abound, it’s easy to feel overwhelmed and exhausted from all the on-the-fly adjustments. And the unique circumstances will of course impact the holiday season in many ways, including how one goes about getting the traditional family photo for the annual holiday card. Because of the risk involved with photo studios or meeting with a photographer, many people are committing to stepping behind the lens themselves.
While it’s possible that throughout the months of quarantine one of several hobbies you’ve mastered is portrait photography—if that’s the case, that’s wonderful, many claps and snaps from us to you—it’s more likely that the idea of taking such an intimate, directly-shared photo sends you into high-stress mode.
We’re here to calm that stress, one tip at a time. With insight from a wide-array of professionals, here you’ll find tips and tricks on how to take the perfect holiday photo in the one place you’ve seen plenty of in 2020: your home.
Prepping for the Picture
Taking the perfect family holiday photo at home starts with preparation. By that, we mean making sure you have the right gear for the job. But don’t stress—you’re probably further along in preparation than you think. And if you aren’t, it’s easy to purchase, or rent, what you’ll need.
The obvious one. But don’t feel like you have to go out and buy a digital camera just for your family’s holiday portrait. If you don’t have one, or if finances are tight, the camera on that handy dandy phone in your pocket will do just fine. Newer phones will perform the best, so make sure to have baked goods on hand, just in case you have to persuade the phone’s owner into letting you use it.
A tripod might not seem crucial at first, but it really is. You’ll need a steady “hand” to take the photo, but you’ll also want something that offers multiple shooting angles.
“The main equipment required for a good family photo is a tripod,” said Michelle Meredith, , founder of Bright Color Mom . “A selfie stick won’t cut it… Just make sure you’re purchasing a tripod that can grip or hold whatever kind of camera you do intend to use.”
Many tripods out there do work across several camera brands and models, but just make sure beforehand—you really don’t want to play the trial-and-return game if you can avoid it. If you’re planning to use a smartphone, be sure to check whether or not the tripod you’re purchasing comes with a smartphone adapter, or if it has to be purchased separately.
Find the right model of tripod for you, though, and it easily becomes a solid investment that pays dividends well past the holiday season.
One last tip when it comes to tripods: consider the height of your family members, as well as the types of poses you’ll be asking them to strike. Why? Because not all tripods extend to the same height. If there’s a family member that’s, say, six-foot-five (77 inches), using a 55-inch tripod to snap a pic in the living room may not do the trick—or, you’ll have to ask that person to kneel for the shot, or sit.
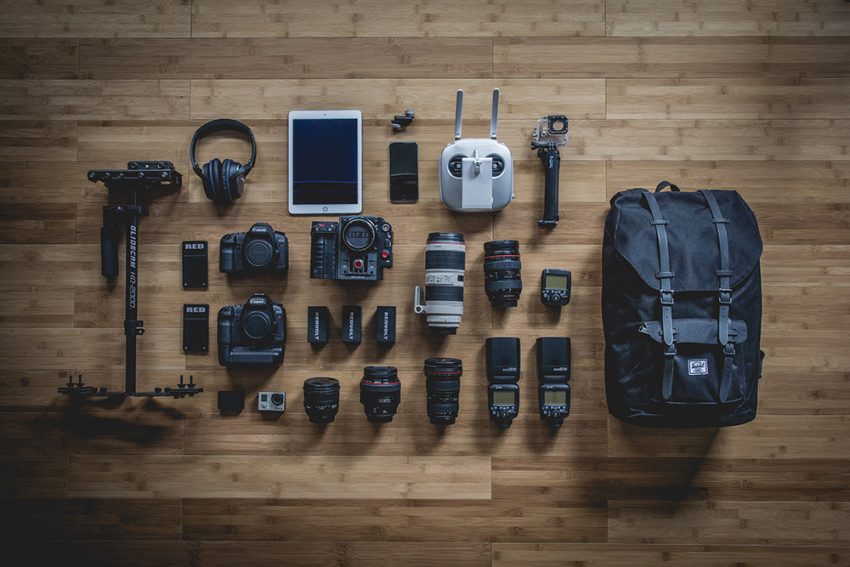
With so many fun photography tools out there, it’s easy to go overboard. But, you may have (most of) what you need for your family’s holiday photo already at your disposal.
Looking for your family’s wardrobe to be super formal? That’s cool. Aiming to present your family members with a color palette they’re to work within? That’s cool, too. Or, thinking of having the wardrobe be reflective of the year, and snap a pic of everyone in their sweatpants? That, of course, is cool as well.
If the lack of socialization over the past months has you questioning every idea, and decision, hopefully you can find some peace knowing however you and your family dress for the family photo will be just fine. If you’re in need of it, you have total permission to be yourselves.
Location + Timing
Whether you’ll be taking your photo outside or indoors, something to be conscious of is just how much clutter could make its way into the frame. With the outdoors, specifically, “clutter” can mean the amount of textures, patterns, and colors found in trees, leaves, and terrain.
If you’re taking your family photo indoors, the clutter can come by way of, well, debris that hasn’t been cleaned up, but also wallpaper, (excessive) decorations, and the like. The elements indoors are, of course, more controllable than they would be outdoors, however. Indoors, it could be best in terms of both clutter and lighting if posing in front of a solid background. Another option is posing in front of the largest window in the home.
As for timing, unless you have lighting equipment, it’s best to stick to what’s known as “the golden hour”. The golden hour is the hour-long stretch of time right after sunrise or right before sunset. From Vinay Amin, CEO of Eu Natural: “The lighting is soft and gentle, meaning everyone looks great naturally. You probably won’t even need your flash!”
Lighting tools (optional)
If you’re aiming to take your photo outdoors, or your house has plenty of windows that offer ample light, you won’t need any lighting tools. But, given just how important lighting is to photography (very, very important), if neither of those are true for your house, or your plans, it might be in your best interest to explore lighting tools. A ring light, for example, can offer plenty to explore, especially one with different levels of brightness.
Ring lights vary in price, but a budget-friendly idea to try if you’re struggling with light and shadow is, “putting a giant white poster board in front of you, just out of the shot—it’ll help bounce the natural light back toward your faces,” Michele Meredith added. “Just tape the poster board to a ladder of the tripod.”
Remote (optional)
If you’d rather not rely upon your camera’s timer feature, a remote can be really useful when snapping pictures from a distance. If you’re using a digital camera, you can choose from remotes that wire directly into the camera itself, or you can choose a wireless remote that operates via Bluetooth technology, or via a receiver that attaches to your camera. Using your smartphone’s camera? Opt for Bluetooth all the way.
Apps (optional)
Taking the pic with your smartphone but have subpar lighting and are on a super-tight budget? No worries. The kind folks at Cole’s Classroom pointed out that free mobile apps exist, such as Snapseed or Lightroom Mobile, “that allow you to adjust key settings like exposure, contrast, and temperature so you can enhance your picture and make it look more professional.”
Taking the Picture
Now that you’ve properly prepared, all everyone needs to do is just show up—right? Well, yes and no.
Yes—assuming a fair amount of energy has gone into the planning, showing up really is the biggest obstacle of the actual picture day. Outside of that, it’s all about focusing, and clicking a button.
Yet, there are some things you’ll want to keep in mind for the big day, starting with how you’ll want everyone to pose. “Posing is one of the most important things for family photography,” the team at JaySoriano.com said. “Everyone tends to line-up in one line, and that’s a big no-no. Get some ideas from Google, or Pinterest and have some fun using your favorite images as inspiration!”
Our tip: have several poses in mind before you start shooting. Then, if the one pose you had your heart set on just isn’t cutting it in the moment, you can pivot.
Which leads us to the thing we want you to remember most: shoot a lot of photos. And we mean, a lot. Like, set-the-camera-to-snap-100-photos-at-one-every-two-seconds a lot. Why? By snapping a lot of photos you’re giving yourself the best chance at snagging at least one awesome shot. But you’re also giving yourself a chance to capture the outtakes, which, as put by Anji & Pete Martin of Potok’s World Photography , can mean that you’re actually capturing treasure:
“Save the outtakes. My mother-in-law once told us that her favorite holiday card photos from my husband’s childhood were not the ones in which he and his brothers were looking at the camera, were smiling cutely and had perfectly combed hair. Instead, they were the shots in between those takes. The ones in which the kids were wrestling. Or someone’s shirt was untucked. Or one of them was trying to dodge scratches from the family cats, who were definitely NOT willing participants. Why does she treasure those pictures so much now? Because that is what my husband and his brothers were really like as kids. And those real moments are what she wants to remember now, not some idealized version of the past. So don’t discard the “imperfect” shots, because those just might be your favorites in the end!”
After the Pictures Have Been Taken
Photo selection.
Photo selection is, as you may imagine, pretty straightforward—you choose what you like the best. One teeny tiny tip though: don’t just choose one photo.
Having a back-up, or several back-ups, will give you peace of mind, should an unforeseen obstacle arise, whether you’re sending physical cards or are selecting an online design. We recommend choosing one photo that has a portrait orientation, and one photo that has a landscape orientation. That way, you always have multiple routes from which to choose. Additionally, you may even decide you want to go with a multi-photo insert holiday card !
Sending the Holiday Card
Sending your holiday card via mail will of course be different than sending your holiday card via email. If you’re sending your holiday card via mail, we recommend brushing up on some tips and best practices , as there are several moving pieces.
Sending your holiday card with Greenvelope is by comparison a lot more conve nient. All you have to do is select your photo-insert design of choice , upload your favorite photo, add your contacts, and schedule your card to send whenever you’d like. No paper, no printing, no stamps required. And, thanks to our partnership with the National Forest Foundation, every purchase you make this holiday season will plant a tree!
Regardless of how your holiday cards are sent, we hope this post helps you take that photo (or several photos) worth sharing. More than that, we wish you and yours a safe and happy holiday season full of lasting memories.
Photo Holiday Card Inspiration

Design: Vintage Postcard by Pink House Press
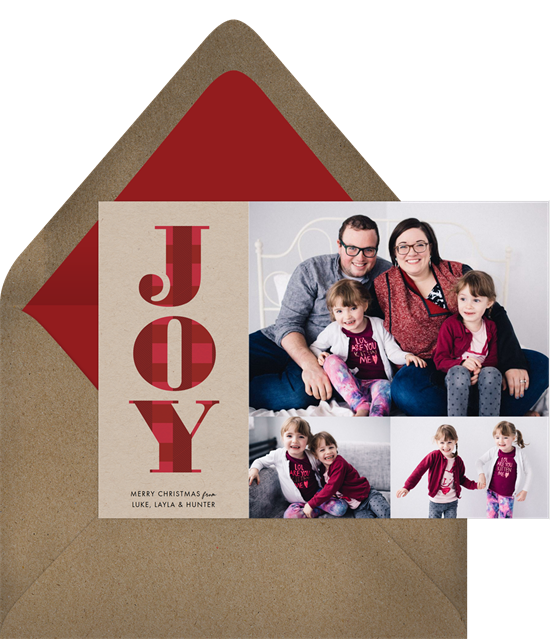
Design: Kraft Plaid by Ellis Design

Design: Merry Craziness by Monika Drachal
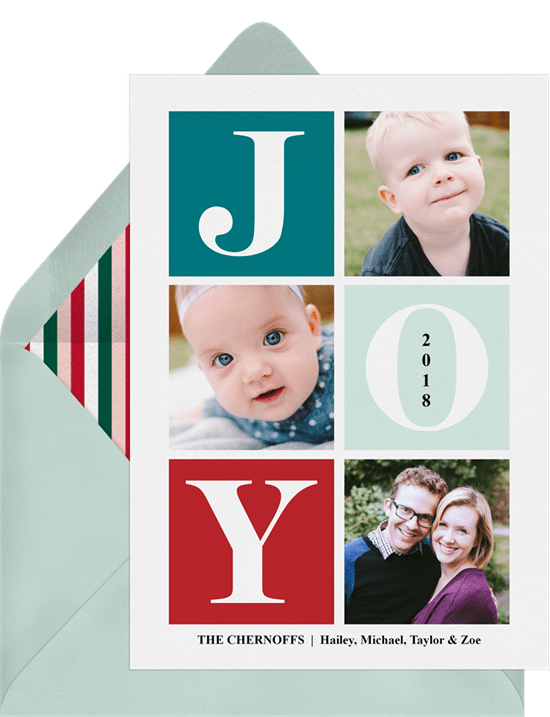
Design: Color Block Joy by Erika Firm

Design: Modern Colorful Cheer by Kate Ahn Design

Design: Colorful Firs Photo

Design: Botanical Cutout Card by Becky Nimoy Stationery

Design: Holiday Happiness by Creo Study

Design: Snowy Frame by Lehan Veenker

Design: Belly Rubs by Jessie Steury

Design: All Is Not Calm by Loree Mayer Design
Browse all holiday cards here .

IMAGES
VIDEO
COMMENTS
Basic images should include a strong establishing shot, some detail shots, and a closing shot, says Harris. If it's a story about food, this might mean capturing images of chefs cooking it, people eating it, and close-ups of the dishes themselves. Chicken feet. A great example of a close-up shot.
Take your time. A great photo essay is not done in a few hours. You need to put in the time to research it, conceptualizing it, editing, etc. That's why I previously recommended following your passion because it takes a lot of dedication, and if you're not passionate about it - it's difficult to push through. 4.
5. Place Over Time. View the "At Home in the Ozarks" photo essay by Kylee Cole. If you want to document changes and show how the streets, buildings, and parks in your city change over time, select your favorite locations and start to visit them regularly to capture the way they look during different seasons. 6.
Written by MasterClass. Last updated: Jun 7, 2021 • 5 min read. Photo essays tell a story in pictures, and there are many different ways to style your own photo essay. With a wide range of topics to explore, a photo essay can be thought-provoking, emotional, funny, unsettling, or all of the above, but mostly, they should be unforgettable.
Choose an idea, hone your unique perspective on it, then start applying the 9 simple steps from above. The life of a plant or animal (your favorite species, a species living in your yard, etc) The many shapes of a single species (a tree species, a bird species, etc) How a place changes over time.
What matters the most are real emotions. 2. Take Documentary Images of Christmas Traditions. Try documentary photography for capturing Christmas traditions. Add this to your family photo ideas. Every family has some habits for Christmas. You don't have to think about huge things here.
Find your subject. A photo essay is a series of images that make up a story. Simple enough. The key, then, is to find a compelling story to tell visually and, if you want to see the end results in print or online, understand what type of story will most likely get an editor's attention. Annie Leibovitz told me while discussing concept ...
1. Find a topic you care about. Every good photo essay should start with an idea. Otherwise, you'll be shooting without a purpose - and while such an approach may eventually lead to an interesting series of photos, it's far, far easier to begin with a topic and only then take out your camera. As I emphasized above, a photo essay can be ...
Using puddles and reflections in your pictures is a great way to take better travel photos and can aid your composition and create a really interesting shot. So keep an eye out for opportunities as you explore. 7. Take Pictures at night. When taking pictures at night, use a tripod and a low ISO setting (if possible).
Photographing landscapes may prove more difficult. A good tripod and the acceptance of more contrast in your photo will help you get good results. You'll need to work with midday sun. 6. Ideas to Help You Avoid Cliche Holiday Photos. Holiday photos can result in quite a few cliched scenes. The most obvious one of all is standing in front of ...
The idea of a photo essay is to create a whole, not a bunch of random parts. Think gestalt. The images must interact with each other. Repetition helps achieve this end. Recurring themes, moods ...
In this video, travel and adventure photographer, Brian Lackey, explains the how and why of making a travel photo essay. He neatly condenses his tips for how to go about this process into six ...
7. Include a clincher. This image may not be apparent to you in the beginning, but most photographers say they know it when they see it. It's an image that wraps up the essay for the viewer. This image should say "the end," give a call to action, or show the end result of a day in the life or how to sequence.
Fourth, consider the image you want to capture. Good holiday photos are so much more than just a crystal clear photo. Before you take holiday photos, consider what you are going to wear and where you are going to take the photos. So often there are so many distractions in photos that take away from the important aspects.
If you need a faster shutter speed or shallow depth of field for a portrait, widen your aperture up to f/3.5 or f/1.8. If you want more depth of field, tighten it down to f/16. Great travel photographers are able to adapt on the go. One major concern with travel photography is weight.
Don't take a boatload of present-opening photos. Just a handful will likely suffice, and the rest of your time can be used to visit, laugh, and share memories. 5. Invest in a prime lens. If you are still shooting with the kit lens that came with your camera, now is a fantastic time to spend a little money on a prime lens (and get familiar ...
As with any good photo, you'll need to make sure that your subject is in focus. Otherwise, you'll end up with a blurred subject, and well, that's just a bad photo. Make sure you always tap your focus point on the iPhone camera to set it, and even tap-and-hold to lock it.
Take a few shots that fill the frame with personalities. If you keep a bit of the background in the frame this usually helps set the scene and adds to the story. Of course be watchful about how objects are positioned in the background—avoid things that jut out of heads, cause distractions or don't fit with your holiday theme. ©
Tip 2: Use the Drama of the Darkness. Shot with Fujifilm XT-1. If it's dark, there are so many interesting things you can do with light, and lack thereof. The first thing to do is expose for the light source you do have, so that the light itself isn't blown out (lacking detail in the bright spots). When you expose for light in a dark ...
General photo taking tips. Use Burst Mode to ensure you get the shot. Burst Mode enables you to take multiple shots with one press of the shutter button. Start shooting when you anticipate the ...
2. Choosing subjects correctly. When working on a photographic essay, is important to choose subjects correctly to keep ourselves within a certain scope. Even if you don't have a human subject to portray, making use of personification can always be a good guide to avoid losing course.
For a softer look to the lighting, bounce the light off of the ceiling. To do this, tilt the flash head upwards. When taking a vertical photograph, you'll want to swivel the flash and tilt it so it is still bouncing off of the surface of the ceiling. Remember, if you're taking color photographs to make sure that the ceiling is white.
Tripod. A tripod might not seem crucial at first, but it really is. You'll need a steady "hand" to take the photo, but you'll also want something that offers multiple shooting angles. "The main equipment required for a good family photo is a tripod," said Michelle Meredith, , founder of Bright Color Mom. "A selfie stick won't ...
"When we take a photo, we're taking a 3D object, we're compressing it into a 2D photo, and there's so many factors that come into play," Buzan says. "The best way to go about getting good photos ...