
How To Make Columns in Google Slides [Easy Step-by-Step Guide]
- Last updated June 26, 2023
If your presentation contains a long list, you can make it easier for your readers by dividing it into columns. This approach not only enhances organization but also facilitates faster content creation.
To create Google Slides columns, begin by creating or opening your presentation. Then, navigate to the “ Layout ” option and select “ Title and Two Columns .” This will modify the formatting of your current slide.
In this comprehensive guide, we’ll show you how to add columns in Google Slides and effectively split text into two columns.
Table of Contents
How To Create Columns in Google Slides
Columns are a great way to organize your slides so your audience can grasp the information presented more easily. Here’s how you can format the current slide into a column:
- Create or open the presentation you want to edit, and navigate to the desired slide where you want to add columns.
- Go to the “ Layout ” option and select “ One column text .” This will format the slide with a single column and a Title bar.

After following these steps, your current slide should appear as shown below:

Related: How To Make Columns in Google Docs
How To Make Two Columns in Google Slides
Sometimes, you want to break texts into two parts, especially when making lists. Fortunately, Google Slides allows you to easily make two columns.
Here’s a quick step-by-step guide on how to split text into two columns in Google Slides:
- Create or open your Google Slides presentation and navigate to the desired slide, or create a new slide where you want to add the columns.
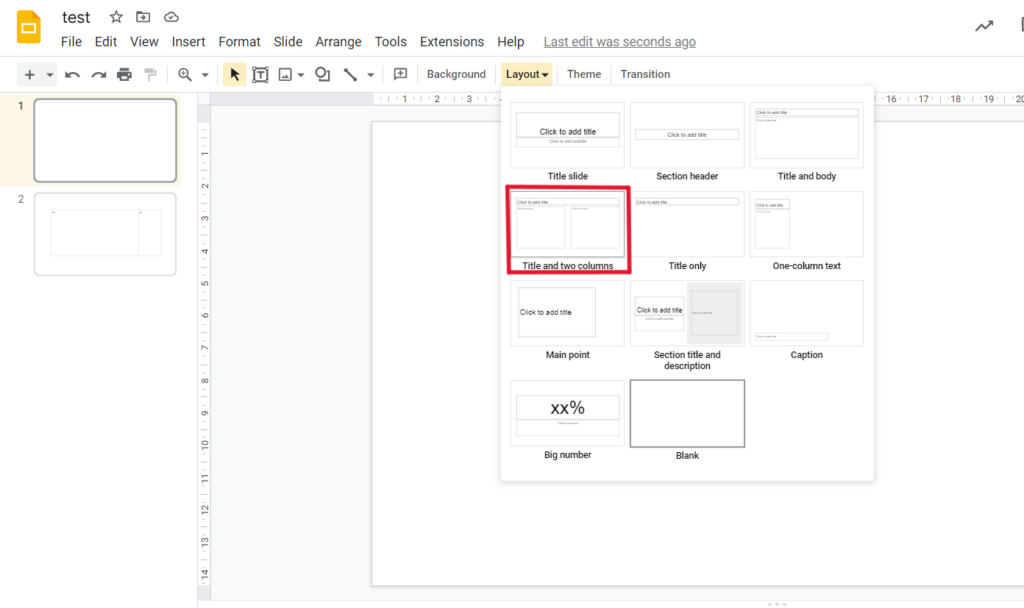
- Go to the “ Layout ” option and select “ Title and two columns .”

- After performing these steps, the current slide will be formatted with two columns alongside the Title box.

How To Make Three Columns in Google Slides
Creating a three-column slide in Google Slides can be a bit challenging since the Layout menu only offers options for one- or two-column slides. You just have to be inventive. Here’s how you can make a three-column slide in Google Slides:
- Create a new slide, which is typically formatted as “ Title and body ” by default. Since this slide already has a text box, you can modify it by scaling it.
- Click on the text box, and then drag the rightmost blue square border all the way to the left to extend it.

- Right-click on the modified text box and select “ Copy .”
- Alternatively, you can use the keyboard shortcuts Ctrl + C for Windows or Cmd + C for Mac.

- Paste the copied text box on the same slide using the Ctrl + V (Windows) or Cmd + V (Mac) keys to duplicate it.
- Repeat this step until you have three text boxes available.
- After pasting the text boxes, arrange them symmetrically to create the desired three columns.
And voila! You should now have a slide with three columns.

Related: How To Change Slide Size in Google Slides
How To Create a Table in Google Slides
Another way to split text is by creating a table. This allows you to create three columns or more and is quite helpful when comparing different data. Simply follow the steps outlined below:
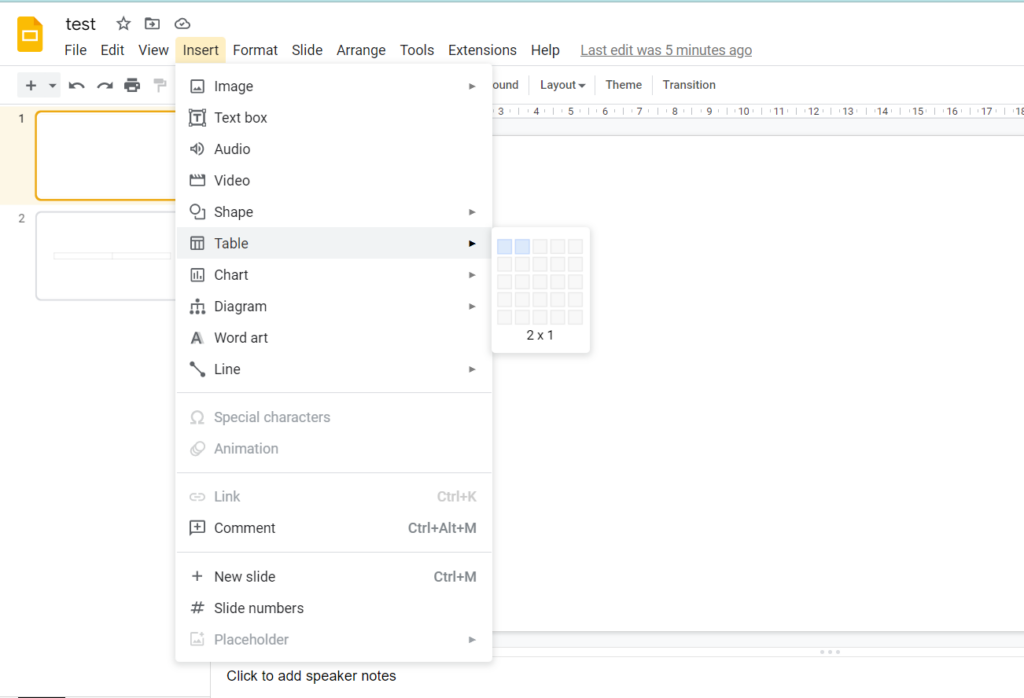
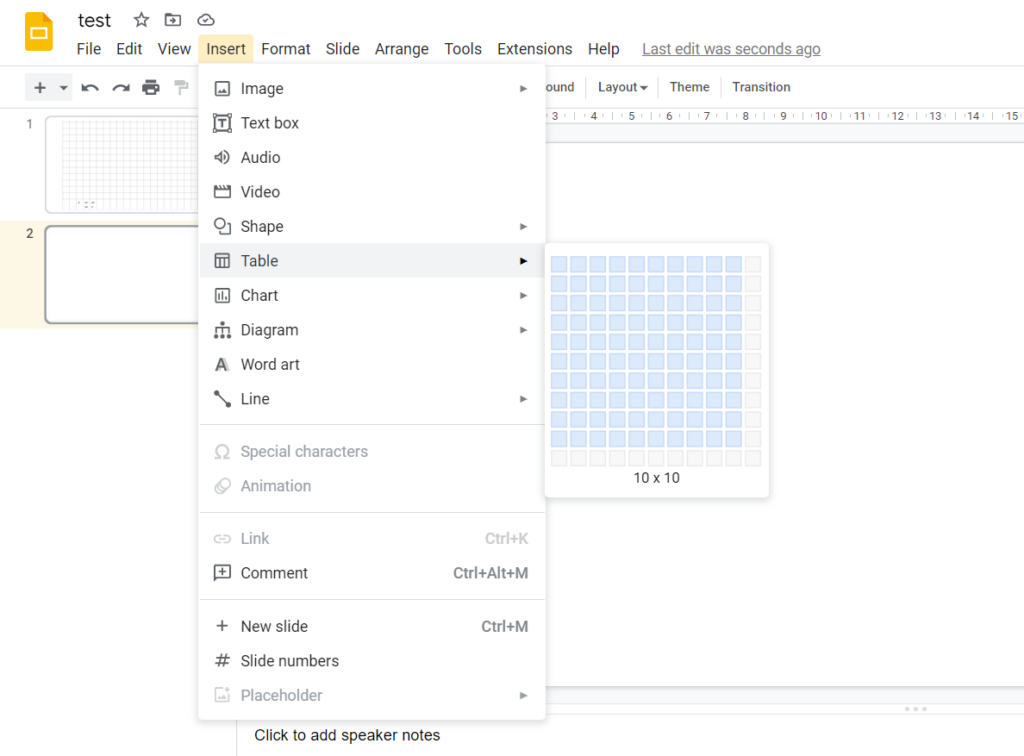
- To create a table, click on “ Insert ” and select “ Table .”
- A grid will appear, allowing you to choose the number of rows and columns for your table.
Note: The maximum table size is 20×20, but you can adjust this later. For now, let’s create a simple 2×2 table as an example. Click and drag to select the desired number of rows and columns.

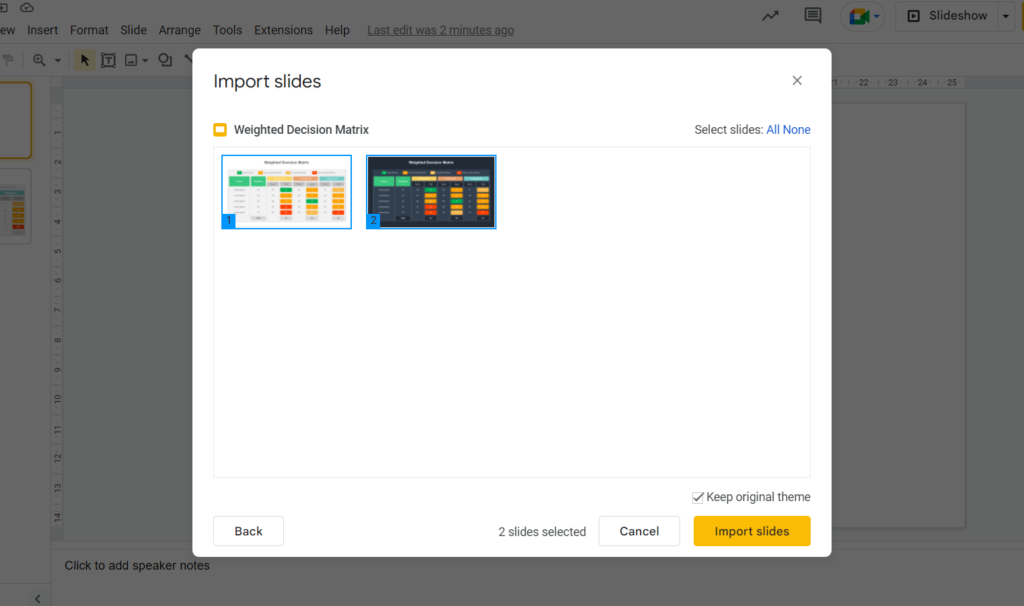
- If you have a template available, you can import it into your presentation. Go to “ File ,” click on “ Import slides,” and choose the slide or file you want to import. You can select multiple files at once.
- After creating the table, you can add more rows and columns as needed. Simply select the table, right-click anywhere on it, and choose the appropriate option from the context menu. You can add rows above or below and columns to the left or right. There is no limit to the number of rows and columns you can add.

- Additionally, you can delete individual rows, columns, or the entire table from the same context menu.
- Once the table is set up, you can add text to each cell. Simply click on the desired cell and enter your text. Each column can contain a different text set, allowing you to create a large list or organize content accordingly.
Related: How To Make Google Slides Vertical
Benefits of Using Columns in Google Slides
Adding columns to your presentation can have several benefits:
1. Makes Your Presentation Look Professional
Adding columns enhances your presentation’s overall look and feel, giving it a more professional and organized appearance. It helps both you and your audience easily navigate and understand the information being presented.
2. Great for Comparing Data
Columns are particularly useful when comparing different sets of data. By separating the text into distinct columns, you can easily analyze and compare the information side by side, making it easier to identify patterns, trends, and differences.
3. Makes Long Lists More Readable
When dealing with long lists, splitting them into two columns can greatly improve readability. By dividing the content into smaller chunks, you and your audience can quickly scan and comprehend the list without feeling overwhelmed by a wall of text.
Final Thoughts
Columns in Google Slides make your presentation look professional and organized. There are various methods to create columns, and sometimes you need to be creative, such as when making three-column slides. Using columns makes reading easier for your audience, and you can highlight important information easily as well.
If you have a long list or a set of data to compare, don’t hesitate to make columns to make an easy-to-follow workflow that would benefit you and your audience.
Looking for spreadsheet templates to kickstart your work? Check out our premium templates today and enjoy 50% off on all templates with the code “SSP.”
Get Premium Templates
- How To Add Fonts to Google Slides [Complete Guide]
- How To Save an Image from Google Slides [4 Easy Ways]
- How To Group in Google Slides [Step-by-Step Guide]
Most Popular Posts

How To Highlight Duplicates in Google Sheets

How to Make Multiple Selection in Drop-down Lists in Google Sheets

Google Sheets Currency Conversion: The Easy Method
A 2024 guide to google sheets date picker, related posts.
How to Insert a Google Sheets Hyperlink in 5 Seconds
- Chris Daniel
- April 15, 2024
How to Import Stock Prices into Google Sheets
- April 2, 2024
How to Calculate Age in Google Sheets (2 Easy Methods)
- Sumit Bansal
- February 21, 2024
How to Hide Gridlines in Google Sheets
- February 14, 2024
Thanks for visiting! We’re happy to answer your spreadsheet questions. We specialize in formulas for Google Sheets, our own spreadsheet templates, and time-saving Excel tips.
Note that we’re supported by our audience. When you purchase through links on our site, we may earn commission at no extra cost to you.
Like what we do? Share this article!
- Get access now
How To Make Columns In Google Slides – Quick Guide

Google slides have now become one of the favorite tools for presenters all over the world because of its wide range of features and flexibility. The major benefit of google slides is that it helps you to create amazing slide shows within minutes. And the sad part is that many of us even don’t know the exact capabilities of google slides. Sometimes, you might need to add columns and rows in Google slides. This helps organize your data more professionally, and your audience finds the follow-up easier. You can also include tables in your presentation to show a certain set of data. This guide shows the step-by-step procedures on how to add columns in google slides.
How to make two columns in google slides?
There are different methods by which you can add two columns to a slide. The below examples give a detailed idea of how you can do this.
How to add columns in google slides?
You can add up to 20 rows and columns in a single slide. Here, I am taking a matrix with two columns and a single row as an example. First of all, insert a new slide or select the slide in which you want the columns to be inserted. Then click on the Insert button on the top menu bar. After that, select the Table option from the drop-down list. Finally, select the 2×1 option by hovering over the columns.
Hurray! Now, you have the required two columns. You can edit this matrix by changing the dimensions of each column and row. You can add more columns and rows or delete existing ones by right-clicking after selecting a column. Try out the different color variations and border adjustments to look your columns better.
How to make text columns in google slides?
To make a new layout with two google slides text columns, click on the down arrow next to the + icon on the top menu bar. Then choose the ‘ Title and two columns ’ option from the drop-down list. You can also change the layout of an existing slide. To do so, select the slide, and click on the Layout button from the top menu bar. Then choose the ‘Title and two columns’ options. Delete the title part if it is unnecessary.
There are many options to edit this text box. You can copy and paste the text box to get the required number of text boxes. You can adjust the size and reposition these google slides text boxes to get your desired style. The main difference between these two methods is that the first method allows you to create a matrix with 2 columns and 1 row. The second method creates two columns, but they will be separate.
How to add/edit a table in google slides?
The google slides presentations allow you to insert multiple columns and rows in a single slide. The Table option allows you to insert a table with a maximum of 20 rows and columns(20×20 matrix). For making a new table, select the slide where you would like the table to be inserted. Then click on the Insert button on the top menu bar and select Table from the drop-down list. Then hover over the cells and columns to insert the required number of rows and columns. You can see that the columns and rows will increase as you hover over them horizontally and vertically.
The size of the cells will increase as you add more content to them. In addition, you can adjust the text position and size of rows and columns and add animation to the table. The border size, color, and position can be adjusted by using the Format button. You can find more options to customize the table according to your requirements.
Adding a table directly from a template
It is much easier to insert a table directly from a predefined template. You can find more professional and sophisticated table designs from our entire library of infographic templates . Just search for ‘table’ in the search bar, and you are ready to explore. To add a table from a template, just go to File , click on Import slides and choose the file you want to import. Then select the slides you want to import (Select All from the top if you want to import all the slides) and click on the Import slides button. All of the selected files will be imported into your presentation.
You can easily modify the table with your own data. The size, style, color, and border of the table, as well as the text, can be adjusted to highlight important data. The major benefit of using a presentation template is that it will save time and allow quick customization. You can invest this valuable time in making your google slides presentation look good .
Final Words
Google slides templates help to deliver attractive presentations within seconds. The effective usage of the capabilities of google slides saves your time and serves all your presentation needs. You can add tables, images, audio, and video to your presentation to catch the audience’s attention easily. Using matrices, charts, and graphs helps reduce the presenters’ effort, and the audience will have a quick understanding of the topic.
Welcome Back!
Please sign in to continue..

Please sign up to continue.
- PowerPoint Themes
- Latest PowerPoint Templates
- Best PowerPoint Templates
- Free PowerPoint Templates
- Simple PowerPoint Templates
- PowerPoint Backgrounds
- Project Charter
- Project Timeline
- Project Team
- Project Status
- Market Analysis
- Marketing Funnel
- Market Segmentation
- Target Customer
- Marketing Mix
- Digital Marketing Strategy
- Resource Planning
- Recruitment
- Employee Onboarding
- Company Profile
- Mission Vision
- Meet The Team
- Problem & Solution
- Business Model
- Business Case
- Business Strategy
- Business Review
- Leadership Team
- Balance Sheet
- Income Statement
- Cash Flow Statement
- Executive Summary
- 30 60 90 Day Plan
- SWOT Analysis
- Flow Charts
- Gantt Charts
- Text Tables
- Infographics
- Google Slides Templates
- Presentation Services
- Ask Us To Make Slides
- Data Visualization Services
- Business Presentation Tips
- PowerPoint Tutorials
- Google Slides Tutorials
- Presentation Resources
How To Make Columns In Google Slides? [Step-by-Step Guide]
This detailed step-by-step guide offers all the steps to create columns in Google Slides. It explains all the steps with visuals so you understand each step clearly. Learning how to make columns in Google Slides can enhance your presentations' efficiency and visual appeal.
![How To Make Columns In Google Slides? [Step-by-Step Guide]](https://slideuplift.com/wp-content/uploads/2024/02/How-to-Make-columns-in-google-slides-guide-1024x576.jpg "How To Make Columns In Google Slides? [Step-by-Step Guide]")
In Google Slides, columns can be quite helpful in a presentation’s objective of clearly communicating and visualizing content for the audience. Columns help to maximize space utilization and arrange presentation slides efficiently. Acquiring the skill of creating Google Slides columns for any presentation can improve your presentation’s efficiency and aesthetic coherence. This blog offers a simple approach and understanding of how to add columns in Google Slides.

Step-by-Step Guide: Creating Columns in Google Slides
Google Slides have Certain pre-made body layouts. The title and two columns are contained in a single arrangement. It allows you to create and edit columns in Google Slides. It’s also the most straightforward method for creating Google Slides columns. You can learn how to make columns in Google Slides with a few clicks by choosing the slide layout:
Add Two columns:
The below steps will help you create a Google Slides two columns text box/slide:
- Launch Google Slides , then select a fresh slide. Remove the title box and text box currently on the first slide of Google Slides if you wish to create columns.
- Click the symbol with the + sign in the left corner of the Google Slides window.
- The layout “title and two columns” is one of the various slide layouts in the dialogue box that opens when you click this icon. To use this layout in Google Slides, select it.
- Enter any data you would like to add to these columns at this point. This method allows you to create columns in Google Slides. Still, it has a limitation in that it uses a premade layout that Google Slides does not permit you to modify or add more columns. Therefore, use the method below to create columns in Google Slides if you want to add more than two columns.
Add Three Columns:
Creating a three-column slide can be tricky since the layout menu in Google Presentations only provides options for one- or two-column presentations. All you need to do is be creative. To create a three-column slide in Google Slides, follow these steps:
- Make a new slide with the default format “Title and body.” This slide already has a text box, so all you have to do is scale it.
- To extend the text box, click on it and drag the blue square border on the right to the left.
- Right-click on the edited text box and choose “Copy.”
- You can use the keyboard keys Ctrl + C for Windows or Cmd + C for Mac as an alternative.
- Using the Ctrl + V (Windows) or Cmd + V (Mac) keys, paste the copied text box into the same slide to duplicate it.
- Continue doing this until three text boxes are accessible.
- After Pasting the text boxes, symmetrically arrange them to form the desired three columns and start entering the content into the text boxes.
How to Make a Table with Columns in Google Slides
Following these steps, you can easily add a table to your columns Google Slides. Let’s examine the procedures:
- Open your presentation in Google Slides.
- Click “Insert,” and a dropdown menu will appear. Choose the “Table” option.
- Once you select “Table,” a grid will cover your slide. Move your cursor over the grid until you see the number of columns and rows as a highlighted rectangle. To choose the desired number of columns, click and drag.
- Let go of the mouse button after choosing the number of columns. Your slide will display the columns you have selected. Now, you can click and drag the column boundaries to change the width of the columns.
- To insert text or photos, click inside each cell. You can also format the text inside the cells using the various formatting choices.
- You’re done once you’ve entered your material and made any necessary column adjustments! There is now a table with several columns on your slide.
How to Add Content in Columns in Google Slides:
These quick steps will help you add content to your columns Google Slides:
- Click inside each text box or cell and type to add content, or you can also copy and paste your content directly. Repeat the same process for each column.
- Customize your text’s font, size, and style to enhance the presentation.
How to Add a Table in Google Slides from a SlideUpLift Template:
Follow the steps below to add a table from a SlideUpLift template:
- Go to slideuplift.com and browse for Google Slides templates .
- Choose a template that includes tables or a layout suitable for your needs. Look for options that offer pre-defined tables for easy insertion.
- Download the chosen template.
- Open the downloaded template directly in Google Slides by uploading the file or using the “Open with Google Slides” option.
- Replace the template content with your information. Edit the text in the table cells to suit your presentation.
- Customize the table further by adjusting cell sizes, colors, or other formatting options in Google Slides.
Using SlideUpLift Google Slides templates can save you time and provide a professional look to your presentation. It’s an efficient way to add tables with a consistent design to enhance the overall visual appeal of your slides. Now, you can seamlessly integrate tables into your Google Slides presentation with the help of SlideUpLift templates. If you have any further questions or need assistance, contact us now!

Learning how to make columns in Google Slides is a beautiful way to showcase material in a condensed form. You can add one column as a table or multiple columns in text box form using the Layouts menu. The Columns can change their size and position, just like other presentation programs. Using the above methods, you can easily create reliable information-displaying slide decks without overcrowding the slides.
How To Make Columns In Google Slides?
Using these steps, you can easily learn how to create columns in Google Slides: Insert text boxes, draw them side by side, adjust sizes, and add content to create columns in Google Slides.
Can I add more than two columns?
Yes, you can add as many columns as needed by duplicating and arranging text boxes accordingly.
Can I adjust the column width?
Absolutely. Resize the text boxes to adjust the width of your columns. Experiment until you find the desired layout.
How do I find and use SlideUpLift templates in Google Slides?
Visit slideuplift.com, explore the Google Slides templates section, and download a template of your choice. Open it in Google Slides and replace the content with your own.
Table Of Content
Related presentations.

Multiple Column Google Slides Template

Tabels Google Slides Template Collection

Table Layout Google Slides Template
Related blogs.

10 Bad PowerPoint Slides Examples to Avoid

10 Best Google Slides Templates And Themes For Presentations

10 Ways To Make Interactive And Engaging Presentations In PowerPoint

19 Tips to Make A Professional-Looking PowerPoint Presentation
Tags and categories, privacy overview.
Necessary cookies are absolutely essential for the website to function properly. This category only includes cookies that ensures basic functionalities and security features of the website. These cookies do not store any personal information
Any cookies that may not be particularly necessary for the website to function and is used specifically to collect user personal data via ads, other embedded contents are termed as non-necessary cookies. It is mandatory to procure user consent prior to running these cookies on your website.
How To Make Columns In Google Slides: A Step-by-Step Tutorial
- Post author: Olivia Tambini
- Post category: Apps
- Post last modified: February 20, 2024
- Post comments: 0 Comments
Embarking on a journey to enhance your Google Slides presentations, this step-by-step tutorial delves into how to make columns in Google Slides. Discover the intricacies of this feature to transform your slides, providing a structured, visually appealing layout that captivates your audience and elevates your presentations.
To create columns in Google Slides, navigate to the “Format” menu, select “Columns,” and choose the desired number. Whether it’s two or more, this simple process instantly organizes your content into a structured layout, enhancing your presentation’s visual appeal and overall professionalism.
Explore the step-by-step tutorial on how to make columns in Google Slides for a transformative presentation experience. Uncover the intricacies of this feature to elevate your slides, optimize content organization, and captivate your audience with a visually appealing and professionally structured layout. Upgrade your presentation skills today.
See Also: Google Calendar VS Apple Calendar : Which Is better
- 1.1 Getting everything rolling with Google Slides
- 1.2 Slide Formats and Layouts
- 1.3 Cooperative Altering
- 1.4 Consistent Sharing and Availability
- 1.5 Dominating Slide Advances and Activities
- 2.1 Making Sections for Visual Agreement
- 2.2 Featuring Central issues
- 2.3 Adjusting Text and Visual Components
- 2.4 Redoing Column Width and Dividing
- 2.5 Changes Between Sections for Stream
- 3.1 Step 1: Open Your Presentation
- 3.2 Step 2: Select the Slide
- 3.3 Step 3: Access the Format Menu
- 3.4 Step 4: Choose the Number of Columns
- 3.5 Step 5: Adjust Width and Spacing
- 4.1 Step 1: Open Your Google Slides Presentation
- 4.2 Step 2: Select the Slide for Column Layout
- 4.3 Step 3: Create Two Text Columns
- 4.4 Step 4: Adjust Text Box Size and Position
- 5.1 Tip 1: Keep It Basic
- 5.2 Tip 2: Test Liveliness
- 5.3 Tip 3: Consistency in Plan
- 6.1.1 1.1 Meaning of Coordinated Content
- 6.1.2 1.2 Lessening Mental Load
- 6.2.1 2.1 Upgrading Readability
- 6.2.2 2.2 Exploring Intricacy with Simplicity
- 6.3.1 3.1 Effect of Visual Elements
- 6.3.2 3.2 Customization for Tasteful Precision
- 6.4.1 4.1 Facilitated Slide Development
- 6.4.2 4.2 Moment Versatility for Changes
- 6.5.1 5.1 Constant Collaboration
- 6.5.2 5.2 Synchronized Altering and Formatting
- 6.6.1 6.1 Consistency is Key
- 6.6.2 6.2 Influence Slide Expert for Uniformity
- 7.1 How to work on Google Slides two columns text box?
- 7.2 How to make two columns in Google Slides?
- 7.3 How to do columns in Google Slides?
- 7.4 Are Google Slides text columns convenient to use?
- 8 Conclusion
Overview of Google Slides Features

Getting everything rolling with Google Slides

Slide Formats and Layouts

Cooperative Altering

Consistent Sharing and Availability

Dominating Slide Advances and Activities

The Job of Columns in Upgrading Introductions
Columns are essential in organizing content and upgrading the clarity of your slides. Understanding how to use sections successfully can take your introductions to a higher level.
Making Sections for Visual Agreement

Featuring Central issues

Adjusting Text and Visual Components

Redoing Column Width and Dividing

Changes Between Sections for Stream

How to make columns in Google Slides: Making two columns m
This transforms your presentation, adding structure and visual appeal. Let’s walk through it together.
Step 1: Open Your Presentation

Step 2: Select the Slide

Step 3: Access the Format Menu

Step 4: Choose the Number of Columns

Step 5: Adjust Width and Spacing

This resolves the query “How to make columns in Google Slides.”
See Also: 6 Best Email Client For Chromebook Tools Of 2023
Creating Text Columns in Google Slides
Text columns bring structure and visual appeal to your content. Let’s dive into creating a two-column layout.
Step 1: Open Your Google Slides Presentation

Step 2: Select the Slide for Column Layout
Choose the slide and make it active.
Step 3: Create Two Text Columns
Step 4: adjust text box size and position.

Tips for a Clean Presentation
Tip 1: keep it basic.

Tip 2: Test Liveliness

Tip 3: Consistency in Plan
Keep a reliable plan for a durable visual encounter with comparative designing, textual styles, and tones. Also, read to change the style and font on the Chromebook .

See Also: How To Turn Off Google Password Manager – Full Tutorial
Productivity Released: The Force of Google Slides Columns Feature
In the domain of show plan, productivity is a central participant, deciding the effect and clarity of your message. Google Slides, a flexible instrument for creating introductions, presents a unique advantage — the Sections include. This profound jump investigates the proficiency of Google Slides Columns, displaying how it changes how data is coordinated and introduced.
1. Smoothing out Satisfied Structure
1.1 meaning of coordinated content.

1.2 Lessening Mental Load

2. Availability and Easy-to-Use Design
2.1 upgrading readability.

2.2 Exploring Intricacy with Simplicity

3. Making Visual Appeal
3.1 effect of visual elements, 3.2 customization for tasteful precision.

4. Time-Productive Show Creation
4.1 facilitated slide development.

4.2 Moment Versatility for Changes

5. Cooperative Efficiency
5.1 constant collaboration.

5.2 Synchronized Altering and Formatting

6. Ways to Boost Productivity with Google Slides Columns
6.1 consistency is key, 6.2 influence slide expert for uniformity.

See Also: How To Save Google Drive Photos To iPhone
How to work on Google Slides two columns text box?
To create a two-column text box in Google Slides, use the ‘Text box’ option, draw a box, and access the ‘Format’ menu. Choose ‘Columns’ and then select ‘Two’. This enables efficient organization and presentation of content.
How to make two columns in Google Slides?
To make two columns, go to the ‘Format’ menu, select ‘Columns’, and choose ‘Two’ in Google Slides. This straightforward process instantly arranges your content into a dual-column layout for enhanced visual appeal.
How to do columns in Google Slides?
Implementing columns in Google Slides is easy. Go to the ‘Format’ menu, click ‘Columns’, and select your preferred number. Whether two or more, this feature optimizes the layout of your content for a more polished presentation.
Are Google Slides text columns convenient to use?
Absolutely! Google Slides text columns are convenient. Access the ‘Format’ menu, choose ‘Columns’, and select the desired number. This feature enhances content organization and readability, making your presentations more polished and visually appealing.
In this comprehensive tutorial on how to make columns in Google Slides, users have gained valuable insights into optimizing their presentations. Mastering this feature ensures a visually appealing and organized layout, elevating the overall impact of your slides and creating a more engaging viewer experience.

Introducing TechiePlus’s all-in-one Editor, Olivia, based in London. From headphones to music streaming, she’s got you covered.
Leave a Reply Cancel reply
Save my name, email, and website in this browser for the next time I comment.
Home Blog Google Slides Tutorials How to Make Columns in Google Slides
How to Make Columns in Google Slides

Columns are used to design layouts and can be effectively managed to help make the most out of content to be added to a slide. A single or two-column slide allows adjusting text and images according to need while addressing key information to account for the best use of slide space. See the instructions below to learn how to add columns in Google Slides templates .
How to Create Columns in Google Slides
Whether you are wondering how to make two columns in Google Slides or add a single column on a blank slide, you can add columns via the Layout menu to find and add the type of column(s) you need. The column options in this menu include Title and Two Columns, One Column Text, and other options that can enable dividing a slide into different sections, such as the Section Title and Description layout.

The below image shows a two-column slide example in Google Slides.

You can right-click to adjust the column orientation to rotate, align, and distribute columns to further edit the columns.

How to Add Insert Table Columns in Google Slides
If you want to add table columns in Google Slides, select the number of columns to add. Using this option, you can add as many as 20 x 20 rows and Insert -> Table columns simultaneously.

To add extra rows and columns, right-click on the table to customize it further. You can insert columns in Google Slides, as well as adjust rows (left or right), or delete them according to need using the right-click context menu.

The below example shows a table added to Google Slides with multiple columns.

Final Words
Be it Google Slides columns in text box form via the Layouts menu or multiple columns added as a table, adding columns can be a great way of showcasing information in a compact form in Google Slides presentations. Like other presentation apps, the Columns can be edited to increase or decrease their size and alignment. Creating slide decks that can show information accurately without creating cluttered slides is possible. If you enjoyed this article, we recommend you to check out some of our other articles about Google Slides, for example how to apply hanging indent on Google Slides or make the slides vertical on Google Slides .

Like this article? Please share
Design, Google Slides Filed under Google Slides Tutorials
Related Articles

Filed under Google Slides Tutorials • April 19th, 2024
How to Find Trash on Google Slides
Don’t worry if you accidently delete a presentation file. Learn how to find trash on Google Slides with this guide.

Filed under Google Slides Tutorials , PowerPoint Tutorials • April 17th, 2024
Google Slides vs. PowerPoint: A Detailed Comparison
Contrast and pick with presentation software suits your best. Check our guide on how the Google Slides vs. PowerPoint eternal debate.

Filed under Google Slides Tutorials • March 22nd, 2024
How to Share a Google Slides Presentation
Optimize your presentation delivery as we explore how to share a Google Slides presentation. A must-read for traveling presenters.
Leave a Reply
Google Slides
How to Make Columns in Google Slides?

Table of Contents
Presentations aim to share information clearly and visually with the audience, and using columns can help. They help organize slides and make the best use of space. If you’re using Google Slides, knowing how to add columns can make your presentations more effective and consistent. This article helps you learn this skill easily and become a master at it.
How to Add Columns in Google Slides?
You can add columns to a slide using two different methods. The examples below explain how to make columns in Google Slides.
Method 1: How to Add Table Columns in Google Slides
If you’re looking to add more than two columns or want a different type of column layout, follow these steps:
Step 1: Open Google Slides and Insert a Table:
From the Insert menu, select “Table” and then choose the number of columns and rows you need. For example, if you want three columns, select a table with three columns and multiple rows.
Step 2: Customize Your Table:
Once your table is inserted, you can adjust the size of the columns and rows to suit your presentation. Click and drag the table borders to resize it, and right-click within cells to add content or additional rows and columns.
Step 3: Add and Format Content:
Populate your table with the desired content, such as text or images. You can format the content within each cell, change fonts, add colors, and more to match your presentation’s style.
Step 4: Fine-Tune Table Design:
If you need further customization, you can access table formatting options to adjust borders, cell padding, and alignment for a polished look.
Method 2: How to Make Text Columns in Google Slides?
For text-heavy slides, organizing your content into columns can make your information more digestible:
Step 1: Start With a Blank Slide:
Open a new blank document in Google Slides.
Step 2: Use the Layout Menu:
Click on the “Layout” option in the toolbar and select either “One column text” or “Title and two columns” depending on your needs.
Step 3: Adjust the Text Box:
Draw your text box across the slide, then access the Format options to adjust the column settings within your text box, fine-tuning your design as needed.
Step 4: Add Text Content:
Begin typing or pasting your text into the columns. You can use bullet points, numbering, or other formatting options to enhance readability.
Step 5: Visual Enhancements:
Complement your text columns with images, charts, or icons to illustrate key points or add visual interest to your slides.
How to Add More Columns in Google Slides?
Google Slides doesn’t have a ready-made option to add more than two columns, but you can still make it happen with a little workaround. Let’s see how to do it step by step:
Step 1 : Change your slide layout to “Title and two columns”.
Step 2 : Adjust the size of the columns using the borders until they look right.
Step 3 : Move the columns around by dragging them to make space for a new one.
Step 4 : Copy one of the existing columns by selecting it and pressing “CTRL + D” (for Windows) or “Command + D” (for Mac).
Step 5 : Put the duplicated column where you want it to make the slide look good.
By following these steps, you can add one more column to your Google Slides presentation. This helps organize your content better and makes your presentation more visually appealing. Just make sure to think about how big and where each column should be for the best look and understanding.
Advantages of Using Columns in Google Slides
Here are some reasons why using columns in Google Slides is helpful:
1. Improved Readability: Columns make long lists easier to read by breaking them into smaller, manageable sections.
2. Emphasizing Key Points: You can use wider columns to highlight important information, making it stand out for your audience.
3. Efficient Content Organization: Columns assist in arranging your content in a clear and digestible format, particularly useful when presenting data or lists of information.
Closing Thoughts
Incorporating columns into your Google Slides presentations is a simple yet powerful way to enhance clarity and engagement. Whether you opt for tables or text columns, mastering these techniques will elevate your presentation skills and captivate your audience. Experiment with different layouts and find what works best for your content. With these tools at your disposal, you’re well-equipped to create impactful presentations that leave a lasting impression.
What are the benefits of using columns in Google Slides?
Columns make your presentation look nice and organized. They help you arrange your stuff neatly and make your presentation look more professional, which keeps your audience interested.
Is it possible to change the number of columns once they’ve been created?
Yes, you can! In Google Slides, you can change the number of columns and how much space is between them whenever you want. Just go to the ‘Format Options’ sidebar and adjust the column settings to how you like.
Does adding columns impact the formatting of text within each column?
Nope, you can still change how the text looks in each column. You can pick different fonts, make the text bigger or smaller, and choose different colors. This way, your presentation looks consistent but still interesting.
Can I use columns on individual slides or across the entire presentation?
Sure thing! You can use columns on just one slide or all slides in your presentation. This lets you customize the layout for each slide depending on what you’re talking about or how you want it to look.
How can I align bullet points side by side in Google Slides?
To add bullet points side by side in Google Slides, you can use a Table. Here’s how:
Step 1 : Open your document where you want the bullet points. Step 2 : Go to the Insert Tab and choose Table. Pick a 2×1 Table for two bullet points next to each other. Step 3 : Put your text on each side of the Table. Step 4 : Select one side’s text, go to the Format Tab, and pick Bullets and Numbering to add bullet points. Step 5: Choose your preferred design. Step 6 : Repeat for the other side’s text. Step 7 : Click on the Table and select border color. Choose transparent.
By following these steps, you can easily create two columns of bullet points side by side in your Google Slides presentation.
What’s the process for cropping text in Google Slides?
Step 1 : Choose the text, object, or slide you want to cut. Step 2 : Go to the menu bar and click “Edit.” Step 3 : Choose “Cut” from the options.
Alternatively, you can press Ctrl + X on your keyboard to cut the selected text, object, or slide.
That’s it! Following these steps, you can easily cut text in Google Slides.
Frequently Asked Questions
Yes, you can! In Google Slides, you can change the number of columns and how much space is between them whenever you want. Just go to the 'Format Options' sidebar and adjust the column settings to how you like.
Sure thing! You can use columns on just one slide or all slides in your presentation. This lets you customize the layout for each slide depending on what you're talking about or how you want it to look.
To add bullet points side by side in Google Slides, you can use a Table. Here's how:Step 1: Open your document where you want the bullet points.Step 2: Go to the Insert Tab and choose Table. Pick a 2x1 Table for two bullet points next to each other.Step 3: Put your text on each side of the Table.Step 4: Select one side's text, go to the Format Tab, and pick Bullets and Numbering to add bullet points. Step 5: Choose your preferred design.Step 6: Repeat for the other side's text.Step 7: Click on the Table and select border color. Choose transparent.By following these steps, you can easily create two columns of bullet points side by side in your Google Slides presentation.
Step 1: Choose the text, object, or slide you want to cut.Step 2: Go to the menu bar and click "Edit."Step 3: Choose "Cut" from the options.Alternatively, you can press Ctrl + X on your keyboard to cut the selected text, object, or slide.That's it! Following these steps, you can easily cut text in Google Slides.
Save Time and Effortlessly Create Presentations with SlidesAI

December 7, 2023
How to add columns in Google Slides (step-by-step guide)
Four methods to add a column to a Google Slide using AI, tables, and templates.
Co-founder, CEO
Adding a column to a slide can help you organize your thoughts and make your slide more visually appealing. Whether you are trying to create a simple three-column layout or add multiple columns with images and icons, this guide will walk you through the different methods to get what you need.
Here are 4 ways to add columns in Google Slides.
Method 1: Use an AI presentation maker
An AI presentation maker like Plus AI can automatically generate multi-column layouts for your Google Slides.
If you have an existing slide and you would like Plus AI to add an extra column, you can follow these steps:
- Open the "Edit with Plus AI" menu
- Click "Remix"
- Write the instructions for a new column
- Select the type of slide layout you'd like
- Click Remix slide
To create a multiple column slide in Plus AI from scratch, you can follow these steps:
- Click "Insert"
- Write a description of the slide you'd like
- Click Generate slide
The best part of using an AI slides tool like Plus AI is it integrates directly with Google Slides and allows you to create and edit your content using AI instructions.
Method 2: Copy and resize from a pre-built layout
When you open a new Google Slides presentation, you typically already have access to several pre-built layouts that include columns. You can use these templates and then copy, paste, and resize the columns to fit your needs. Here are the steps:

- Click on the "Layout" dropdown menu in the toolbar.
- Choose a layout with columns.
- Copy and paste the right-most column
- Resize and reposition the column(s) as needed
This method allows you to quickly add columns to your slide without manually creating them from scratch. However, it will likely require some adjustments to match your presentation theme and design style.
Method 3: Create a table
Creating a table in Google Slides is another way to add a slide with columns to your presentation. "Columns" within a table are less flexible from a formatting perspective, but they do make it easier to keep all of your content aligned, especially if you need more than 5 columns or columns with different widths.
Here's how to create columns using a table:

- Click Insert -> Table
- Choose the number of columns and rows you need for your table.
- Resize the table as needed depending on your column widths.
- Add your content to the table cells.
Using this method will probably result in a less visually appealing result, but it is an easy way to organize your content in a structured format.
Method 4: Find and use a pre-existing template

If you are starting your presentation from scratch, one of the easiest ways to make pretty slides with more columns is to find a pre-existing template that offers a slide with the number of columns you need. There are many websites that offer professionally-designed templates, so you can just find one that meets your needs and replace the content with your own. (Here's the link to the example presentation above if you are looking to create a restaurant marketing strategy )
Plus offers a library of presentation templates that you can browse to find a set of slides that works for your presentation, and you can also use their AI function to rewrite the slides for you.
Other tips and tricks for great presentations
Here are some resources to help you create great presentations:
- Make slides look good - Here are some quick tips you can start trying out immediately to make your slides look like they were designed by a pro.
- PowerPoint Night ideas - Love presentations so much that you want to create and share them with your friends? Here are some ideas for fun presentations for a PowerPoint Night!
Adding columns in Google Slides - especially in a way that makes your slide looks good - is not always easy. The right solution really depends on your situation and exactly what you are trying to achieve. Hopefully you can use one of these methods to fit your content to your slide and make sure your presentation looks great!

Latest posts
Latest post.

How to use ChatGPT to create PowerPoint presentations
Step-by-step guide to using AI tools to create presentations. Looking for ChatGPT for PowerPoint? Here's a guide to using AI in PowerPoint and Google Slides

The Best GPT-4 Apps and Demos (so far, April 2024)
The best GPT-4 powered apps we have seen so far

How do AI content detectors work — and can you trust them?
We tested 10 of the most popular AI content detector tools, their accuracy, whether they can be trusted — and how to bypass detection.

Tome vs. Gamma: In-depth comparison, pricing, and recommendations
In-depth comparison of Tome and Gamma with recommendations for which tool is right for you
More resources
How to use microsoft copilot in powerpoint.
Step-by-step guide to using Copilot for PowerPoint to make presentations, along with an alternative to create better slides
How to Use ChatGPT for Sales + 19 Free Prompts
Tips and tricks on using ChatGPT for sales, along with ready-to-use ChatGPT prompts for sales
How to compress a PowerPoint presentation
Wondering how to compress a PowerPoint file? Here are five simple ways to reduce the size of your ppt file.
Genuine software, legally FREE - no cracking required!
Edit Word, Excel, and PPT effortlessly
Read, edit, and convert PDFs with the powerful PDF toolkit.
Microsoft-like interface, easy to use.
Windows • MacOS • Linux • iOS • Android

- Articles of Office solution
How to Make Columns in Google Slides: A Step-by-Step Guide
The purpose of a presentation is to communicate and visualize content clearly with the audience, and in doing so, columns can be highly beneficial. Columns assist in organizing presentation slides and optimizing space utilization effectively. If you're using Google Slides for your presentation tasks, learning how to make columns in Google Slides can enhance the effectiveness and visual consistency of your presentations. This article provides a seamless way to learn and master this valuable skill.
How to Make One or Two Text Columns in Google Slides
Let's start with the basics, exploring how to make columns in Google Slides:
Step 1 : Begin by opening a new blank Google Slides document in your web browser.
Step 2 : In the toolbar, located just beside the "+" icon, you will find a downward arrow icon labeled "New slide with layout". Clicking on this icon will reveal a dropdown menu.
Step 3 : Within this dropdown menu, click on "Title and two columns" to add a new slide with two columns.
Step 4 : If you wish to modify the layout of your current slide, first click anywhere on the slide, and then navigate to the toolbar and click on "Layout". From there, select "Title and two columns", and two columns will be added to your existing slide.
Step 5 : Similarly, for slides with a single column, navigate to the "Layout" option in the toolbar. Choose "One column text" from the menu to configure your slide with a single column format.
This method allows for a straightforward approach to introducing one or two text columns in your Google Slides presentation.
How to Make Three Text Columns in Google Slides
While Google Slides may not have a predefined layout for three text columns, there is a workaround that allows us to achieve this within the existing two-column text layout. Let's explore how to add or create multiple columns in Google Slides:
Step 1 : Begin by changing the layout of your current slide to "Title and two columns".
Step 2 : Adjust the size of your two columns by using the borders, ensuring they are proportionate and visually balanced.
Step 3 : Reposition the columns within your slide by dragging them, creating space for the addition of a new column.
Step 4 : Duplicate one of the existing columns by selecting it and then pressing "CTRL + D" (for Windows) or "Command + D" (for Mac).
Step 5 : Reposition the duplicated column to enhance the visual appeal of the slide.
With these steps, you can seamlessly incorporate a third column into your Google Slides presentation, enhancing the layout and effectively organizing your content. Remember to consider the sizing and positioning of each column to maintain a visually appealing and comprehensible presentation.
How to Make a Table with Columns in Google Slides
If you wish to insert a table into your Google Slide, the process is straightforward. Let's explore the steps:
Step 1 : To create a new table in your Google Slide, navigate to the Insert menu and click on "Table".
Step 2 : A flyout menu for the table will appear. Here, you can choose the number of rows and columns for your table. Hover your cursor over the grid, and the flyout menu will dynamically adjust based on your selection.
Step 3 : Edit your table by utilizing options like "Fill Color" or "Border Color" in the toolbar. This allows you to enhance the visual appeal of your table.
Importing Slides with Tables to Google Slides:
Alternatively, you can download a table template from an online resource and import it into your Google Slide.
Step 1 : Go to the File menu and click on "Import Slides" in Google Slides.
Step 2 : If you have a Google Slide with a table, select it from the available slides on your Google Drive and then click on "Import Slides".
These slides can be accessed from anywhere on your Google Drive and shared with others for collaboration. However, it's important to exercise caution regarding privacy concerns when sharing sensitive information.
Best Free Alternative to Google Slides - WPS Presentation
While Google Slides offers a solid platform for presentations, WPS Presentation takes it a step further with its clean and simple interface, making it a user-friendly choice for users of all levels. The DIY service allows you to craft presentations with ease, and the ample templates available in the WPS Office app make your slides not only highly customizable but also visually attractive.
Not only does WPS Presentation offer a clean interface, but it also provides the freedom to create stunning presentations with its advanced tools, diverse animations, and transitions. With various layouts, including columns for improved organization, WPS Presentation ensures that your presentations are visually consistent. Download WPS Presentation now and experience it for yourself.
Use Word, Excel, and PPT for FREE, No Ads.
Edit PDF files with the powerful PDF toolkit.
Microsoft-like interface. Easy to learn. 100% Compatibility.
Boost your productivity with WPS's abundant free Word, Excel, PPT, and CV templates.
How to Create a New Google Slide from WPS Presentation
Given that many users may not be acquainted with the user interface of Google Slides, an alternative approach involves initiating the creation of a new presentation in the user-friendly environment of WPS Presentation. Following the creation process, users can then seamlessly transfer their work to Google Slides, let's explore the steps:
Step 1 : Open WPS Office on your system and click on "New" from the sidebar menu.
Step 2 : Revisit the sidebar menu, click on "Slides", and then select "Blank".
Step 3 : Utilize the WPS Presentation interface to craft a compelling slide. To add new slides, simply press "CTRL + M" or, in the Home tab ribbon, click on "New Slide".
Step 4 : Enhance your presentation by inserting pictures, changing the design, or incorporating animations using the advanced yet user-friendly tools provided by WPS Presentation.
Step 5 : Once your presentation is complete, go to the Menu at the top right corner and click on the "Save as" option.
Step 6 : Upload your file directly to "Google Drive" or save the file on your computer.
Step 7 : Head over to Google Drive, where you'll find your presentation if you saved it directly through WPS Presentation.
Alternatively, users can click on the "New" icon and select "File Upload" to upload their presentation to Google Drive.
Step 8 : Open the presentation on Google Slides and make any necessary changes before sharing your slides with others. This seamless process ensures your WPS Presentation is easily accessible and editable within the Google Slides platform.
Q1. How to put bullet points side by side in Google Slides?
You can add bullet points side by side in Google Slides using a Table. Here is a straight-forward guide on how to do it:
Step 1: Open your document where you wish to incorporate side-by-side bullet points.
Step 2: Navigate to the Insert Tab and select Table. Choose a 2x1 Table for two bullet points side by side.
Step 3: Input your text or copy-paste content into each side of the Table.
Step 4: Select the text on one side and go to Format Tab. Choose Bullets and Numbering from the drop-down menu to insert bullet points into the selected text. Select your preferred design from the bulleted list menu.
Step 5: Now, select the text on the other side of the Table and repeat the above step to insert bullet points.
Step 6: Click on the Table and navigate to the border color. The icon of the border color looks like a pencil. Choose transparent from the displayed options.
Following these steps will seamlessly create two columns of bullet points side by side in your Google Slides presentation.
Q2. How do I cut text in Google Slides?
You can apply the following straight-forward steps to cut text in Google Slides:
Step 1: Select the specific slide, object, or text you intend to cut.
Step 2: Navigate to the menu bar and click on "Edit."
Step 3: Select the "Cut" option from the dropdown menu.
Alternatively, you can use the keyboard shortcut by pressing Ctrl + X to cut the highlighted text, object, or slide.
Q3. Does WPS Office support collaborative editing like Google Slides?
Yes, WPS Office supports collaborative editing. It excels in collaborative functionality, enabling seamless teamwork by facilitating multiple users to contribute to a presentation concurrently. This feature enhances productivity and promotes efficient collaboration, making WPS Office a robust alternative to Google Slides for collaborative work.
Transform Your Presentations: Elevate Your Creativity with WPS Office!
No matter which tool you use for your presentations, it's important to be creative and make impactful slides, and learning how to make columns in Google slides brings you a step closer. Google Slides is a great choice, and it has features like inserting columns that help you organize your content better. But if you want an even easier and more versatile experience, WPS Office is a strong competitor. It has user-friendly tools that can make your presentations stand out. Give WPS Office a try and see how it can make your presentation journey more exciting. Download WPS Office now for a better presentation experience.
- 1. How to Make a Slideshow on Google Slides: A Comprehensive Guide
- 2. How to make a Shape Transparent in Google Slides (The Easiest Way)
- 3. How to Make Google Slides Play Automatically - A Step-By-Step Guide
- 4. How to hide slides in Google Slides?
- 5. How to Select Multiple Slides in Google Slides (Easy & Fast)
- 6. How to Create Two Columns in Google Docs (Step-by-Step)

15 years of office industry experience, tech lover and copywriter. Follow me for product reviews, comparisons, and recommendations for new apps and software.
How to Make Columns in Google Slides
Thanks to Google, now we can create some amazing presentations by using Google Slides. And this service is absolutely free, which makes things even sweeter.
However, some of us may still not know how to utilize its features, such as adding columns and rows. And to help you with that, we’ve come up with this article.
Here we’ll discuss how to make columns in Google Slides and add some tips that will help you understand the full potential of this service. So, without wasting much time, let’s get started right away!
How to Create Columns in Google Slideshows
- Open your Google Slides file.
- Choose a slide.
- Select Insert at the top of the window.
- Choose Table , then the desired table layout.
Our guide continues below with additional information on making columns in Google Slides , including pictures of these steps.
If you are working on spreadsheets too, and you want to improve their reliability, then follow this background color in Excel tutorial and learn about a way to do it.
How to Make Google Slides Columns (Guide with Pictures)
The steps in this article were performed in the desktop version of the Google Chrome Web browser. These same steps will work for other desktop browsers like Mozilla Firefox , Microsoft Edge, or Apple’s Safari browser.
Google Slides doesn’t give you any limitations, so there is no rule for how many slides you can create, just like Microsoft Powerpoint.
Now it is time to tell you how to insert columns or do a column break in your slides to make them more informative and attractive. We’ll cover all the aspects you need to learn, so tighten your seatbelts!
Step 1: Open your Google Slides presentation.
First of all, go to the Google Docs Presentation’s slide thumbnail. And then, you can create a new slide from there. Alternatively, you can create a new Slides file by clicking New, then Google Slides .
Step 2: Select the slides at the left side of the window to which you wish to add columns.
You can add a new slide by choosing Insert > New slide at the top of the window or using the Ctrl + M keyboard shortcut.
You can change the layout of a slide by right-clicking on it, then choosing the Apply layout option. When the layout options appear, you will see a number of different options that you can select from, including things like Title slide, Section header, Title and two columns, Title only, One column text, and more.

Step 3: Choose the Insert tab at the top of the window.

Step 4: Select the Table option, then click the box that indicates the number of rows and columns that you want to use in your slide.
If you only want to create two columns, for example, then you might want to select the 2 x 1 option. Note that the cells will extend vertically as you add more content to them. You can also resize them manually by dragging the controls on the border of the table .

Once you have your columns in the slide you can add more columns by right-clicking on a cell in the table then choosing the Insert column left or Insert column right option. You can use a similar technique to delete unwanted columns as well.
Once you are done picking layouts, add all your details, such as pictures, titles, or anything you want to put in the slide. You can access the Insert Menu to add photos, tables, video clips, and any other thing in all the slides.
After opening the slide layout, right-click a cell on the table and insert rows and columns in this manner: Insert column left > Insert column right > Insert row above > Insert row below.
Related Article: Want to know more about changing the number of columns in a document? This how to switch columns in Google Docs tutorial can answer some of those questions.
How Do I Delete Rows and Columns?
If you have made any mistakes or just want to delete an entire column or row, here’s how to do it.
- Firstly, move your cursor to the column or row you want to delete.
- After pointing to the cursor, use the right-click. When the options appear, select the delete row or delete column option. You can do the same for the next column or row you want to delete.
How Can I Merge Cells in a Table?
When you have to merge two cells to create titles or insert several details in one cell, this is the way to combine cells.
- Open your slide or document at first.
- After that, click on the cells you want to combine and drag to highlight the part.
- Now, do the right clicking, and multiple options will pop up. Next, click on the “Merge Cell.” And if you are not happy with the merging, simply click the unmerge option. And that’s how you combine cells to make an entire table.
How to Split Text into Two Columns in Google Sheets
Here is the instruction on splitting text into two columns in Google Sheets.
- Open your document and select the column. Now, you have to click on the “Data menu” and pick the “Split text to Columns” option.
- After that, Sheets will give you access to a small menu beside the text. From there, you will get the option to split the text with a comma, space, period, or you can use any custom character you want.
- Now, pick the diameter used by your text, and Google Sheets will split your selected text.
How Do I Split Google Docs in Half Horizontally?
Sometimes you may have to split your documents in half for different reasons. And here is how you do it on Docs.
- First of all, access Google Docs and open the document you want to split in half horizontally.
- Now, go to the toolbar, which is located at the top left corner of the window.
- After accessing that, click on the format tab and choose the Columns option.
- You will see a button with two columns; you have to click on that to split the document.
Understanding the Toolbar and Menu Bar
To enjoy the full potential of Google Slides, you should know how to use the toolbar. This way, you can create an intriguing Google presentation effortlessly. These options can be used on all your slides without any trouble.
Paint Format
Thanks to this tool, you can copy/paste the formatting of an object and then use it on another one. Here you will get options such as fill color to make your slides creative. Here’s how you use it.
- Pick a shape and then click on the Paint Format tool.
- Now, choose another shape and watch the formatting of the previous shape; you will see that the similar solid color, line width, etc., will be applied.
Well, the zoom functionality on Google Slides comes with limitations; you will not have many options to utilize. However, you can zoom up to 50 to 200 percent, which is enough.
To do that, you can use these keyboard shortcuts; CTRL+ALT++ and CTRL+ALT+–. Furthermore, you can also click on the zoom button from the toolbar.
If you want to insert google images in your slide from your Google Drive, you can do that too! Moreover, you can add pictures from your computer or the web, whatever you prefer. Google Slides also allows you to edit images to make them more amazing!
Bullet Points
Slides aren’t usually text-heavy content, and you mostly need to add bullet points. And in Google Slides, you have the liberty to do that pretty effortlessly.
All you have to do is type whatever you want to say and highlight the text. Then, go to the dropdown menu and select what type of bullet point you want to use. Well, that’s all you need!
Slide Layouts
You can apply slide layouts or change slide layouts to a slide by right-clicking on that slide, choosing Apply layout, then selecting the desired option.
One of the options here allows for multiple columns without using a table, so this could be a preferable solution if you know how many columns you want, it’s only two columns, and you don’t think you will need to add more rows or more columns to one slide in the same manner that’s available when you are using a tabular layout.
More Information on How to Make Columns in Google Slides
Our tutorial above provided you with a way that you can insert a table into one of your presentation slides in Google Slides so that you can include additional columns.
When you add a table to a slide it is going to have some borders that separate the cells. If you don’t want these borders then you can use your mouse to select the entire table, then click the Border color button in the toolbar and select the Transparent option.
If you don’t want to use a table to present your information, another option that you have is to simply add multiple text boxes in one of your slides. You are able to resize and reposition text boxes on a slide, allowing you to create the layout that you want.
If you have added multiple text boxes to one of your slides but find that you need to delete one, simply click on the border of that text box, then press the Delete key or the Backspace key on your keyboard. This will delete the text box as well as any information contained within it.
The Bottom Line
So, here is how you add columns in Google Slides. Well, it is pretty easy to do; hence, you only need to try it once. After that, you can do that in seconds whenever you’re making presentations.

Kermit Matthews is a freelance writer based in Philadelphia, Pennsylvania with more than a decade of experience writing technology guides. He has a Bachelor’s and Master’s degree in Computer Science and has spent much of his professional career in IT management.
He specializes in writing content about iPhones, Android devices, Microsoft Office, and many other popular applications and devices.
Read his full bio here .
Share this:
- Click to share on Twitter (Opens in new window)
- Click to share on Facebook (Opens in new window)
- Click to email a link to a friend (Opens in new window)
- Click to share on LinkedIn (Opens in new window)
- Click to share on Reddit (Opens in new window)
- Click to share on Pinterest (Opens in new window)
- Click to share on Tumblr (Opens in new window)
Related posts:
- How to Hide a Slide in Google Slides
- How to Duplicate a Slide on Google Slides
- How to Delete a Slide on Google Slides
- How to Delete Columns in Google Docs (An Easy 4 Step Guide)
- How to Add Another Column in Google Docs Table
- How to Delete Multiple Slides in Google Slides
- How to Make All Columns Same Width – Google Sheets
- How to Change Slide Dimensions in Google Slides
- How to Add Lines Between Columns in Word 2013
- How to Center a Google Docs Table
- How to Add Columns to a Table in Word for Office 365
- How to Number Slides in Google Slides
- How to Delete Columns in Google Sheets
- How to Split Columns in Google Sheets
- How to Put YouTube Videos in Google Slides
- How to Add a Column in Word 2013
- How to Make a Table Smaller in Google Docs
- How to Change Font on Google Slides Text Box
- How to Add a Page on Google Docs
- How to Delete Table on Google Docs
How To Make Two Columns In Google Slides (Easy Guide)

To add two columns in Google Slides, all you have to do is open presentation > Layout > select “Title and two columns.” Google Slides makes it easy to add multiple columns to your slides, and you can even adjust the width of each column to fit your needs.
Here are the quick steps you need to take to add two columns to your slides in Google Slides:
Step 1: Open Google Slide
Step 2: go to layout, benefits of using columns in google slides.
Open a new or existing presentation in Google Slides.

Find the Layout option from the taskbar and select “ Title and two columns .” (Feel free to delete the title part if you don’t need it.)

That’s it! You have successfully created two columns in Google Slides.
You can adjust the width of each column by hovering your mouse over the line between the columns and dragging it to the left or right.
Some benefits of using columns in Google Slides include:
- Making long lists more readable: Using columns break long information into smaller, more readable chunks.
- Highlighting important information: You can use columns to emphasize specific points or information by making them wider than the other columns. This will help draw attention and make it easier for your audience to see.
- Organizing content: Columns can help you manage your conten t in an easily digestible format. This is especially helpful when presenting data or lists of information.
Using columns in Google Slides is a great way to organize your content and make it easier for your audience. By using the steps above, you can easily add multiple columns to your slides and adjust the width of each column to fit your needs.
We hope you found this guide helpful! If you have any questions or comments, feel free to leave them below.
Related Posts:
")
How to create columns in google slides
Elevate your Google Slides presentations with ease by mastering the art of creating dynamic columns.
Sanskar Tiwari
Step-by-Step Guide: Creating Columns in Google Slides
Step 1: open your google slides presentation.

Step 2: Select the Text Box
Step 3: draw your text box.

Step 4: Access the Format Options

Step 5: Adjust Column Settings

Step 6: Fine-Tune Your Design

Conclusion:
Frequently asked questions:, why should i use columns in google slides, can i adjust the number of columns after creating them, will adding columns affect the text formatting in each column, can i use columns in specific slides or throughout the entire presentation, related blogs, how to group different objects together in google slides.
How to convert selected Text to Capitals in Google Slides
How to convert pdf report to powerpoint presentation, how to convert pdf lecture notes to powerpoint, how to extract webinar highlights from youtube to powerpoint for quick references, how to create language learning materials by converting youtube videos to powerpoint slides, how to create marketing presentations from youtube videos, how to transform historical event videos into powerpoint summaries for educational purposes, how to convert youtube educational content to powerpoint, stunning presentations in seconds with ai.
Install MagicSlides app now and start creating beautiful presentations. It's free!

~1M Installs, rated 4.5/5 ⭐️ by 424 reviews
How to Make Columns in Google Slides

Columns are an effective way to organize content and design the layout of your slides in Google Slides. Whether you want a simple two-column text layout or multiple columns with images, this guide provides several methods to add columns to your presentation.
Why Use Columns in Google Slides
Here are some key reasons why columns can enhance your Google Slides:
- Organize information clearly into sections
- Optimize space usage on slides
- Improve visual appeal and consistency
- Allow flexibility in content layout
- Accommodate more text and visuals
Using columns aligns with core presentation design principles around structure, clarity, and visual appeal.
Method 1: Insert a Table
The easiest way to create columns in Google Slides is by inserting a table. Here is a step-by-step guide:
- Open your Google Slides presentation and select the slide you want to add columns to.
- Click Insert > Table on the top menu.
- In the grid that appears, hover over until you see a highlighted rectangle showing the number of columns. Click and drag to select the desired number of columns.
- Release the mouse button once selected. The columns will appear on your slide.
- Adjust the column widths by clicking and dragging the borders as needed.
- Add your content into the table cells such as text, images, shapes, and charts.
The key benefit of using a table is that you can precisely control column widths. You can also easily add up to 20 rows and columns in a single slide.
Method 2: Use a Column Layout
Another way to add columns is by applying a column layout to your slide. Here is how:
- Open your presentation and select the slide.
- Click the Layout button on the top menu bar.
- Select Title and Two Columns or any other column layout from the dropdown menu.
- Delete the title box if not needed.
- Customize the column formatting from the toolbar to meet your needs.
The layout method makes it fast and simple to get started with columns. However, it provides less control than inserting a table.
Method 3: Insert Text Boxes
For full customization over column design, you can manually insert and format text boxes:
- Click Insert > Text Box on the top menu bar.
- Draw a text box on your slide to define the column width and location.
- Copy and paste the text box to add more columns.
- Customize borders, background, alignment, and spacing for each text box.
- Add your text, images, charts and other visuals into the text boxes.
While this method requires more work upfront, you can fully control width, height, position, and formatting per column.
Tips for Great Looking Columns
Follow these tips to make sure your columns look visually appealing:
- Maintain consistent font styles, sizes and line spacing across all columns.
- Use similar background colors and borders to unify multi-column slides.
- Align columns neatly using layout grids and guidelines.
- Balance column widths to allocated space effectively.
- Add negative space between columns to prevent a cluttered look.
Taking the time to properly design your columns ensures your content shines through clearly and professionally.
Common Column Layouts to Try
Here are some popular column layouts you can create in Google Slides:
- Two Column: A 50-50 split works well for showcasing two sets of comparable data side-by-side.
- Primary + Secondary: Use a wide primary column with narrow secondary column for supporting details.
- Thirds: Having three equal columns can allow you to break information into logical groupings.
- Media + Body: Pair an image gallery column with a text-heavy body content column.
Experiment with these column layouts and more to find what communicates your ideas most effectively.
Adding columns to your Google Slides gives you more ways to organize information and design visually appealing slides. By following the step-by-step instructions in this guide, you can leverage columns to take your presentations to the next level.
Focus on your content structure first before designing the visual layout. And don’t be afraid to try different combinations of columns, rows, text boxes and tables to build slides that engage your audience.
About The Author
Vegaslide staff, related posts.

How to Share Video with Google Slides

How To Group in Google Slides

How to Save an Image From a Google Slides Presentation

Microsoft PowerPoint vs. Google Slides: Which One Should You Be Using?

how to make columns in google slides
How to make columns in google slides: a comprehensive guide, hello, readers.
Welcome to our in-depth guide on creating columns in Google Slides. Whether you’re a seasoned presentation pro or just starting out, this article will provide you with everything you need to know about structuring your content effectively for maximum impact. So, grab a cup of coffee and let’s dive right in!
Section 1: Understanding Columns
What are columns.
Columns are vertical sections that divide a slide into multiple parts. They allow you to organize and present your content in a clear and concise manner. Columns can be used to:
- Break up text into smaller, more manageable chunks
- Present data in a structured format, such as tables or charts
- Create visual interest and hierarchy in your slides
Column Types
Google Slides offers two main types of columns:
- AutoFit Columns: These columns automatically adjust their width based on the content you insert.
- Manual Columns: The width of manual columns is set manually by the user.
Section 2: Creating Columns
Adding columns automatically.
To add columns using the AutoFit option, simply follow these steps:
- Click on the "Insert" menu and select "Table."
- Choose the number of columns you want from the dropdown menu.
- Enter your content into the table cells.
Adding Columns Manually
For more precise control over column width, you can use the Manual Column option:
- Choose "Custom table" and enter the number of columns and rows you want.
- In the "Column width" field, enter the desired width for each column in inches or centimeters.
Section 3: Formatting Columns
Adjusting column width.
Once your columns are created, you can adjust their width to suit your needs:
- AutoFit Columns: To make all columns the same width, click on the "AutoFit" button in the table toolbar.
- Manual Columns: To manually adjust the width of individual columns, drag the column boundaries on the slide.
Aligning Content
You can align the content within your columns to enhance readability:
- Horizontal Alignment: Align text left, center, or right within the columns.
- Vertical Alignment: Align text top, middle, or bottom within the columns.
Section 4: Additional Tips for Working with Columns
- Combine Columns: Merge two or more adjacent columns to create a wider column.
- Split Columns: Split a column into two or more separate columns.
- Insert Images and Objects: Add images, shapes, or other objects to your columns to enhance visual appeal.
- Use Color and Shading: Apply different colors or shadings to your columns to differentiate them or highlight important information.
- Convert Text to Columns: If you have a block of text, you can convert it into columns by selecting the text and clicking on the "Table" button in the toolbar.
Section 5: Table Breakdown for Column Creation
Section 6: conclusion.
Mastering the art of creating columns in Google Slides is essential for crafting visually appealing and well-organized presentations. By following the steps and tips outlined in this guide, you can effectively structure your content, enhance readability, and impress your audience.
Thank you for reading! If you found this article helpful, be sure to check out our other resources on presentation design and Google Slides techniques. We’re always here to assist you on your journey to becoming a presentation master!
FAQ about How to Make Columns in Google Slides
How do i create a new column in google slides.
Insert a table and add more columns as needed.
How do I insert a table in Google Slides?
Go to Insert > Table and select the desired number of rows and columns.
How do I add a new column to an existing table?
Select the table, right-click, and choose "Insert Column."
How do I set the column width?
Click or drag on the vertical border of the column to adjust its width.
How do I align the text in a column?
Select the text, right-click, and choose the desired alignment (left, right, or center).
How do I merge or split columns?
Select the columns to merge or split, right-click, and choose the appropriate option.
How do I remove a column from a table?
Select the column, right-click, and choose "Delete Column."
How do I resize the space between columns?
Click or drag on the vertical border between columns to adjust the spacing.
How do I format the column heading?
Select the column heading, use the formatting options in the toolbar, or right-click and choose "Table Properties."
Can I use conditional formatting to highlight specific columns?
Yes, select the columns, go to Format > Conditional Formatting, and set the conditions and formatting options.
- Skip to main content
- Skip to primary sidebar
Additional menu
All About Tech
How To Make Columns in Google Slides? [5 Easy Ways]
Written by Amanda Gaudet posted on February 19, 2024
One good thing about Google’s documentation tools is that there are multiple crossovers of features across the platforms.
You can put horizontal and vertical lines and make them look like a table, but there is a better and more authentic way to add columns to Google Slides. All you have to do is to access the Insert option and choose a table.
While we associate tables with Google Sheets , the need to present data in the form of rows and columns cannot be completely ruled out. There will be a whole editor dedicated to the things you can do with a table.
So, without further ado, let’s dig in!
Ways To Make Columns in Google Slides
Since Google Slides is a dynamic design tool, the possibilities are endless. So, adding columns can be done in various ways just like any other task. What you have to do is to narrow down the most convenient and straightforward method for your use case.
So, based on what I have been doing for years, here are the five most straightforward ways to do it.
Method 1: Using a Table
Yes, you can add a table in Google Slides as in Google Sheets or Docs. You can choose the number of columns you want in your table at the time of adding it through the Insert option.
Here are a few simple steps to follow:
- Open your presentation file in Google Slides.
- Click on the “Insert” option from the main menu.
- Hover over the option “Table” from the dropdown.

- Notice the table dimensions mentioned below the selection as you move the cursor.
- Select the number of columns and rows you want and click on the selection at the end. That’s it. The table will be added to your G slide.
Method 2: Using a Pre-designed Layout
You can create a standard two columns text box using a predesigned layout. You can always copy these columns and paste them if you want more columns.
Here is how you can add columns using text columns:
- Find the “+” sign on the ribbon menu to add a new slide.
- Locate a dropdown next to the “+” sign and click on it.

- Resize the text boxes that look like two parallel columns.
Method 3: Using Templates
Many websites offer different templates for Google Slides. There are dozens of great templates containing tables that you can import into Slides.
Here is how you can add one with columns:

- Adjust the designs and enter your text into the tables.
Tip: You can also download the template from other website and then import it. Once imported you can easily adjust the designs and edit text.
Method 4: Using Design Elements
Another simple yet lengthy way to do columns is by drawing them with the help of designing tools within Google Slides.
Here is how you can draw:
- Open your presentation file.
- Select “Line” or “Shape” from the ribbon bar.

- Alternatively, add shapes (preferably rectangles) to draw a table. Copy and paste the shape to design a table with the desired number of columns.
- Now, enter text into this design using the text box.
Method 5: Using Images
This is probably the most unorthodox way of adding columns or tables in Google Slides. You can download a PNG or SVG image of a table from the internet and import it into your slides.
Here is how:
- Download an image of a table of desired dimensions from the internet.
- You can alternatively draw a table using any design tool and save it as a PNG or SVG file.

- Go to “Insert” from the main menu.

- Import the image of a table that you downloaded.
Adding More Columns To Existing Table
If you have already added a table and want to add more columns to it, then you have to go to any individual cell and right-click on it to add new rows and columns. Here’s a step-wise process:
- Go to a table where you want to add new columns.
- Right-click on any of its cells.

If you want to improve your presentations further, you may try different things like rotating text , zooming in , adding a timer , and transitions (animations) .
Frequently Asked Questions
You can add a table of desired dimension from Insert > Table and write text into the cells separately to split your text into columns.
You can add a new slide with the “+” option and choose “Title and two columns” as the desired layout. This will add a new slide with a title and two parallel text boxes that appear like columns. Now, add bullet points in these boxes/columns.
Google Slides may be a very dynamic tool for designing and presenting, but it has the same DNA as Google’s other documentation tools. That is why it inherits some popular features like adding tables and charts into slides.
Using columns to denote different data points could be a great way to enhance your presentation, and I hope now you know how to add them.
Reader Interactions
Leave a reply cancel reply.
Your email address will not be published. Required fields are marked *
Save my name, email, and website in this browser for the next time I comment.

Cloud Storage

Custom Business Email

Video and voice conferencing

Shared Calendars

Word Processing

Spreadsheets
Presentation Builder

Survey builder

Google Workspace
An integrated suit of secure, cloud-native collaboration and productivity apps powered by Google AI.
Tell impactful stories, with Google Slides
Create, present, and collaborate on online presentations in real-time and from any device.
- For my personal use
- For work or my business

Jeffery Clark
T h i s c h a r t h e l p s b r i d g i n g t h e s t o r y !

E s t i m a t e d b u d g e t

Make beautiful presentations, together
Stay in sync in your slides, with easy sharing and real-time editing. Use comments and assign action items to build your ideas together.

Present slideshows with confidence
With easy-to-use presenter view, speaker notes, and live captions, Slides makes presenting your ideas a breeze. You can even present to Google Meet video calls directly from Slides.

Seamlessly connect to your other Google apps
Slides is thoughtfully connected to other Google apps you love, saving you time. Embed charts from Google Sheets or reply to comments directly from Gmail. You can even search the web and Google Drive for relevant content and images directly from Slides.

Extend collaboration and intelligence to PowerPoint files
Easily edit Microsoft PowerPoint presentations online without converting them, and layer on Slides’ enhanced collaborative and assistive features like comments, action items, and Smart Compose.

Work on fresh content
With Slides, everyone’s working on the latest version of a presentation. And with edits automatically saved in version history, it’s easy to track or undo changes.

Make slides faster, with built-in intelligence
Assistive features like Smart Compose and autocorrect help you build slides faster with fewer errors.

Stay productive, even offline
You can access, create, and edit Slides even without an internet connection, helping you stay productive from anywhere.
Security, compliance, and privacy

Secure by default
We use industry-leading security measures to keep your data safe, including advanced malware protections. Slides is also cloud-native, eliminating the need for local files and minimizing risk to your devices.
Encryption in transit and at rest
All files uploaded to Google Drive or created in Slides are encrypted in transit and at rest.
Compliance to support regulatory requirements
Our products, including Slides, regularly undergo independent verification of their security, privacy, and compliance controls .
Private by design
Slides adheres to the same robust privacy commitments and data protections as the rest of Google Cloud’s enterprise services .

You control your data.
We never use your slides content for ad purposes., we never sell your personal information to third parties., find the plan that’s right for you, google slides is a part of google workspace.
Every plan includes

Collaborate from anywhere, on any device
Access, create, and edit your presentations wherever you are — from any mobile device, tablet, or computer — even when offline.

Get a head start with templates
Choose from a variety of presentations, reports, and other professionally-designed templates to kick things off quickly..

Photo Album

Book Report

Visit the Slides Template Gallery for more.
Ready to get started?

How to make text columns in Google Slides
Hello Tecnobits! How are you? Ready to learn how to make text columns in Google Slides? I tell you that it is super easy and you are going to love it. Now, don't miss a single detail, let's turn those slides into works of art with bold text!
1. How can I make text columns in Google Slides?
To make text columns in Google Slides, follow these steps:
- Open your presentation in Google Slides.
- Select the slide in which you want to create the text columns.
- Click the "Insert" menu and select "Table."
- Choose the number of rows and columns you want for your text columns.
- Adjust the size of the table columns to fit the design of your slide. Remember that tables will allow you to create text columns in a simple and effective way in Google Slides.
2. Is it possible to modify the size and layout of the text columns in Google Slides?
Yes, you can modify the size and layout of text columns in Google Slides as follows:
- Select the table that contains your text columns.
- Click the "Format" menu and choose "Table."
- From there, you can adjust the width of the columns, change the background color, add borders, and make other layout modifications. It is important to note that this will allow you to customize your text columns according to your needs and preferences.
3. Can I add bullets or numbering to text columns in Google Slides?
Yes, you can add bullets or numbering to text columns in Google Slides by following these steps:
- Select the column of text to which you want to add bullets or numbering.
- Click the bullet (dot) or numbering icon in the toolbar. This will automatically add bullets or numbers to your list items in the text column. Remember that this feature will help you organize and present information more clearly and effectively.
4. Can I include images in text columns in Google Slides?
Yes, you can include images in text columns in Google Slides by following these steps:
- Click the table cell where you want to insert the image.
- Select the “Insert” option from the menu and choose “Image.”
- Select the image you want to insert from your computer or from your Google Drive account.
- Adjust the size and position of the image within the table cell according to your preferences. Remember that this will allow you to enrich your text columns with striking visual elements.
5. How can I align text within columns in Google Slides?
To align text within columns in Google Slides, follow these steps:
- Select the cell or set of cells that contain the text you want to align.
- Click the "Format" menu and choose "Align Text."
- Select the alignment option you prefer, such as align left, center, align right, etc. It is important to note that this process will allow you to adjust the format and appearance of your text columns to achieve a more professional and attractive presentation.
6. Can I change the style and color of the text in Google Slides columns?
Yes, you can change the style and color of the text in Google Slides columns as follows:
- Select the text you want to modify.
- On the toolbar, choose the font, size, bold, italic, underline, and text color options. Remember that these options will allow you to customize the appearance of the text in your columns in a detailed and attractive way.
7. How can I split the content of one column into two columns in Google Slides?
To split the content of one column into two columns in Google Slides, follow these steps:
- Select the slide that contains the column you want to split.
- Click on the “Layout” option at the top and choose “Title Layout.”
- Select the two-column layout that best suits your needs. This feature will allow you to efficiently divide your content into two columns for a more structured and clear presentation.
8. Can I adjust the spacing between columns in Google Slides?
Yes, you can adjust the spacing between columns in Google Slides as follows:
- Select the spacing option and adjust the measurement according to your preferences. Importantly, this feature will allow you to customize the spacing between your columns to achieve a more balanced and attractive layout.
9. Can I add animation effects to text columns in Google Slides?
Yes, you can add animation effects to text columns in Google Slides by following these steps:
- Select the column of text to which you want to add the animation effect.
- Click the “Presentation” menu and select “Animate Element.”
- Choose the type of animation you want to apply, as well as the direction, duration, delay, and other customization options. Remember that this will allow you to give a dynamic and attractive touch to your text columns during your presentation.
10. Can I share my text columns in Google Slides online?
Yes, you can share your text columns on Google Slides online by following these steps:
- Click the "Share" button in the top right corner of the screen.
- Choose visibility and permissions options for your presentation and copy the link to share it with others. It is important to note that this option will allow you to share your text columns quickly and easily with colleagues, friends, or anyone you want.
Until next time, Tecnobits! And now, who needs newspapers when you can make columns of text in Google Slides? Learn how to make it bold in our next article!
You may also be interested in this related content:
- How to delete a post on Google
- How to stop an upload to Google Drive
- How to add Feit lights to Google Home

I am Sebastián Vidal, a computer engineer passionate about technology and DIY. Additionally, I am the creator of tecnobits.com, where I share tutorials to make technology more accessible and understandable for everyone.
IMAGES
VIDEO
COMMENTS
Create or open your Google Slides presentation and navigate to the desired slide, or create a new slide where you want to add the columns. Go to the " Layout " option and select " Title and two columns .". After performing these steps, the current slide will be formatted with two columns alongside the Title box.
To make a new layout with two google slides text columns, click on the down arrow next to the + icon on the top menu bar. Then choose the ' Title and two columns ' option from the drop-down list. You can also change the layout of an existing slide. To do so, select the slide, and click on the Layout button from the top menu bar.
Open your presentation in Google Slides. Click "Insert," and a dropdown menu will appear. Choose the "Table" option. Once you select "Table," a grid will cover your slide. Move your cursor over the grid until you see the number of columns and rows as a highlighted rectangle. To choose the desired number of columns, click and drag.
4.2 Step 2: Select the Slide for Column Layout. 4.3 Step 3: Create Two Text Columns. 4.4 Step 4: Adjust Text Box Size and Position. 5 Tips for a Clean Presentation. 5.1 Tip 1: Keep It Basic. 5.2 Tip 2: Test Liveliness. 5.3 Tip 3: Consistency in Plan. 6 Productivity Released: The Force of Google Slides Columns Feature.
If you want to add table columns in Google Slides, select the number of columns to add. Using this option, you can add as many as 20 x 20 rows and Insert -> Table columns simultaneously. To add extra rows and columns, right-click on the table to customize it further. You can insert columns in Google Slides, as well as adjust rows (left or right ...
Let's see how to do it step by step: Step 1: Change your slide layout to "Title and two columns". Step 2: Adjust the size of the columns using the borders until they look right. Step 3: Move the columns around by dragging them to make space for a new one.
Method 1: Use an AI presentation maker. An AI presentation maker like Plus AI can automatically generate multi-column layouts for your Google Slides. If you have an existing slide and you would like Plus AI to add an extra column, you can follow these steps: Open the "Edit with Plus AI" menu. Click "Remix". Write the instructions for a new column.
Step 1: Begin by opening a new blank Google Slides document in your web browser. Step 2: In the toolbar, located just beside the "+" icon, you will find a downward arrow icon labeled "New slide with layout". Clicking on this icon will reveal a dropdown menu. Step 3: Within this dropdown menu, click on "Title and two columns" to add a new slide ...
Step 2: Select the slides at the left side of the window to which you wish to add columns. You can add a new slide by choosing Insert > New slide at the top of the window or using the Ctrl + M keyboard shortcut. You can change the layout of a slide by right-clicking on it, then choosing the Apply layout option.
Step 2: Go to Insert: In the top menu, click on the "Insert" option. Step 3: Click Table: From the dropdown menu that appears when you click "Insert," select the "Table" option. Step 4: Choose Columns: After clicking "Table," a grid will appear over your slide. Hover your cursor over the grid until you see a highlighted rectangle indicating the ...
This video shows you how to add a columns and rows to a Google Slide. You need to insert a table to accomplish this.
Elevate your Google Slides presentations with structured and organized content by learning how to add columns with our comprehensive tutorial! Whether you're...
Step 2: Go to Layout. Find the Layout option from the taskbar and select " Title and two columns ." (Feel free to delete the title part if you don't need it.) That's it! You have successfully created two columns in Google Slides. You can adjust the width of each column by hovering your mouse over the line between the columns and ...
By following these straightforward steps, you can easily add columns to your Google Slides presentations, providing a more structured and visually appealing design. Whether you're presenting data, creating a newsletter, or designing a professional pitch, columns in Google Slides offer versatility and enhance the overall visual impact of your ...
Step 5: Adjust Column Settings. Within the Format options, locate and click on 'Columns.'. Here, you can specify the number of columns you want, as well as the spacing between them. Experiment with different configurations until you achieve the desired look. If that is not visible, you can choose table options in the insert tab.
Open your Google Slides presentation and select the slide you want to add columns to. Click Insert > Table on the top menu. In the grid that appears, hover over until you see a highlighted rectangle showing the number of columns. Click and drag to select the desired number of columns. Release the mouse button once selected.
This video tutorial will learn,how to make columns or text columns in google slides. follow this step by step video and learn,how to make 2 columns in google...
In the "Column width" field, enter the desired width for each column in inches or centimeters. Section 3: Formatting Columns Adjusting Column Width. Once your columns are created, you can adjust their width to suit your needs: AutoFit Columns: To make all columns the same width, click on the "AutoFit" button in the table toolbar.
Open your presentation file in Google Slides. Go to a table where you want to add new columns. Right-click on any of its cells. Select "Insert column left" or "Insert column right" to add a column to either side of the selected cell.
The advantage of using columns in Google Slides compared to other presentation tools is its integration with other Google services, such as Google Drive y gmail, which facilitates collaborative work and access to your presentations from any device with an Internet connection. Additionally, Google Slides offers a wide range of templates and ...
Step 3: Adjust the Text Box. Once you've got your layout selected, it's time to draw your text box over the slide. This is where the magic happens. Stretch that box across your slide, then right-click (or control-click for Mac users) to access the Format options. Here, you can tweak the column settings to your heart's content.
Use Google Slides to create online slideshows. Make beautiful presentations together with secure sharing in real-time and from any device.
To make text columns in Google Slides, follow these steps: Open your presentation in Google Slides. Select the slide in which you want to create the text columns. Click the "Insert" menu and select "Table." Choose the number of rows and columns you want for your text columns. Adjust the size of the table columns to fit the design of your slide ...