- PlayStation 3
- PlayStation 4
- PlayStation 5
- Xbox Series
- More Systems

The Foundation
Control — guide and walkthrough (ps4).

Guide and Walkthrough (PS4) by chris-williams
Version: 2.0e | Updated: 04/19/2024 Highest Rated Guide
- Previous: Take Control
Table of Contents
- Next: The Nail
- Introduction
- Expeditions
- Copyright and Acknowledgements
- Welcome to the Oldest House
- Unknown Caller
- Directorial Override
- Old Boys' Club
- My Brother's Keeper
- The Face of the Enemy
- Finnish Tango
- Take Control
- The Pyramid
- A Dark Place
- The Third Thing
- It's Happening Again
- Side Missions
- Astral Constructs
- Collectibles and Secrets
- Research & Records
- Correspondence
- Hidden Locations
- Trophies: The Foundation
- Trophies: Altered World Events
Talk to the Board
Head to the Director's Office and from there make your way to the Hotline Chamber. Use the telephone to speak to the Board and learn of a threat to the Oldest House.
Find the Door
Return to Central Executive via the Director's Office and fast travel to Foundation. The door that you're looking for is right next to the control point.

Interact with it to go through.
Explore the Foundation
There is only one way you can go initially so head down the tunnel until you come to a locked door.

Launch the power core into the outlet and go through. Continue down the tunnel until you reach Research Site Gamma. Look for a tape recorder on the ground that plays the Log 1: Discovery Ash tape.
Subterranean Research There is a trophy for finding all collectibles in the Foundation so keep your eyes peeled!
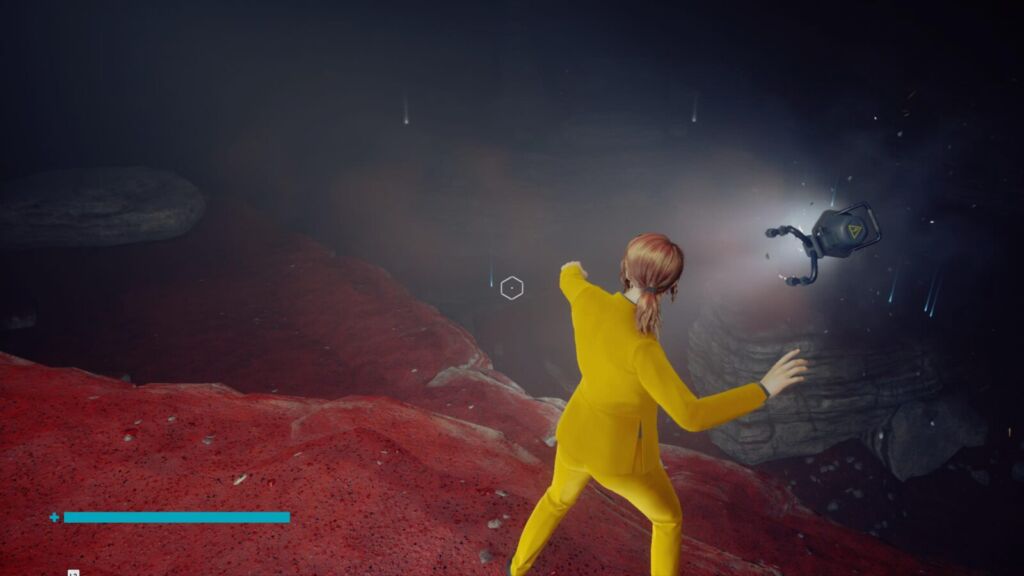
There is a ledge that you can Levitate to but you can't do anything with the loot box there at this time so continue to the next tunnel. As you do so, you will automatically receive a new Hotline entry from Marshall, The Foundation . Levitate across the gap in the cave floor and continue to follow the tunnel until you are attacked by three Hiss Charged.
You will emerge in a cave with three other tunnels leading from it. The tunnel to your right leads to a loot container while the one to the left is blocked by a void that you are not able to Levitate across. Head down the tunnel opposite to the one you came in from, continuing towards Research Site Delta.
As the cave opens up in front of you, you will see three Hiss hanging from the ceiling. After dealing with them, claim the Cave System control point. There is a locked door to your right that you cannot currently open, so Levitate across the gap in front of you and continue down the tunnel.
When the cave opens up again, look on the floor to your left for a folder with the Cave Paintings research. Continue across one of the bridges spanning the chasm where you will be attacked by several Hiss Sharpened. These are fast moving enemies that use a pickaxe to attack you both close up and at range. Use Launch to take them out. You will automatically unlock the Hiss Sharpened research after the encounter.
Hostile Work Environment There is a trophy for killing 50 Hiss Sharpened. This should unlock without much difficulty.
On the other side of the chasm, grab the contents of the loot container near the earth mover and then examine the folder on the ground near the shelter for the Relocation Order correspondence. Go up the ramp in front of you to a cave with geysers in the floor that erupt frequently.

Levitate up to the ledge on the left to avoid them. If you look across the cave, you will see another ledge that you can reach by levitating across to it. However, it ends in a dead end so ignore it for the time being. Instead, make your way back down to the exit.
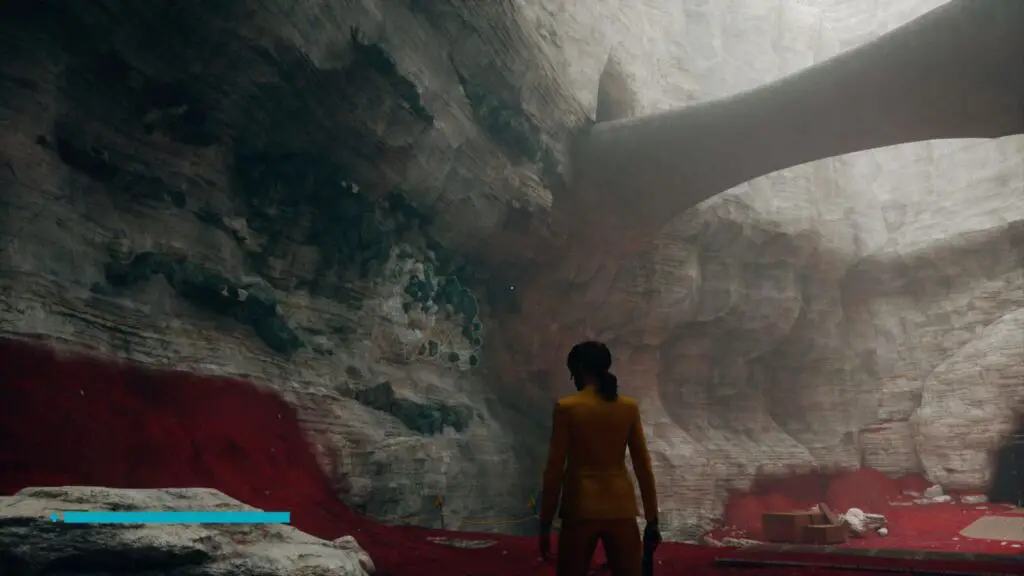
As you go through the next cave, look out for a folder on the ground to your right containing the Foundation Accident correspondence. Continue forward and claim the loot container by a blocked cave entrance. Press on to the Cave Bleed, an area where the Astral Plane is intersecting with the material world.

Levitate across to the first platform and you will see enemies on the platform ahead of you. These are Astral Copies, the mannequin-like figures you will have fought during various Astral Plane challenges. There are also regular Hiss enemies and the Astral Copies attack them as well as you. After clearing the enemies, you will unlock the Astral Copy research. Use the other platforms to get across to the other side.
As you make your way down the next tunnel, you will see Marshall ahead of you. Use Levitate to cross the gap in front of you and follow the tunnel to the end to emerge in a large cavern called the Crossroads.
Investigate the Nail
Claim the Crossroads control point and go into the building to your right where you'll find a loot container in one and a tape recorder with Log 2: Foundation in the other. Back outside, search the shelter to the left of the control point for the Leylines research and the other shelter for the Foundation Pillar research.
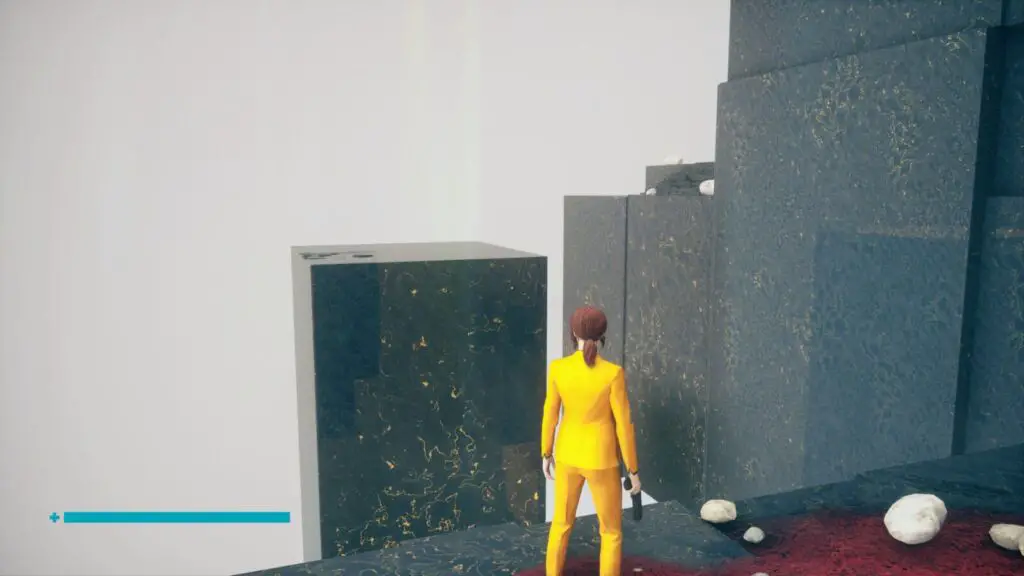
Hidden Location - Crossroads Before checking out the very obvious onyx structure, go to the right of the area and look down to see a series of ledges that you can climb down. Drop down the first two to find a loot container. Hugging the wall to your left, look for a ledge that you can walk along. Follow the ledge round until you come to a cave mouth. Squeeze past the wooden structure blocking the entrance and head down the tunnel. Examine the folder on the floor for the Unacceptable Behavior Memo . Just past that you will receive notification of discovering a Hidden Location. If you open the loot container, you will receive a personal mod, but will also trigger an ambush from a large number of Hiss Charged. Head back out and continue down to the lower ledges to find another loot container right at the bottom and then make your way back up to the Crossroads.
Examine the large onyx structure.

You will be addressed by the board who ask you to choose an ability. The choice on the left unlocks the Shape ability while the one on the right chooses Fracture.

Choose Fracture for the time being - you will be able to unlock Shape later. Note that there is a trophy for using Shape / Fracture 100 times.
There shouldn't be a choice here. If you choose Shape, the amount of backtracking required to pick up everything would be unreasonable in the extreme.
Complete the Astral Plane Challenge
Shoot the crystal formations blocking your way and go through. Levitate to the next platform and shoot more crystals blocking your way. Shoot some crystals above you and Levitate up and go past. Shoot the next set blocking your way and then shoot a crystal to lower a block that you can use to progress. Repeat the process until you come to the next section of the trial.
An enemy will start shooting at you. Shoot the ground beneath its feet to eliminate it. After a little more platforming, you will come to an area with three enemies. Hold back so that they advance onto breakable ground and then shoot that.
After one more small section of platforming you will reach the exit. Upon returning to the Crossroads, you will receive 2 Ability Points and unlock the Rituals Hotline entry.
Long read: How TikTok's most intriguing geolocator makes a story out of a game
Where in the world is Josemonkey?
Control The Nail mission: Complete the ritual in the Warehouse and the Collapsed Department in The Foundation DLC explained
How to use the Shape ability to delve deeper into The Foundation.
Now that you've found the Nail in Control , it's time to start removing the Hiss from The Foundation.
To do this you need to complete four rituals, with the first two being located at the Warehouse and hidden with the Collapsed Department .
It's important to note that you'll only visit these areas first if you choose the Shape ability during the Astral Plane challenge in The Foundation mission . If you choose the Fracture ability instead, you'll need to visit the Canon Rim and Research Gamma Site .
Remember - you need to start The Foundation DLC correctly before you can explore either the Warehouse or Collapsed Department.
On this page:
How to find the Warehouse in Control
Complete the ritual in the warehouse in control, how to find the base camp in control, complete the ritual in the collapsed department in control.

To find the Warehouse Path you need to head west from the Crossroads Control Point and, using Shape, create platforms that will allow you to reach the tunnel entrance.

Use a combination of levitate and crystal platforms to explore these new tunnels, until you reach a locked door. Luckily this problem has an easy solution - all you have to do is melee the wooden barricade and then use launch to place the Power Core back in the socket.

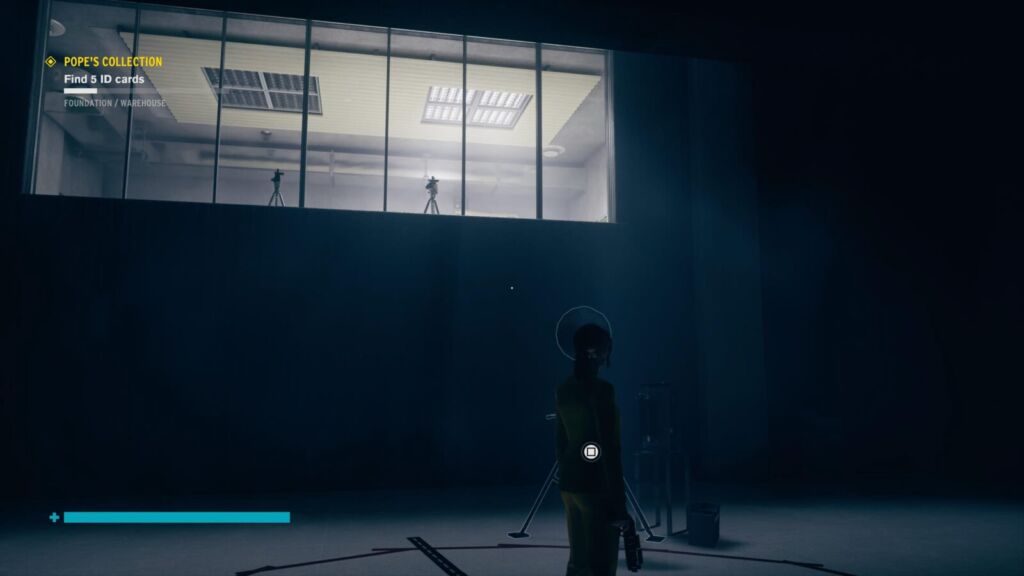
With the door open, you can now enter the Warehouse and cleanse the Control Point you find in there.
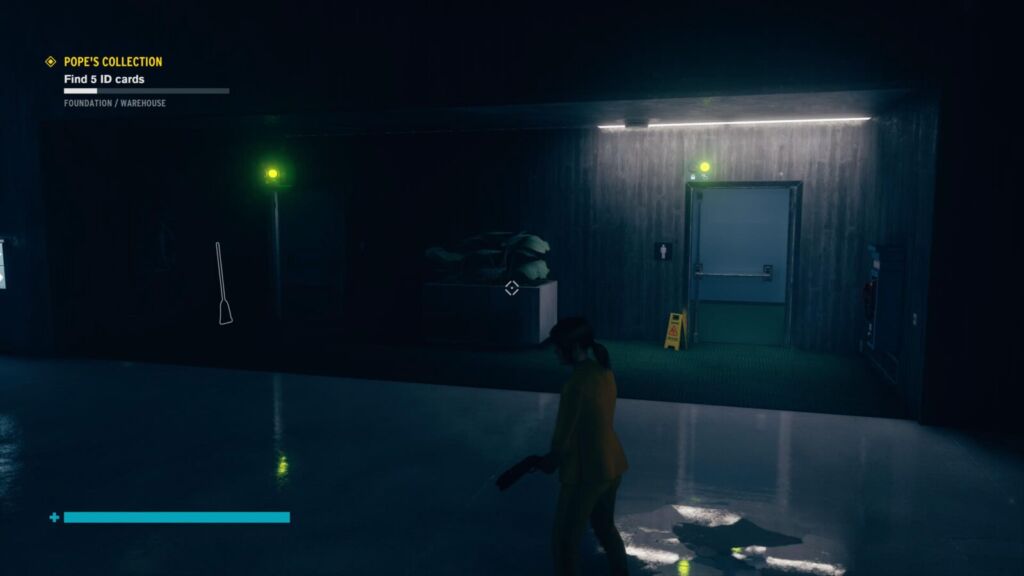
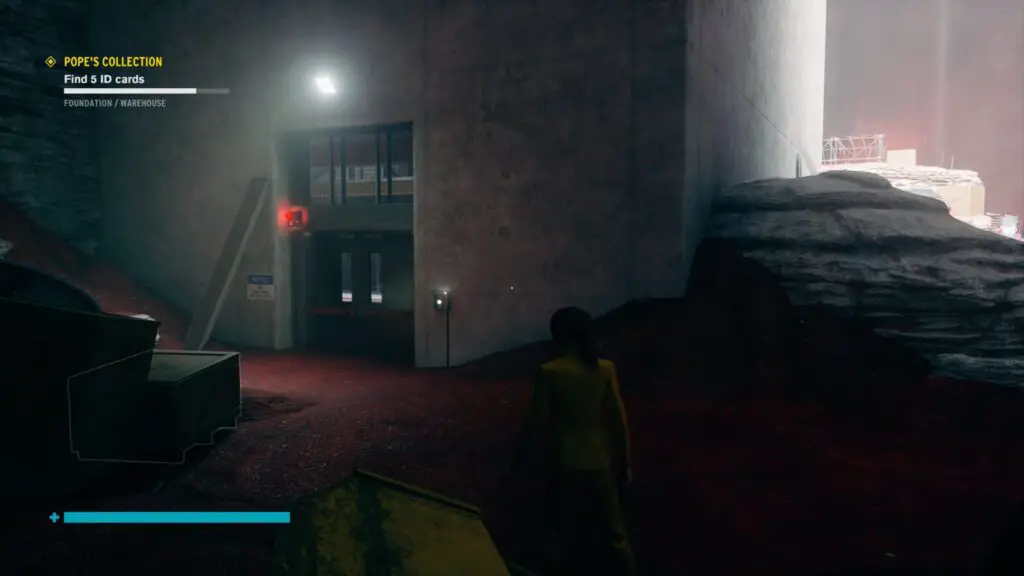
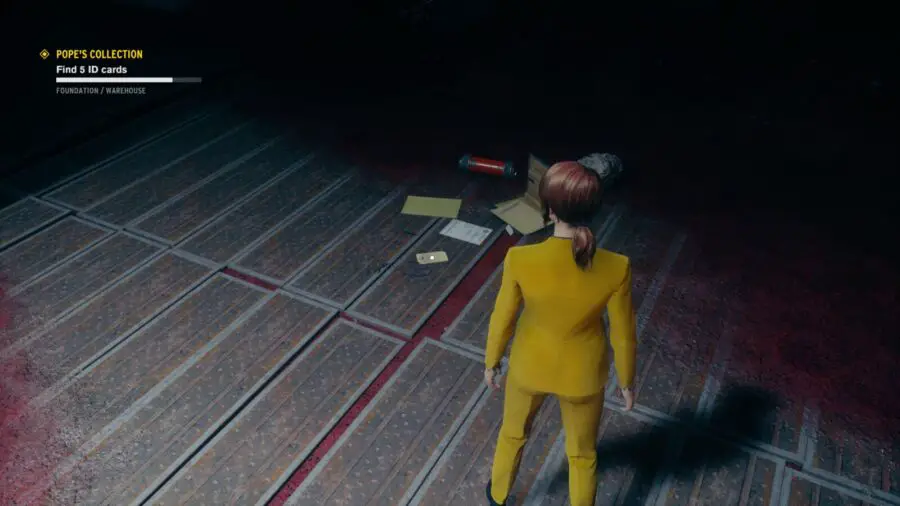
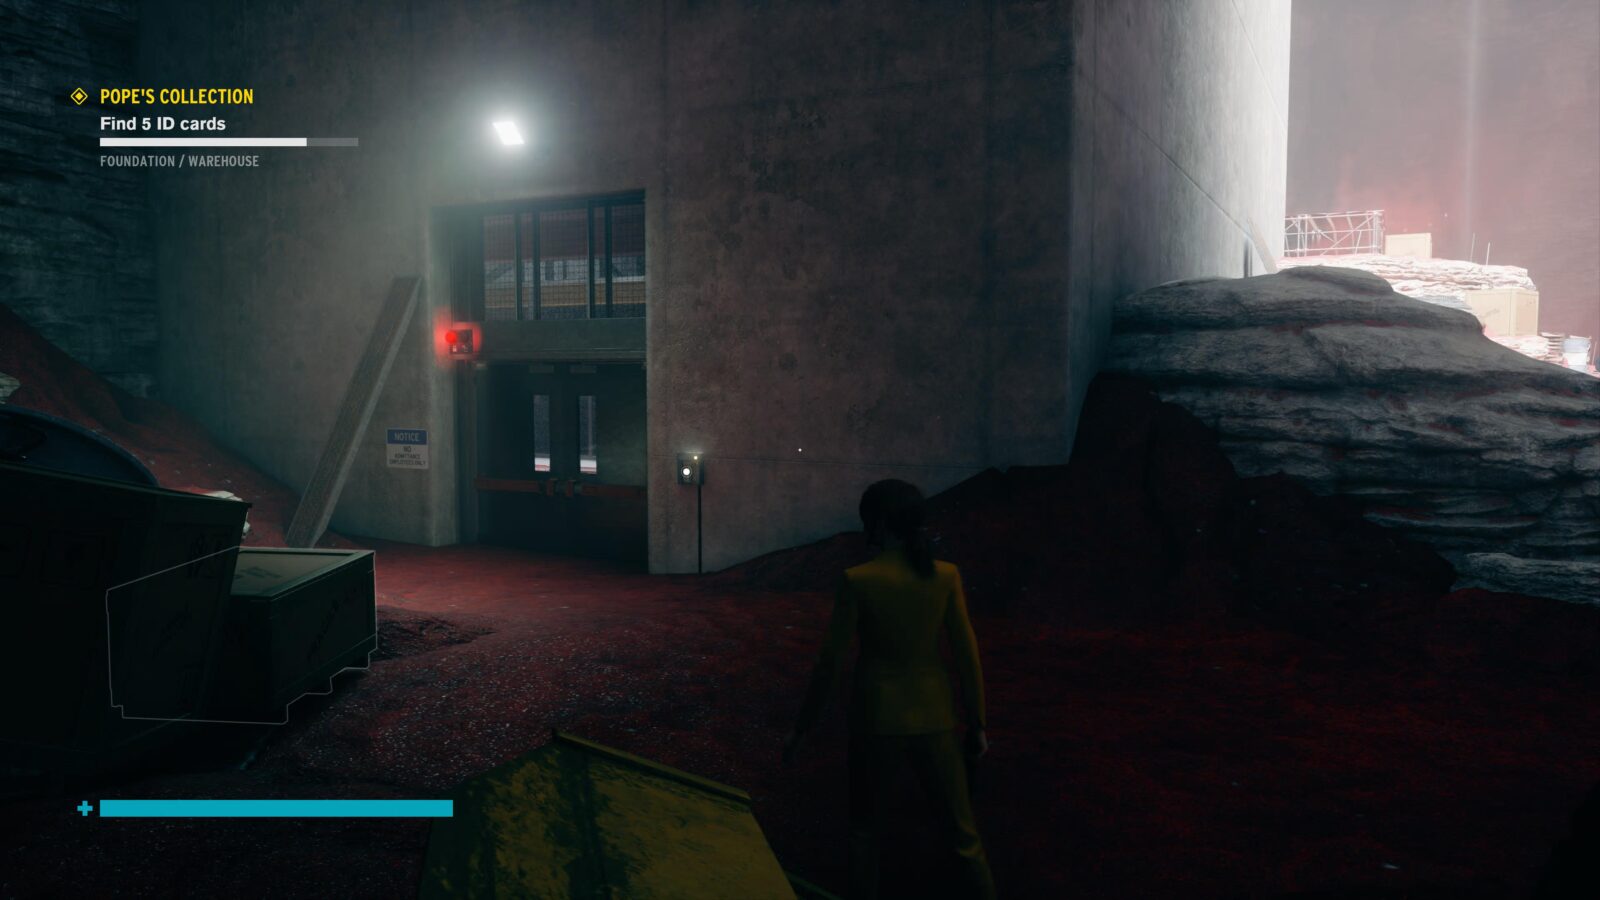
Before you start exploring the Warehouse it's important to know that you can find a number of ID cards in this area and, if you pick one up, you'll be able to start the side mission - Pope's Collection - by talking to Emily Pope.
There are also a number of flying Hiss enemies you should keep an eye out for.
When you're ready, head up the cliffs to the right of the Control Point and enter the Warehouse. Press the button to call the elevator once you're inside and then use launch to place the Power Core back on its socket.

Take the elevator up to the Power Core Storage and exit the elevator to the right to side the next electricity box you need to get the lift moving again to the Tunnel Entrance.

On this level, you'll want to head up the ramps and then levitate across to the tunnel entrance opposite you.

Follow this tunnel and claim the Control Point you find inside it. After this continue down the tunnel and engage in a battle with another group of Hiss; make sure you use Shape to your advantage and take out a number of their foes quickly.
Once all the Hiss are dead, head through the cavern and into the new tunnel on the other side to find yourself back at the Warehouse, but higher up.

You'll be able to see another tunnel for you to explore higher up in the cavern wall, so, once again, use a combination of Shape and Levitate to climb your way to the top.
Like with the previous tunnel, head inside, cleanse the Control Point and defeat the Hiss inside, before continuing your way through the Foundation.
At the end of this tunnel, you'll find another area which you can cross by creating platforms and levitating. From there, fly back inside the Warehouse and destroy the Hiss Nodes that power the barrier blocking your path.
There are three Hiss Nodes in total, which can be found:
- On the cavern wall opposite the Warehouse
- Behind some boxes inside the Warehouse
- In the elevator shaft and can only be destroyed by launching a box at it

With the Hiss Nodes destroyed, call the elevator and place the nearby Power Core on the socket, so that you can travel up to the Upper Warehouse.
Here you'll find another etching that you need to interact with and, when you do, a battle with the Hiss will begin. If you're having trouble with this fight, we recommend levitating as much as you can and using Shape to create spikes that will kill anything they touch.

After defeating the Hiss, touch the etching again and you'll be sent to the Astral Plane, where you need to use the Shape ability to fix the key. (Or is it a lock?)

Once the key is fixed, return to the Foundation and this part of the mission will be completed, rewarding you with:
- 4 Ability Points
- 1 Personal Mod
Collectibles to be found:
- Research & Records - Research - History of the Oldest House
- (Found in one of the yellow buildings in the Warehouse.)
- Research & Records - Research - Pyramidic Geometry
- Multimedia - Ash Tapes - Log 3: Work
- (In the main tower of the Warehouse by the elevator, which is accessed by simply walking through the gap in the wall.)

- Case Files - Altered World Events - Meteor Hill Summary
- (Use Shape to create platforms along the side of the cavern wall to reach the gap in the side of the Warehouse. Once inside, you'll find this file directly beneath the ledge you entered through.)
- Research & Records - Reports - Power Cores
- (On the floor by the Power Core socket on the Power Core Storage level of the Warehouse.)
- Multimedia - Ash Tapes - Log 5: Pyramids
- (On the Tunnel Entrance level of the Warehouse beneath the ramp leading out of this level.)

- Hotline - Marshall - Becoming Director
- (Found as you enter a tunnel as part of the storyline.)
- Case Files - Altered World Events - Meteor Hill Supplement
- (On a higher level of Warehouse accessed by travelling through the tunnels and levitating over when close by. This floor is labelled Tunnel Quick Access.)
- Research & Records - Research - Foundation Etchings
- (After cleansing the second tunnel Control Point, fly, from the following cavern chamber, over to the Warehouse and you'll find this document at the end, opposite the gap you enter by.)

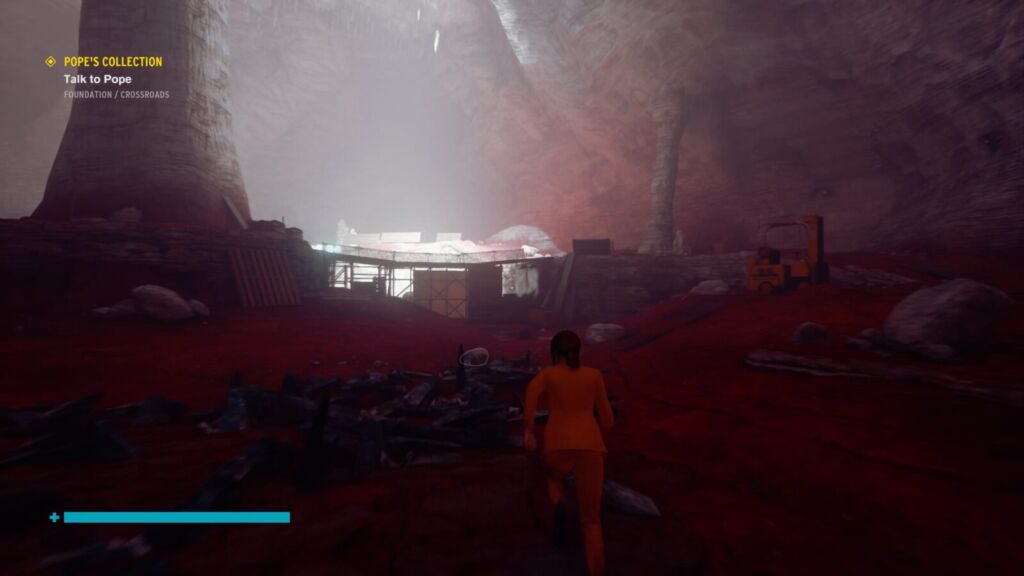
With this ritual completed, it's time to head back to the Crossroads and you'll discover that Emily Pope has made her way down to the Foundation. Take the time to fill her in with the situation, though she already seems to know, and, if you talk to her again, you can take part in the Pope's Collection side mission.
After you've finished talking to her, head over to the right-hand side of the Crossroads and you'll find another series of platforms for you to create, which will take you to a new tunnel.

Head down this tunnel, keeping an eye on those toxic geysers, and defeating the Hiss you encounter, before exploring further into the caves. This will lead you to yet another large cavern, where you'll fight a number of Hiss, before leaving down a tunnel to a gated area.

Kill the Hiss Sharpened that tries to attack you and then place the Power Core, which is inside the small office space, on the socket to open the door.
It’s time to journey into the mysterious Federal Bureau of Control. Our Control walkthrough can help you through the storyline missions, including Welcome to the Oldest House , Unknown Caller , Directorial Override , Old Boy’s Club , Threshold , My Brother's Keeper , The Face of the Enemy , Finnish Tango , Polaris and Take Control . You can also learn new supernatural powers by completing A Merry Chase , A Good Defence and A Captive Audience . We also have guides on upgrading the Service Weapon , your Abilities , how to use Weapon and Personal Mods , how to unlock every outfit and the solution to the Roulette Wheel puzzle .
Going through the Firebreak, you'll find yourself in a familiar setting and with a familiar task of destroying some Hiss Nodes.
- On the broken ledge directly in front of you when you enter the Firebreak
- Attached to the right-hand side of the Firebreak you're standing on
- On the side of the Firebreak above you

With these nodes destroyed, you can now float across to the other side, create a platform where the barrier was once located and reach the other Firebreak platform. From there, you can enter the Collapsed Department and cleanse the first Control Point.
Next - it's smashing time.
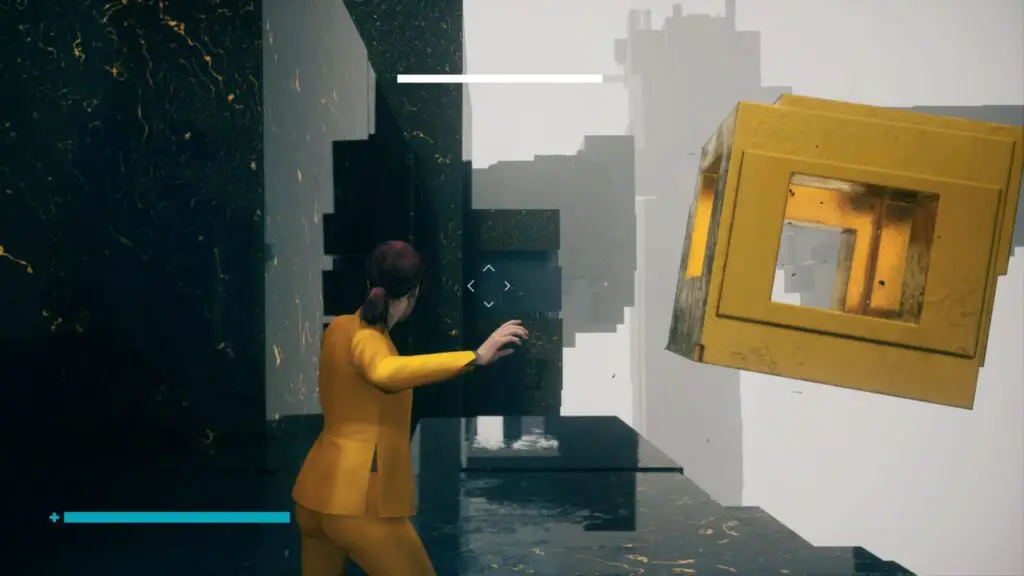
Use whatever you like - bench, vending machine, bin - and launch it into the office window above you. Once there, exit through the open door and go down the stairs.

If you want to create a quick shortcut, you can go through the doors on your left-hand side and open the security gate.
After that continue down the corridor and head further into the Collapsed Department. Before you do, however, it's a good idea to call a ranger as backup from the nearby station, as, once you enter the next room, you'll find yourself in a long battle with the Hiss.

This fight takes place in an area with multiple levels, so the ranger can take care of any Hiss enemies on the ground floor, while you concentration the ones hiding higher up or flying around.

With these Hiss defeated, exit this area through the office at the top of the office stack and head deeper into the department by heading through another Firebreak door. (We highly recommend having a look in the ladies toilet before you do so though.)

Across the gap in the platform and then head through the door in the far left-hand corner to reach another Control Point.
After you've cleansed this Control Point, head up the stairs to your left and press on the big red button, which is part of the computer banks, to open up the doors. Hitting the red button in the next room, however, will cause a P.A to tell you that there's an Altered Item in the transport bay and, because of this, you can't enter.
Instead, you need to head through the door on your right and follow the corridor along to reach the Transit Control. Annoyingly, the Transit Engine has no power, so head down one of the corridors to access it.

The first thing you'll want to do in the Transit Engine room is rip the doors off both the tops of the engine shoots and the Power Core container. Once you've done this, you can use launch to toss Power Cores down into each engine socket, powering up the Transit Engine once again.

Now you can head back to the Transit Control and move the Altered Item into storage, granting you access to the transit area. After you've defeated the Hiss infesting the area first of course.
With the Hiss defeated, you can use the blocks on the right-hand side of the room to climb atop one of the corridors and then, after smashing the glass, levitate over to the next office space.

From there, head through the double doors and follow the pathway till you reach a third Firebreaker door. Go through this door and cross the walkway beyond to find the second etching you need to interact with.

Doing so will return you to the Astral Plane, where you'll use your abilities to restore the key. Once you've done this, one of two events will occur depending on how many rituals you've already completed.

If this is the second ritual you've completed, you'll find yourself transported back to the Astral Challenge area to learn the ability you previously passed over.
If, however, this is the final ritual you needed to complete, the Astral Plane will begin to fall apart. To escape, you'll need to head over to the right-hand side of the platform where you'll be able to eventually create a bridge to the next platform, which will continue a new exit back to reality.
Either way, the mission will be completed once you return from the Astral Plane, giving you:
- Correspondence - Non-Official - Shift Account Pt. 1
- (In the office above the first Collapsed Department Control Point.)
- Case Files - Altered World Events - Kyiv Summary
- (Behind the guard gate for the Collapsed Department.)
- Correspondence - Dead Letters - Computer Program
- (In the first ladies toilet you can visit in the Collapsed Department.)

- Multimedia - America Overnight - Ep. 382
- (After cleansing the second Control Point in the Collapsed Department, head through the locked doors and head through the doors until you can reach the guard's office where this collectable can be found.)
- Case Files - Altered World Events - Kyiv Supplement
- (On the conveyor belt opposite the room where you find America Overnight Ep. 382)
- Correspondence - Non-Official - Shift Account Pt. 2
- (Atop a computer to the east of the second Control Point in the Collapsed Department.)

- Correspondence - Dead Letters - New Language
- (In the elevator containing the Mold monster in the Collapsed Department.)
- Case Files - Altered Items - Movie Camera Supplement
- (In the office on the right near the Firebreaker door after you've crossed the Transit area.)
- Correspondence - Non-Official - Shift Account Pt. 3
- (On the desk opposite the Firebreaker door found past Transit.)
- Hotline - Marshall - End of the World
- (Receive this once you go through the Firebreak door after the Transit office.)

With these two rituals completed, it's time to explore the Canyon's Rim and the Deep Cavern .
If, however, you've now completed all the rituals, you'll automatically start the final mission, The Pyramid , which will see you battle Marshall at the foot of the Nail.
Control Foundation Deep Cavern Ritual Walkthrough
In this guide, we’ll walk you through the objectives “Reach Research Site Gamma” and “Complete the ritual in Deep Cavern”....

In this guide, we’ll walk you through the objectives “Reach Research Site Gamma” and “Complete the ritual in Deep Cavern”. In order to complete the mission, you need to complete the ritual in Deep Cavern in Control Foundation DLC.
Control Foundation Deep Cavern Ritual
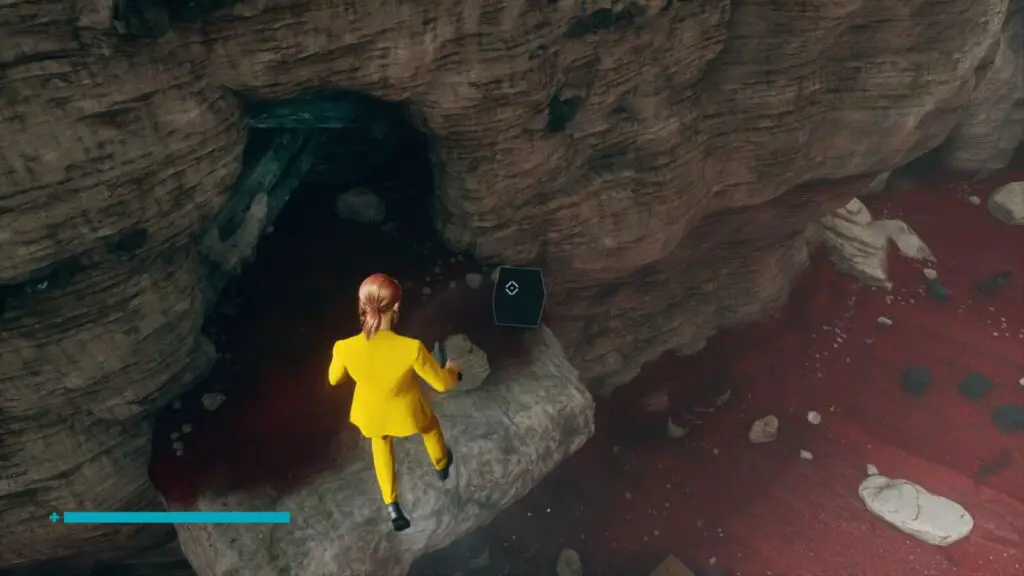
Once you fast travel to the Cave System, you will be tasked to Reach Research Site Gamma. Go straight ahead and shoot the container here that will be covered in a cage made of rocks.
Interact with it and go back towards the place where you spawned. You will see a cave entrance right in front of you, head inside and you will face a few enemies here, deal with them and continue forwards.
Once you reach a junction, head right and fly ahead once you reach a ledge, fly forwards and then backwards to break the cave wall. Continue ahead and go right, you will run into more enemies here, kill them by levitating rocks and the gun.
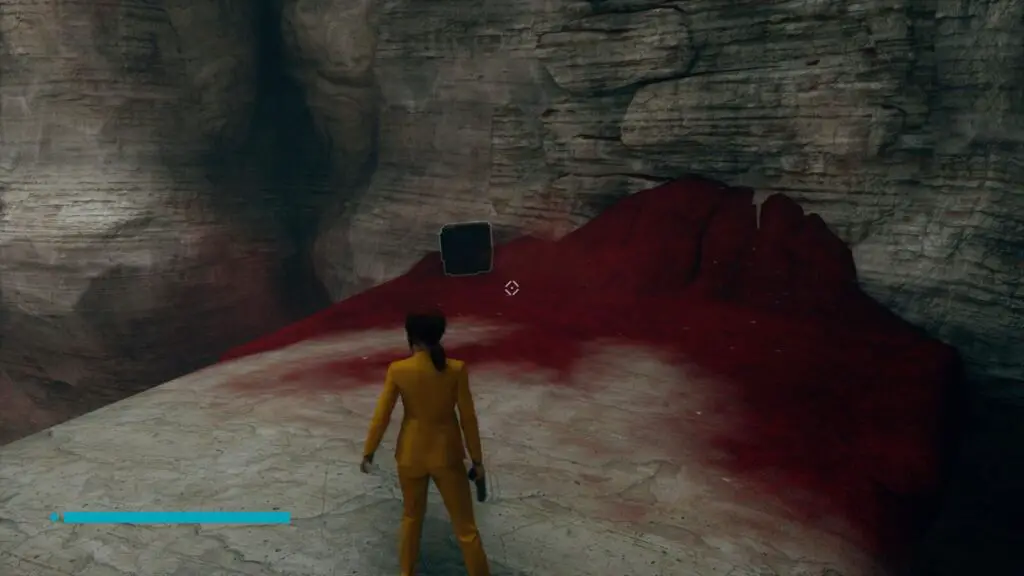
Once you’ve cleared the area, go ahead and you will have a new objective to Complete the ritual in the Deep Cavern. Shoot at the web of rocks ahead and you will clear and entrance to another cave.
Go forward and you will hear Jesse talk, after which you will reach a bigger cave. There will be a number of enemies here, clear the area. Try to fly and kite the enemies if they’re harder to kill. The black one will be harder to kill, keep throwing rocks at it and shoot at it from a distance.
Levitate past the cave and you will see another web of rocks, shoot at it to find a new entrance. Levitate across the platforms and open the crates here. Shoot through all the web of rocks that you run into, there will most likely be materials in crates over here.
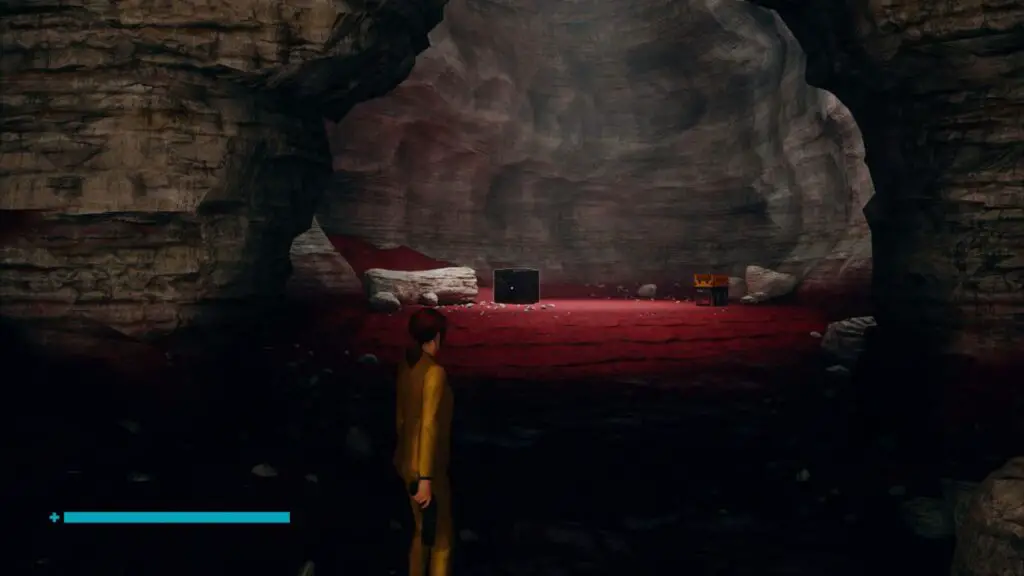
On the second bridge, there will be a web of rocks, destroy it and you will get into another corridor that will have a set of computers on it. Head past to the next cave and you will run into more enemies here.
There will be a big red ball that you will need to destroy. Steer the place clear of all the enemies and shoot through the next web of rocks to get into the next cave. Go straight ahead and be wary of the geysers over here that will be blowing hot smoke since it can be very dangerous for you.
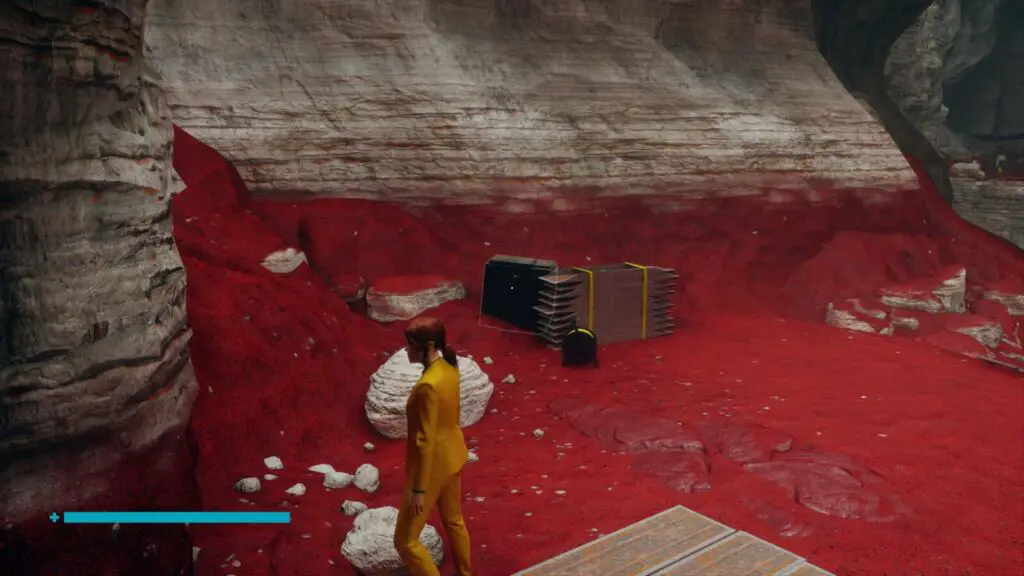
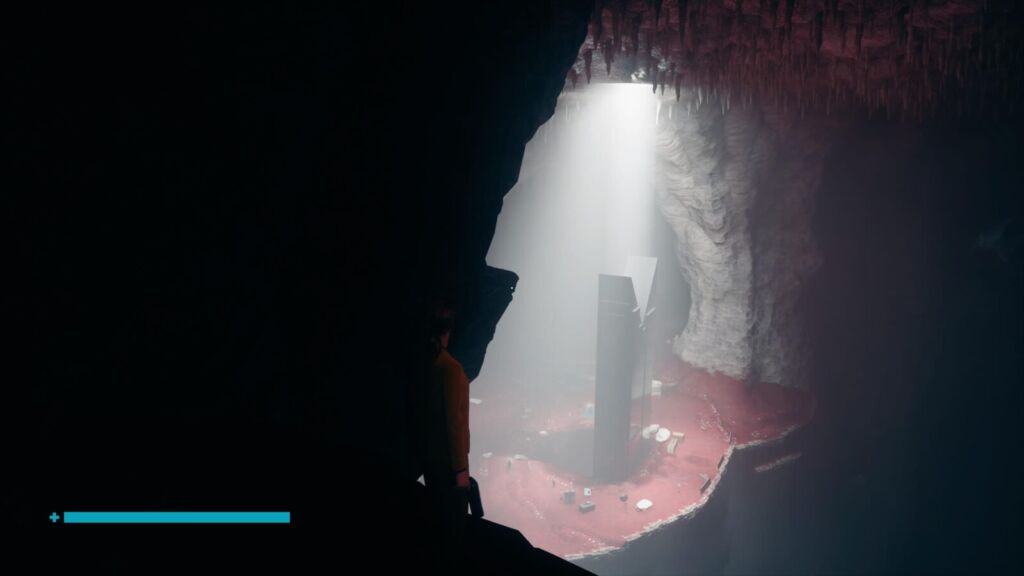
Deep Cavern Continue forward and you will reach the Deep Cavern. Go ahead interact with the stone structure here and you will teleport to another place. There will be a big globe in front of you, break the web-like structure made up of rocks that will have supported the globe.
You will trigger a cutscene and you will be teleported to another place. Go forward and interact with the handprint on the wall.
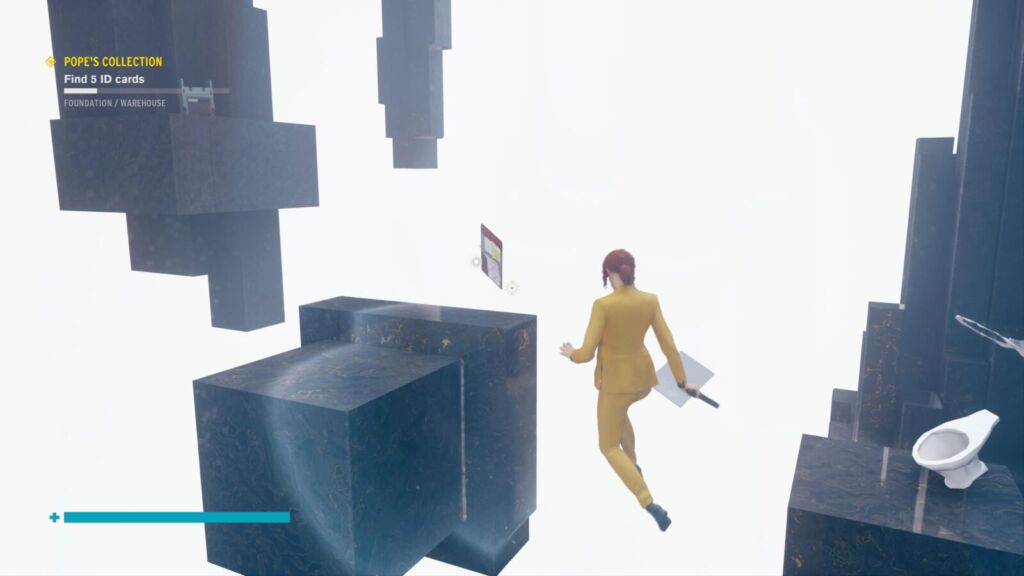
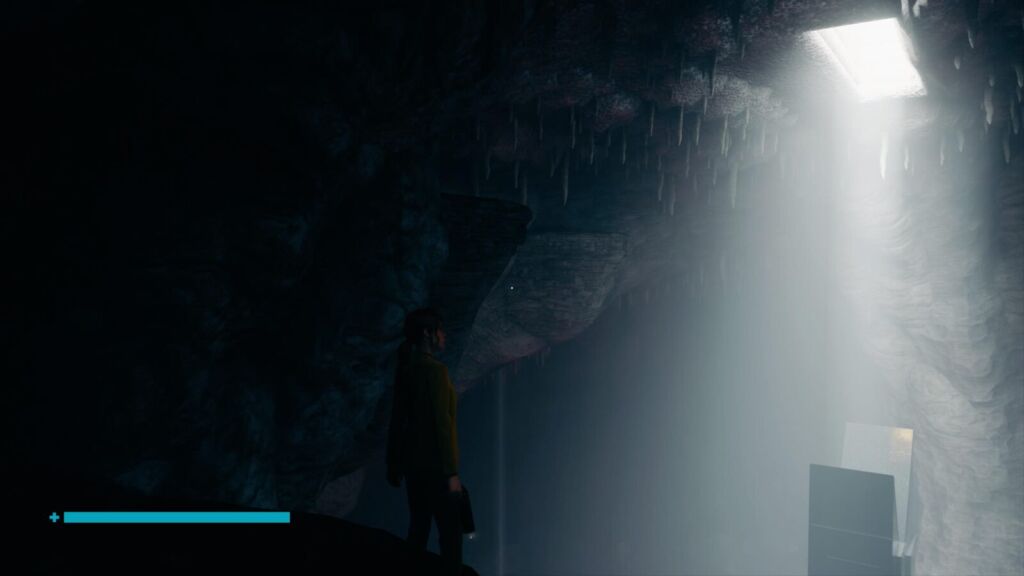
Afterwards, head left and expand the crystals once the prompt appears on the screen. Use the newly constructed platform as a step and levitate to the next platforms. Repeat these steps as you will come across a number of expandable crystals. You will run across some enemies in yellow suits, it’s not necessary that you kill them. So just keep moving ahead and levitate through them.
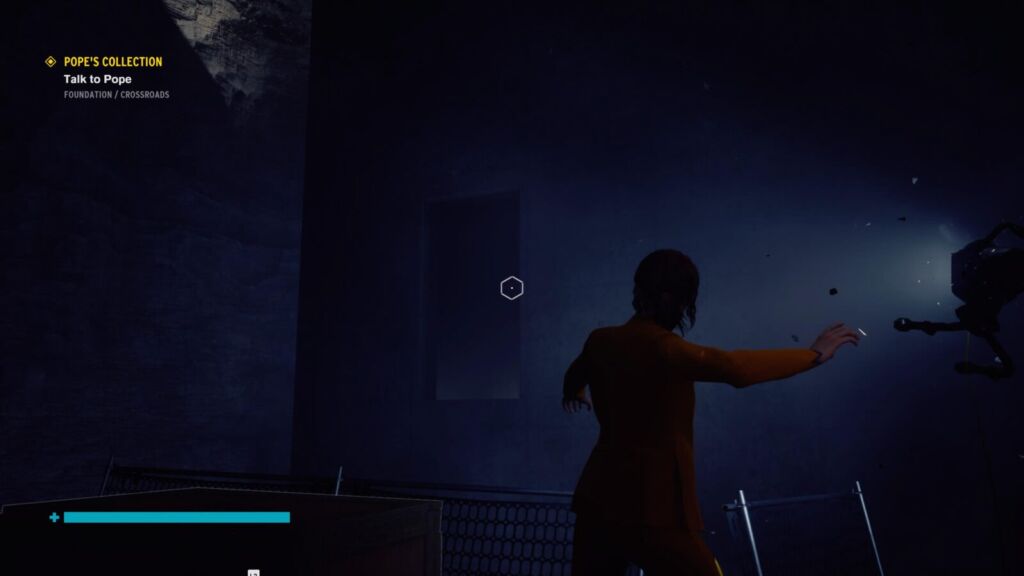
You can also kill the enemies by pulling up the rock spikes. At the last platform, there will be a thin beam coming out of the ground. Interact with it to be teleported to another place. Run through this black pathway and a structure will pop up at the end of it, which will have a big light source in its face. Jesse will converse with it.
Once you’re done with the conversation, you will teleport back to the cave and your mission will be completed.
- " class="share-link facebook">
- " class="share-link twitter">
- &title= " class="share-link redit">
- &title= " class="share-link linkdin">

A vape enthusiast who'd sell himself for vape joos and some fused clapton rolls. Oh and he seems rather fond of coining words, we'd say he's a peculiament.

Control The Foundation: Collectibles and Hidden Secrets
Welcome to our Control game guide! This page contains information on where to find all the secrets in The Foundation expansion set, helping you to discover 100% of the collectibles and unlock the trophy.
The list below only applies to collectibles, such as documents and recordings. We have not included hidden locations or maneki-neko figurines, which are discussed on separate pages of our guide.
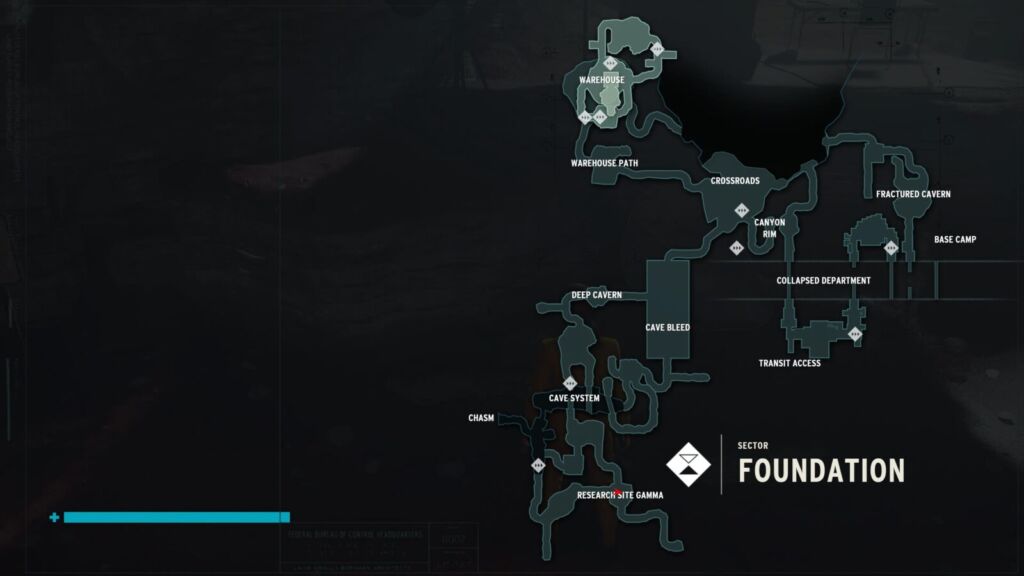
Basic Information and Map of Foundation Sector
1 – research site gamma, 2 – chasm, 3 – cave system, 4 – cave bleed, 5 – deep cavern, 6 – crossroads, 7 – warehouse path, 8 – warehouse.
- 9 – Canyon Rim
- 10 – Fractured Cavern
- 11 – Base Camp
- 12 – Collapsed Department
13 – Transit Access
- Astral Plane
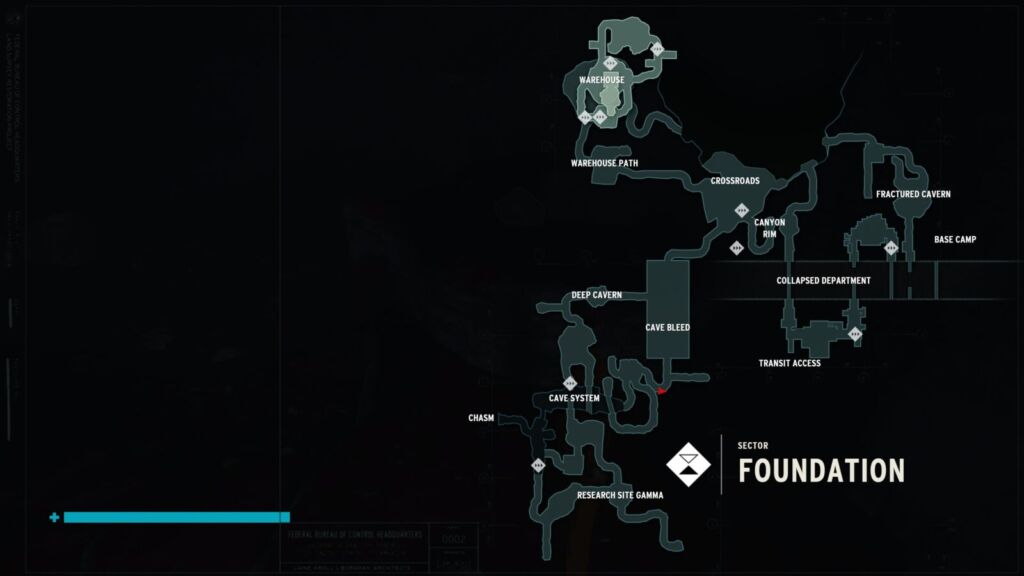
Above is a map showing the 13 main areas of the Foundation sector and their markings in the game. In the following section, we have provided information about the collectibles found in each location, including pictures to help you find some of the well-hidden secrets.
Some collectibles can be found in the astral plane, which we have discussed in a separate section. Unfortunately, this area does not offer the possibility to use the map.
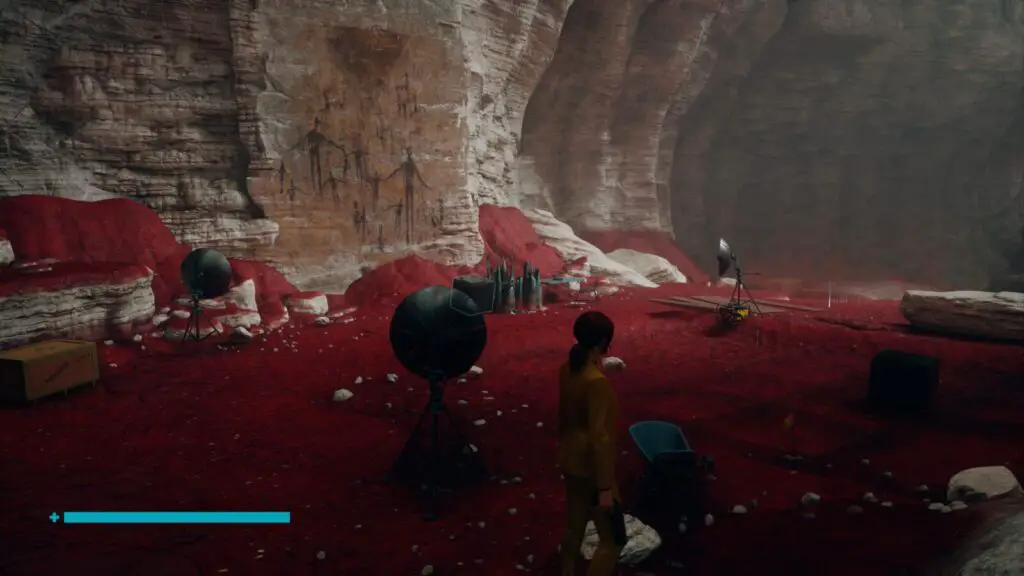
Log 1: Discovery – a tape recorder can be found on the ground next to an encampment in the research site area.
Hotline: The Foundation – the recording will automatically play shortly after leaving the Research Site Gamma for the first time, en route to the location of the Cave System.
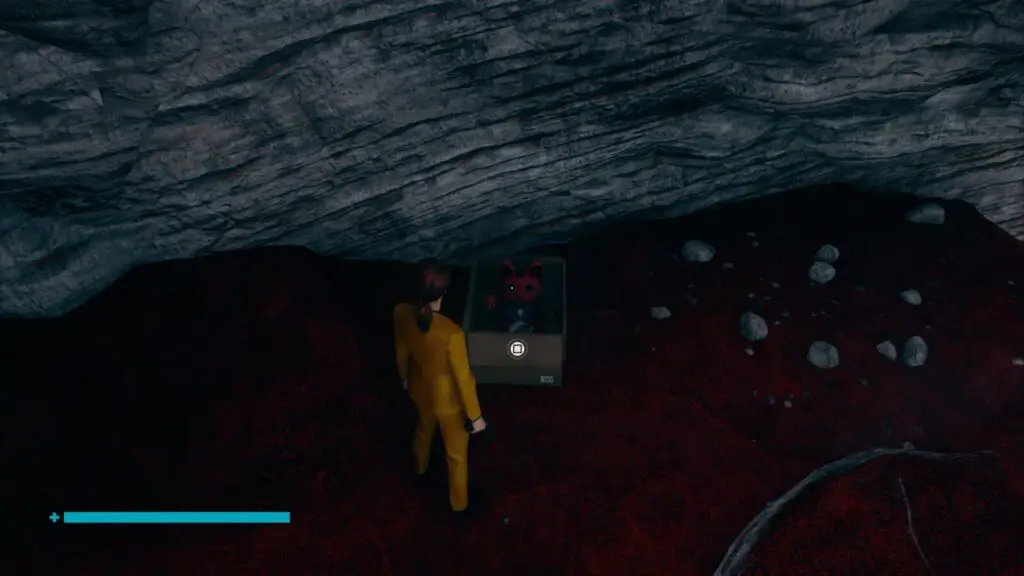
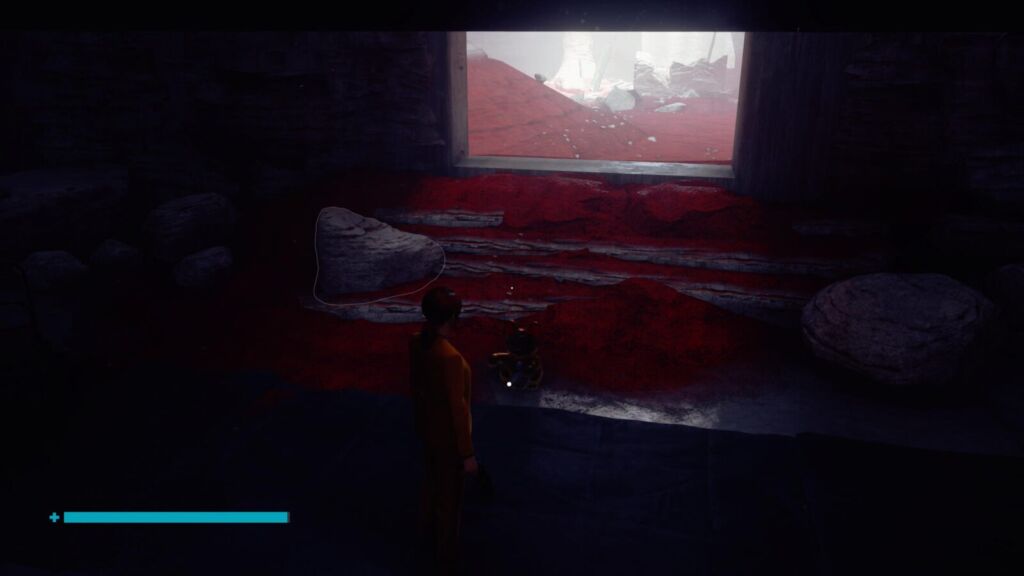
VHS Tape Supplement – the documentary can be found on the ground in an encampment with a cage used to trap the TV, an object of power (it takes place during the Found Footage side mission).
VHS Tape Procedures – the document will be automatically obtained after completing the side task called Found Footage, which we have described in our walkthrough.
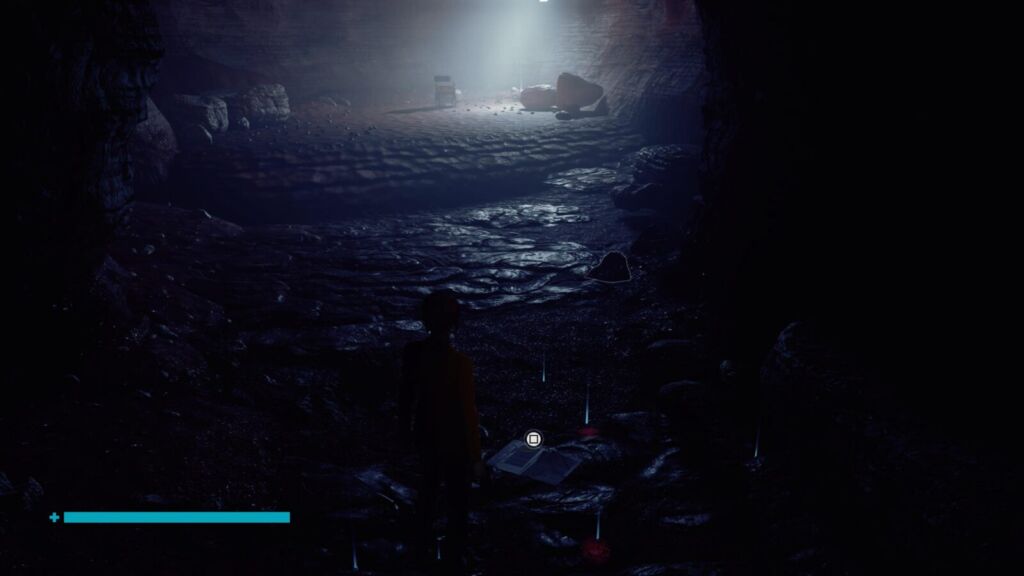
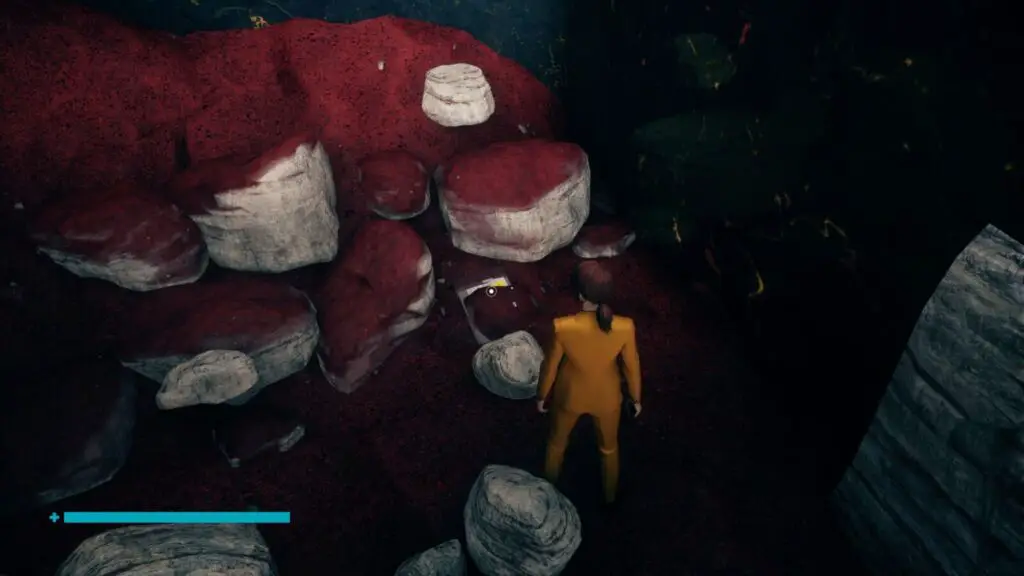
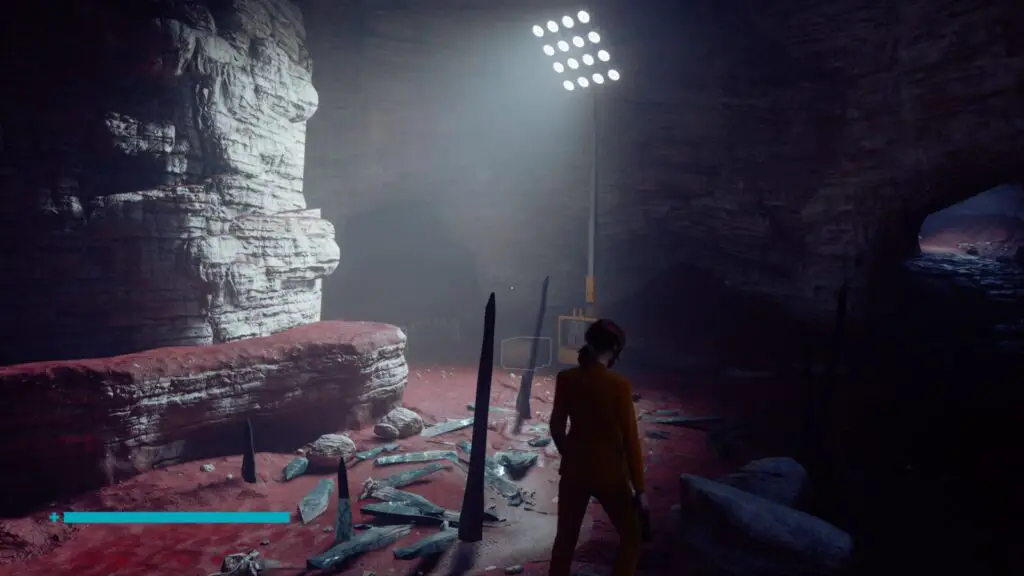
Talented Janitor – the document is in a secret area in dark caves explored during the Found Footage mission. You can also return to the caves after completing this task and light them up with a portable lamp. Find the collapsed passage from the picture and get rid of the boulders with the help of telekinesis. A cat figurine can be found in the same place; this place was more accurately described on the Maneki-neko figurines page of our guide. Check the description of statue number 2.
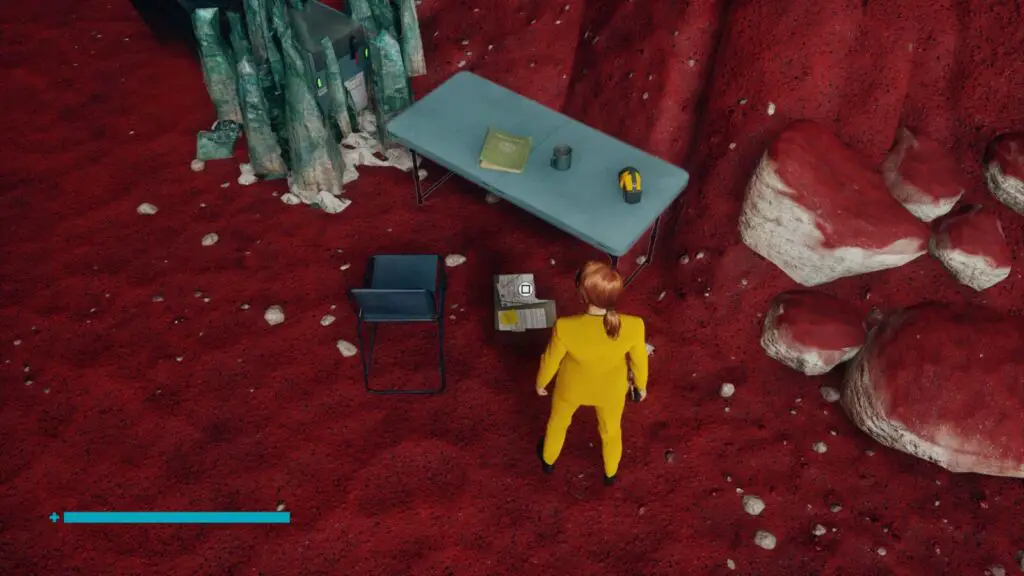
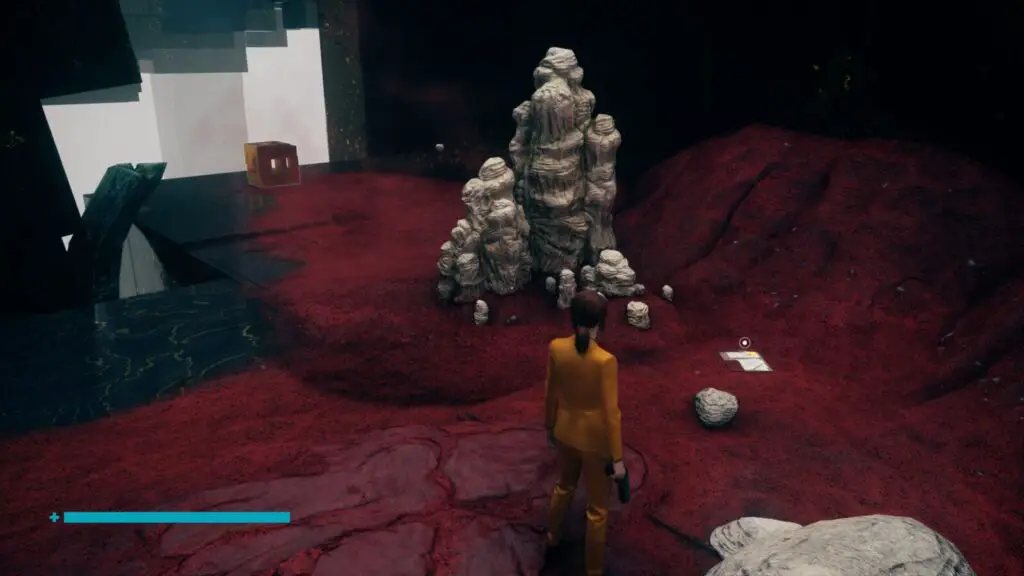
Cave Paintings – the document can be found under a small desk located in the cave grounds, next to a chest obscured and protected by crystals.
Hiss Sharpened – you should receive this document after defeating the first Hiss Sharpened opponents (a new type of enemy in The Foundation DLC).
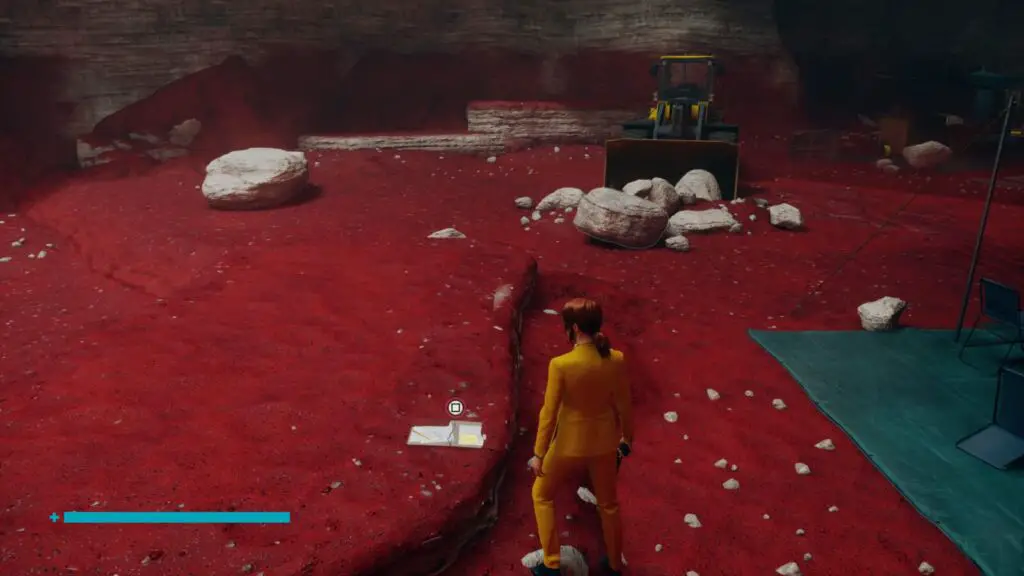
Relocation Order – the document can be found on the ground in the place where you fought the Hiss Sharpened enemies. There is also a yellow bulldozer in this area.
The Foundation Accident document can be found in a cave to the south of the entrance. In order to access the Astral Copy document, players must defeat a new type of monster found in the same location.
The Adventure Accepted document can be found at the marked campground on the way to the Deep Cavern from the Gamma Research Site. The Log 4: The ID tape recorder is also located at the same encampment.
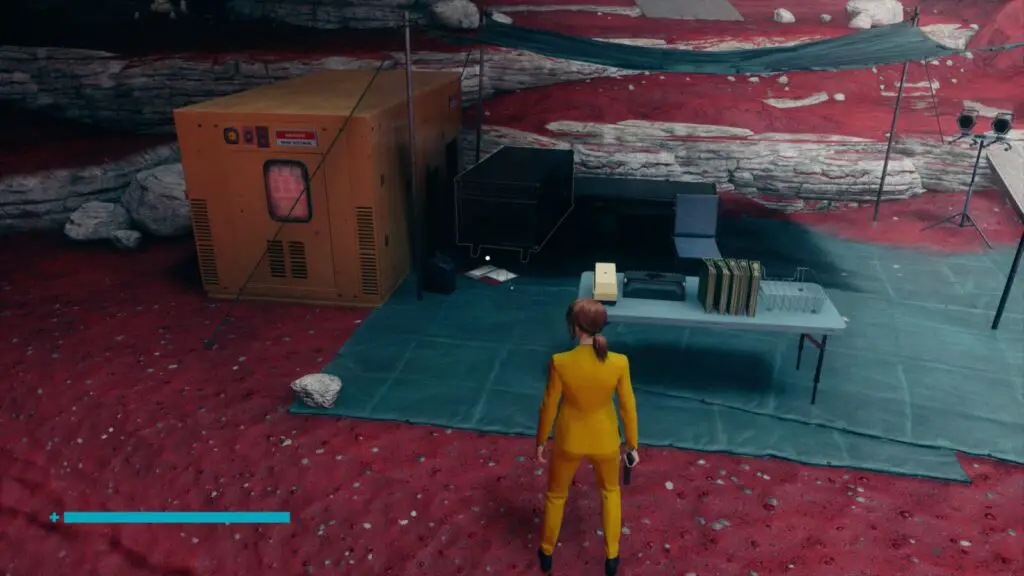
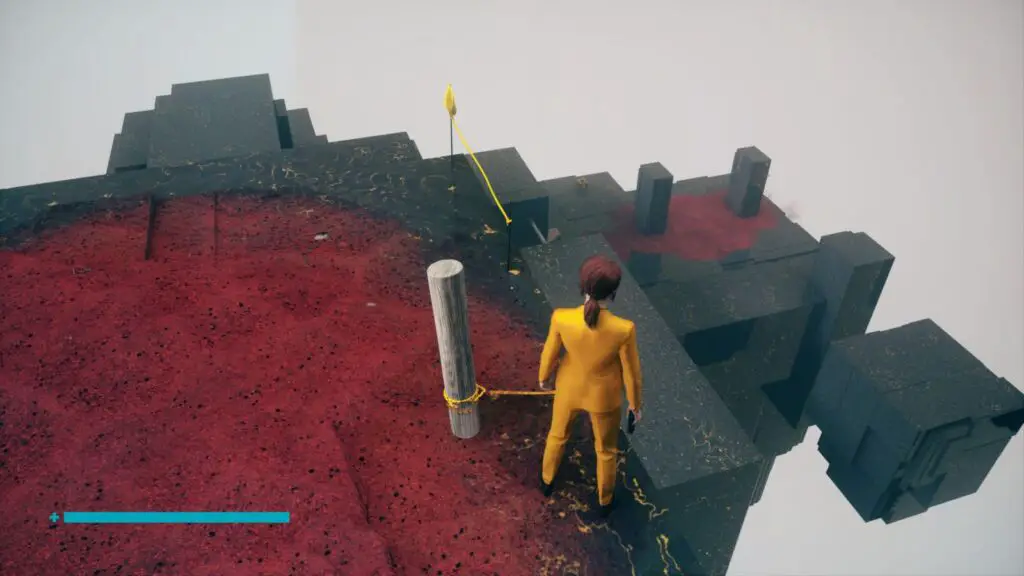
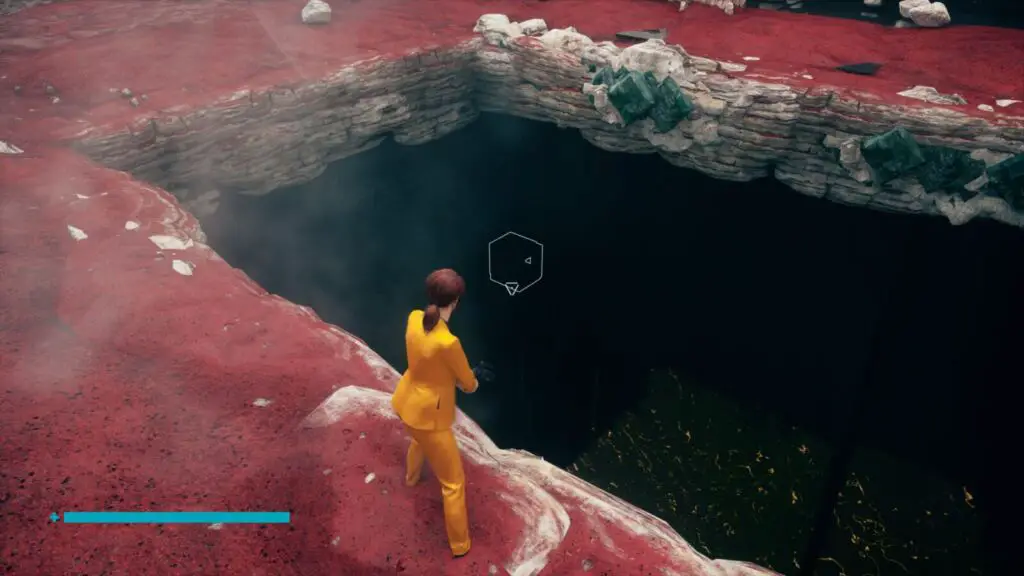
The Leylines document can be found on the floor of the encampment near the Nail, next to a yellow generator. The Foundation Pillar document is located on a blue mat near computers and a whiteboard in the same encampment. The Log 2: Foundation tape recorder is situated inside the Yellow Building. The Unacceptable Behavior Memo document is hidden in a secret area beneath the main part of the intersection, accessible by following the instructions on the Hidden locations page. The Hotline: Rituals recording is unlocked after completing The Foundation main mission. The Log 7: Changes tape recorder can be found by jumping into the pit shown in the picture, after beginning the Pyramid main task. The Hotline: Two Birds, One Bomb recording is displayed during the Pyramid mission. The Log 8: Purpose tape recorder is located near the Lower Crossroads control point and can be accessed during the main Pyramid mission.
No secrets can be found in this area.
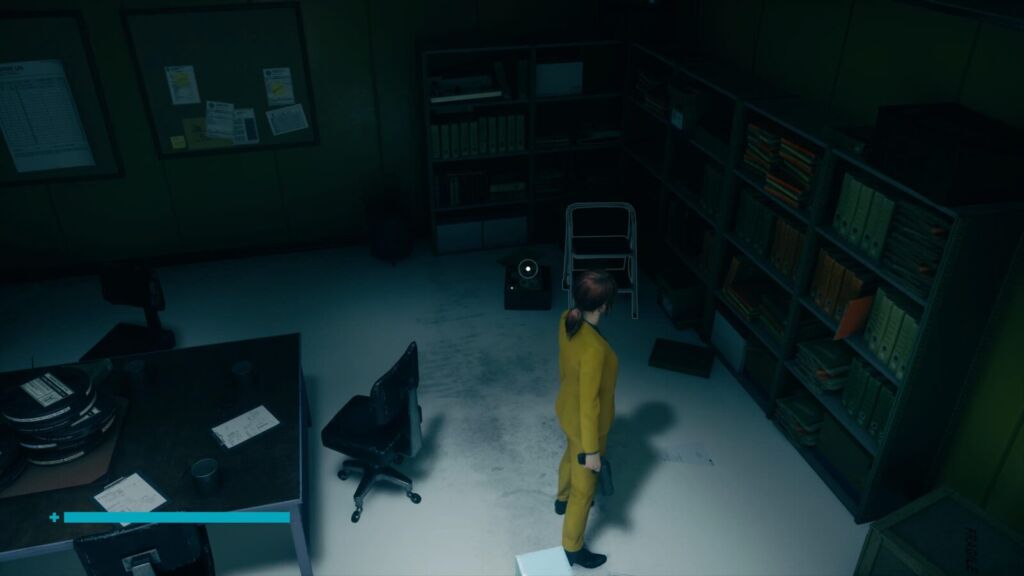
The Meteor Hill Summary document is located in a room on one of the upper levels of the tower, accessible by climbing onto scaffolding and using the Shape power to pull out the side platforms. The History of the Oldest House document can be found on a desk in one of the small yellow buildings, while the Pyramidic Geometry document is on a bed in another. The Log 3: Work tape recorder is located on the floor of Level 1 of the tower, next to the elevator shaft.
The Tower in Control is full of hidden documents and tape recorders waiting to be discovered. Here is a guide to help you find them:
On Level 2 of the Tower, in the Power Core Storage area, you can find a document called \”Power Cores\” to the right of the generator.
On Level 3 of the Tower, in the Tunnel Access area, you can find a tape recorder called \”Log 5: Pyramids\” next to a barrel and scaffolding that lead to a hole in the wall.
As you pass through the upper caves next to the Tower, the recording \”Hotline: Becoming Director\” will automatically switch on.
On Level 4 of the Tower, in a secret location that can only be reached by passing through a hole in the tower wall, you can find a document called \”Meteor Hill Supplement\”. Follow the tunnel from the Warehouse Tunnel control point until you reach the main tower area, then look for the gap shown in the picture above. The secret lies on the ground next to the elevator shaft.
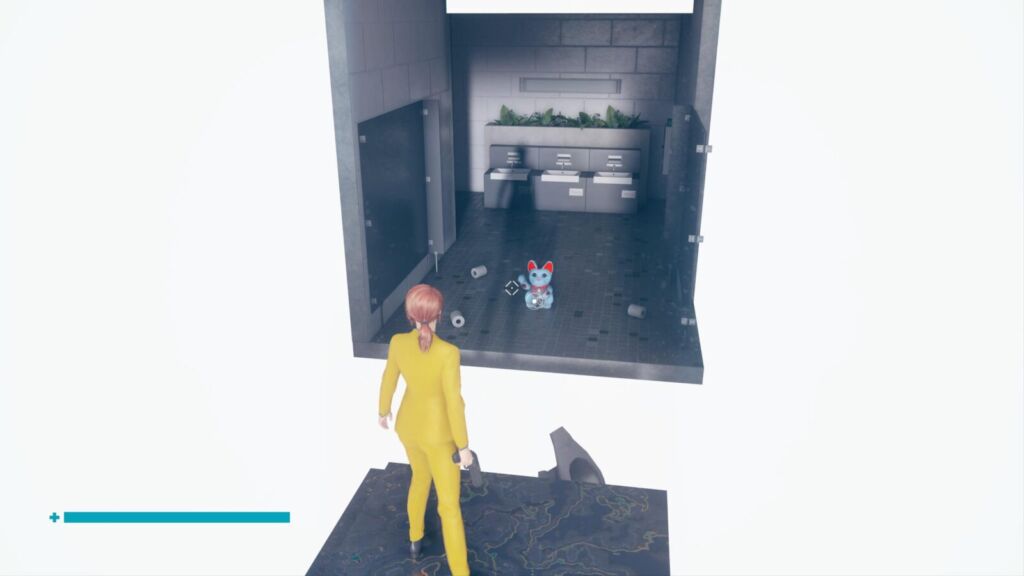
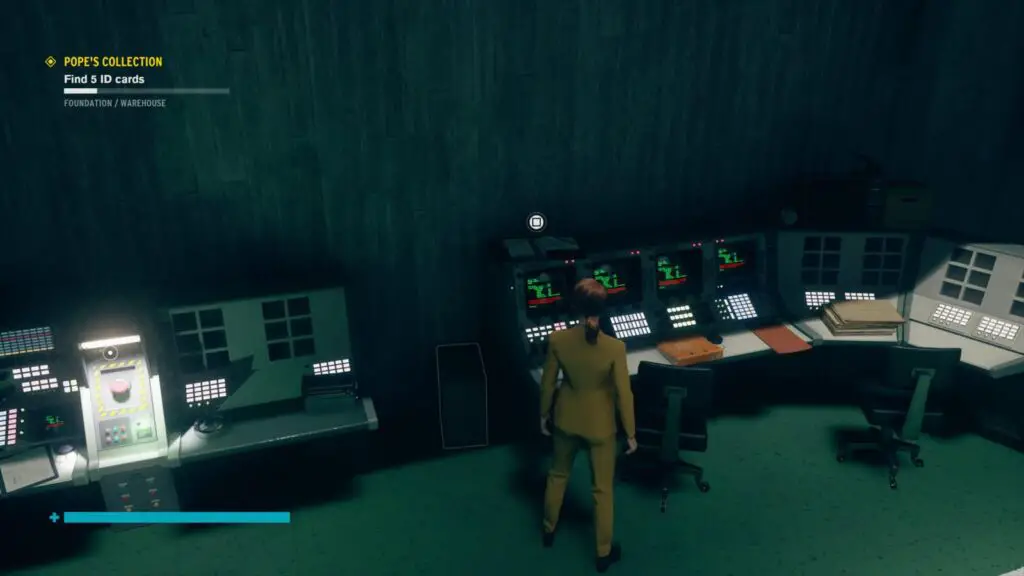
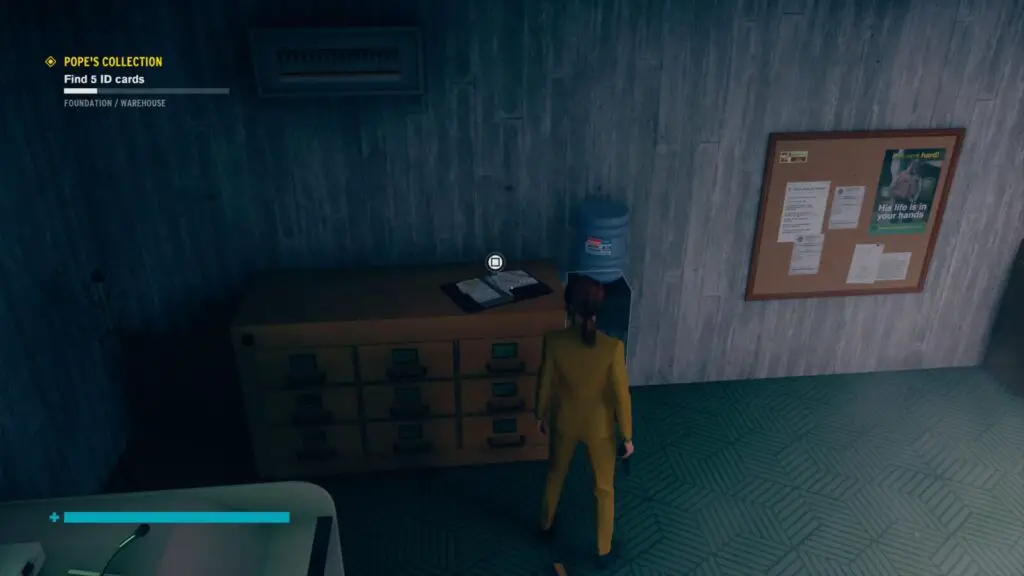
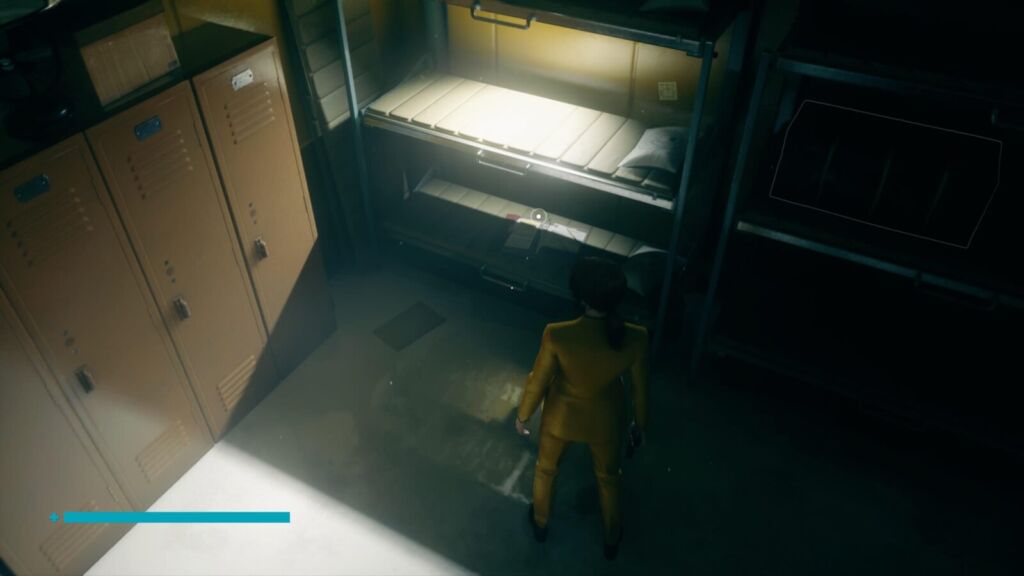
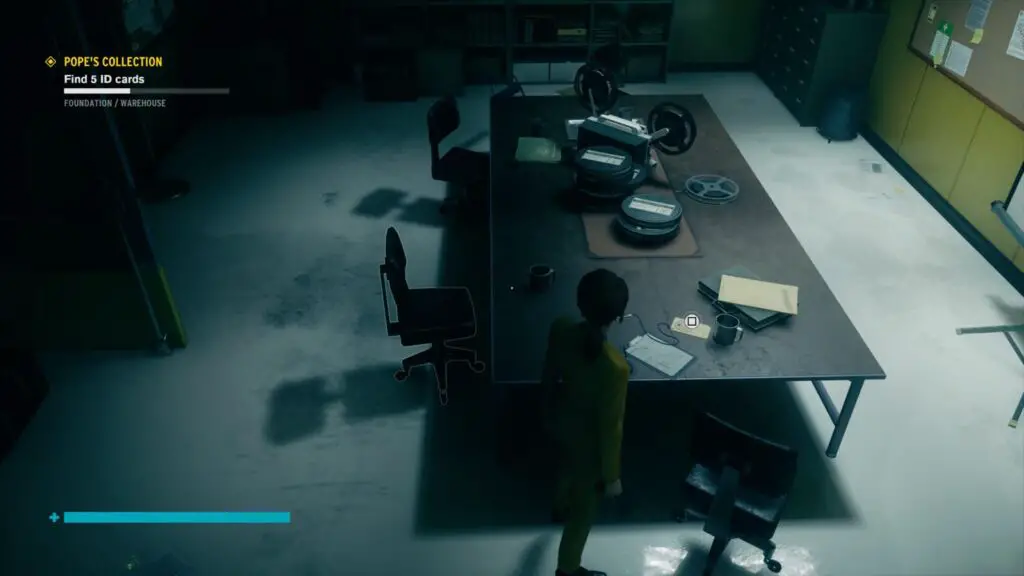
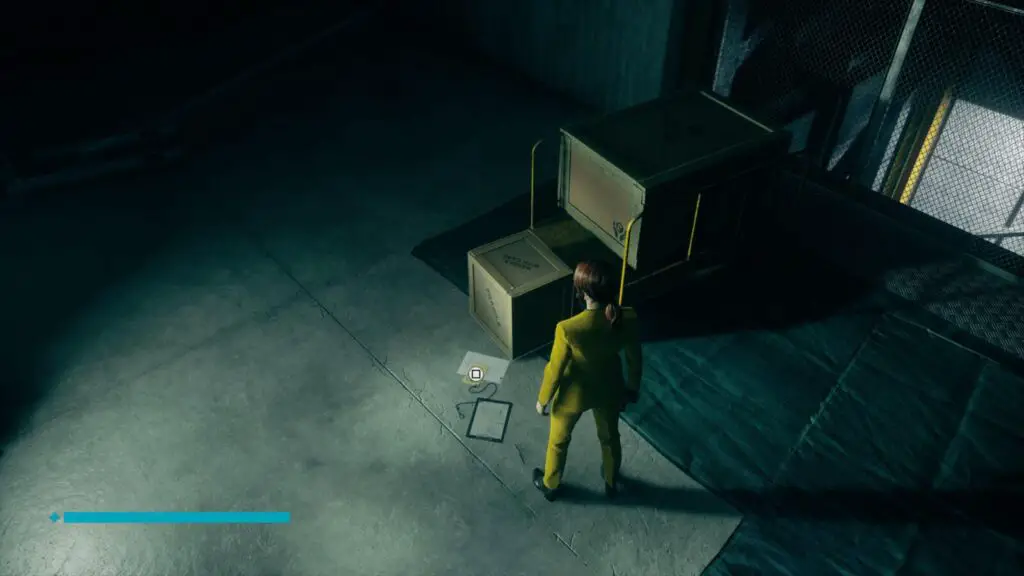
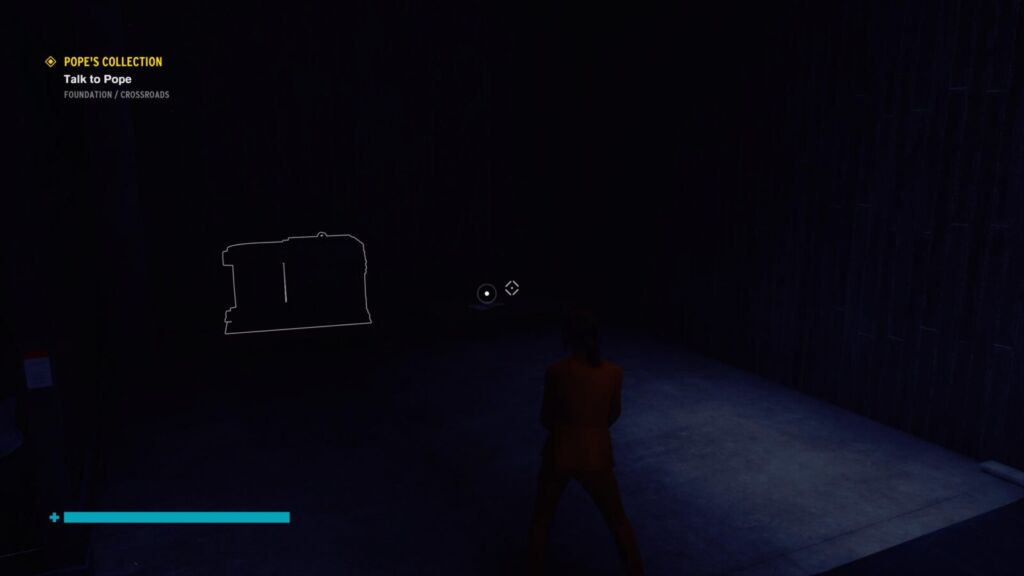
In a room on the lowest level of the Tower, you can find a document called \”Ash: Request Denied\”. To get there, you must first start the Pope\’s Collection side quest and go through the doors shown in the picture.
On Level 0 of the Tower – Basement Lab, in an area with a smaller version of the nail, you can find a document called \”Northmoor: Final Warning\”. To get there, you must first start the Pope\’s Collection side quest and deal with Processes Designer Gibbs boss.
On one of the initially inaccessible floors of the Tower, you can find the document \”Northmoor: Medical Results\”. To reach this location, go through a hole in the tower wall at Level 3 – Tunnel Access. In our game guide, this location is referred to as Hidden Location no. 10.
Another document, \”Foundation Etchings\”, can also be found on one of the initially inaccessible floors of the Tower. To get there, start at the Warehouse Rise and find the area on the left of the picture with two wooden barricades. Go through the hole in the tower wall visible behind the barricades.
In the Canyon Rim area, the recording \”Hotline: Out of Options\” will automatically turn on when you start exploring.
There are no secrets to be found in the Fractured Cavern or Base Camp areas.
In the Collapsed Department, you can find the document \”Shift Account PT. 1\” in the upper room of the office. Use levitation to reach it soon after you enter the collapsed section and find the first control point.
The Kyiv Summary document can be found near the first control point. To reach the gate and metal detector on the other side, you need to move forward. If you wish, you can open the gate from this side to make your return to the control point easier.
The Kyiv Supplement document is located at the gates and metal detector in the first section of the Collapsed Department.
In America Overnight Ep. 367, the tape recorder can be found in the Data Entry and Filing room, which is visited in the initial section of the Collapsed Department location. Once you have dealt with your opponents, explore one of the higher office spaces.
The Computer Program document is in the so-called astral toilet, which is described in our trophy guide. As you leave the Data Entry and Filing room, take a look at the toilets. One of them is actually an astral toilet and you\’ll notice a levitating object in it.
In America Overnight Ep. 382, a tape recorder lies on the floor next to a large photocopier in one of the rooms next to the Transit Access control point.
The Shift Account PT. 2 document is located on one of the computer stations near the Transit Access control point.
The Movie Camera Supplement document can be found in one of the cabinets near the passageway to the adjacent Transit Access location in the final stages of exploration of the Collapsed Department section.
The Shift Account PT. 3 document lies on a desk in the final areas of the Collapsed Department. It is a location adjacent to the rising gates that lead towards the monolith.
In Hotline: End of the World, the recording automatically switches on at the end of the march to the monolith in the Collapsed Department section.
The Movie Camera Procedures document is automatically obtained after completing Jesse Faden\’s Starring in The Swift Platform episode side quest that is available at this location.
The New Language document is located in an elevator that Jesse can call by pressing a button. There\’s a monster which will come out of the elevator that needs to be killed first. This location is a secret area and we have described it in more detail on a separate site of our guide – Hidden locations – check the description of Hidden location no. 6.
In Brian\’s Movie Den Ep. 3, the video can be found in a dark toilet near a passageway leading to the Transit Access location. Destroy the crystals with Fracture service weapon to get there.
Astral plane
The Were-Everything document can be found on the ground shortly after you begin exploration of the Astral Collision location. This is a unique location first visited in the Nail main task. After unlocking the control points, Jesse can freely return to this area later in the game.
The Maneki-neko Procedures document can be found during initial exploration of the Astral Collision, even before the first control point was found.
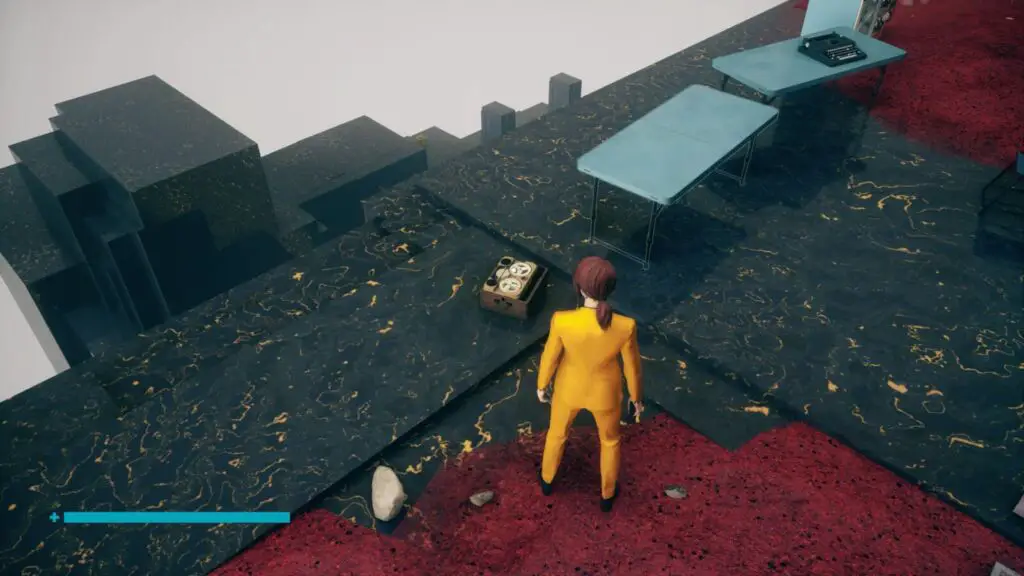
The guide provides information on where to find specific items in the game. Each item is accompanied by a screenshot and a brief description of where it can be found in the Astral Plane. The items include a tape recorder, a document, a TV with a recording, and a collectible. The locations for each item are generally in the eastern part of the Astral Plane and near specific control points. The guide also provides tips on how to reach certain hidden locations to find the items.
1. What are collectibles in Control The Foundation?
Collectibles in Control The Foundation are items that the player can find and collect throughout the game. They can be found in hidden places, secret rooms, or by completing certain objectives. There are different types of collectibles, including documents, audio recordings, and multimedia presentations. Each collectible provides the player with more information about the game\’s lore, backstory, and characters.
2. How do you find secrets in Control The Foundation?
Finding secrets in Control The Foundation requires careful exploration and observation. Secrets can be hidden in unexpected places, such as behind a bookshelf or inside a locked room. Players should pay attention to their environment and use their abilities to uncover secrets, such as using the Levitate ability to reach high places or the Shield ability to break through obstacles. It\’s also important to interact with objects in the environment, such as pushing buttons or pulling levers. Some secrets require the player to solve puzzles or complete challenges.
3. What is the significance of collectibles and secrets in Control The Foundation?
Collectibles and secrets play an important role in Control The Foundation as they provide the player with a deeper understanding of the game\’s narrative and world-building. By collecting all the available items, the player can piece together a more complete picture of the events that led up to the game\’s current situation. Secrets also add to the game\’s sense of mystery and intrigue, rewarding players who take the time to explore every nook and cranny of the game\’s environment.
4. Are there any rewards for collecting all the collectibles and uncovering all the secrets in Control The Foundation?
There are no specific rewards for collecting all the collectibles and uncovering all the secrets in Control The Foundation. However, players who do so will gain a deeper understanding and appreciation of the game\’s story and lore. Additionally, some achievements and trophies are tied to collecting all the collectibles, providing a sense of satisfaction for completionists.
- Control AWE: Duration of the Game
- Control: The Pyramid – Step-by-Step Guide
- How to Defeat esseJ, the Boss in Control?
- Are There Jumpscares in Poppy Playtime?
- Prevent Scarecrows Henchmen from Destroying Oracles Servers | Main Story
- AC Odyssey Legacy of the first blade: The Horsemen Cometh
- How to Obtain Materials and Source in Control
- Poppy Playtime: Guide for Beginners
- Age of Wonders 4: Pantheon
- AC Odyssey: An Eye for an Eye
- Assassins Creed Valhalla: Jorvik Flyting Locations and Secrets
- Stray: Different Language Versions
- Argent Facility Guide
- How to Obtain Crafting Materials in AC Odyssey
- List and Walkthrough for Spikeroogs Side Quests in The Witcher 3 Wild Hunt
- Tips and Tricks for Resident Evil 4 Remake
- How to Unlock The Foundation DLC in Control?
- The Riddlers Final Battle in Batman Arkham Knight
- AC Valhalla: Siege of Paris: Fire from Heaven
- Blair Witch Walkthrough: Chapters 6 and 7
- Poppy Playtime: Red Hand – Step-by-Step Guide
- Amnesia Rebirth: The Mines – step-by-step guide, hidden items
- Breathedge: List of Resources and How to Obtain Them
- Poppy Playtime: Conveyor – step-by-step guide
Related Posts
Assassins creed valhalla: legendary animal – hamtunscire secrets and locations, how to defeat the compass boss in assassins creed valhalla, assassins creed valhalla: tewdwr – romance guide, guide to obtaining ingots in assassins creed valhalla, how to finish the main storyline of assassins creed valhalla quickly, assassins creed valhalla: eivor guide – gender, assassin, and personalization, leave a comment cancel reply.
Your email address will not be published. Required fields are marked *
Save my name, email, and website in this browser for the next time I comment.
Research Site Gamma Collectible Locations
Chasm collectible locations, cave system collectible locations, crossroads collectible locations, astral collision collectible locations, collapsed department collectible locations, warehouse collectible locations, story and combat collectibles.
- Additional Guides
- Related Guides
PlayStation 4, Playstation 5
Control: The Foundation Collectible Guide
Categories:
Where to Find all Collectibles, Maneki Neko, and ID Cards in The Foundation DLC For Control
The Foundation DLC not only wants you to find all of the collectibles in the game, but it introduces two new types of collectible too; Maneki Neko (Japanese Waving Car figures), and ID Cards .
The Collectibles and Maneki Neko will each earn you a trophy for full collection, and the ID Cards are needed for a Side Mission. Completing all Side Missions will earn you another trophy. For more information on all the trophies in the Foundation DLC, check out our Full Control Foundation Trophy Guide & Road Map here .
I’ve laid out the below Collectibles guide as a walkthrough so that you can make your way from one collectible to the next. However, sometimes I’ll jump to a different area by fast travelling, but will always start you at the right Control Point.
We will start our journey through the collectibles From the “Cave System” Control Point.
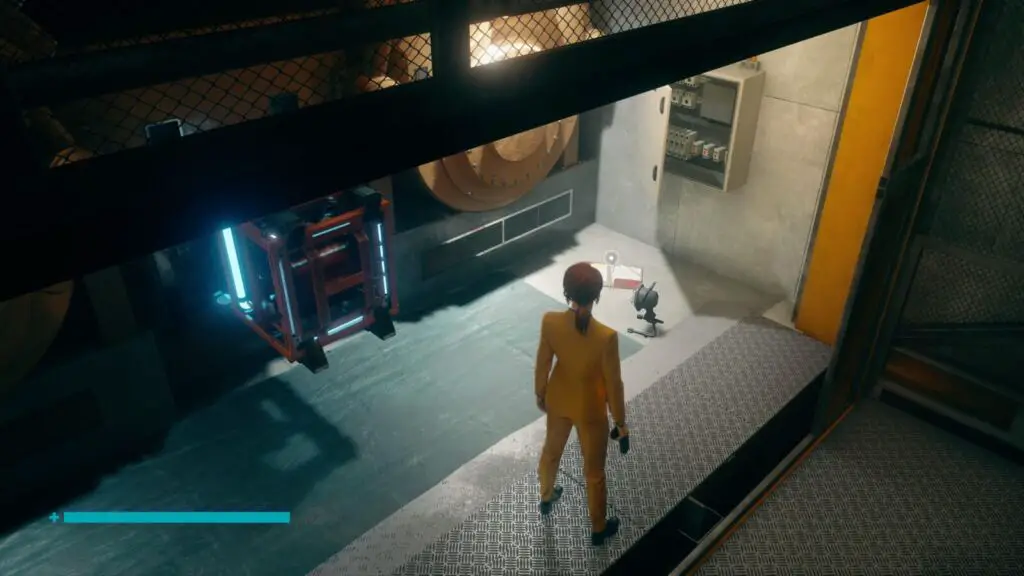
Log 1: Discovery – Multimedia
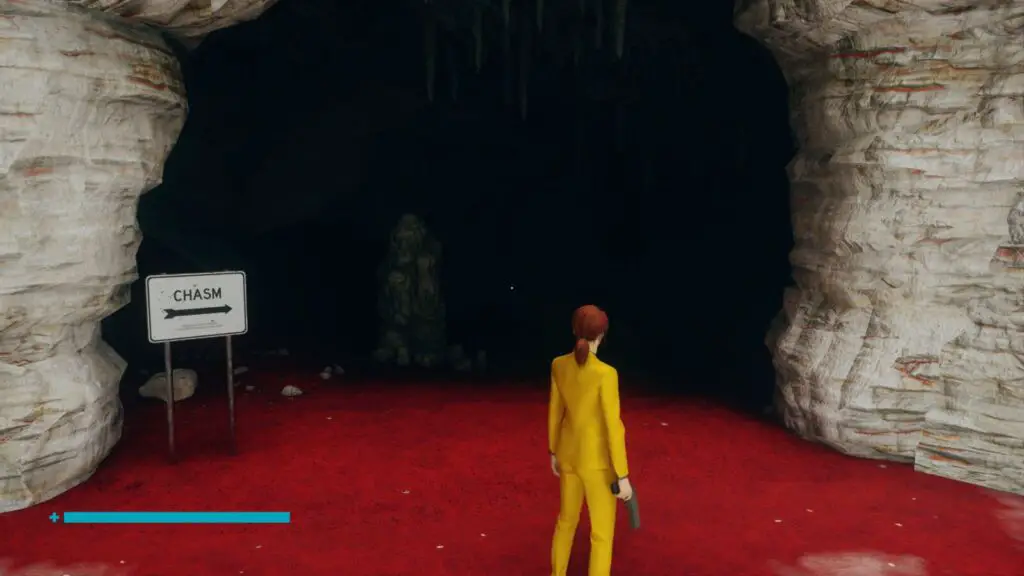
Head south from the Cave System Control Point, through the caves to Research Site Gamma.
Close to the signpost pointing to the Deep Caverns area, this collectible is found on the ground by a short ledge with a radar dish on it.
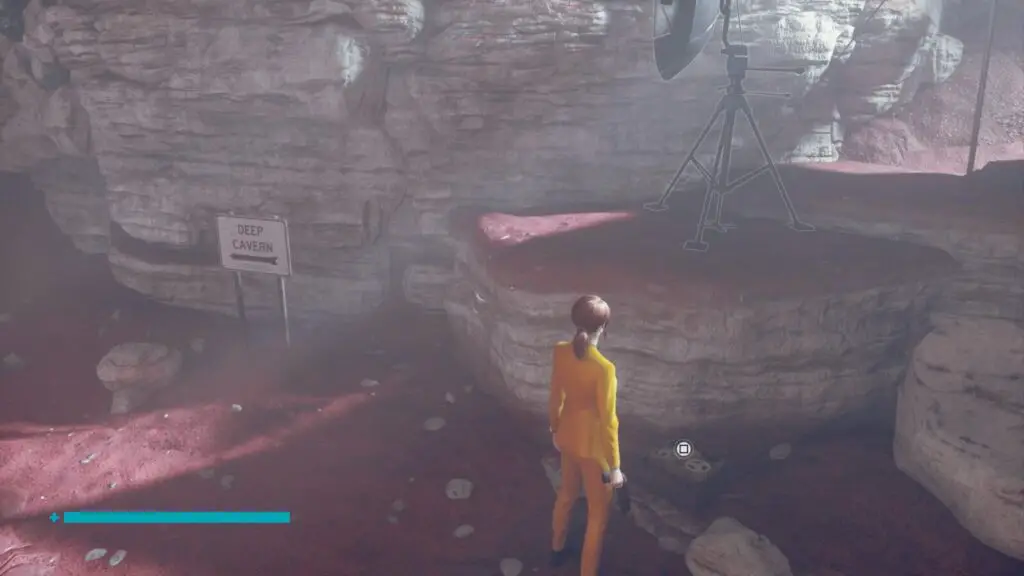
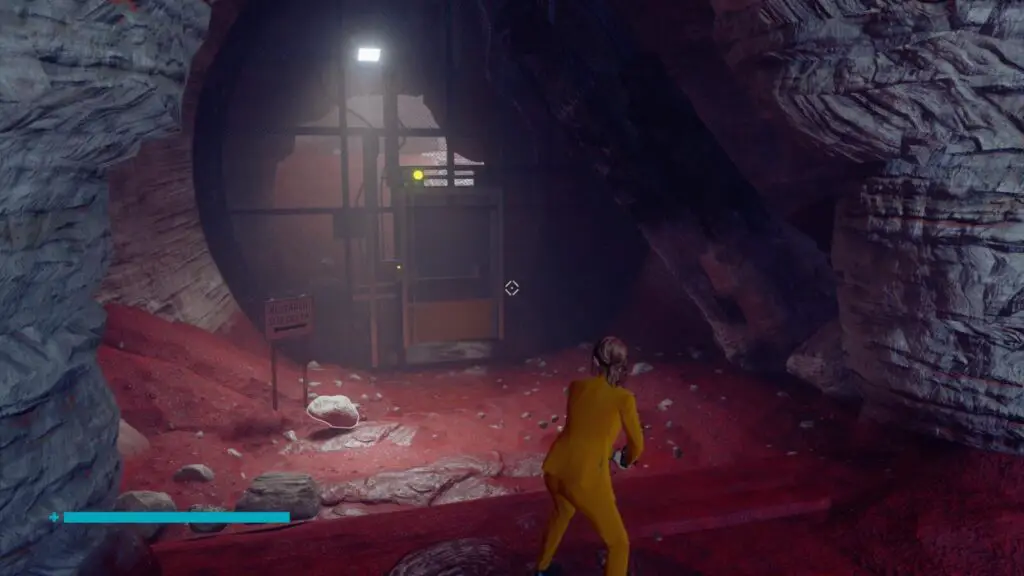
Once you have it, follow the sign and enter the Deep Cavern, breaking your way through the crystals.
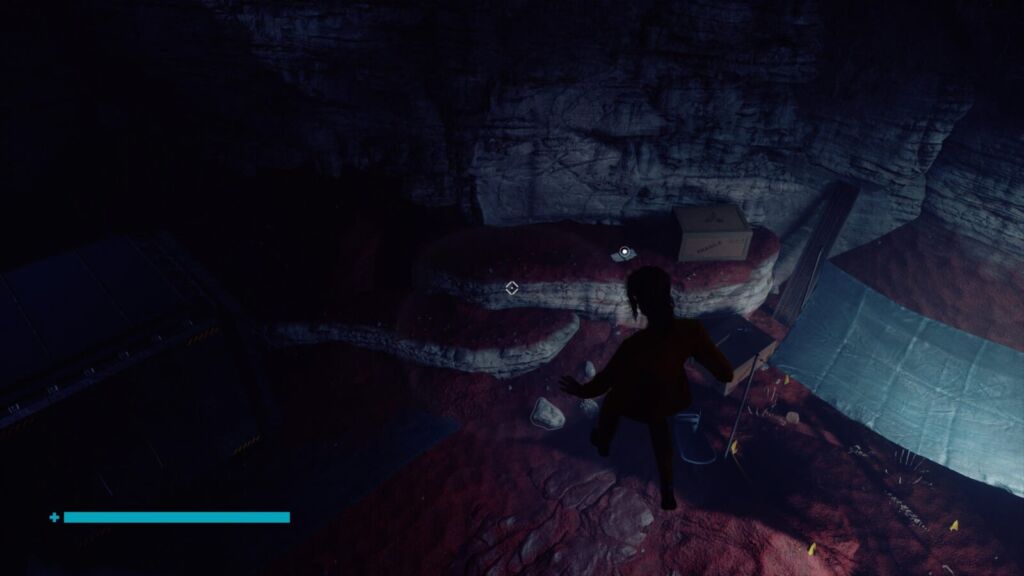
Adventure Accepted – Correspondence
Continue through the cave until you reach a large room with an Astral Monster in it. On the southern side of this room, there’s a doorway leading back to Research Site Delta and the Cave System Checkpoint, head inside.
At the bottom of the ramp in here, you’ll find this collectable on the ground.
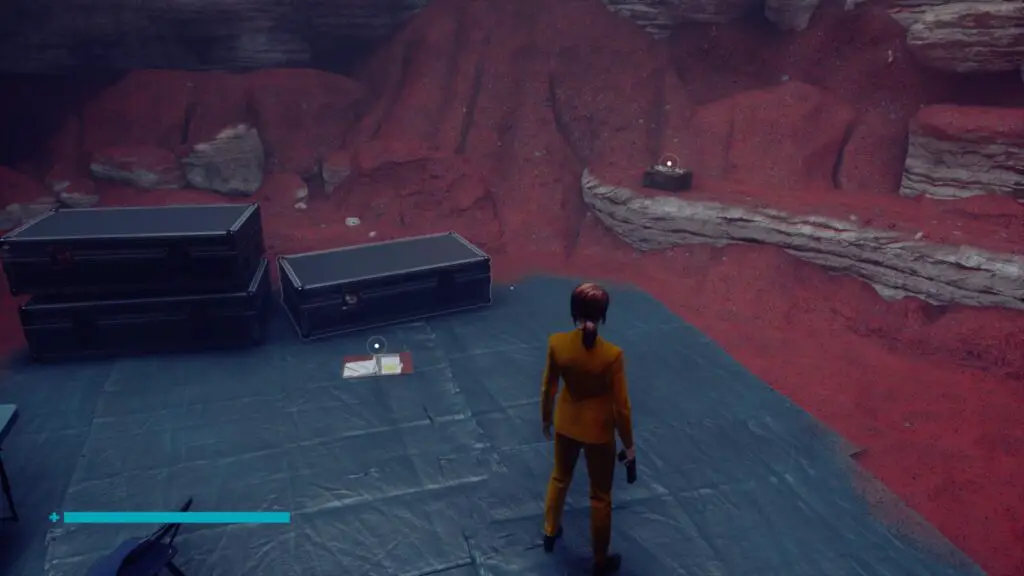
Log 4: ID – Multimedia
On a ledge next to the above collectible.
VHS Tape Supplement – Case Files
Back at the Cave System Control Point, you’ll see a crystal patch on the wall that you can use Shape on.
Do so and use the resulting platform to reach the stone bridge overhead. From there, head inside the cave towards the Chasm.
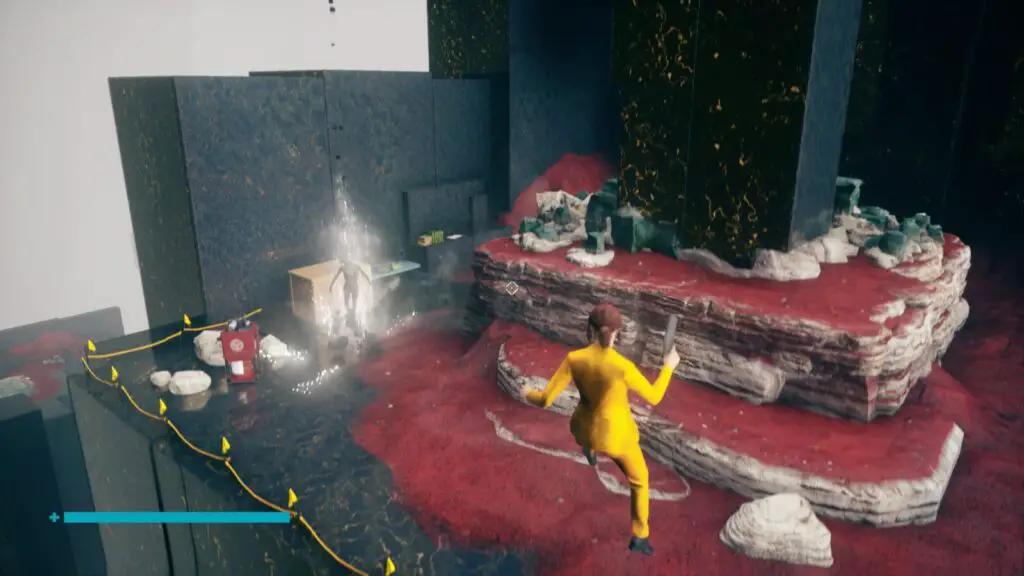
At the bottom of this ramp, you’ll find the containment cell where the “Found Footage” Side Mission ends, and the collectable is on a ledge at the back.
Talented Janitor – Research & Records
Nearby, you will see a light source you can lift and a doorway (the one you came through at the end of the Found Footage Side Mission).
Grab the light and head through this door and deep into the cave. Glide over an open hole int he ground with a bright white light coming through it, and enter into a large cavern. Some enemies will likely spawn in this cavern.
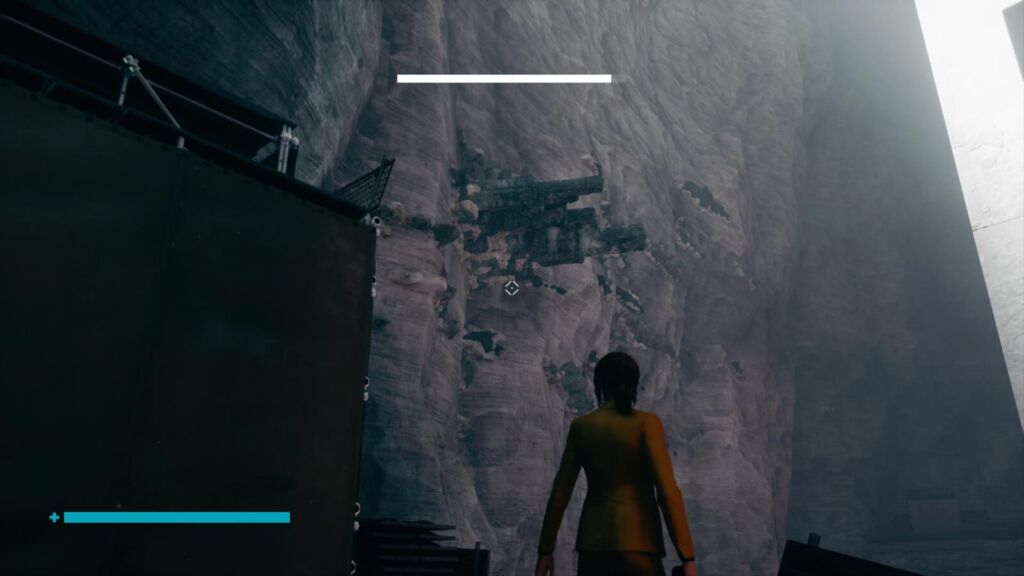
Look for the rocks shown in the picture below, as they’re hiding a secret cave.
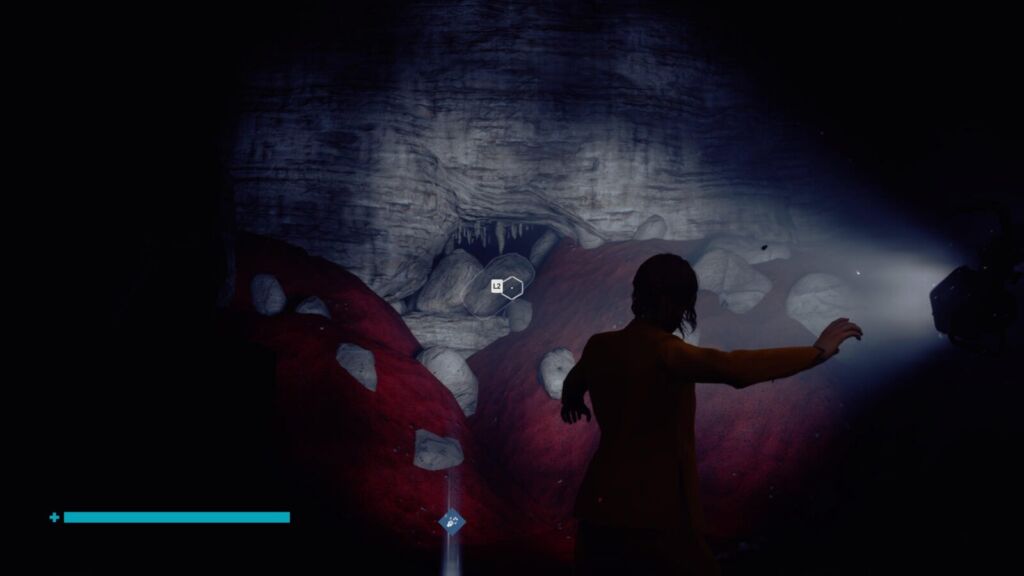
Use launch to clear the rocks from the entrance and head inside to find this collectible next to a Maneki Neko .
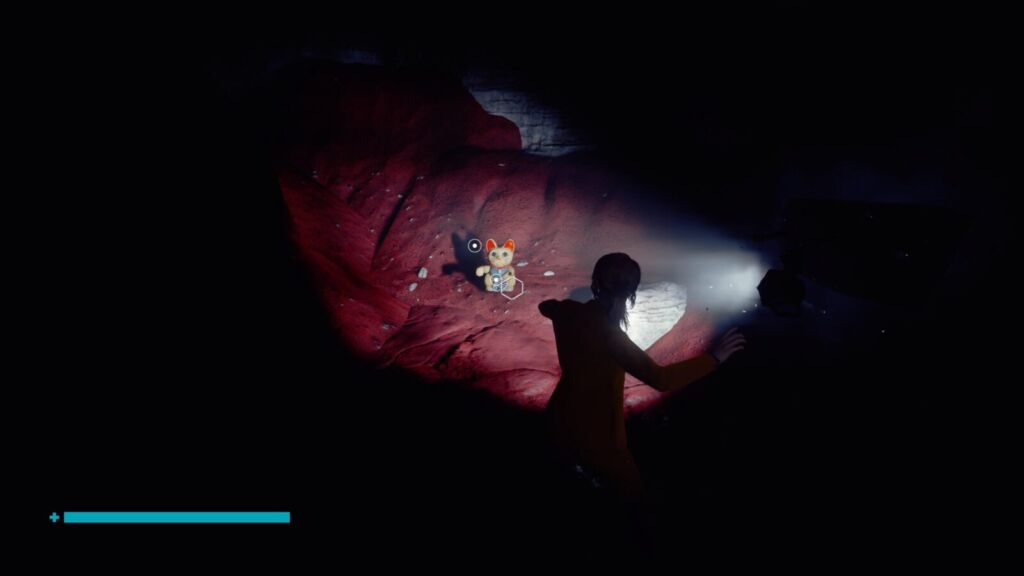
Maneki Neko #1
Next to the above collectible.
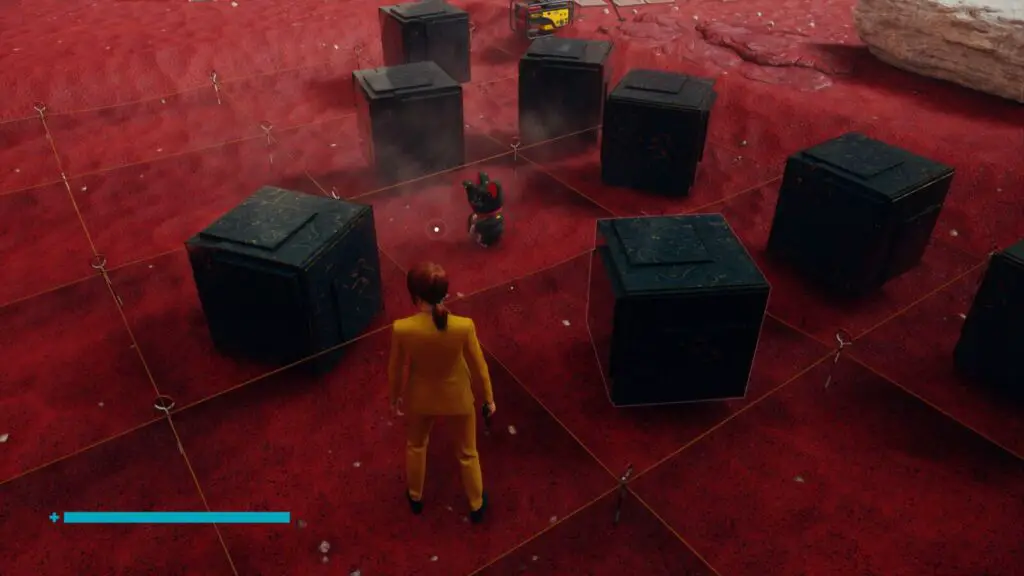
Maneki Neko #2
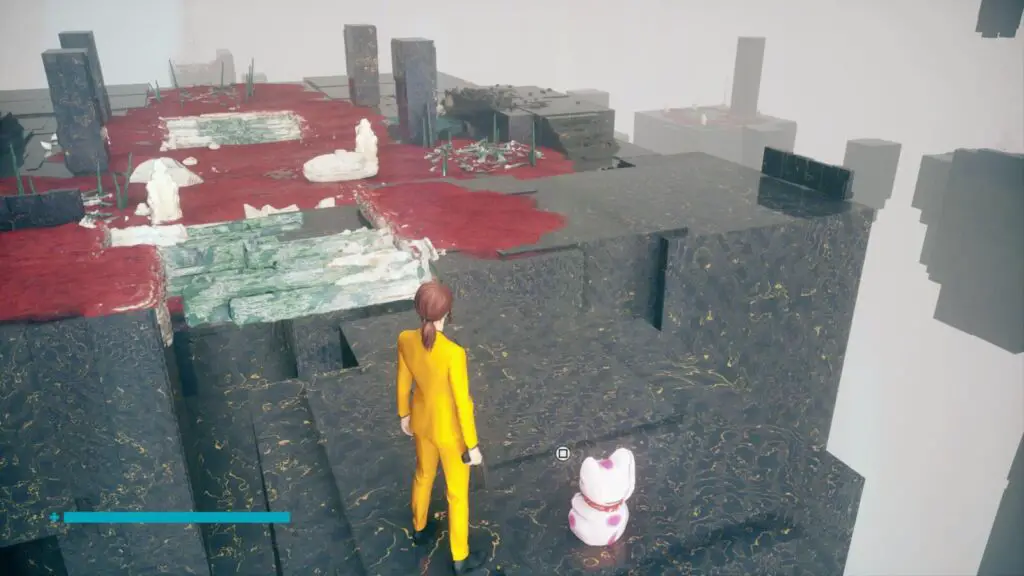
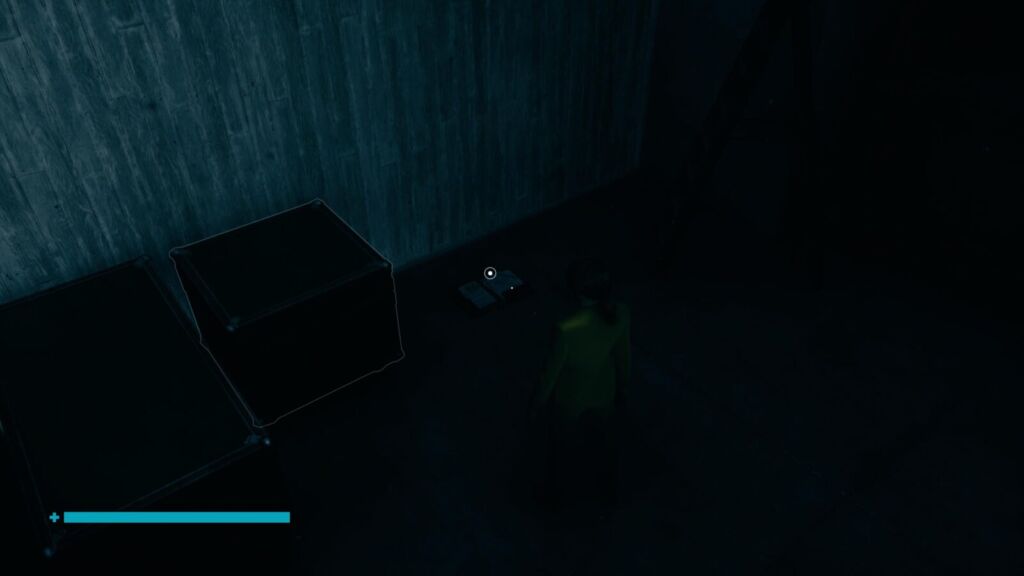
Start at the Cave Bridge Checkpoint this time, we just need to make a quick detour for our second Maneki Neko.
Next to the checkpoint, you will notice a small black cube. There’s actually 8 of them hidden in the nearby surroundings and you need to gather them all in a single location.
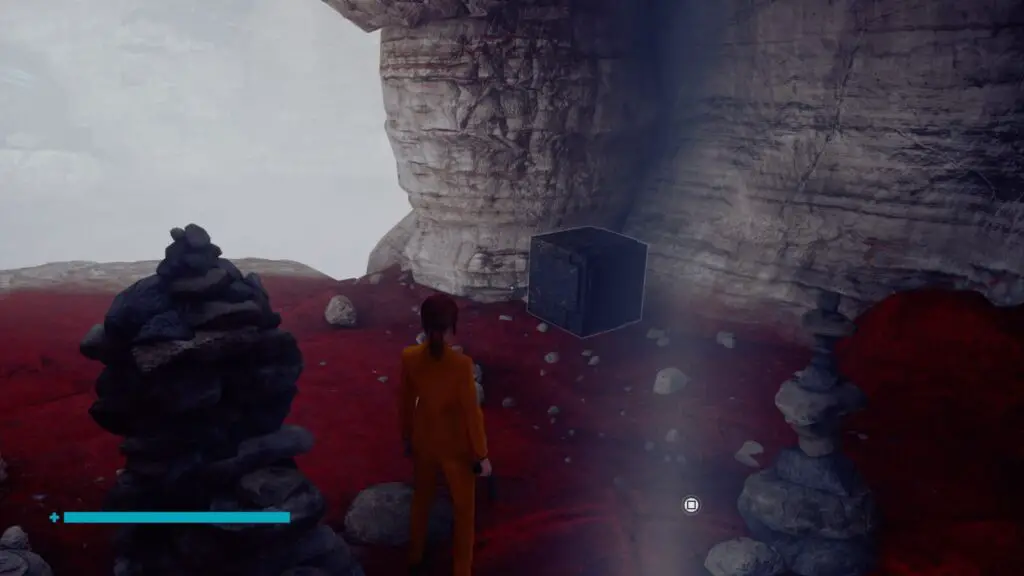
Be very careful about how far you stray from them, though, as they’re prone to respawning if you tread too far.
Grab the one next to you and throw it down towards the grid of squares which is mapped out on the floor below you and to the right. There are three other blocks over here which is great, so we only need to find 4 more.
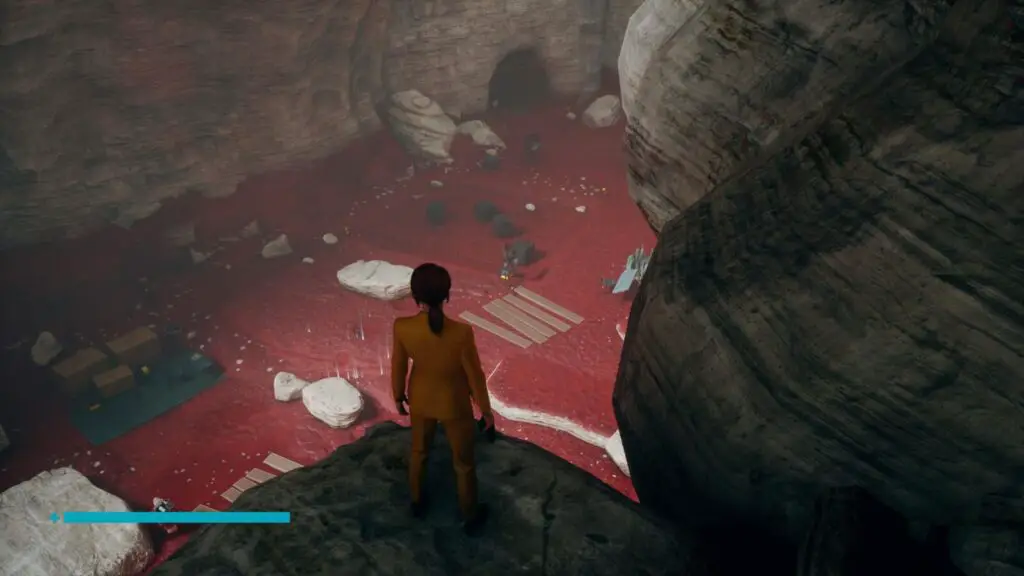
You can get the next block on the ledge opposite the Cave Bridge Control Point. Throw it down with the others.
Another is on the next bridge over. Levitate across and throw it over with the rest.
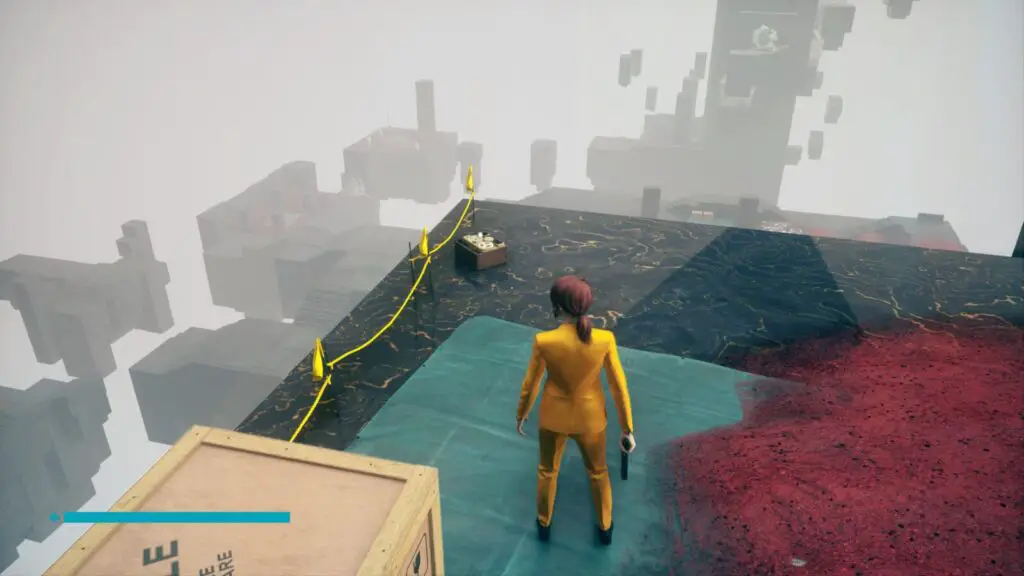
The next is in this Hidden Location on the northern side of the next bridge over, try not to go too far in and risk a despawn.
The last one is through the cave next to the grid where the “Research Site Delta” sign is, so you can now go down to the ground level to grab that. It’s not too far in, it’s just to the left on the other side.
Once all the blocks are placed, you should hear the “pop” of a Maneki Neko spawning in at the center!
Cave Paintings – Research & Records
While you’re already at Research Site Gamma, near the grid you just used, there’s a large cave painting on the wall.
Next to the cave painting on the ground, you’ll find this Collectable.
Relocation Order – Correspondence
In the center of this area, there’s a chasm. Jump over it and you’ll find a bright yellow bulldozer with this collectible on the ground opposite it.
Foundation Accident – Correspondence
Continue on through the next cave towards the Astral Bleed. After the toxic geysers, continue on towards Atral Bleed. Where the last bend in the cave is, you’ll find this collectable on a ledge to your right.
From this point, start from the “Crossroads” Control Point.
Leylines – Research & Records
On some blue tarp on the ground next to a yellow machine north-west of the Control Point.
Foundation Pillar – Research & Records
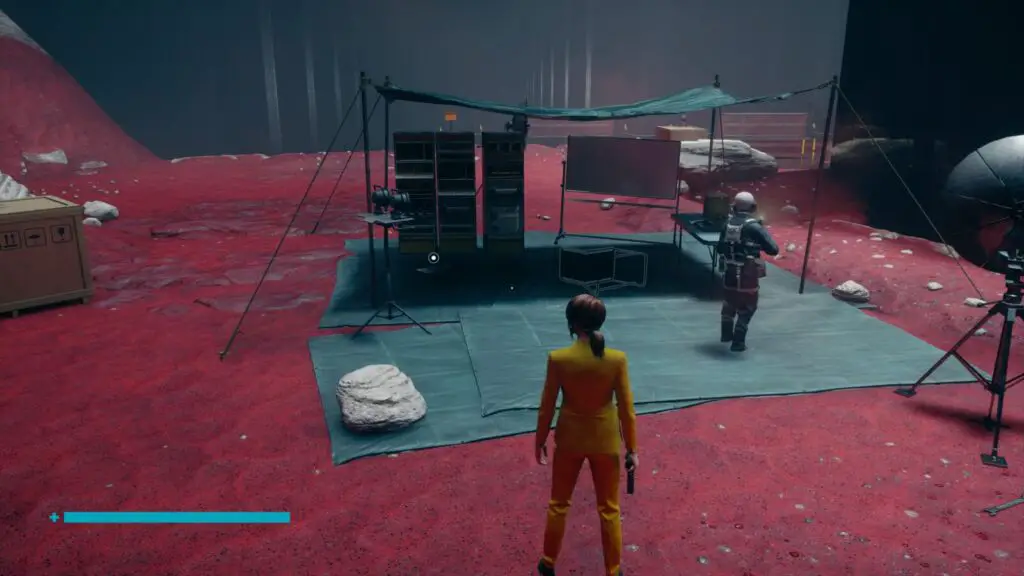
On some blue tarp next to a soldier. West of the Nail, North of the Control Point.
Log 2: Foundation – Multimedia
Inside the Yellow Mobile Lab building, east of the Control Point. Through the northern-most door.
Unacceptable Behavior Memo – Correspondence
On the ground in the Hidden Location. It’s a cave on the ledges behind the Nail. Click here to be taken to the correct location in our Hidden Locations guide.
Log 7: Changes – Multimedia
Drop down the hole at the base of the Nail. The collectible is at the bottom on a stone ledge opposite the Nail.
Log 8: Purpose – Multimedia
At the Lower Crossroads Control Point, on the ground.
From this point, start at the “Astral Collision” Control Point.
FBC Reminder: Windows – Multimedia
On the ground next to the Astral Collision Control Point.
Maneki-Neko Procedures – Case Files
You’re going to need to glide down to the large platform below with the gold block on it.
You’ll find the collectible on the ground near this Hidden Location .
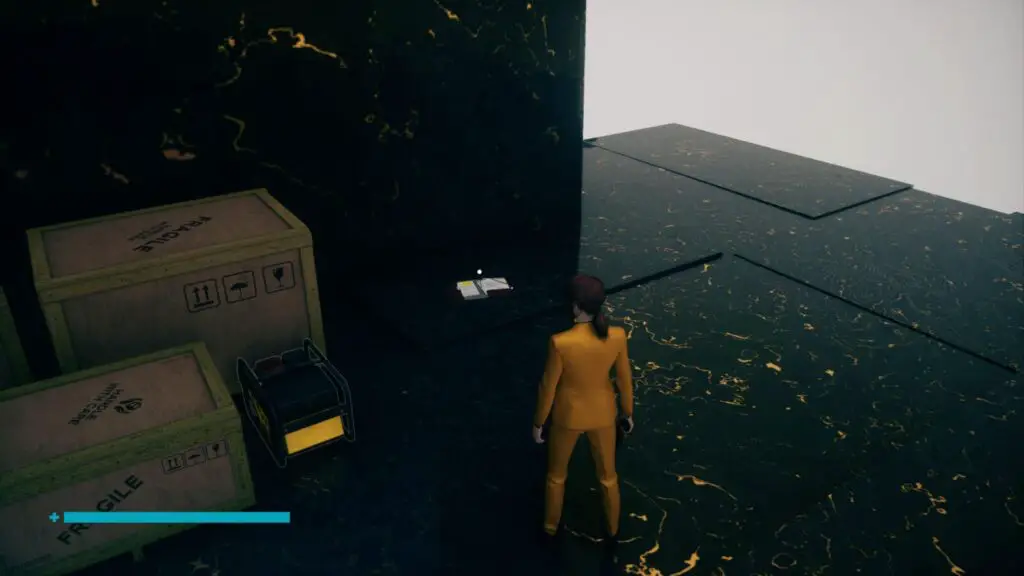
Maneki Neko #5 – Part 1
While you are here, you can start the process for this Maneki Neko. Grab the Gold Block mentioned above and throw it into the toilet cubicle. This will start something that we’re going to finish later…
Were-Everything – Correspondence
Continue backtracking, all the way to another platform further down with another gold block on it. It’s actually the first platform you arrive on when you first come to the Astral Collision.

The collectible is in the sand near some white rocks.
Green – Correspondence
Make your way to the Astral Platform PE Control Point. Jump across to the nearby floating black block.
From there, you’ll see a ledge covered in red sand with a white rock structure in the center and a black pillar on top of that. Behind this black pillar, you’ll find the collectable on a thin ledge.
Log 6: Departure – Multimedia
Go back to Astral Platform PE Control Point and use it to fast travel to Astral Tower PE Control Point. You’ll find this collectible on the ground next to it.
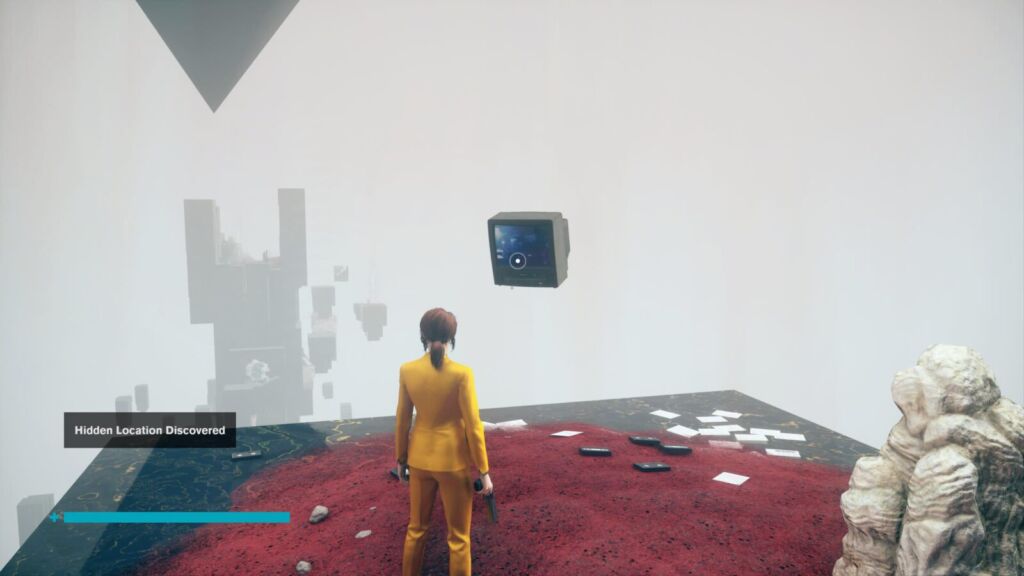
Rejected Episode – Multimedia
At Astral Tower PE Control Point, climb up the highest black pillar on this same platform and you’ll find a TV to interact with. It’s also this Hidden Location .
America Overnight Fatality – Research & Records
Use the Astral Tower PE Control Point to fast travel to Astral Tower PW Control Point. There, you’ll find this collectible hidden among some rocks on the ground nearby.
Maneki Neko #3
Also from the Astral Tower PW Control Point, levitate to the platforms directly ahead of you.
From there, break the crystals in the center of the platform and you’ll find a gold cube underneath.
Once you have, it take it up the stairs at the end of the platform and break the crystals there to reveal the gold slot where the cube must go.
Place the cube in its place and then glide over to the floating pillar nearby and the cat will appear when you land.
From now, start at the “Collapsed Department” Control Point.
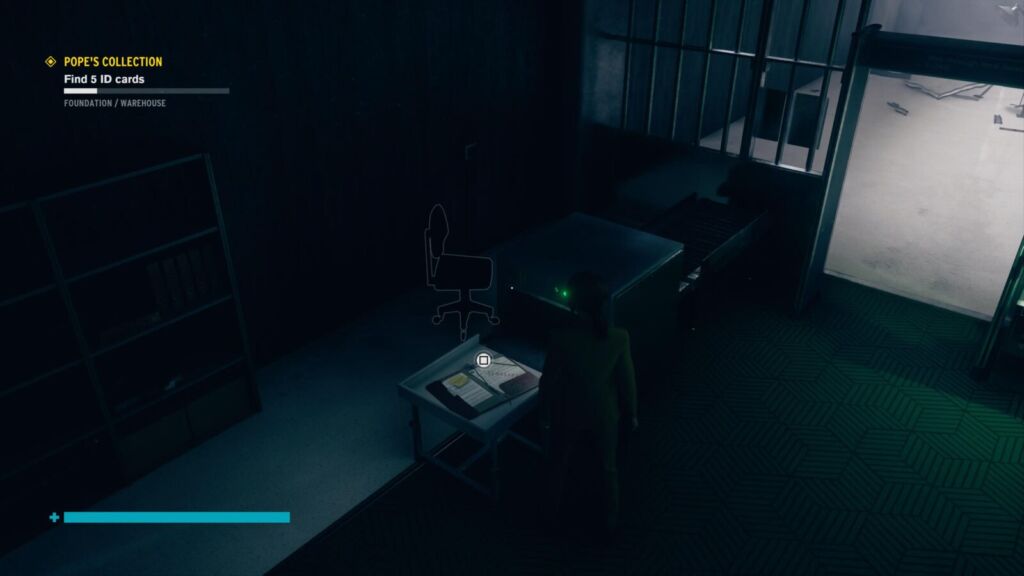
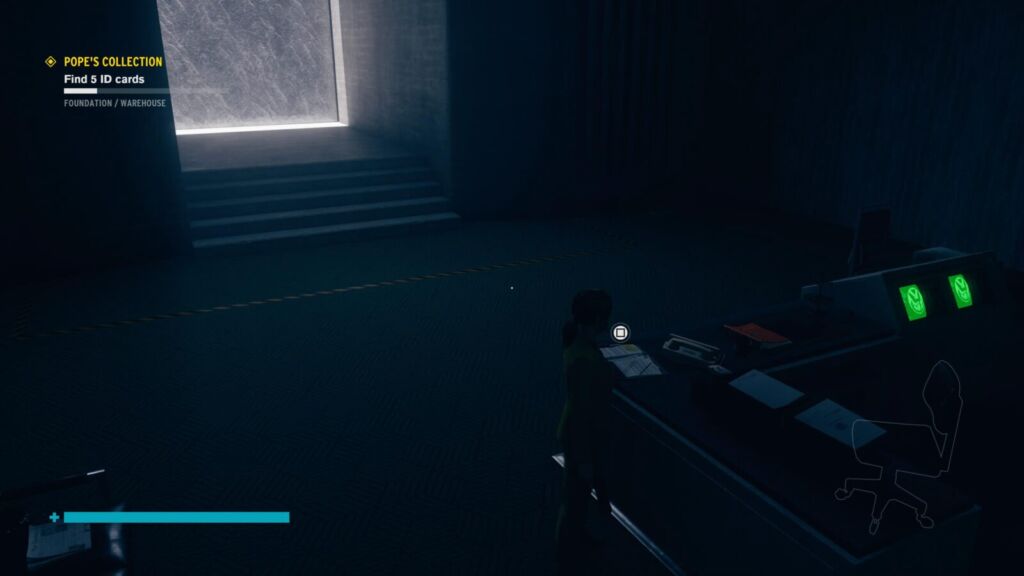
Shift Account Pt. 1 – Correspondence
From the Collapsed Department Control Point, you should be able to see some glass windows just slightly above you, which lead to a control room.
You can find this collectible in there on a filing cabinet.
Kyiv Summary – Case Files
In the security checkpoint next to the Collapsed Department Control Point, you will find this collectible on the conveyor belt.
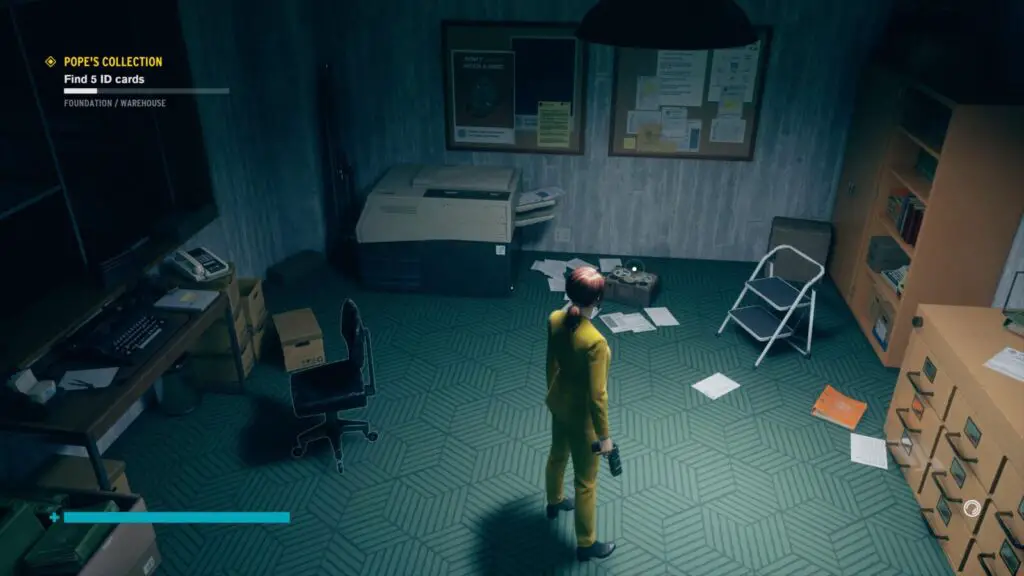
America Overnight Ep. 367 – Multimedia
Continue on into the Data Entry & Filing Room. On the third floor of this room you’ll find this collectible in a dimly-lit office in the north-east corner.
Maneki Neko #4
Look for this Hidden Location by breaking the wall behind a painting in an office on the ground floor, in the north-east corner.
Inside that hidden room, you can break another wall with a poster on it to your right.
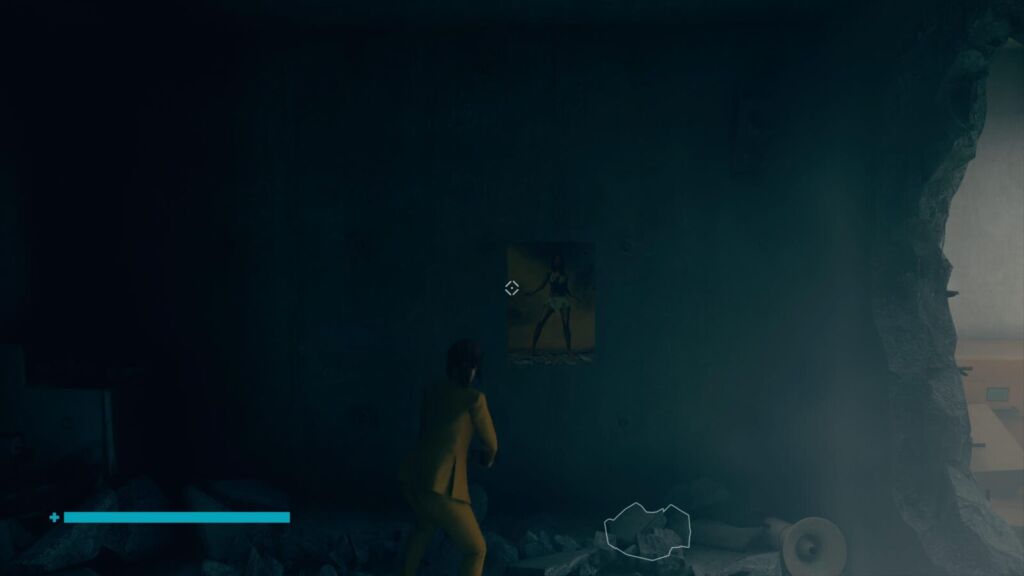
The Maneki Neko is inside!
Computer Progam – Correspondence
Head through the door towards Firebreak on the 5th floor of the Data Entry and Filing Room. In the corridor before the Firebreak door, look to your right to see a restroom door.
Head inside and you’ll find this collectible floating in the Astral plane.
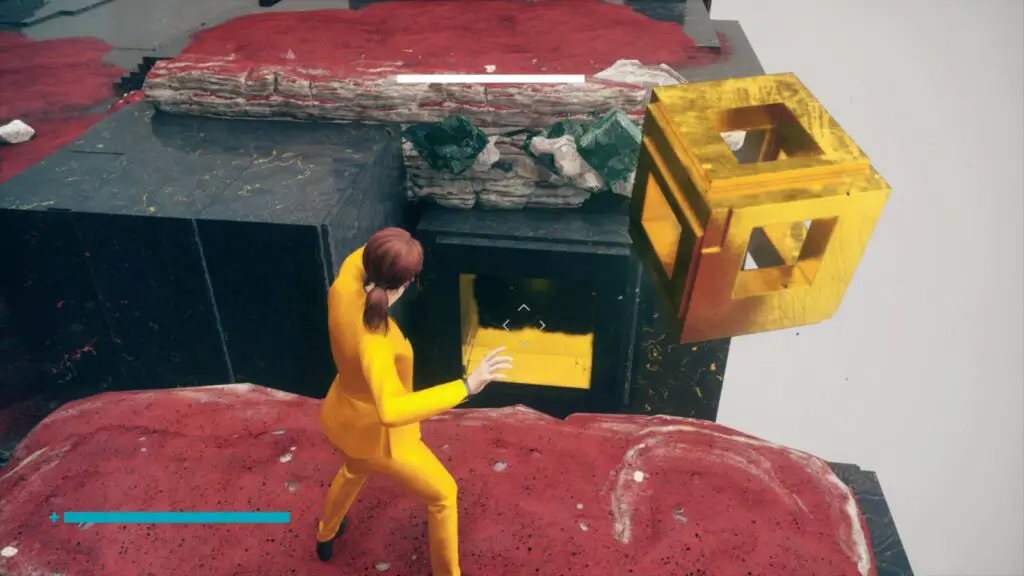
Maneki Neko #5 – Part 2
While you are here, you should be able to find the Gold Cube we threw into the toilets way back in the Astral Collision.

Grab it with Launch and place it in the corresponding gold slot on the nearby block.
The Maneki Neko will spawn in the restroom!
Kyiv Supplement – Case Files
Next to the Transit Access Control Point, head through the security door to the left of the sign.
Continue on through the next door and you’ll find this collectible on the conveyor belt in the security checkpoint.
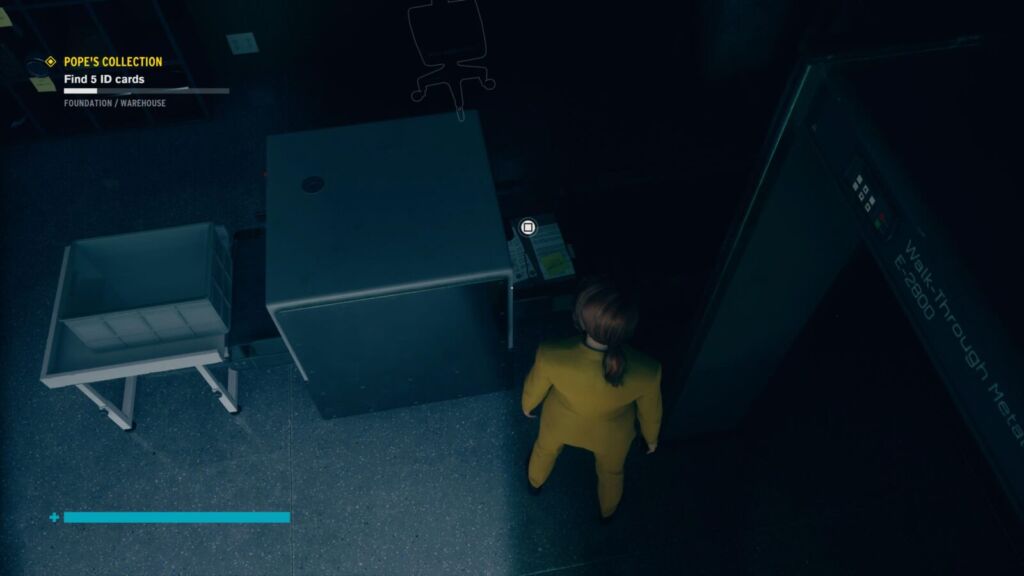
America Overnight Ep. 382 – Multimedia
From the last collectible, head inside the door directly next to you, leading inside the security booth. The collectible is on the ground.
Shift Account Pt. 2 – Correspondence
Go back to the Transit Access Control Point. Head up the stairs and check the control panel, you’ll see the collectible there.
New Language – Correspondence
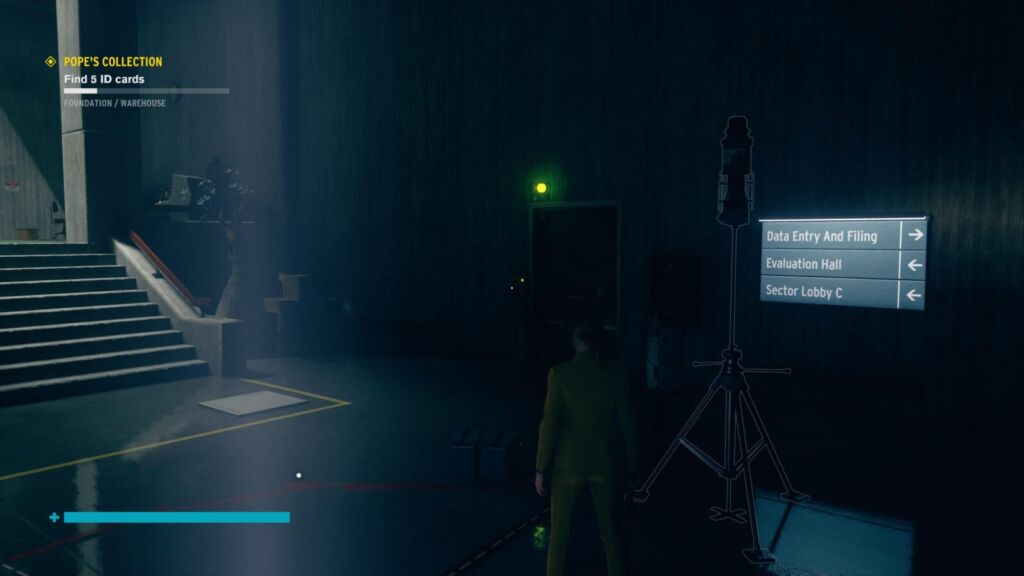
Continue on from the last collectible into the Evaluation Hall. Use the containers on the right side of the room to climb up to the bridge, and from there break in through the glass windows leading to some double doors.
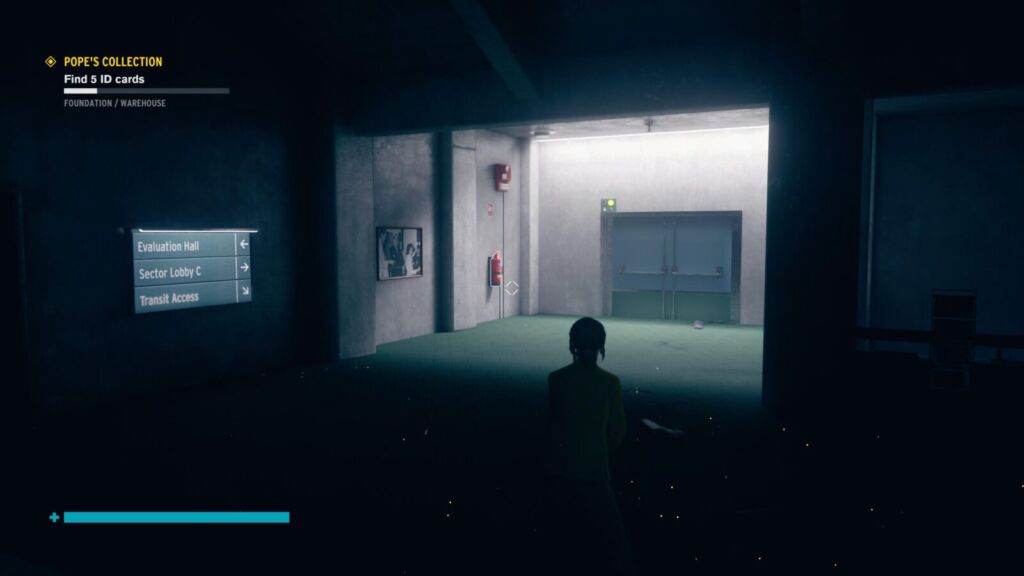
Head through the double doors to Sector Lobby C. You’ll find the collectible in the Elevator shaft on the left, which is this Hidden Location .
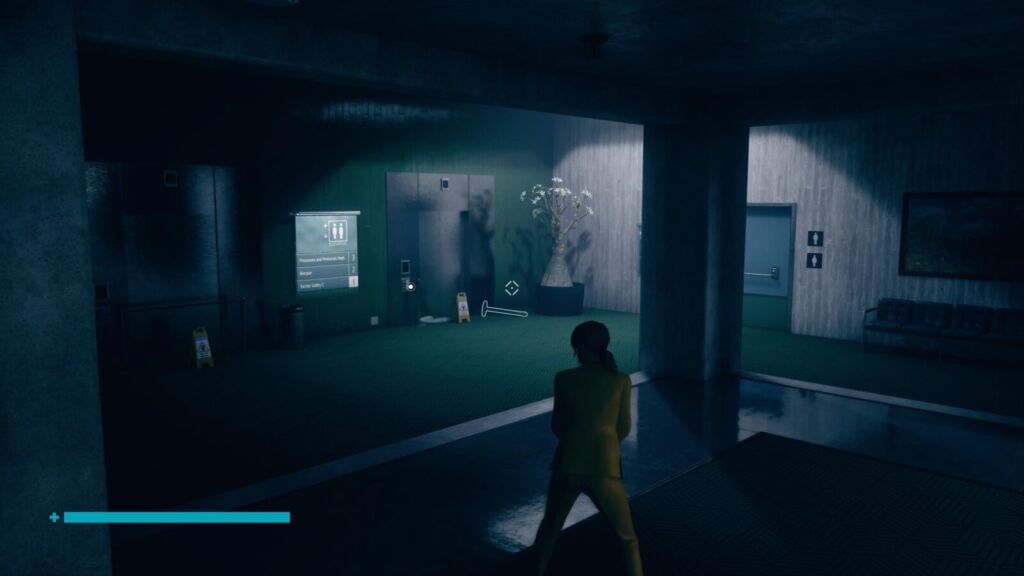
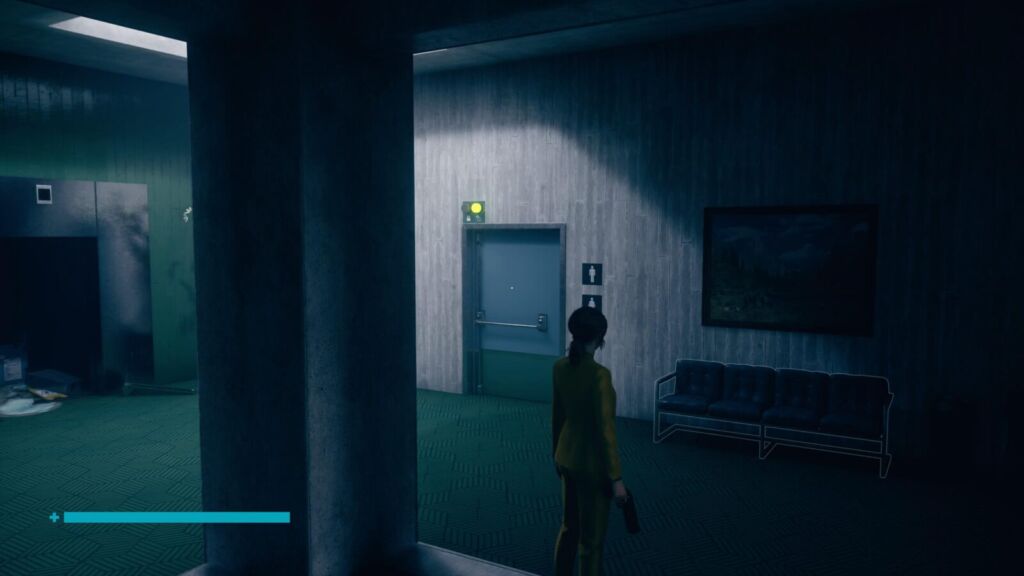
Brian’s Movie Den Ep. 3 – Multimedia
Inside the restroom to the right of the elevator mentioned above.
Movie Camera Supplement – Case Files
Continue on through the double doors in Sector Lobby C and you’ll find yourself at another security checkpoint. The collectible is in the left-most security booth as you go through the doors.
Shift Account Pt. 3 – Correspondence
Continue on towards the Firebreak in this area and you’ll see another collectible on a reception desk.
Maneki Neko #6
Continue through the firebreak and out towards the Crossroads. Go all the way through the cave to the other end which overlooks the Crossroads and then look left. You should see a ledge sticking out of the wall.
Levitate over to it. From there, you should be able to see two more ledges. Make your way across them.
The third ledge has a Cardboard box on it, with the Maneki Neko inside!
From here, start at the Warehouse Control Point
History of the Oldest House – Research & Records
In the western-most yellow mobile lab building near the Warehouse Control Point.
Pyramidic Geometry – Research & Records
On a bunk in the Easternmost yellow mobile lab building, through the left-most door.
In the same building as the above collectible, but through the other door. On a bunk.
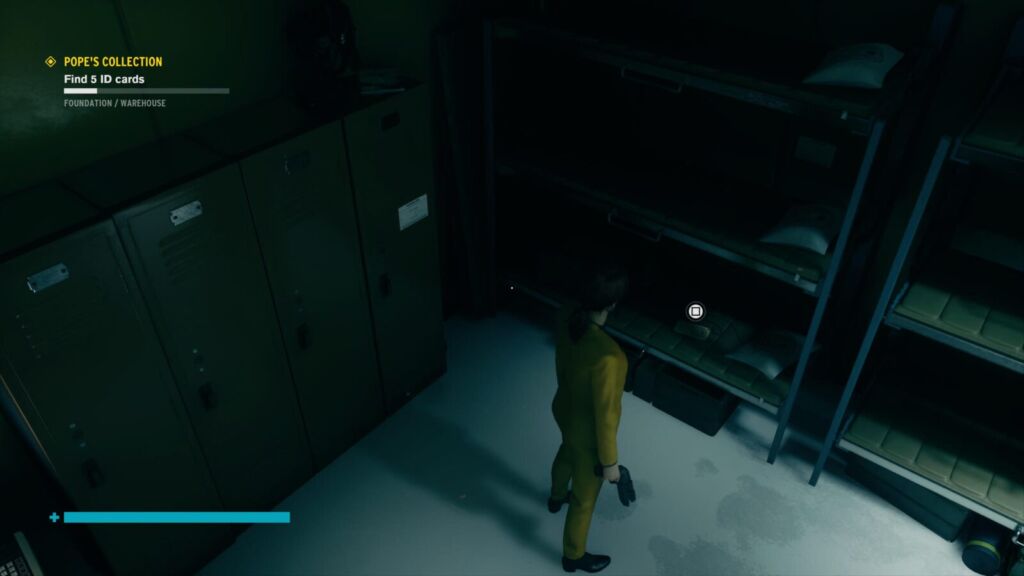
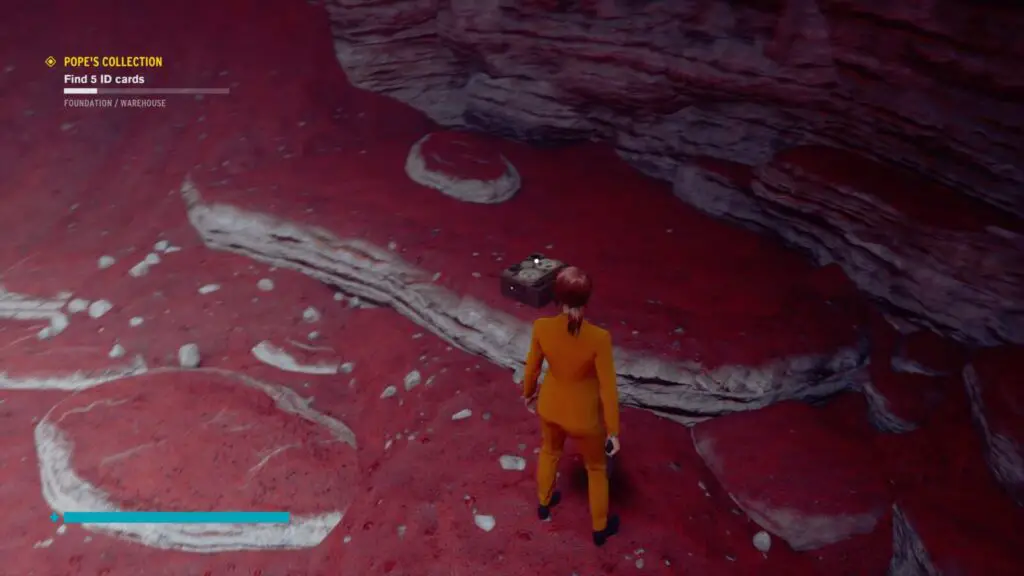
Up the hill next to the Warehouse Elevator Shaft Entrance, there’s another yellow lab.
Enter it and you’ll find this ID Card on the table.
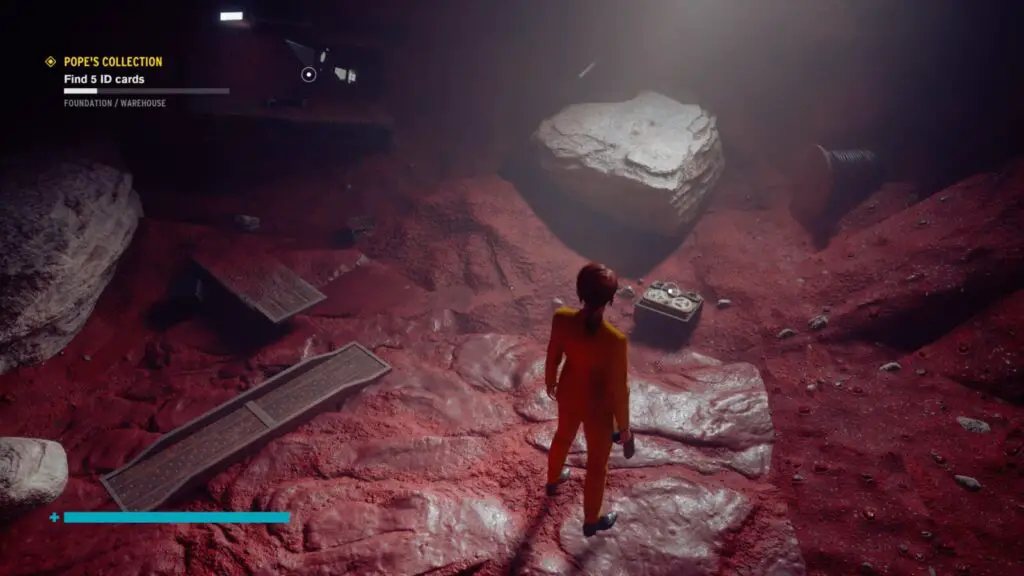
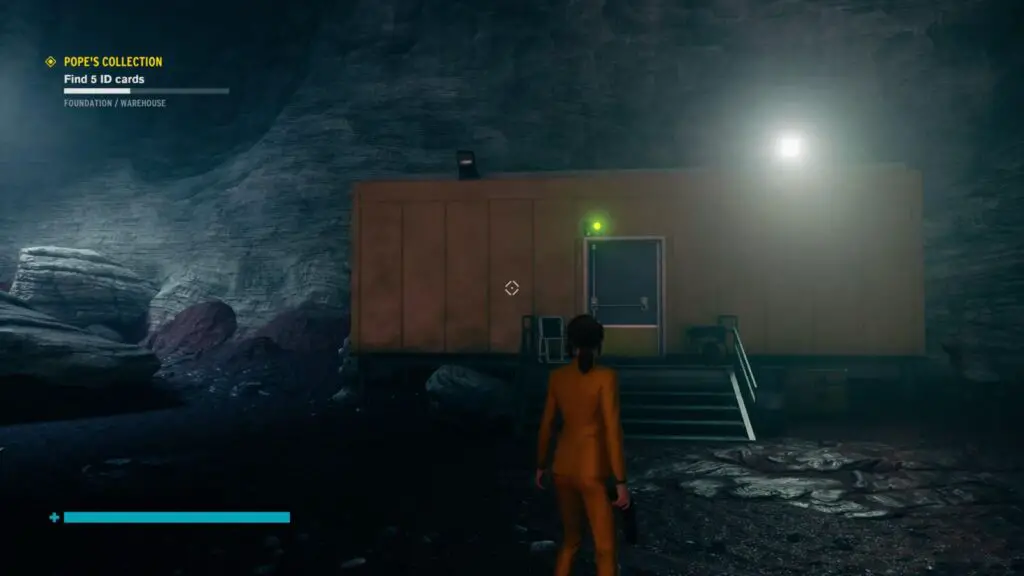
Outside of the building where the previous ID Card was, turn right and head past the floodlight up a path wrapping around the back of the Elevator Shaft.
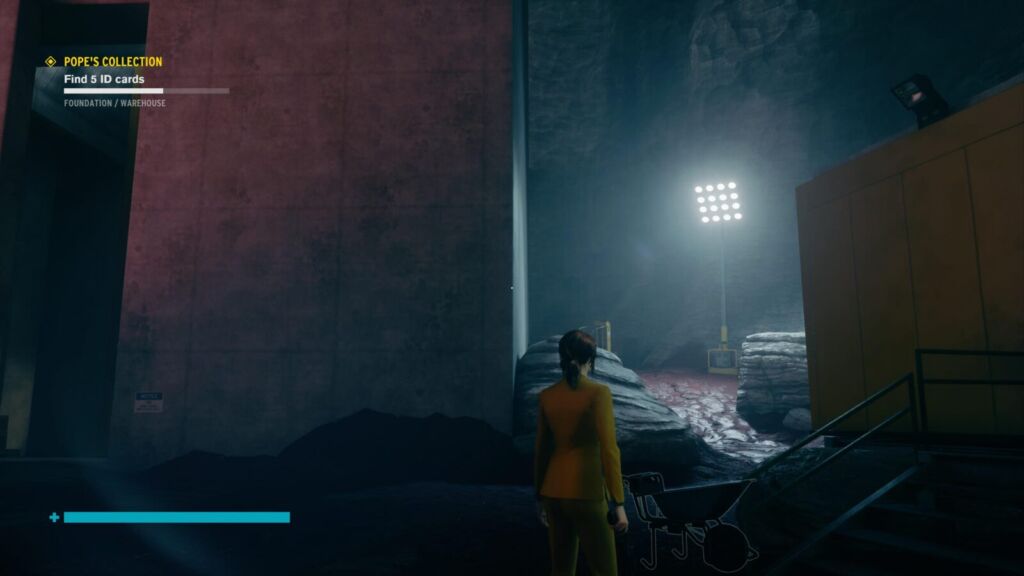
It will lead to some scaffolding overlooking the other mobile labs, with an ID Card on it.
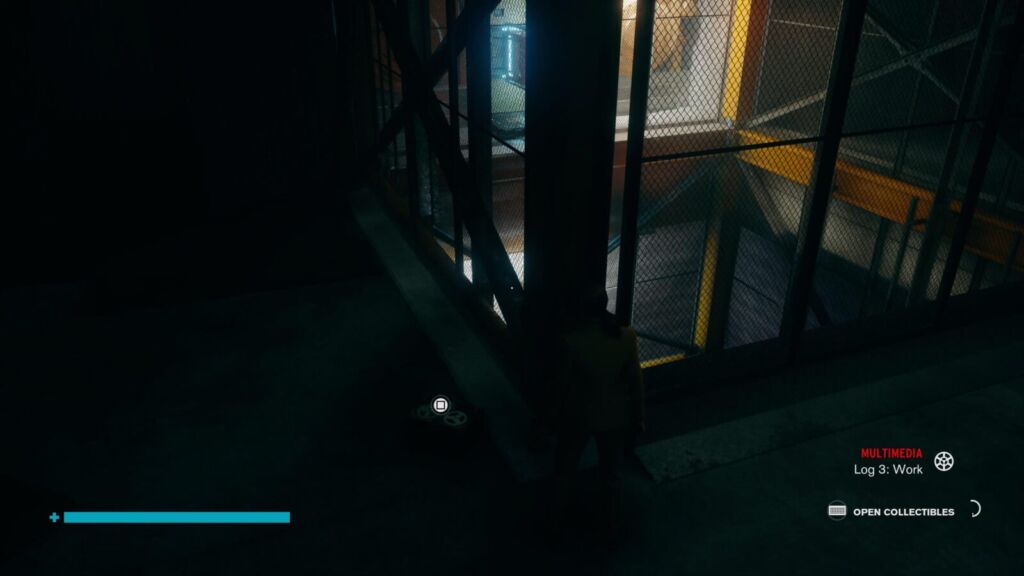
Log 3: Work – Multimedia
Head inside the Warehouse Elevator Shaft through the main entrance near the Control Point, you’ll see this collectible next to the Elevator door.
Power Cores – Research & Records
In the Level 2 – Power Cores Level of the Warehouse Elevator Shaft.
Meteor Hill Summary – Case Files
Go back to the Warehouse Control Point and head to the cliff wall at the back.
Use shape to travel up the cliff wall to reach a Level between Floors 1 and 2 of the Warehouse Elevator Shaft.
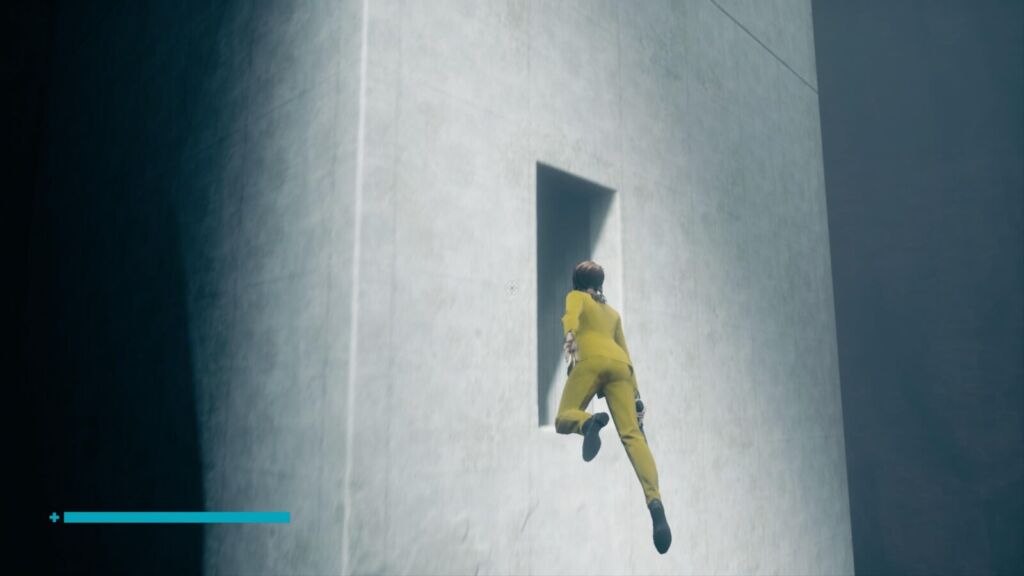
The collectible is in here.
In the same room as the above collectible.
Log 5: Pyramids – Multimedia
On Floor 3 – Tunnel Access of the Warehouse Elevator Shaft, under the metal ramp and next to a barrel you can lift.
Meteor Hill Supplement – Case Files
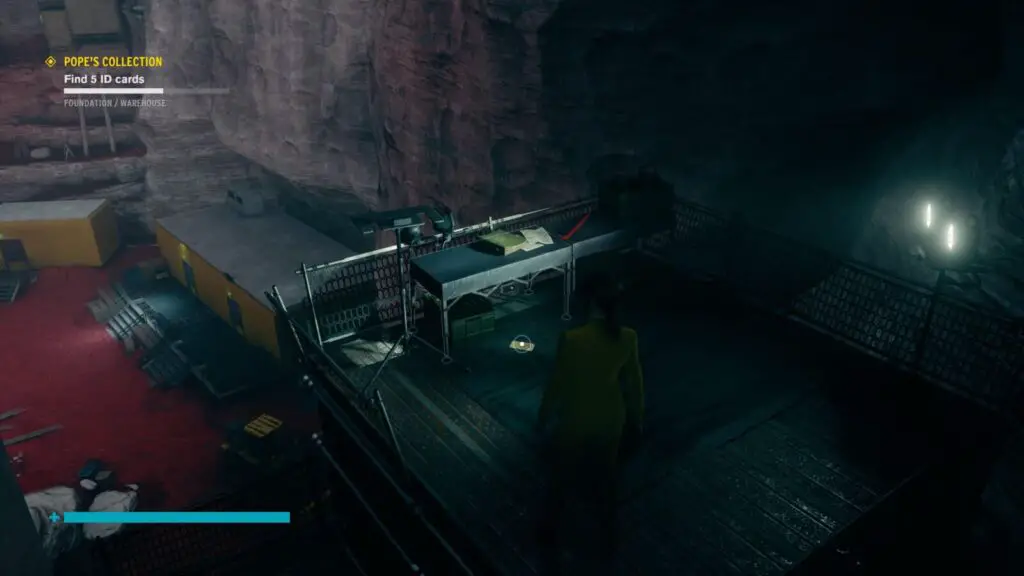
Head up the ramp the last collectible was under and out through the opening in the wall. Levitate over into the tunnel and continue past the Warehouse Tunnel Control Point.

You will come out into a large room with a Forklift in it.
Head through the cave at the very back of this room on the opposite side and continue on until you see the Elevator Shaft again. You should be able to very faintly make out a doorway in the side of it.
Levitate over and into this room. the collectible is in plain sight next to the Elevator door.

Maneki Neko #7
This one is really tricky. When you take the elevator from the 5th floor to the 6th floor you’ll see 4 Hiss nodes on the way, outside the elevator.
In order to get this Maneki Neko to spawn, you will need to melee all four Hiss nodes. In one trip. If you miss any, you’ll have to start again on your next pass.
If going from the 5th floor to the 6th, Start by facing the side of the Elevator to the left of the Control Panel, this is where the first one will be. Then work your way clockwise around the room, each time turning right to face the next node. When going from Floor 6 to Floor 5 they won’t spawn.
I tried doing this with the Charge weapon form instead. Put as many Blast Radius mods on it as I could and managed to hit all 4 but the Maneki Neko wouldn’t spawn. I did it a few times before concluding that you have to melee them for it to count.
Good luck! The cat will spawn outside of the elevator on ths 6th floor if you were successful!
Foundation Etchings – Research & Records
Start from the Warehouse Rise Control Point for this next one. Head south towards “Warehouse Path” into a large room with two big floodlights. Head towards the floodlights on the left and you’ll see an opening in the cave wall next to them, with two wodden barriers in front of it.
Opposite this opening is a doorway into the Warehouse Shaft. Levitate over and into it and you’ll find the collectible inside.
Northmoor: Medical Results – Correspondence
Head back out through the opening you entered through for the above collectible, but let yourself float down the side of the Warhouse Shaft, you’ll see there’s another opening leading to this hidden location in-between the 2nd and 3rd floors of the Warehouse Elevator Shaft.

The collectible is in there.
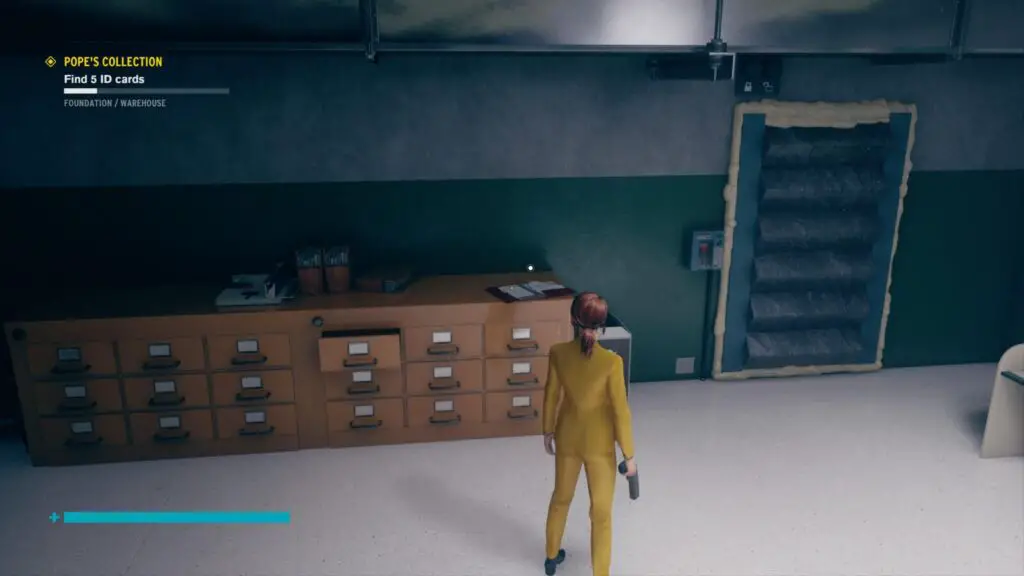
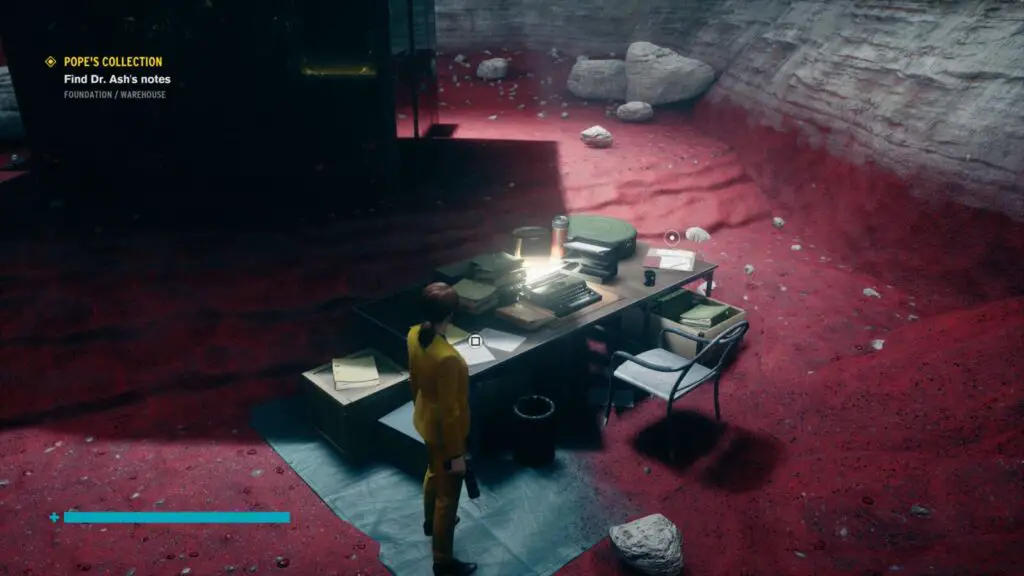
Ash: Request Denied – Correspondence
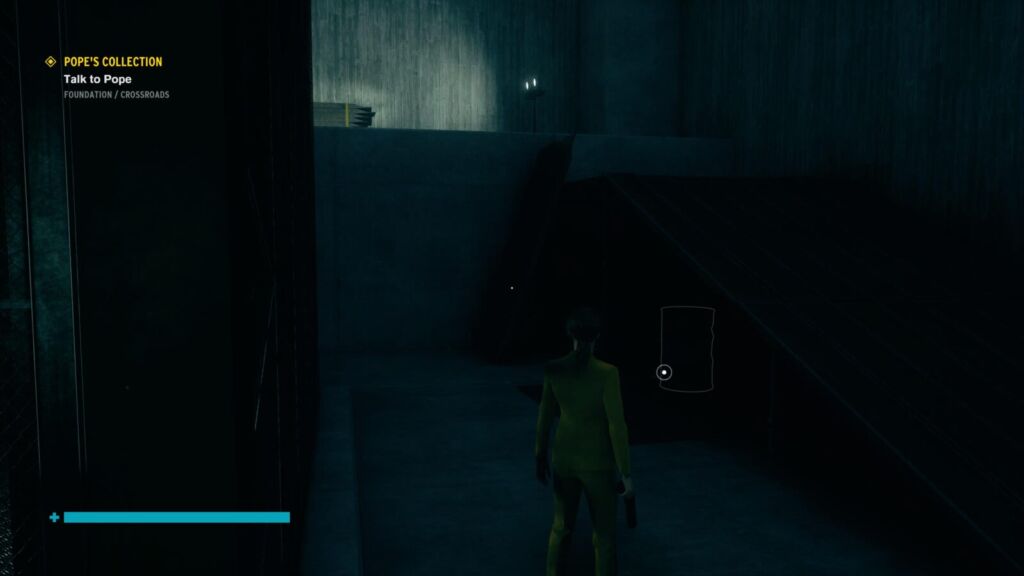
There’s a locked door behind the Elevator shaft on the outside. To open it you need to have started the Side Mission “Pope’s Request” by finding an ID Badge. You’ll then need to speak to Pope and she will give you a skeleton key that can open the basement.
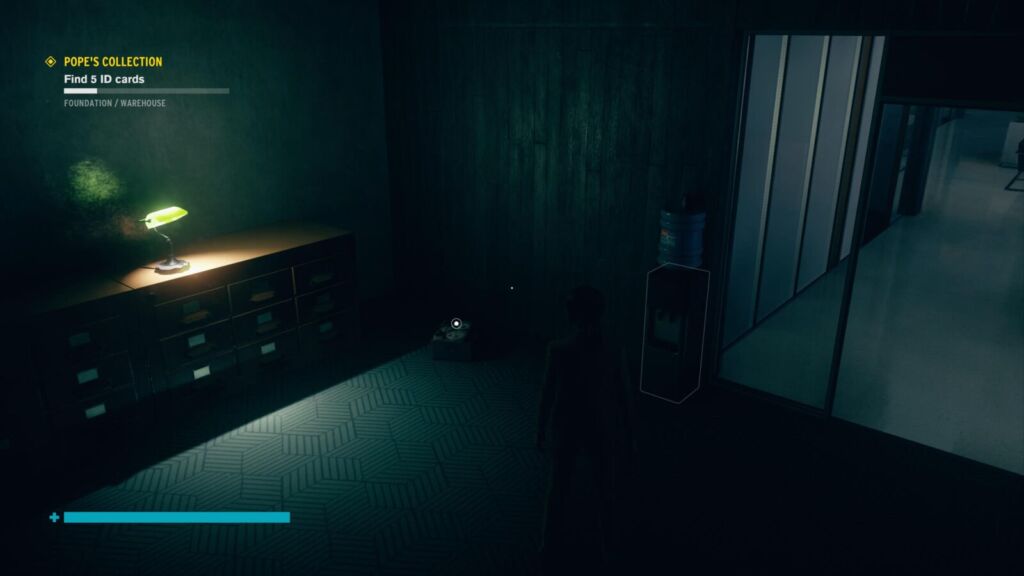
If you’ve done that, head inside and grab the collectible in the wheelbarrow on the left.

In the same room as the above collectible, on the ground right inside the door.
Now that you should have all of the ID Cards, you should be able to open the secret lab under the Warehouse. Just place each card in the correct terminal. Use the workspace next to each terminal to determine the profession of the person it belongs to so that you can identify the correct card to use.
Northmoor: Final Warning – Correspondence
After using the 5 badges to go into the basement of the warehouse, get the large door at the end of the room open and you’ll trigger a boss fight. Defeat this boss to gain access to an area at the other side of the large door you opened, there you’ll find this collectible on a table.
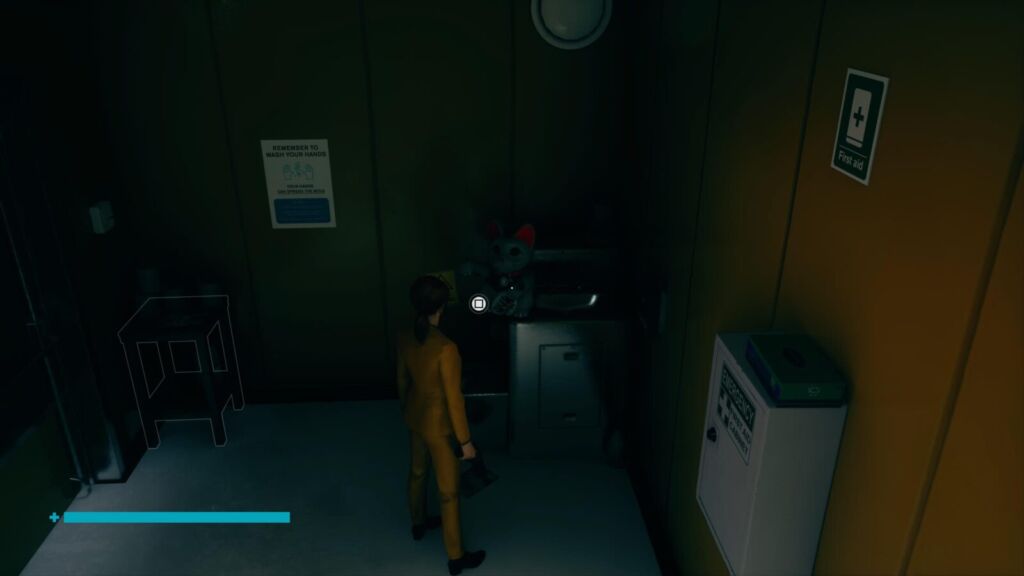
Maneki Neko #8
First, while you’re in Floor 0 – Basement of the Warehouse Elevator, turn a valve at the opposite side of the room from the big door. This will activate a shower in one of the mobile labs.

Head back up and out of the Elevator Shaft and go to the three Mobile Lab at the western side of the area. Enter the smallest of the three – the middle one – and activate the shower.
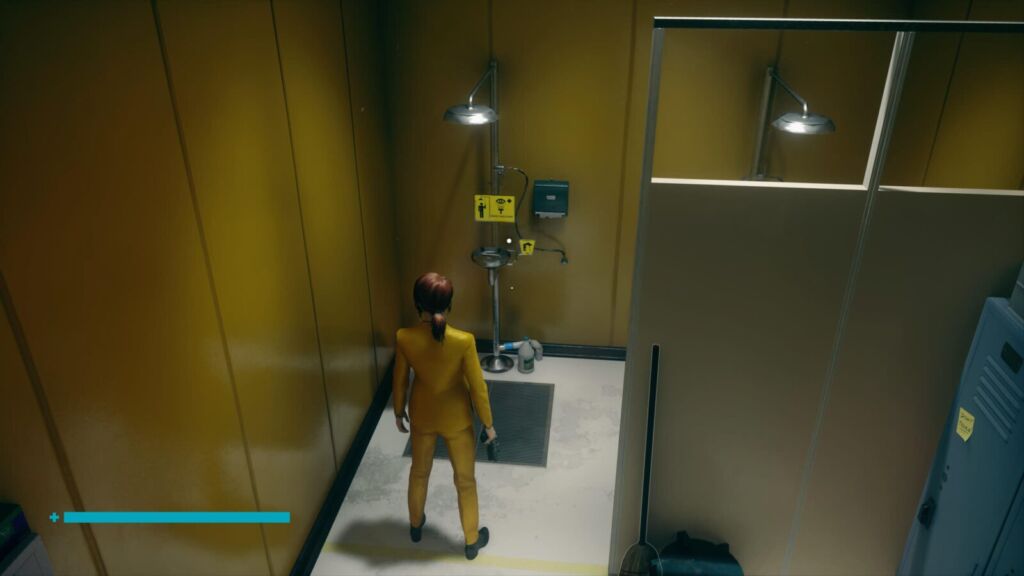
The Maneki Neko will spawn in the room.
The following Collectibles will be added to your collection automatically. You’ll either need to progress the Main Story or fight an enemy for the first time.
The Foundation – Hotline
Automatically obtained as part of the story
Rituals – Hotline
Becoming Director – Hotline
End of the World – Hotline
VHS Tape Procedures – Case Files
Complete the Side Quest “Found Footage”
Movie Camera Procedures – Case Files
Complete the Side Quest “Jesse Faden starring in Swift Platform”
Out of Options – Hotline
Astral Entities – Hotline
Two Birds, One Bomb – Hotline
Hiss Sharpened – Research & Records
Kill a Hiss Sharpened for the first time
Astral Copy – Research & Records
Kill an Astral Copy for the first time
Astral Mimic – Research & Records
Kill an Astral Mimic for the first time
Once you have all of those collectibles listed above, you should have everything you need to 100% the DLC! For more information on all the trophies in the Foundation DLC, check out our Full Control Foundation Trophy Guide & Road Map here .
Thank you for choosing PlatGet as your source for a Control Foundation Trophy Guide, consider checking out our reviews and other guides!
Follow us on twitter @GetPlat or Instagram @platget for updates on new reviews and guides, as well as small anecdotes about our platinum journeys.
We've Partnered with NordVPN
Other Guides & Maps for Control: The Foundation DLC
Control: The Foundation Trophy Guide
Related Trophy Guides

God of War Ragnarok Trophy Guide

A Plague Tale: Requiem Trophy Guide

The Last of Us Part 1 Trophy Guide

Stray Trophy Guide

The Quarry Trophy Guide

Telling Lies Trophy Guide
IMAGES
VIDEO
COMMENTS
The Research Site Gamma is located in the southern part of the Foundation, not far from where you started your exploration. To access it, best use the Cave System control point. Head south and then turn north-east. On the way to the research area, you'll encounter a few opponents, but you should deal with them easily.
Hi again. I'm at the Foundation part at the moment. I've finished restoring 3/4 of the Nail and I still need to do the last part. I've done the Warehouse route and the Collapsed Department route and the Rim route. Emily then points me to Research Site Gamma, I can't seem to reach it. There are two spots that I can't seem to get to. The first is a chest across a white pit inside the cave ...
Part 2: https://youtu.be/lue1DnppyAU
Relocation Order. Correspondence. On the ground to the left of the bulldozer, on the far side of the Research Site Delta. Foundation Accident. Correspondence. On the ground between the Research ...
If, however, you selected the Fracture ability, you'll find yourself heading to the Canyon Rim and Research Gamma Site first. Good luck exploring the Foundation! Page 1 of 5
The list below applies only to collectibles, that is, various types of documents and recordings. We did not include hidden locations or maneki-neko figurines, which we discussed on separate pages of our guide. Basic information and the map of Foundation Sector. 1 - Research Site Gamma. 2 - Chasm. 3 - Cave System. 4 - Cave Bleed.
Assuming you don't want to backtrack through the Cave Bleed to get to Research Site Gamma, use the Control Point to fast travel to the Cave System. You can now destroy the crystals around the loot container near the locked door. Head south through the tunnel and fight off the Hiss Charged that try to kill you.
Control DLC The Foundation - The Nail - Reach Research Site Gamma - Complete the Ritual in the Deep Cavern - Gameplay WalkthroughThe Nail missionComplete the...
What is Control: The Nail, Canyon Rim and Research Site Gamma? Control is a third-person action-adventure game developed by Remedy Entertainment. The game follows Jesse Faden, a young woman looking for answers about her past and her connection to the Federal Bureau of Control (FBC). The Nail is a location within the game where Jesse must go to ...
Explore the Foundation. There is only one way you can go initially so head down the tunnel until you come to a locked door. Launch the power core into the outlet and go through. Continue down the tunnel until you reach Research Site Gamma. Look for a tape recorder on the ground that plays the Log 1: Discovery Ash tape.
Research & Records - Research - Foundation Etchings (After cleansing the second tunnel Control Point, fly, from the following cavern chamber, over to the Warehouse and you'll find this document at ...
The one right next to the Control Point. The one on the opposite side of the area, from the Control Point. The one on the second bridge, opposite the Deep Cavern entrance. The one in the hidden ...
To the final monument!Support us on Patreon! http://patreon.com/playframe_____Playlist https://www.youtube.com/playlist?list=PLvFQJa1XAXzzgQU3RnXE_...
Control Foundation Deep Cavern Ritual. Once you fast travel to the Cave System, you will be tasked to Reach Research Site Gamma. Go straight ahead and shoot the container here that will be covered ...
1 - Research Site Gamma. Log 1: Discovery - a tape recorder can be found on the ground next to an encampment in the research site area. Hotline: The Foundation - the recording will automatically play shortly after leaving the Research Site Gamma for the first time, en route to the location of the Cave System. 2 - Chasm
On this page of our game guide to Control - The Foundation you can find a detailed description of The Foundation mission. Our walkthrough explains how to reach the Foundation caves, how to run through the first areas of the caves, and how to unlock the first new power of Jesse. Launching the DLC. Talk to the Board. Find the door.
72K subscribers in the controlgame community. The subreddit for the third-person supernatural shooter, Control by Remedy Entertainment.
In this part of The Nail Mission, I will reach the Canyon Rim & Site Gamma in The Foundation DLC of Control. If your like me and by now you're tired of compl...
Head south from the Cave System Control Point, through the caves to Research Site Gamma. Close to the signpost pointing to the Deep Caverns area, this collectible is found on the ground by a short ledge with a radar dish on it. Once you have it, follow the sign and enter the Deep Cavern, breaking your way through the crystals.
Did find a way to open the locked door next to the "deep cavern" sign ? It's a the cave system waypoint. Hey, i actually tried this with the rocks but got bored (well done!) I can't access Gamma at all actually, can't find any route to it…. There seems to be connections in Cave Bleed (west and south, by the higher tunnels to cave system) but ...
Hello Guys,In this video, I will show You how to complete the mission of control.my pc specs.....cabinet : coolarmaster masterbox TD 500 mesh https://amzn...
This page of the guide to Control - The Foundation has a walkthrough for the Found Footage side mission. You will learn, e.g. where to unlock the quest, how to pass safely through a dark cave and how to trap the transported Altered Item. This quest begins in the Chasm located in the western part of the map - we have marked it on the picture.
Reach the Warehouse Path. Begin the mission at the Crossroads. Reach the area shown in the pictures above, which is located on the western side of the Crossroads location. Use the Shape power to extend one of the side ledges. Reach it by using the levitation, bounce off it, and enter a higher passage.