

Create a SmartArt graphic from scratch
Create a SmartArt graphic to quickly and easily make a visual representation of your information. You can choose from among many different layouts, to effectively communicate your message or ideas. SmartArt graphics can be created in Excel, Outlook, PowerPoint, and Word, and they can be used throughout Office.
For an overview of SmartArt graphics, including considerations for choosing the best graphic and layout type to display your data or convey a concept, see Choose a SmartArt graphic .
Insert a SmartArt graphic and add text to it
On the Insert tab, in the Illustrations group, click SmartArt .

In the Choose a SmartArt Graphic dialog box, click the type and layout that you want.
Enter your text by doing one of the following:
Click [Text] in the Text pane, and then type your text.
Copy text from another location or program, click [Text] in the Text pane, and then paste your text.
If the Text pane is not visible, click the arrow control on the left side of the SmartArt graphic.
To add text, like a title, in an arbitrary position close to or on top of your SmartArt graphic, on the Insert tab, in the Text group, click Text Box to insert a text box. If you want only the text in your text box to appear, right-click your text box, click Format Shape or Format Text Box , and then set the text box to have no background color and no border.
Click in a box in the SmartArt graphic, and then type your text. For best results, use this option after you add all of the boxes that you want.
Add or delete shapes in your SmartArt graphic
Click the SmartArt graphic that you want to add another shape to.
Click the existing shape that is located closest to where you want to add the new shape.
Under SmartArt Tools , on the Design tab, in the Create Graphic group, click the arrow next to Add Shape .

If you don't see the SmartArt Tools or Design tabs, make sure that you've selected the SmartArt graphic. You may have to double-click the SmartArt graphic to open the Design tab.
Do one of the following:
To insert a shape after the selected shape, click Add Shape After .
To insert a shape before the selected shape, click Add Shape Before .
To add a shape from the Text pane, click an existing shape, move your cursor before or after the text where you want to add the shape, and then press ENTER.
To delete a shape from your SmartArt graphic, click the shape you want to delete, and then press DELETE. To delete your entire SmartArt graphic, click the border of your SmartArt graphic, and then press DELETE.
To add a shape like a callout or a line, see Add shapes .
Change the colors of an entire SmartArt graphic
You can apply color variations that are derived from the theme colors to the shapes in your SmartArt graphic.
Click your SmartArt graphic.
Under SmartArt Tools , on the Design tab, in the SmartArt Styles group, click Change Colors .

If you don't see the SmartArt Tools or Design tabs, make sure that you've selected a SmartArt graphic. You may have to double-click the SmartArt graphic to open the Design tab.
Click the color variation that you want.
Apply a SmartArt Style to a SmartArt graphic
A SmartArt Style is a combination of various effects, such as line style, bevel, or 3-D, that you can apply to the shapes in your SmartArt graphic to create a unique and professionally designed look.
Under SmartArt Tools , on the Design tab, in the SmartArt Styles group, click the SmartArt Style that you want.

In the menu of types that appears, point at the type you want and then select a layout.
On the SmartArt Design tab, in the Create Graphic group, click the arrow next to Add Shape .

If you don't see the SmartArt Design tab, make sure that you've selected the SmartArt graphic. You may have to double-click the SmartArt graphic to open the SmartArt Design tab.
To add a shape while using the Text pane, click an existing shape, move your cursor before or after the text where you want to add the shape, and then press ENTER.
On the SmartArt Design tab, in the SmartArt Styles group, click Change Colors .

On the SmartArt Design tab, in the SmartArt Styles group, click the SmartArt Style that you want.
To see more SmartArt Styles, click the More button.

In PowerPoint for the web, you can add and edit SmartArt graphics.
On the Insert tab, select SmartArt .

On the dropdown menu, select the layout that you want.
The graphic is inserted on your slide. A text editor appears on the left of the graphic. Each bullet item in the editor corresponds to one item in the graphic.

To enter text, click next to a bullet in the Text editor, and then type your text, or paste text that you've copied from elsewhere.
You add shapes in the Text editor by pressing the Enter key to add another bullet item.
You delete shapes in the Text editor by backspacing over the bullet item that you want to remove.
You can apply color variations (which are derived from the presentation's theme colors) to the shapes in your SmartArt graphic.
On the Ribbon, under SmartArt Tools , select Change Colors .

On the menu that appears, select the color variation you want.
Apply a SmartArt Style to a graphic
A SmartArt Style is a combination of effects, such as line style, bevel, or 3-D, that you can apply to the shapes in your SmartArt graphic to create a professional look.
On the Ribbon, under SmartArt Tools , select Styles .

On the menu that appears, select the style you want.
Point your mouse at any option to see a description name for the option.
Reverse the order of the shapes in a graphic
By default, the shapes in a graphic are ordered from left to right (or clockwise, if the graphic is circular).
To reverse the order of the shapes:
Select the graphic.
On the Ribbon, under SmartArt Tools , select Right to Left .
Change the list level of an item
The Text pane works like an outline or a bulleted list that maps information directly to your SmartArt graphic. Each SmartArt graphic defines its own mapping between the bullets in the Text editor and the set of shapes in the SmartArt graphic.
To indent a line in the Text pane, select the line that you want to indent, and then under SmartArt Tools , on the Design tab, click Demote .
To decrease the list level, select the line that you want to indent, and then click Promote (or press Shift+Tab).
To resize your entire SmartArt graphic, click the border of your SmartArt graphic, and then drag the sizing handles in or out until your SmartArt graphic is the size that you want.

Need more help?
Want more options.
Explore subscription benefits, browse training courses, learn how to secure your device, and more.

Microsoft 365 subscription benefits

Microsoft 365 training

Microsoft security

Accessibility center
Communities help you ask and answer questions, give feedback, and hear from experts with rich knowledge.

Ask the Microsoft Community

Microsoft Tech Community

Windows Insiders
Microsoft 365 Insiders
Was this information helpful?
Thank you for your feedback.

Free Online Microsoft Training
Free tips and tricks for using Microsoft Office and Windows
Add a SmartArt graphic in Word
- By Belinda Anderson
- 28 March 2023
- Updated: 22 January 2024
- No Comments

Being able to represent content in a graphical way can add immense meaning and visual appeal to any document. All the Microsoft 365 apps provide the ability to easily create a SmartArt graphic to provide a visual representation of information rather than the traditional numbered or bulleted list or other display options.
The SmartArt feature is not to be confused with the Charts feature as they do offer separate functions.
If you are interested in using SmartArt in PowerPoint , be sure to check out the post for that.
To insert a SmartArt graphic in a Word document, follow these steps:
- Open Microsoft Word and create a new blank document:
- Now let’s insert a SmartArt graphic
- Select the Insert tab and click the SmartArt button

- The Choose a SmartArt Graphic window will appear:

- You will see the various categories shown on the left side of the dialog box
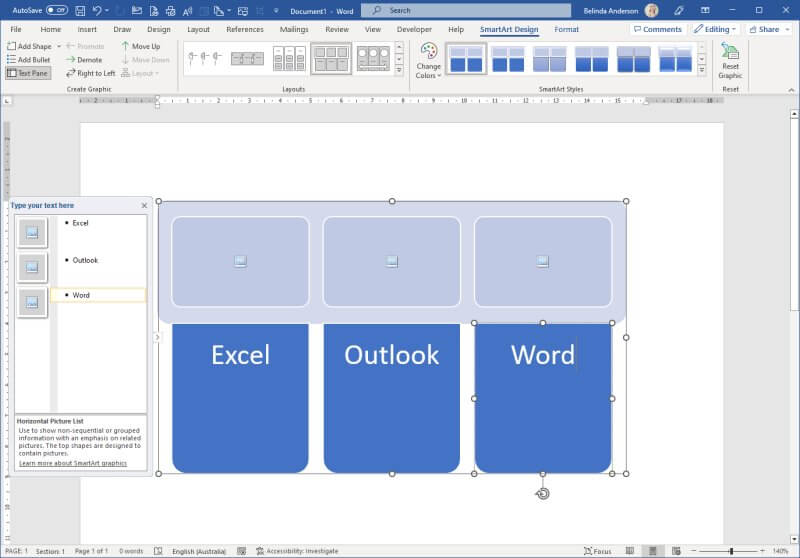
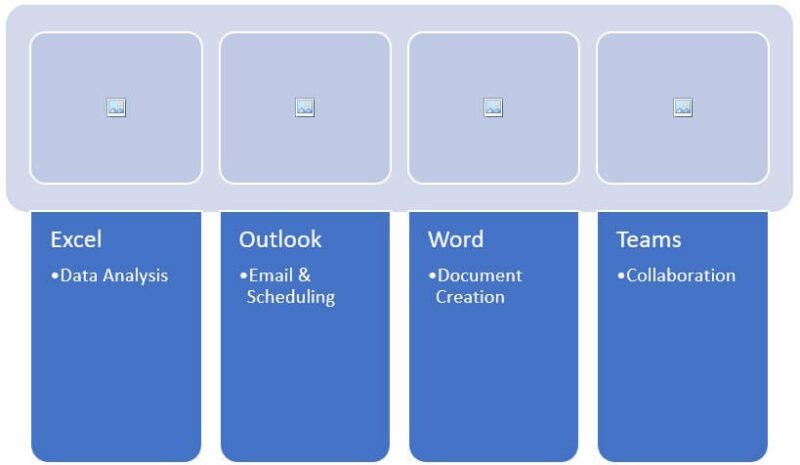
- Scroll through the options to see what is possible, then select the List category and choose the Horizontal Picture List option then click OK .
- An empty SmartArt graphic will now be added to the page.
- You will now see you have two new tabs appearing on the Ribbon, the SmartArt Design and Format tabs. These are contextual tabs, so are only visible when you have the SmartArt graphic selected. Once you deselect or click off the SmartArt graphic, these tabs will disappear.
- Beside the SmartArt graphic you will see the Text Pane which allows you to add text into each shape:
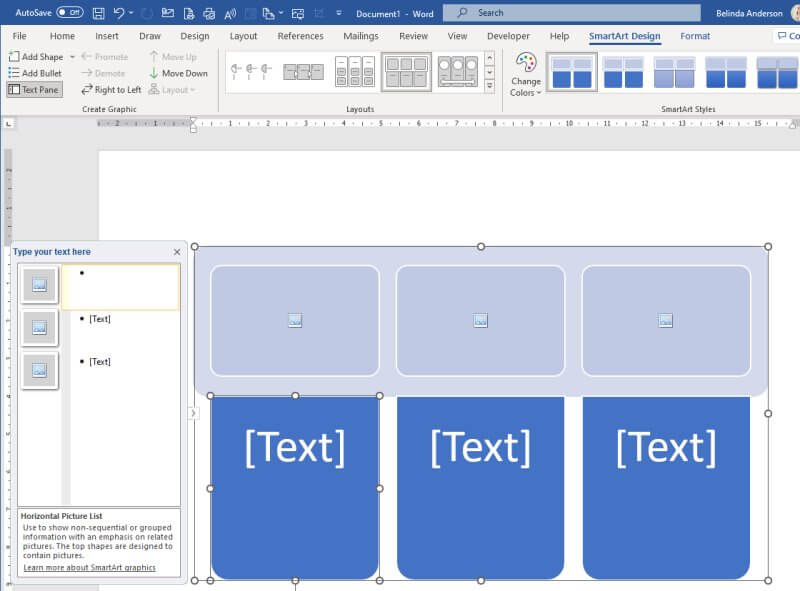
- Alternatively, you can type directly into the shapes rather than using the Text Pane
- Now click on the first bullet point in the Text Pane, this represents the first shape in the graphic
- Enter the text you wish to display, for my example, I am going to list some of the Microsoft apps
- Now click in the next bullet point and enter text for the next shape
- Repeat this process to add text for each shape displayed:
- Let’s say you want to add an extra shape, a 4th option:
- To add a new shape ensure that the bullet point for the last shape is selected in the Text Pane
- Press the Enter key to add a new shape.
- You will now see a new shape appear allowing you to add another option:

- Just like it creates a new bullet point in other Office products, here it will insert a new shape and allow you to add another item
Moving shapes around within the SmartArt graphic
Follow these steps f you need to change the position of the shapes within your graphic.
- Select the shape from the SmartArt graphic or select the item in the Task Pane list
- Select the SmartArt Design tab
- From the Create Graphic group, you will see buttons to Move Up and Move Down . Use these to change the position of the shape
- The shape will move as needed
Add sub items to a shape in SmartArt
A few of the different SmartArt graphics allow you to have sub items listed within the shapes. You can then add a main heading or title and have bullet points then displayed within the shape with additional information.
- Select a shape within the graphic
- Press the Enter key to add a new shape
- Now with the new shape still selected go to the SmartArt Design tab and click the Demote button

- This will demote the new shape back to be a sub item of the previous shape.
- Type in the text for the sub-item.
- Repeat the process for the other shapes to create sub-items.
Add pictures to each shape in SmartArt
There are many SmartArt graphics available which allow you to easily incorporate a picture.
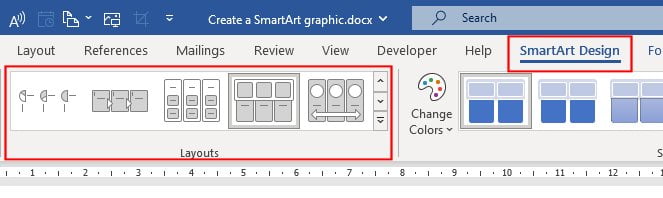
- Make sure the SmartArt layout you have chosen includes an option to add pictures.
- If not, change the layout through the SmartArt Design tab and select a new option from the Layouts gallery.
- Once you have a layout which incorporates pictures, click the first shape allowing a picture to be added, you will see the Picture icon displayed within the shape.

- The Insert Pictures window will appear allowing you to choose where you want to source the picture. I’m going to use an image I have saved to my computer, so I will use From a File .
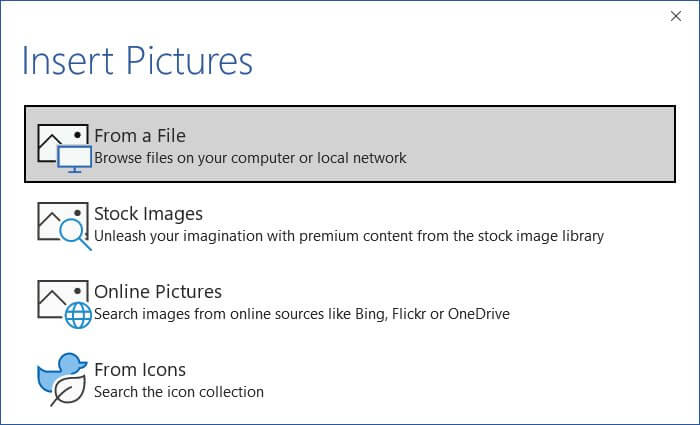
- Select the image from your computer, or from another source.
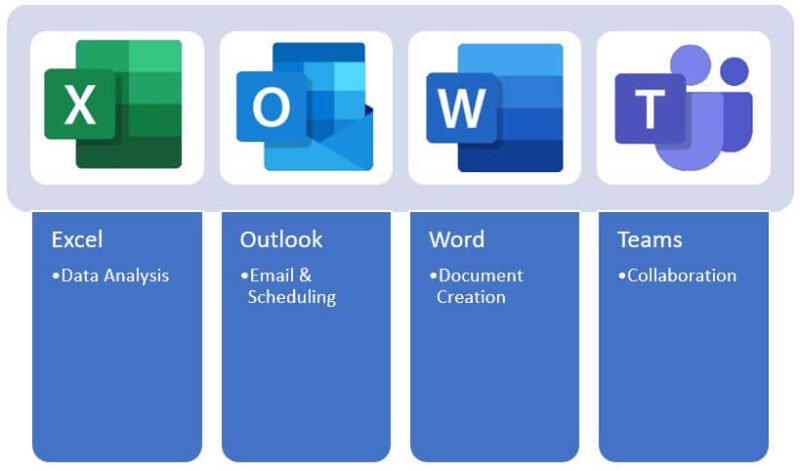
- The image will be displayed inside the shape.
- Repeat the process for any remaining shapes allowing pictures.
Change colour of shapes in SmartArt
When you add any SmartArt graphic to your document, it will use the theme from your document for the colour scheme, most likely to be blue for the default Office template. You will likely want to change the colour scheme to match your document or styling.
- Make sure the SmartArt graphic is selected
- Click the SmartArt Design tab
- Click the Change Colors button
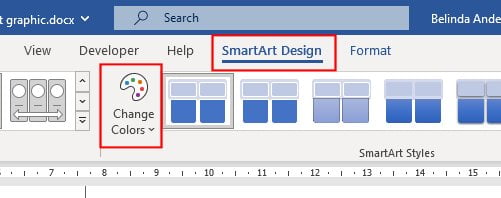
- Choose a different colour scheme from the preset options.
- Alternatively you may choose to change the colours to your own customised colour scheme.
- Select an individual shape so that you can see the white dots around the outside border

- Select the SmartArt Format tab
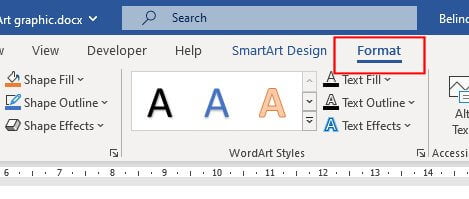
- Now use the Shape Fill button and choose a custom colour for the shape.

- Repeat the process for each remaining shape.
That’s a wrap
I hope this has helped you to start working with SmartArt graphics in Word. They are a really great way to provide a visual representation of your data rather than the standard bullet or numbered lists we see day to day. Be sure to check out my other articles covered more features of Microsoft Word .
- Chart , display , graphic , org chart , Smartart
- Microsoft Word
Leave a Reply Cancel reply
Your email address will not be published. Required fields are marked *
Please enter an answer in digits: eleven − 8 =
This site uses Akismet to reduce spam. Learn how your comment data is processed .
Recent Posts

- General (4)
- Microsoft Excel (37)
- Microsoft Forms (9)
- Microsoft OneNote (10)
- Microsoft Outlook (32)
- Microsoft PowerPoint (32)
- Microsoft Sway (8)
- Microsoft Teams (10)
- Microsoft Windows (23)
- Microsoft Word (31)

- Get started with computers
- Learn Microsoft Office
- Apply for a job
- Improve my work skills
- Design nice-looking docs
- Getting Started
- Smartphones & Tablets
- Typing Tutorial
- Online Learning
- Basic Internet Skills
- Online Safety
- Social Media
- Zoom Basics
- Google Docs
- Google Sheets
- Career Planning
- Resume Writing
- Cover Letters
- Job Search and Networking
- Business Communication
- Entrepreneurship 101
- Careers without College
- Job Hunt for Today
- 3D Printing
- Freelancing 101
- Personal Finance
- Sharing Economy
- Decision-Making
- Graphic Design
- Photography
- Image Editing
- Learning WordPress
- Language Learning
- Critical Thinking
- For Educators
- Translations
- Staff Picks
- English expand_more expand_less
Word 2013 - SmartArt Graphics
Word 2013 -, smartart graphics, word 2013 smartart graphics.

Word 2013: SmartArt Graphics
Lesson 28: smartart graphics.
/en/word2013/finalizing-and-protecting-documents/content/
Introduction
SmartArt allows you to communicate information with graphics instead of just using text. There are a variety of styles to choose from, which you can use to illustrate many different types of ideas.
To insert a SmartArt graphic:
- Place the insertion point in the document where you want the SmartArt graphic to appear.

To add text to a SmartArt graphic:

You can also add text by clicking on the desired shape and then typing. This works well if you only need to add text to a few shapes . However, for more complex SmartArt graphics, working in the task pane is often faster.
Changing the SmartArt organization
To add a shape:.

- Click the Add Shape command in the Graphics group. A drop-down menu will appear.

To promote or demote shapes:

You can also demote and promote shapes from within the task pane . With the insertion point in the task pane, press the Tab key to demote a shape. Press the Backspace key (or Shift+Tab ) to promote a shape. It's a lot like creating an outline with a multilevel list . For more information, you may want to review our Lists lesson.
To rearrange shapes on the same level:
- Select the SmartArt graphic, then click the Design tab.

Customizing SmartArt
After inserting SmartArt, there are several things you might want to change about its appearance. Whenever you select a SmartArt graphic, the Design and Format tabs will appear on the right side of the Ribbon. From there, it's easy to edit the style and layout of a SmartArt graphic.
To customize SmartArt

To change the SmartArt layout:
If you don't like the way your information is organized within a SmartArt graphic, you can always change its layout to better fit your content.
- Select the SmartArt graphic, then select the Design tab.

If the new layout is too different from the original, some of your text may not show up. Before deciding on a new layout, check carefully to make sure no important information will be lost.
- Create a new document.
- Insert a SmartArt graphic .
- Enter text into the graphic.
- Try promoting and demoting shapes between levels.
- Try moving shapes up and down on the same level .
- Change the color scheme .
- Change the SmartArt style .
/en/word2013/styles/content/
- Trending Now
- Foundational Courses
- Data Science
- Practice Problem
- Machine Learning
- System Design
- DevOps Tutorial
- How to Add a Cover Page in Microsoft Word Document?
- How to Add a Watermark in Microsoft Word?
- How to Add different Slide Designs in MS PowerPoint?
- How to Insert 3D Models in MS PowerPoint?
- How to Use Spell Checker in MS Word?
- How to Password Protect a Microsoft Word Document?
- How to Change the Slide Size in MS PowerPoint?
- How to Print Multiple Slides on One Page in MS PowerPoint?
- How to Insert Equations in a MS Word Document?
- How to Change Slide Layout in MS PowerPoint ?
- How to Record Screen using Microsoft PowerPoint?
- How to Insert Shapes in MS Word?
- How to Insert Symbols and Special Characters in Microsoft Word?
- How to Password Protect a File in MS PowerPoint?
- How to Double Underline a Text in Microsoft Word?
- How to Insert a Picture in Microsoft Word Document?
- How to Save PowerPoint Presentations as PDF Files using MS PowerPoint?
- How to set the Background Color of the Textbox in MS Word?
- How to Change Page Color in MS Word?
How to Insert SmartArt in Microsoft Word?
Microsoft Word is a software tool that allows us to create document files like articles, office letters, project files, and many more in a very simplest and easy manner. MS Word makes our document more attractive as compared to paper or file work by providing different features like it has different sizes of pages, fonts, colors, design, bullets, tables, charts, page border/number, and many more.
It also provides various features like editing, texting, formatting, graphics designs, fonts color, and styles, inserting images, videos, printing documents, etc.
This MS Word software saves our article/letters in a form of a document and saves it on the computer forever. Whenever it is required it can be shared or can access the document.

Features of MS Word
- Images- MS Word provides the inserting of various images in our document.
- Videos- We can insert videos in our document
- Fonts Styles- It has a wide range of font styles for our text.
- Colors- It also has different types of colors to make our document more attractive.
- Page number and size- You can set the size of the page of your document
- WordArt- It provides various writing styles for our documents.
- Tables- Tables in MS Word are used to represent data in Tabular form
- Graph and Charts- These are used to represent statistical data
- Animations and Designs- MS Word allows the creation of Animations and designs as per user needs
- Page border/color- MS Word allows adding borders and colors to pages.
What is SmartArt in MS Word?
Microsoft Word has a special feature called SmartArt in which you can use different types of SmartArt graphics to convey your ideas and information to others. In simple words, SmartArt is a visual representation of your thoughts, communications, and ideas. SmartArt creates a virtual image in our minds so that we can correlate the topic very easily.
With the help of SmartArt graphics, you can create diagrams that can say so much more than words alone. You can choose different types of layouts such as lists, circles, blocks, pyramids, cycles, matrices, charts, Venn diagrams , etc.
Some examples of SmartArt are:

Steps to Add SmartArt to your document
Step 1: On the navigation menu select the insert option.

Step 2: Now click on the SmartArt option as shown in the figure:

Step 3: A SmartArt dialog box will open where you can choose different types of SmartArt graphics.

As you see on the left-hand side there is a list of topics for SmartArt.
Step 4: Select the SmartArt of your choice from the left side menu bar as shown in the figure:

Note: You can also select more SmartArt graphic structures from office.com.

There are 9 types of SmartArt:
- Relationship
Some SmartArt designs are:

Step 5: Now choose the structure of your SmartArt according to your requirement as shown in the figure:

Step 6: Next click on the OK option.

Step 7: A rough SmartArt structure is added to your current page. You have to modify or edit it with the help of text, designs, color, size, etc.

Step 8: Under the design section, select the change color option to change the color format of your SmartArt as shown in the figure(You can also change the color manually).

Step 9: Now click on the drop-down arrow to give the style to SmartArt.

Step 10: A menu will open where you can select the style.

Step 11: Now set the size of the SmartArt by simply just drag the button as shown in the figure:

Step 12: Select the left arrow to enter the text.

Step 13: A type your text here dialog box will open.

Step 14: Enter the text in the textbox.

Step 15: Now close the text box.

Step 16: On the navigation menu select the format option to change the background color of the SmartArt blocks.

Step 17: Click on the drop-down arrow and select the color from the color panel.

To make it more beautiful you can change the font style of the text, color, and many more.
Finally, SmartArt is added to the document.

These are some of the steps to insert or create SmartArt graphics in our document.
Please Login to comment...

- School Learning
- School Programming
- How to Delete Whatsapp Business Account?
- Discord vs Zoom: Select The Efficienct One for Virtual Meetings?
- Otter AI vs Dragon Speech Recognition: Which is the best AI Transcription Tool?
- Google Messages To Let You Send Multiple Photos
- 30 OOPs Interview Questions and Answers (2024)
Improve your Coding Skills with Practice
What kind of Experience do you want to share?
- Skill Assessments
- AI Course Builder
- Free Courses
- Word 2021 Basic
SmartArt in Word

Start Free Trial
Or log in with:
How to Insert SmartArt Diagrams in Word

The SmartArt feature lets you create and customize designer-quality diagrams to convey information with graphics instead of just text. You can even convert bulleted lists into a diagram using the SmartArt diagram tools.
Insert SmartArt Diagrams
- Click where you want to insert the SmartArt.
- Click the Insert tab.

A dialog box opens, displaying categories of SmartArt on the left, styles of SmartArt graphics in the middle, and a preview and description of the selected SmartArt on the right.
- Select a category.
- Select a graphic.

The selected SmartArt graphic is inserted.
Each part of the graphic contains placeholder text, ready for you to fill it in.
- Click the arrow on the SmartArt graphic’s left border.
The text pane opens, where you can enter the text for the SmartArt graphic.
You can also open the text pane by clicking the Text Pane button on the Design tab in the SmartArt Tools ribbon group.
- Enter text for each bullet in the text pane.

You can also click each text placeholder in the SmartArt graphic to directly add text.
Some SmartArt graphics can accommodate more bullet points than they start with. To add another bullet, press Enter in the text pane.
Format SmartArt
Finally, you can customize the look of each shape in the SmartArt graphic.
- Click the SmartArt shape you want to format.
- Click the Format tab under SmartArt Tools.

You can continue formatting the shapes how you want.
Use the options in the Shape Styles pane for advanced formatting.

FREE Quick Reference
Free to distribute with our compliments; we hope you will consider our paid training.
- LinkedIn-ready certificate
- Skill assessments
- Bite-sized, interactive lessons
- Saved progress
IMAGES
VIDEO
COMMENTS
On the Insert tab, in the Illustrations group, click SmartArt. In the Choose a SmartArt Graphic dialog box, click the type and layout that you want. Enter your text by doing one of the following: Click [Text] in the Text pane, and then type your text. Copy text from another location or program, click [Text] in the Text pane, and then paste your ...
To insert a SmartArt graphic: Place the insertion point in the document where you want the SmartArt graphic to appear. From the Insert tab, select the SmartArt command in the Illustrations group. A dialog box will appear. Select a category on the left, choose the desired SmartArt graphic, then click OK. The SmartArt graphic will appear in your ...
1. Use the Design Tab. To change the colors, click on the Design tab. Click on your Microsoft Word SmartArt graphic so that the SmartArt Design tab shows. In the ribbon, you’ll see a Change Colors icon. Click on this icon. When you click on the Change Colors icon, you’ll see a popup with several color options.
Learn EVERYTHING about Microsoft Word SmartArt in this advanced tutorial deep dive. From SmartArt setup to full control of each element. We cover it all!Po...
To insert a SmartArt graphic in a Word document, follow these steps: Open Microsoft Word and create a new blank document: Now let’s insert a SmartArt graphic. Select the Insert tab and click the SmartArt button. The Choose a SmartArt Graphic window will appear: You will see the various categories shown on the left side of the dialog box.
From the Insert tab, select the SmartArt command in the Illustrations group. Clicking the SmartArt command. A dialog box will appear. Select a category on the left, choose the desired SmartArt graphic, then click OK. Inserting a SmartArt graphic. The SmartArt graphic will appear in your document.
Steps to Add SmartArt to your document. Step 1: On the navigation menu select the insert option. Step 2: Now click on the SmartArt option as shown in the figure: Step 3: A SmartArt dialog box will open where you can choose different types of SmartArt graphics. As you see on the left-hand side there is a list of topics for SmartArt.
Insert SmartArt Diagrams. Click where you want to insert the SmartArt. Click the Insert tab. Click the SmartArt button in the Illustrations group. A dialog box opens, displaying categories of SmartArt on the left, styles of SmartArt graphics in the middle, and a preview and description of the selected SmartArt on the right. Select a category.