Problem-Solving Flowchart: A Visual Method to Find Perfect Solutions
Lucid Content
Reading time: about 7 min
“People ask me questions Lost in confusion Well, I tell them there's no problem Only solutions” —John Lennon, “Watching the Wheels”
Despite John Lennon’s lyrics, nobody is free from problems, and that’s especially true in business. Chances are that you encounter some kind of problem at work nearly every day, and maybe you’ve had to “put out a fire” before lunchtime once or twice in your career.
But perhaps what Lennon’s saying is that, no matter what comes our way, we can find solutions. How do you approach problems? Do you have a process in place to ensure that you and your co-workers come to the right solution?
In this article, we will give you some tips on how to find solutions visually through a problem-solving flowchart and other methods.

What is visual problem-solving?
If you are a literal thinker, you may think that visual problem-solving is something that your ophthalmologist does when your vision is blurry. For the rest of us, visual problem-solving involves executing the following steps in a visual way:
- Define the problem.
- Brainstorm solutions.
- Pick a solution.
- Implement solutions.
- Review the results.
How to make your problem-solving process more visual
Words pack a lot of power and are very important to how we communicate on a daily basis. Using words alone, you can brainstorm, organize data, identify problems, and come up with possible solutions. The way you write your ideas may make sense to you, but it may not be as easy for other team members to follow.
When you use flowcharts, diagrams, mind maps, and other visuals, the information is easier to digest. Your eyes dart around the page quickly gathering information, more fully engaging your brain to find patterns and make sense of the data.
Identify the problem with mind maps
So you know there is a problem that needs to be solved. Do you know what that problem is? Is there only one problem? Is the problem sum total of a bunch of smaller problems?
You need to ask these kinds of questions to be sure that you are working on the root of the issue. You don’t want to spend too much time and energy solving the wrong problem.
To help you identify the problem, use a mind map. Mind maps can help you visually brainstorm and collect ideas without a strict organization or structure. A mind map more closely aligns with the way a lot of our brains work—participants can bounce from one thought to the next defining the relationships as they go.

Mind mapping to solve a problem includes, but is not limited to, these relatively easy steps:
- In the center of the page, add your main idea or concept (in this case, the problem).
- Branch out from the center with possible root causes of the issue. Connect each cause to the central idea.
- Branch out from each of the subtopics with examples or additional details about the possible cause. As you add more information, make sure you are keeping the most important ideas closer to the main idea in the center.
- Use different colors, diagrams, and shapes to organize the different levels of thought.
Alternatively, you could use mind maps to brainstorm solutions once you discover the root cause. Search through Lucidchart’s mind maps template library or add the mind map shape library to quickly start your own mind map.
Create a problem-solving flowchart
A mind map is generally a good tool for non-linear thinkers. However, if you are a linear thinker—a person who thinks in terms of step-by-step progression making a flowchart may work better for your problem-solving strategy. A flowchart is a graphical representation of a workflow or process with various shapes connected by arrows representing each step.
Whether you are trying to solve a simple or complex problem, the steps you take to solve that problem with a flowchart are easy and straightforward. Using boxes and other shapes to represent steps, you connect the shapes with arrows that will take you down different paths until you find the logical solution at the end.

Flowcharts or decision trees are best used to solve problems or answer questions that are likely to come up multiple times. For example, Yoder Lumber , a family-owned hardwood manufacturer, built decision trees in Lucidchart to demonstrate what employees should do in the case of an injury.
To start your problem-solving flowchart, follow these steps:
- Draw a starting shape to state your problem.
- Draw a decision shape where you can ask questions that will give you yes-or-no answers.
- Based on the yes-or-no answers, draw arrows connecting the possible paths you can take to work through the steps and individual processes.
- Continue following paths and asking questions until you reach a logical solution to the stated problem.
- Try the solution. If it works, you’re done. If it doesn’t work, review the flowchart to analyze what may have gone wrong and rework the flowchart until you find the solution that works.
If your problem involves a process or workflow , you can also use flowcharts to visualize the current state of your process to find the bottleneck or problem that’s costing your company time and money.

Lucidchart has a large library of flowchart templates to help you analyze, design, and document problem-solving processes or any other type of procedure you can think of.
Draw a cause-and-effect diagram
A cause-and-effect diagram is used to analyze the relationship between an event or problem and the reason it happened. There is not always just one underlying cause of a problem, so this visual method can help you think through different potential causes and pinpoint the actual cause of a stated problem.
Cause-and-effect diagrams, created by Kaoru Ishikawa, are also known as Ishikawa diagrams, fishbone diagrams , or herringbone diagrams (because they resemble a fishbone when completed). By organizing causes and effects into smaller categories, these diagrams can be used to examine why things went wrong or might go wrong.

To perform a cause-and-effect analysis, follow these steps.
1. Start with a problem statement.
The problem statement is usually placed in a box or another shape at the far right of your page. Draw a horizontal line, called a “spine” or “backbone,” along the center of the page pointing to your problem statement.
2. Add the categories that represent possible causes.
For example, the category “Materials” may contain causes such as “poor quality,” “too expensive,” and “low inventory.” Draw angled lines (or “bones”) that branch out from the spine to these categories.
3. Add causes to each category.
Draw as many branches as you need to brainstorm the causes that belong in each category.
Like all visuals and diagrams, a cause-and-effect diagram can be as simple or as complex as you need it to be to help you analyze operations and other factors to identify causes related to undesired effects.
Collaborate with Lucidchart
You may have superior problem-solving skills, but that does not mean that you have to solve problems alone. The visual strategies above can help you engage the rest of your team. The more involved the team is in the creation of your visual problem-solving narrative, the more willing they will be to take ownership of the process and the more invested they will be in its outcome.
In Lucidchart, you can simply share the documents with the team members you want to be involved in the problem-solving process. It doesn’t matter where these people are located because Lucidchart documents can be accessed at any time from anywhere in the world.
Whatever method you decide to use to solve problems, work with Lucidchart to create the documents you need. Sign up for a free account today and start diagramming in minutes.
Lucidchart, a cloud-based intelligent diagramming application, is a core component of Lucid Software's Visual Collaboration Suite. This intuitive, cloud-based solution empowers teams to collaborate in real-time to build flowcharts, mockups, UML diagrams, customer journey maps, and more. Lucidchart propels teams forward to build the future faster. Lucid is proud to serve top businesses around the world, including customers such as Google, GE, and NBC Universal, and 99% of the Fortune 500. Lucid partners with industry leaders, including Google, Atlassian, and Microsoft. Since its founding, Lucid has received numerous awards for its products, business, and workplace culture. For more information, visit lucidchart.com.
Related articles

Sometimes you're faced with challenges that traditional problem solving can't fix. Creative problem solving encourages you to find new, creative ways of thinking that can help you overcome the issue at hand more quickly.

Dialogue mapping is a facilitation technique used to visualize critical thinking as a group. Learn how you and your team can start dialogue mapping today to solve problems and bridge gaps in knowledge and understanding (plus get a free template!).
Bring your bright ideas to life.
or continue with
We use essential cookies to make Venngage work. By clicking “Accept All Cookies”, you agree to the storing of cookies on your device to enhance site navigation, analyze site usage, and assist in our marketing efforts.
Manage Cookies
Cookies and similar technologies collect certain information about how you’re using our website. Some of them are essential, and without them you wouldn’t be able to use Venngage. But others are optional, and you get to choose whether we use them or not.
Strictly Necessary Cookies
These cookies are always on, as they’re essential for making Venngage work, and making it safe. Without these cookies, services you’ve asked for can’t be provided.
Show cookie providers
- Google Login
Functionality Cookies
These cookies help us provide enhanced functionality and personalisation, and remember your settings. They may be set by us or by third party providers.
Performance Cookies
These cookies help us analyze how many people are using Venngage, where they come from and how they're using it. If you opt out of these cookies, we can’t get feedback to make Venngage better for you and all our users.
- Google Analytics
Targeting Cookies
These cookies are set by our advertising partners to track your activity and show you relevant Venngage ads on other sites as you browse the internet.
- Google Tag Manager
- Infographics
- Daily Infographics
- Template Lists
- Graphic Design
- Graphs and Charts
- Data Visualization
- Human Resources
- Beginner Guides
Blog Business
What is a Problem-Solving Flowchart & How to Make One
By Danesh Ramuthi , Aug 10, 2023

Problem-Solving Flowcharts, contrary to what many believe aren’t just aesthetic wonders — they’re almost like magical blueprints for troubleshooting those pesky problems that many of us face.
Flowcharts take business challenges and turn them into a navigable pathway. In this post, I will guide you on key aspects of problem-solving flowcharts such as what it is, the advantages of problem-solving flowcharts, how to create one and more.
Besides, you’ll also discover how to create problem-solving flowcharts with the help of Venngage’s Flowchart Maker.
And for those of you thinking, “I’m no designer, how can I create one?” worry not! I’ve got you covered. Just hop on Venggage’s Flowchart Templates and you’ll be charting your way to problem-solving glory in no time.
Click to jump ahead:
What are problem-solving flowcharts?
When to use problem-solving flowcharts, what are the advantages of flowcharts in problem-solving, what are the 7 steps of problem-solving flowcharts.
- 5 different types of problem-solving flowcharts
Best practices for designing effective problem-solving flowcharts
How to make a flowchart using venngage , problem-solving flowcharts faqs.
- Final Thoughts
Problem-Solving Flowcharts is a graphical representation used to break down problem or process into smaller, manageable parts, identify the root causes and outline a step-by-step solution.
It helps in visually organizing information and showing the relationships between various parts of the problem.
This type of flowcharts consists of different symbols and arrows, each representing different components or steps in the problem-solving process.
By following the flow of the chart, individuals or teams can methodically approach problem, analyze different aspects of it and come to a well-informed solution.

Problem-Solving Flowcharts is a versatile tool that can be used in various scenarios. Here’s when to consider utilizing one:
- Complex Problems: When faced with a multifaceted issue that involves multiple steps or variables, flowcharts can help break down the complexity into digestible parts.
- Team Collaboration: If you’re working with a team and need a common understanding of problem and its potential solutions then a flowchart provides a visual that everyone can refer to.
- Analyzing Processes: In a situation where you need to understand a particular process, whether it’s within a project or a part of regular operations then mapping it out in a flowchart can offer clarity.
- Decision Making: When various paths or decisions might be taken, a flowchart can outline the potential outcomes of each aiding in making an informed choice.
- Training and Onboarding: Flowcharts can be used in training materials to help new employees understand complex processes or procedures which makes the learning curve smoother.
- Identifying Root Causes: If you’re looking to identify the underlying causes of problem then a flowchart can facilitate a systematic approach to reaching the root of the issue.
Related: How to Use Fishbone Diagrams to Solve Complex Problems
Problem-solving flowcharts can offer several benefits to the users who are looking to solve a particular problem. Few advantages of flowcharts in problem solving are:
Visual Clarity
When you’re dealing with multifaceted problems or processes, words alone can make the situation seem even more tangled. Flowcharts distill these complexities into easily understandable visual elements.
By mapping out each phase or component of problem, flowcharts offer a bird’s eye view enabling individuals to grasp the bigger picture and the finer details simultaneously.
Sequential Representation
Flowcharts excel in laying out the sequence of events or actions. By indicating a clear starting point and illustrating each subsequent step, they guide users through a process or solution path methodically.
This linear representation ensures that no step is overlooked and each is executed in the right order.
Collaboration
Problem-solving often requires team effort and flowcharts are instrumental in fostering collaborative environments.
When a team is discussing potential solutions or trying to understand problem’s intricacies, a flowchart serves as a collective reference point.
It aids in synchronizing everyone’s understanding, minimizing miscommunications and promoting constructive discussions.
Read more about: Flowcharts Symbols and Meaning

1. Define the Problem
Before anything else, it’s essential to articulate the problem or task you want to solve clearly and accurately. By understanding exactly what needs to be addressed you can ensure that subsequent steps align with the core issue.
2. Identify the Inputs and Outputs
Determine what inputs (such as data, information or resources) will be required to solve the problem and what the desired outputs or outcomes are. Identifying these factors will guide you in structuring the steps needed to reach the end goal and ensure that all necessary resources are at hand.
3. Identify the Main Steps
Break down the problem-solving process into its main steps or subtasks. This involves pinpointing the essential actions or stages necessary to reach the solution. Create a roadmap that helps in understanding how to approach the problem methodically.
4. Use Decision Symbols
In problem-solving, decisions often lead to different paths or outcomes. Using standard symbols to represent these decision points in the flowcharts allows for a clear understanding of these critical junctures. It helps visually present various scenarios and their consequences.
5. Add Descriptions and Details
A well-designed flowcharts is concise but clear in its labeling. Using arrows and short, descriptive phrases to explain what happens at each step or decision point ensures that the flowcharts communicates the process without unnecessary complexity.
6. Revise and Refine
Creating a flowcharts is not always a one-and-done process. It may require revisions to improve its clarity, accuracy or comprehensiveness. Necessary refinement ensures that the flowcharts precisely reflects the problem-solving process and is free from errors or ambiguities.
7. Use Flowchart Tool
While it’s possible to draw a flowcharts manually, using a flowcharts tool like Venngage’s Flowchart Maker and Venngage’s Flowchart Templates can make the process more efficient and flexible. These tools come with pre-designed templates and intuitive interfaces that make it easy to create, modify and share flowcharts.

5 different types of problem-solving flowcharts
Let’s have a look at 5 most common types of flowcharts that individuals and organizations often use.
1. Process Flowchart s
A process flowcharts is a visual representation of the sequence of steps and decisions involved in executing a particular process or procedure.
It serves as a blueprint that showcases how different stages or functions are interconnected in a systematic flow and it highlights the direction of the process from its beginning to its end.

Process flowcharts are instrumental in training and onboarding, sales process , process optimization, documentation, recruitment and in any scenario where clear communication of a process is crucial.

2. Flowcharts Infographic
A flowcharts infographic is a great way to showcase the process or a series of steps using a combination of graphics, icons, symbols and concise text. It aims to communicate complex information in a clear and easy-to-understand manner, making it a popular tool for conveying information, data and instructions in a visually engaging way.

For example, you can use this flowchart to illustrate a health insurance process that visually explains the steps involved from finding a provider to paying for your healthcare provider.

3. Circular Flowcharts
A circular flowcharts is used to illustrate the flow of information, goods, services or money within a closed system or process. It gets its name from its circular shape, which emphasizes the continuous and cyclical nature of the flow.

Circular flowcharts are widely used in various fields such as economics, business, engineering and process management to help visualize and understand complex systems.
In a circular flowcharts , elements are represented using various shapes and connected with arrows to indicate the direction of flow. The circular arrangement indicates that the process is ongoing and repeats itself over time.

4. Swimlane flowcharts
Swimlane flowcharts , also known as cross-functional flowcharts are a specific type of flowchart that organizes the process flow into lanes or “swimlanes.”
Each lane represents a different participant or functional area involved in the process and the flowchart shows how activities or information move between these participants.

Swimlane flowcharts are particularly useful for illustrating complex processes that involve multiple stakeholders or departments.
In a swimlane flowcharts, the process is divided horizontally into lanes and each lane is labeled with the name of the department, person or role responsible for that part of the process. Vertically, the flowchart displays the sequence of steps or actions taken in the process.

5. Decision Flowchart s
Decision flowcharts, also known as decision trees or flow diagrams are graphical representations that illustrate the process of making decisions or solving problems.
They are widely used in various fields such as computer science, business mapping , engineering and problem-solving scenarios.

Decision flowcharts help break down complex decision-making processes into simple, sequential steps, making it easier to understand and follow.
A decision tree is a specialized flowchart used to visually represent the process of decision-making.
Businesses and other individuals can employ a decision tree analysis as a tool to aid in evaluating different options and the possible consequences associated with each choice.
Decision trees Infographics can be used to create a more nuanced type of flowchart that is more informative and visually appealing by combining a decision flowchart and the flowchart infographic.
Decision flowcharts are valuable tools for visualizing decision-making processes, analyzing complex problems and communicating them effectively to others.

Designing effective problem-solving flowcharts involves careful consideration of various factors to ensure clarity, accuracy and usability. Here are some best practices to create efficient and useful problem-solving flowcharts:
- Understand the problem first & clearly define it
- Keep it simple
- Use standard & recognizable symbols
- Ensure that the flowchart follows a logical and sequential order
- Clearly label each decision point, action and outcome
- Verify the flowchart’s accuracy by testing it
- Clearly state the decision criteria that lead to different branches
- Provide context when the flowchart is part of a larger process or system
- Review and revise the flowchart
Creating problem-solving flowchart on Venngage is incredibly simple. All you have to do is:
- Start by Signing Up and Creating an Account with Venngage
- Choose a flowchart template that best suits your needs from our library.
- Start editing your flowchart by choosing the desired shapes, labels and colors.
- You can also enhance your flowchart by incorporating icons, illustrations or backgrounds all of which are readily available in our library.
- Once done, you will have 2 options to choose from, either sharing it online for free or downloading your flowchart to your desktop by subscribing to the Premium or Business Plan.
Is flowchart the representation of problem solutions?
Flowcharts are not the representation of problem solutions per se; rather, they are a visual representation of processes, decision-making steps and actions taken to arrive at a solution to problem.
What are the 3 basic structures of flowcharts?
3 Basic Structures of Flowcharts are:
- Sequence: Simplify Complexity
- Selection (Decision): Embrace Choices
- Repetition (Loop): Emphasize Iteration
What are the elements of a good flowchart?
A good flowchart should exhibit clarity and simplicity, using consistent symbols and labels to depict a logical sequence of steps. It should be readable, with appropriate white space to avoid clutter while eliminating ambiguity through well-defined decision criteria and paths.
Can flowcharts be used for both simple and complex problem-solving?
Yes, flowcharts can be used for both simple and complex problem-solving scenarios. Flowcharts are versatile visual tools that can effectively represent various processes, decision-making steps and problem-solving approaches regardless of their complexity.
In both cases, flowcharts offer a systematic and visual means of organizing information, identifying potential problems and facilitating collaboration among team members.
Can problem-solving flowcharts be used in any industry or domain?
Problem-solving flowcharts can be used in virtually any industry or domain. The versatility and effectiveness of flowcharts make them applicable to a wide range of fields such as Business and Management, Software Development and IT, Healthcare, Education, Finance, Marketing & Sales and a lot more other industries.
Final thoughts
Problem-solving flowcharts are a valuable and versatile tool that empowers individuals and teams to tackle complex problems with clarity and efficiency.
By visually representing the step-by-step process of identifying, analyzing and resolving issues, flowcharts serve as navigational guides simplifying intricate challenges into digestible parts.
With the aid of modern tools like Venngage’s Flowchart Maker and Venngage’s Flowchart Templates , designing impactful flowcharts becomes accessible to all while revolutionizing the way problems are approached and solved.
- Bipolar Disorder
- Therapy Center
- When To See a Therapist
- Types of Therapy
- Best Online Therapy
- Best Couples Therapy
- Best Family Therapy
- Managing Stress
- Sleep and Dreaming
- Understanding Emotions
- Self-Improvement
- Healthy Relationships
- Student Resources
- Personality Types
- Guided Meditations
- Verywell Mind Insights
- 2023 Verywell Mind 25
- Mental Health in the Classroom
- Editorial Process
- Meet Our Review Board
- Crisis Support
Overview of the Problem-Solving Mental Process
Kendra Cherry, MS, is a psychosocial rehabilitation specialist, psychology educator, and author of the "Everything Psychology Book."
:max_bytes(150000):strip_icc():format(webp)/IMG_9791-89504ab694d54b66bbd72cb84ffb860e.jpg "diagram of problem solving process")
Rachel Goldman, PhD FTOS, is a licensed psychologist, clinical assistant professor, speaker, wellness expert specializing in eating behaviors, stress management, and health behavior change.
:max_bytes(150000):strip_icc():format(webp)/Rachel-Goldman-1000-a42451caacb6423abecbe6b74e628042.jpg "diagram of problem solving process")
- Identify the Problem
- Define the Problem
- Form a Strategy
- Organize Information
- Allocate Resources
- Monitor Progress
- Evaluate the Results
Frequently Asked Questions
Problem-solving is a mental process that involves discovering, analyzing, and solving problems. The ultimate goal of problem-solving is to overcome obstacles and find a solution that best resolves the issue.
The best strategy for solving a problem depends largely on the unique situation. In some cases, people are better off learning everything they can about the issue and then using factual knowledge to come up with a solution. In other instances, creativity and insight are the best options.
It is not necessary to follow problem-solving steps sequentially, It is common to skip steps or even go back through steps multiple times until the desired solution is reached.
In order to correctly solve a problem, it is often important to follow a series of steps. Researchers sometimes refer to this as the problem-solving cycle. While this cycle is portrayed sequentially, people rarely follow a rigid series of steps to find a solution.
The following steps include developing strategies and organizing knowledge.
1. Identifying the Problem
While it may seem like an obvious step, identifying the problem is not always as simple as it sounds. In some cases, people might mistakenly identify the wrong source of a problem, which will make attempts to solve it inefficient or even useless.
Some strategies that you might use to figure out the source of a problem include :
- Asking questions about the problem
- Breaking the problem down into smaller pieces
- Looking at the problem from different perspectives
- Conducting research to figure out what relationships exist between different variables
2. Defining the Problem
After the problem has been identified, it is important to fully define the problem so that it can be solved. You can define a problem by operationally defining each aspect of the problem and setting goals for what aspects of the problem you will address
At this point, you should focus on figuring out which aspects of the problems are facts and which are opinions. State the problem clearly and identify the scope of the solution.
3. Forming a Strategy
After the problem has been identified, it is time to start brainstorming potential solutions. This step usually involves generating as many ideas as possible without judging their quality. Once several possibilities have been generated, they can be evaluated and narrowed down.
The next step is to develop a strategy to solve the problem. The approach used will vary depending upon the situation and the individual's unique preferences. Common problem-solving strategies include heuristics and algorithms.
- Heuristics are mental shortcuts that are often based on solutions that have worked in the past. They can work well if the problem is similar to something you have encountered before and are often the best choice if you need a fast solution.
- Algorithms are step-by-step strategies that are guaranteed to produce a correct result. While this approach is great for accuracy, it can also consume time and resources.
Heuristics are often best used when time is of the essence, while algorithms are a better choice when a decision needs to be as accurate as possible.
4. Organizing Information
Before coming up with a solution, you need to first organize the available information. What do you know about the problem? What do you not know? The more information that is available the better prepared you will be to come up with an accurate solution.
When approaching a problem, it is important to make sure that you have all the data you need. Making a decision without adequate information can lead to biased or inaccurate results.
5. Allocating Resources
Of course, we don't always have unlimited money, time, and other resources to solve a problem. Before you begin to solve a problem, you need to determine how high priority it is.
If it is an important problem, it is probably worth allocating more resources to solving it. If, however, it is a fairly unimportant problem, then you do not want to spend too much of your available resources on coming up with a solution.
At this stage, it is important to consider all of the factors that might affect the problem at hand. This includes looking at the available resources, deadlines that need to be met, and any possible risks involved in each solution. After careful evaluation, a decision can be made about which solution to pursue.
6. Monitoring Progress
After selecting a problem-solving strategy, it is time to put the plan into action and see if it works. This step might involve trying out different solutions to see which one is the most effective.
It is also important to monitor the situation after implementing a solution to ensure that the problem has been solved and that no new problems have arisen as a result of the proposed solution.
Effective problem-solvers tend to monitor their progress as they work towards a solution. If they are not making good progress toward reaching their goal, they will reevaluate their approach or look for new strategies .
7. Evaluating the Results
After a solution has been reached, it is important to evaluate the results to determine if it is the best possible solution to the problem. This evaluation might be immediate, such as checking the results of a math problem to ensure the answer is correct, or it can be delayed, such as evaluating the success of a therapy program after several months of treatment.
Once a problem has been solved, it is important to take some time to reflect on the process that was used and evaluate the results. This will help you to improve your problem-solving skills and become more efficient at solving future problems.
A Word From Verywell
It is important to remember that there are many different problem-solving processes with different steps, and this is just one example. Problem-solving in real-world situations requires a great deal of resourcefulness, flexibility, resilience, and continuous interaction with the environment.
Get Advice From The Verywell Mind Podcast
Hosted by therapist Amy Morin, LCSW, this episode of The Verywell Mind Podcast shares how you can stop dwelling in a negative mindset.
Follow Now : Apple Podcasts / Spotify / Google Podcasts
You can become a better problem solving by:
- Practicing brainstorming and coming up with multiple potential solutions to problems
- Being open-minded and considering all possible options before making a decision
- Breaking down problems into smaller, more manageable pieces
- Asking for help when needed
- Researching different problem-solving techniques and trying out new ones
- Learning from mistakes and using them as opportunities to grow
It's important to communicate openly and honestly with your partner about what's going on. Try to see things from their perspective as well as your own. Work together to find a resolution that works for both of you. Be willing to compromise and accept that there may not be a perfect solution.
Take breaks if things are getting too heated, and come back to the problem when you feel calm and collected. Don't try to fix every problem on your own—consider asking a therapist or counselor for help and insight.
If you've tried everything and there doesn't seem to be a way to fix the problem, you may have to learn to accept it. This can be difficult, but try to focus on the positive aspects of your life and remember that every situation is temporary. Don't dwell on what's going wrong—instead, think about what's going right. Find support by talking to friends or family. Seek professional help if you're having trouble coping.
Davidson JE, Sternberg RJ, editors. The Psychology of Problem Solving . Cambridge University Press; 2003. doi:10.1017/CBO9780511615771
Sarathy V. Real world problem-solving . Front Hum Neurosci . 2018;12:261. Published 2018 Jun 26. doi:10.3389/fnhum.2018.00261
By Kendra Cherry, MSEd Kendra Cherry, MS, is a psychosocial rehabilitation specialist, psychology educator, and author of the "Everything Psychology Book."
What is Problem Solving? (Steps, Techniques, Examples)
By Status.net Editorial Team on May 7, 2023 — 5 minutes to read
What Is Problem Solving?
Definition and importance.
Problem solving is the process of finding solutions to obstacles or challenges you encounter in your life or work. It is a crucial skill that allows you to tackle complex situations, adapt to changes, and overcome difficulties with ease. Mastering this ability will contribute to both your personal and professional growth, leading to more successful outcomes and better decision-making.
Problem-Solving Steps
The problem-solving process typically includes the following steps:
- Identify the issue : Recognize the problem that needs to be solved.
- Analyze the situation : Examine the issue in depth, gather all relevant information, and consider any limitations or constraints that may be present.
- Generate potential solutions : Brainstorm a list of possible solutions to the issue, without immediately judging or evaluating them.
- Evaluate options : Weigh the pros and cons of each potential solution, considering factors such as feasibility, effectiveness, and potential risks.
- Select the best solution : Choose the option that best addresses the problem and aligns with your objectives.
- Implement the solution : Put the selected solution into action and monitor the results to ensure it resolves the issue.
- Review and learn : Reflect on the problem-solving process, identify any improvements or adjustments that can be made, and apply these learnings to future situations.
Defining the Problem
To start tackling a problem, first, identify and understand it. Analyzing the issue thoroughly helps to clarify its scope and nature. Ask questions to gather information and consider the problem from various angles. Some strategies to define the problem include:
- Brainstorming with others
- Asking the 5 Ws and 1 H (Who, What, When, Where, Why, and How)
- Analyzing cause and effect
- Creating a problem statement
Generating Solutions
Once the problem is clearly understood, brainstorm possible solutions. Think creatively and keep an open mind, as well as considering lessons from past experiences. Consider:
- Creating a list of potential ideas to solve the problem
- Grouping and categorizing similar solutions
- Prioritizing potential solutions based on feasibility, cost, and resources required
- Involving others to share diverse opinions and inputs
Evaluating and Selecting Solutions
Evaluate each potential solution, weighing its pros and cons. To facilitate decision-making, use techniques such as:
- SWOT analysis (Strengths, Weaknesses, Opportunities, Threats)
- Decision-making matrices
- Pros and cons lists
- Risk assessments
After evaluating, choose the most suitable solution based on effectiveness, cost, and time constraints.
Implementing and Monitoring the Solution
Implement the chosen solution and monitor its progress. Key actions include:
- Communicating the solution to relevant parties
- Setting timelines and milestones
- Assigning tasks and responsibilities
- Monitoring the solution and making adjustments as necessary
- Evaluating the effectiveness of the solution after implementation
Utilize feedback from stakeholders and consider potential improvements. Remember that problem-solving is an ongoing process that can always be refined and enhanced.
Problem-Solving Techniques
During each step, you may find it helpful to utilize various problem-solving techniques, such as:
- Brainstorming : A free-flowing, open-minded session where ideas are generated and listed without judgment, to encourage creativity and innovative thinking.
- Root cause analysis : A method that explores the underlying causes of a problem to find the most effective solution rather than addressing superficial symptoms.
- SWOT analysis : A tool used to evaluate the strengths, weaknesses, opportunities, and threats related to a problem or decision, providing a comprehensive view of the situation.
- Mind mapping : A visual technique that uses diagrams to organize and connect ideas, helping to identify patterns, relationships, and possible solutions.
Brainstorming
When facing a problem, start by conducting a brainstorming session. Gather your team and encourage an open discussion where everyone contributes ideas, no matter how outlandish they may seem. This helps you:
- Generate a diverse range of solutions
- Encourage all team members to participate
- Foster creative thinking
When brainstorming, remember to:
- Reserve judgment until the session is over
- Encourage wild ideas
- Combine and improve upon ideas
Root Cause Analysis
For effective problem-solving, identifying the root cause of the issue at hand is crucial. Try these methods:
- 5 Whys : Ask “why” five times to get to the underlying cause.
- Fishbone Diagram : Create a diagram representing the problem and break it down into categories of potential causes.
- Pareto Analysis : Determine the few most significant causes underlying the majority of problems.
SWOT Analysis
SWOT analysis helps you examine the Strengths, Weaknesses, Opportunities, and Threats related to your problem. To perform a SWOT analysis:
- List your problem’s strengths, such as relevant resources or strong partnerships.
- Identify its weaknesses, such as knowledge gaps or limited resources.
- Explore opportunities, like trends or new technologies, that could help solve the problem.
- Recognize potential threats, like competition or regulatory barriers.
SWOT analysis aids in understanding the internal and external factors affecting the problem, which can help guide your solution.
Mind Mapping
A mind map is a visual representation of your problem and potential solutions. It enables you to organize information in a structured and intuitive manner. To create a mind map:
- Write the problem in the center of a blank page.
- Draw branches from the central problem to related sub-problems or contributing factors.
- Add more branches to represent potential solutions or further ideas.
Mind mapping allows you to visually see connections between ideas and promotes creativity in problem-solving.
Examples of Problem Solving in Various Contexts
In the business world, you might encounter problems related to finances, operations, or communication. Applying problem-solving skills in these situations could look like:
- Identifying areas of improvement in your company’s financial performance and implementing cost-saving measures
- Resolving internal conflicts among team members by listening and understanding different perspectives, then proposing and negotiating solutions
- Streamlining a process for better productivity by removing redundancies, automating tasks, or re-allocating resources
In educational contexts, problem-solving can be seen in various aspects, such as:
- Addressing a gap in students’ understanding by employing diverse teaching methods to cater to different learning styles
- Developing a strategy for successful time management to balance academic responsibilities and extracurricular activities
- Seeking resources and support to provide equal opportunities for learners with special needs or disabilities
Everyday life is full of challenges that require problem-solving skills. Some examples include:
- Overcoming a personal obstacle, such as improving your fitness level, by establishing achievable goals, measuring progress, and adjusting your approach accordingly
- Navigating a new environment or city by researching your surroundings, asking for directions, or using technology like GPS to guide you
- Dealing with a sudden change, like a change in your work schedule, by assessing the situation, identifying potential impacts, and adapting your plans to accommodate the change.
- How to Resolve Employee Conflict at Work [Steps, Tips, Examples]
- How to Write Inspiring Core Values? 5 Steps with Examples
- 30 Employee Feedback Examples (Positive & Negative)
What is a Fishbone diagram?

Table of Contents
Fishbone diagrams explained.
A fishbone diagram (also known as an Ishikawa fishbone diagram) is an effective problem-solving tool. Instead of focusing on a quick fix, creating a fishbone diagram helps to identify the root cause of a problem and find a long-term solution.
As a type of cause and effect diagram , the “fishbone” name comes from the diagram’s resemblance to a fish skeleton. A fishbone diagram consists of three main categories:
There’s a fish head at the head of the diagram, where you’ll outline the problem you’re trying to solve. The rest of the diagram branches out from here.
The spine stems from the head of the diagram (the problem statement), providing the outline of the fish. At the end of each spinal bone is a category that needs to be considered as part of the problem-solving process.
Branching out from each spinal bone, you’ll see a smaller rib bone. This is where the possible causes will sit to help you pinpoint the potential cause of the problem.
Benefits of fishbone diagrams
Fishbone diagrams are useful tools for improving existing processes and pinpointing causes of issues. Take a look at some benefits of performing a fishbone diagram root cause analysis:
Easily find the root cause of a problem
A fishbone diagram is a visual tool that adds structure and clarity to problem-solving. It indicates the problem and its possible causes in a single location, making it easier for teams to conduct a root cause analysis .
Prevent further problems
By finding the root cause of the problem, you fix the problem at its source and mitigate future issues. As a result, you’re far more likely to prevent the same (or similar) problems from cropping up in the future.
Collaborate with your team
A fishbone diagram is a great way to work with your team to brainstorm solutions . It’s a collaborative diagram, encouraging teams to review all the available information and discuss the best course of action.
If you’re part of a remote or hybrid team, an online platform like Miro allows you to collaborate with your team, no matter where they work. Simply share the diagram and hop on a video chat, and you can perform your root cause analysis virtually.
Example of a fishbone diagram
To see a fishbone diagram in action, look at this CEDAC Template from NEXT LEVEL Partners.

CEDAC is an acronym for Cause and Effect Diagram with the Addition of Cards. The diagram contains issues on the left-hand side of the ribs and solutions on the right-hand side.
Its inventor, Ryuji Fukuda, created CEDAC so that teams can delve deeper into their problem-solving analyses. By adding cards to the diagram, teams have a way of questioning existing information and suggesting new ideas. As a result, they’ll gain a deeper understanding of their problems and how to solve them.
Here are some of the common areas where the CEDAC model can be helpful:
Product development
Visualize issues with product development using the CEDAC diagram. Collaborate with the product team to identify the cause of the problem and use cards to identify the best possible solution.
Software features
Effectively allocate resources based on team structures and capabilities. Understand the most critical problems to solve and how they map together.
Product design
Define failures or problems with your product design, and identify effective solutions. Using the diagram’s cards, product designers can generate new and creative solutions to improve the design.
Internal processes
Pinpoint bottlenecks and figure out how to streamline and improve your business processes. Encourage team members to join in the discussion and make suggestions for improving the process going forward.
When to use a fishbone diagram
Take a look at some of the different instances when using a fishbone diagram can be useful for you and your team.
1. To analyze a problem statement
If you have a clear problem statement for your business, a fishbone diagram is a great way to analyze it in detail. You can see the problem’s culprit and decide how to fix the issue.
2. To brainstorm the causes of the problem
Also known as root cause analysis, a fishbone diagram allows you to discuss the potential causes of a problem. It’s the perfect opportunity to host a brainstorming session to identify pressing concerns and work through possible solutions.
3. To analyze a new product design
Use a fishbone diagram to map your new product design and visualize any potential hurdles before they come your way. As a result, you can put preventative measures in place before going live.
4. To improve your processes
If you’re struggling to streamline your processes and inefficiencies, a fishbone diagram can help. Use a fishbone diagram to pinpoint the troublesome areas of your process and find the cause of a problem. From there, you can determine exactly how to fix it.
5. For quality improvement
Use a fishbone diagram to visualize how and where you can improve to offer your customers a higher-quality experience. For example, you might want to improve the quality of your customer service. In this case, you can use the diagram to find areas for improvement in your existing processes.
How to make a fishbone diagram
Follow these simple steps to create an effective fishbone diagram:
1. Select the Fishbone Diagram Template
While you can always build your own diagram from scratch, you can also get a headstart by selecting this Fishbone Diagram Template . It’s free and easy to use, so you can start mapping your diagram immediately.

2. Outline your problem statement
When your diagram is ready to use, start by defining the problem. Otherwise known as a problem statement, this will sit at the head of the diagram. This must be as clear and concise as possible to find the right solution.
For example, in the diagram below, the main problem is that “40% of users cancel the subscription in the first month.” This statement clearly describes the problem and offers a solid starting point for finding a solution. Now, let’s consider how this would work if the statement were written differently — for example, “to increase customer retention.”
This statement is pretty vague, and there’s a lot of room for interpretation. Instead of focusing specifically on how to keep existing customers after the first month, teams might explore other avenues that won’t necessarily solve the actual problem.
The problem statement doesn’t have to be long and detailed. In fact, you should keep it short — ideally, no longer than a sentence. That way, it’ll be easy for your team to see the problem and won’t overcrowd the diagram. But the problem statement should always be clear and concise, leaving no room for interpretation.
If you’re new to problem statements or want a framework to guide you, look at Prime Motive’s Problem Framing Workshop Template .
3. Pinpoint your root causes
With your problem statement in place, you can now branch out and start to pinpoint the possible causes of the problem.
The specific causes will depend on what your problem statement is. For example, if your problem statement is related to product design, your root causes could include the following:
These are just a few examples. In your diagram, you might find that you have more or fewer root causes. With an intuitive platform like Miro, it’s easy to add or remove boxes based on how many you need.
When adding causes to your diagram, those with the biggest impact should be closest to the problem. The farther away a cause is from the head of the diagram, the less influence it has on the problem.
4. Identify individual causes
You can now identify the individual elements that contribute to the overall cause. These are the bones of the fish.
Let’s use an example to demonstrate how this works. Imagine that one of your root causes is “Equipment.” Here are some of the individual causes that might sit under this area:
You are using outdated and inefficient equipment
It’s expensive to replace existing equipment
There aren’t enough employees who know how to use the equipment
All of these elements could contribute to the problem you’re facing, but it’s up to you and your team to pinpoint the key elements at the root of the problem. Review all this information with your team, and you’ll be able to see which problem is most likely to have a long-term solution.
If you’re unsure how to identify the individual causes, look at the 5 Whys framework . It’s a simple brainstorming tool that helps teams explore the reasons behind a potential problem.
5. Create a plan of action
After working with your team to find the root cause of the problem, you can create an action plan for improvements. This involves mapping out the steps you need to take to solve your problem and how you’ll measure success (we suggest using the SMART Goals framework for this).
During this stage, be sure to focus on how to make lasting improvements. Don’t lose sight of the bigger picture in favor of a quick fix. The purpose of the fishbone diagram is to implement a long-lasting solution to your problem, so keep this in mind when creating your plan of action for the future.
Fishbone diagram categories: the 6Ms of production
The fishbone diagram is used across various industries, but the original diagram was created to improve the manufacturing process. The six methods (6Ms) of production come from this original diagram, and engineers and designers would use this structure to cover all their bases.
The 6Ms of production are as follows:
1. Manpower
The functional activity involved in designing and delivering a product.
The production process and any other processes that contribute to the delivery of the final product.
Any systems, tools, or equipment used in manufacturing.
4. Material
The raw materials and components needed to create the end product.
5. Milieu (or Mother Nature)
Any environmental factors, such as weather, floods, or fire. Although most milieu factors can’t be controlled, there are some instances where businesses can put preventative measures in place to mitigate problems.
6. Measurement
The physical measurements (volume, distance, temperature, and so on) of a product, machine, or workspace.
The 6Ms are only relevant if you’re using the fishbone diagram to improve a manufacturing or production process. If you’re using the diagram for any other purpose, there’s no need to follow this structure.
Discover more
How to build a fishbone diagram
What is a cause and effect diagram
What is root cause analysis?
What is the 5 Whys Framework?
5 Whys: Examples, explanations, and how to find the causes of problems
Get on board in seconds
Join thousands of teams using Miro to do their best work yet.

How it works
For Business
Join Mind Tools
Article • 9 min read
Flow Charts
Identify and communicate your optimal process.
By the Mind Tools Content Team
How often have you thought about streamlining a process in your organization but not been sure where to start? Or perhaps you've struggled to understand a process when it's described to you in detail.
Flow charts are a useful tool in these situations, as they make a process easy to understand at a glance. Using just a few words and some simple symbols, they show clearly what happens at each stage and how this affects other decisions and actions.
In this article and video, we look at how to create and use flow charts, and explore how they can help you to solve problems in your processes.
What Is a Flow Chart?
Flow charts are easy-to-understand diagrams that show how the steps of a process fit together. American engineer Frank Gilbreth is widely believed to be the first person to document a process flow, having introduced the concept of a "Process Chart" to the American Society of Mechanical Engineers in 1921.
Flow charts tend to consist of four main symbols, linked with arrows that show the direction of flow:
1. Elongated circles, which signify the start or end of a process.

2. Rectangles, which show instructions or actions.

3. Diamonds, which highlight where you must make a decision.

4. Parallelograms, which show input and output. This can include materials, services or people.

You can use many other symbols in a flow chart but remember that these diagrams are used for communication . If you use symbols that only a few people understand, you may fail to get your message across. So, be sure to keep things simple !
When to Use a Flow Chart
All manner of organizations use flow charts to:
- Define a process.
- Standardize a process.
- Communicate a process.
- Identify bottlenecks or waste in a process.
- Solve a problem .
- Improve a process.
For example, software developers can use them to work out how the automated and manual parts of a process join up. Inexperienced team members might follow a flow chart to help them to complete activities in the right order. A manufacturer could ensure that it keeps to its values by applying a quality-control flow chart that presents questions and decision points. And an HR department might combine a flow chart with an organogram to show people who to contact about issues and when.
Why Use Flow Charts?
This tool's simplicity makes communicating and documenting a process quick and clear, so that the process will more likely be understood and applied correctly and consistently. It can also help you to estimate the timescale of the process, as you're better able to gauge the time needed for each task along the way. And you'll more likely identify who you should involve and at what stage, such as senior management or a compliance authority.
But you can also benefit from the process of creating a flow chart itself, as you build it step by step. You'll be able to focus on the detail of each individual stage, without feeling overwhelmed by the rest of the process, and then "zoom out" again to see the wider picture.
If your process or project involves several people or teams, you might find it more useful to use a Swim Lane Diagram rather than a flow chart – this helps you to show process flows between people and teams.
How to Create a Flow Chart
Follow these four steps:
Step 1: Identify Tasks
Begin by listing all of the tasks in a process in chronological order. Ask questions such as, "What happens next in the process?" or, "Do you need to make a decision before the next step?" or, "What approvals are required before you move on to the next task?"
Put yourself in the shoes of the person using the process, possibly for the first time. Talk to team members who work with the process directly, and get their opinions on where improvements could be made. Better yet, take a hands-on approach and go through the procedure yourself, and think about the practicalities of each stage. Use Customer Experience Mapping if your flow chart focuses on customer service, so that you can gain a better understanding of the process.
Step 2: Organize and Document Tasks
Next, start your flow chart by drawing the elongated circle shape and labeling it "Start."
Then, work through your whole process, and show the actions and decisions in the order that they happen. Link them with arrows to illustrate the flow of the process.
Where you need to make a decision, draw arrows from the decision diamond to each possible solution, and then label each arrow with the decision made. Remember to show the end of the process by using an elongated circle labeled "Finish."
Step 3: Double-Check the Process
When you've completed your flow chart, go back to the start and try it out to make sure that you haven't overlooked anything. Work through each step, and ask yourself whether you've represented the sequence of actions and the decisions involved correctly. Are there more decisions to be made at certain stages?
Then show your flow chart to other people, especially those who work directly with the process. Ask them to test that it works and to tell you if there are any problems or omissions.
Step 4: Challenge the Flow Chart
Finally, you might want to improve the process rather than just record it. So, see whether any of the steps that you've described are unnecessary or overly complicated. Identify any major bottlenecks , and deal with them to improve performance.
Are there any missing steps, no matter how small or seemingly insignificant, that you should add? And have you assigned tasks and decisions to the right people or automated them where it's most appropriate? Make any changes and then challenge the chart again.
As you challenge your flow chart, you might also be challenging your team members' tried and tested ways of working. So, take time to win support for your ideas, and don't expect to change people's habits overnight.
You may find that SIPOC diagrams will give you the detailed information that you need to introduce change in a controlled and effective way.
Flow Chart Software
You'll likely start with drawing flow charts by hand, but it's often more convenient to use a diagramming app to save, amend and share your charts.
Such apps vary from the simple and free, such as draw.io , creately and Pencil Project , to the more complex and paid-for, such as gliffy™ , Lucidchart , SmartDraw™ , and Visio® .
Flow charts can quickly become long and complicated, so that you can't represent them on a single piece of paper. This is where you can use "connectors" (shown as numbered circles) to link the flow when moving from one page to another. The user can follow the matching numbers to trace the flow of the process.
The image below shows part of a flow chart for how the receptionists in an example company should route incoming phone calls to the correct department:

Flow charts are simple diagrams that map out a process, so that you can easily communicate it to other people. You can also use them to define and analyze a process, build a step-by-step picture of it, and then standardize or improve it.
To draw a flow chart, identify the tasks and decisions that you make during a process, and write them down in order.
Then, arrange these steps in the flow chart format, using the appropriate symbols.
Finally, check and challenge your flow chart to make sure that it accurately represents the process, and that it shows the most efficient way of doing the job.
You've accessed 1 of your 2 free resources.
Get unlimited access
Discover more content
How to spot real and fake news.
Critically Appraising Information
Jain and Sharma's BADIR Framework
Extracting Information From Data, Intelligently
Add comment
Comments (0)
Be the first to comment!

Try Mind Tools for FREE
Get unlimited access to all our career-boosting content and member benefits with our 7-day free trial.
Sign-up to our newsletter
Subscribing to the Mind Tools newsletter will keep you up-to-date with our latest updates and newest resources.
Subscribe now
Business Skills
Personal Development
Leadership and Management
Member Extras
Most Popular
Newest Releases

Team Briefings

Onboarding With STEPS
Mind Tools Store
About Mind Tools Content
Discover something new today
New pain points podcast - perfectionism.
Why Am I Such a Perfectionist?
Pain Points Podcast - Building Trust
Developing and Strengthening Trust at Work
How Emotionally Intelligent Are You?
Boosting Your People Skills
Self-Assessment
What's Your Leadership Style?
Learn About the Strengths and Weaknesses of the Way You Like to Lead
Recommended for you
Taking people with you.
David Novak
Book Insights
Business Operations and Process Management
Strategy Tools
Customer Service
Business Ethics and Values
Handling Information and Data
Project Management
Knowledge Management
Self-Development and Goal Setting
Time Management
Presentation Skills
Learning Skills
Career Skills
Communication Skills
Negotiation, Persuasion and Influence
Working With Others
Difficult Conversations
Creativity Tools
Self-Management
Work-Life Balance
Stress Management and Wellbeing
Coaching and Mentoring
Change Management
Team Management
Managing Conflict
Delegation and Empowerment
Performance Management
Leadership Skills
Developing Your Team
Talent Management
Problem Solving
Decision Making
Member Podcast
- Skip to main content
- Skip to primary sidebar
- Skip to footer
Additional menu
Fishbone diagrams: How to use them for problem-solving
October 5, 2023 by MindManager Blog
When something goes wrong, it’s essential to understand the root cause in order to prevent it from occurring again.
However, life and business are both complex, making it difficult to identify at times the underlying causes which created the situation you’re facing now. That’s where and when a fishbone diagram can help!
In this article, we’ll dive into everything you need to know about fishbone diagrams and how to use them for problem-solving.
What is a fishbone diagram?
Fishbone diagrams (also called Ishikawa diagrams and cause-and-effect diagrams) are visualizations used to identify and illustrate the causes for a specific event. Potential causes are often brainstormed and then categorized in order to identify a problem’s root cause.
The diagram gets its name due to the branches radiating out from the main issue in a way that resembles a side view of a fish skeleton. However, the process can be applied to most mind map layouts.
Here’s a fishbone diagram example:

When to use fishbone diagrams
Fishbone diagrams help focus you and your team’s energy on the root cause of a problem instead of merely addressing and wasting time on the symptoms.
Here are a few common applications of Fishbone diagrams:
Manufacturing: Discover the root cause of a manufacturing issue by brainstorming and ranking the likelihood and impact of all the areas that influence the production process.

How to create a fishbone diagram in MindManager in 5 steps
Fishbone diagrams are quick to make in MindManager and the examples above are included as templates to make it even easier.
MindManager’s ease of capturing ideas during brainstorming makes it the ideal tool to capture and organize potential causes. The visual format allows you to see all the causes simultaneously, draw relationships between causes, and identify if the root cause is found multiple times within the diagram.
Here’s how to create a fishbone diagram:
- In MindManager, go to the File menu, select New and then click into the Problem-Solving folder. There you’ll find three templates for Fishbones, the manufacturing, service, and product analyses. Select a template.
- Enter the issue in the central topic.
- Next, either brainstorm potential causes and add them as floating topics initially and categorize them after the brainstorming session. Or, use each category as a guide for a mini-brainstorm session and enter the potential causes directly in the appropriate branch.
- Add more details to your causes as new subtopics or notes with the cause itself.
- Once all the potential causes have been identified, you can take the diagram a step further and rank each cause. One way to do this would be to use the Priority marker to rank the cause between 1 and 9. You can later filter the diagram and view specific priorities and hide the less important ones that will distract the focus of the team.
Key MindManager features for fishbone diagrams
There is no one single ‘right’ way to create, categorize, or rank items within a fishbone diagram.
With that said, here’s a list of ways to apply some of MindManager’s features to transform an ordinary diagram into a powerful application to visualize and empower your work.
- Use color (fonts, topic fill color) to categorize different causes.
- Change the font characteristics to emphasize different causes (e.g. bold, larger fonts, different font types, etc.).
- Use topic images to add greater context and enhance the visualizations.
- Write topic notes for more in-depth details related to each cause.
- Apply icons and tags to categorize causes.
- Hyperlink or add attachments to provide more details.
- Draw relationship lines between different connected causes throughout the diagram.
- Assign resources to any causes that you have identified. This may clarify who is responsible or accountable for that cause.
- Collapse branches for a quick overview or drill down into all the details.
- View the diagram through multiple lenses. For instance, you are not confined to the layout of the Fishbone diagram. Switch views to see the diagram as an outline, or dive in the Schedule, Icon or Tag views to see your content in groupings based on your assigned categories or due dates.
- Filter content to either show or hide topics that you have annotated with tags or icon markers. For instance, filter on all the top priority potential causes that need additional investigation.
- Share your diagram by either publishing it onto the web (and sharing a link) where anyone can open and view the Fishbone diagram interactively in their browser or export the diagram into a variety of different formats (e.g. Microsoft Word, HTML5, Microsoft Project, etc.).
Download MindManager today to get started on your fishbone diagram!
Ready to take the next step?
MindManager helps boost collaboration and productivity among remote and hybrid teams to achieve better results, faster.
Why choose MindManager?
MindManager® helps individuals, teams, and enterprises bring greater clarity and structure to plans, projects, and processes. It provides visual productivity tools and mind mapping software to help take you and your organization to where you want to be.
Explore MindManager
Problem Solving Stages Diagram
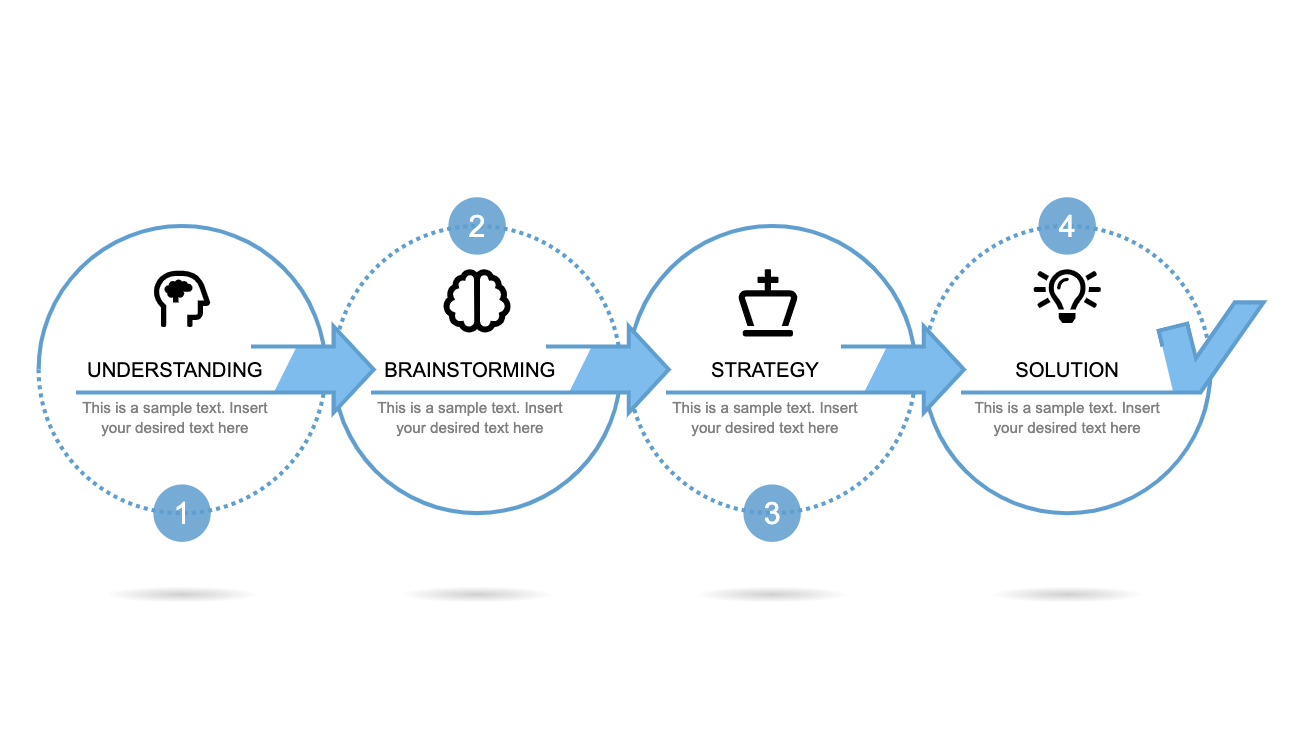
The Problem Solving Stages Diagram is a concept diagram design. The template shows a linear process flow diagram containing up to ten individual process cycles. Although there are various problem-solving techniques depending on the complexity of issue or corporate structure. Because some problems are small and can be resolved quickly while others are complex and need more research. This diagram provides basic decision-making approach for solving a problem in hand. This diagram by default shows four main components of any problem-solving model , however you can easily add up to ten components with our diagram designer . These default components include Understanding, Brainstorming, Strategy, and Solution. This diagram could be used for personal, professional, and organizational difficulties. For example, threats, challenges, product quality, and risk management.
This diagram template is a useful tools for demonstrating problem-solving techniques and strategies as a learning experience. Further, it is suitable for organizations to outline their systematic approach to identify complications. And provide a visual roadmap to tackle them. The diagram of problem-solving model illustrates an intensive thought process. The users can copy this diagram template to another set of presentation and create waves in discussion.
- Managing Your Finances Effectively
- Identifying Patterns: A Practical Guide
Crossword Puzzles and Sudoku: A Problem-Solving Exploration
Exploring online whiteboarding tools for brainstorming.
- Analytical problem solving
- Identifying root causes
- Analyzing consequences
- Brainstorming solutions
- Heuristic problem solving
- Using analogies
- Applying existing solutions
- Trial and error
- Creative problem solving
- Mind mapping
- Brainstorming
- Lateral thinking
- Research skills
- Interpreting information
- Data collection and analysis
- Identifying patterns
- Critical thinking skills
- Recognizing bias
- Analyzing arguments logically
- Questioning assumptions
- Communication skills
- Negotiation and compromise
- Listening skills
- Explaining ideas clearly
- Planning techniques
- SWOT analysis
- Gantt charting
- Critical path analysis
- Decision making techniques
- Force field analysis
- Paired comparison analysis
- Cost-benefit analysis
- Root cause analysis
- Five whys technique
- Fault tree analysis
- Cause and effect diagrams
- Brainstorming techniques
- Brainwriting
- Brainwalking
- Round-robin brainstorming
- Creative thinking techniques
- Serendipity technique
- SCAMPER technique
- Innovation techniques
- Value innovation techniques
- Design thinking techniques
- Idea generation techniques
- Personal problems
- Deciding what career to pursue
- Managing finances effectively
- Solving relationship issues
- Business problems
- Increasing efficiency and productivity
- Improving customer service quality
- Reducing costs and increasing profits
- Environmental problems
- Preserving natural resources
- Reducing air pollution levels
- Finding sustainable energy sources
- Individual brainstorming techniques
- Thinking outside the box
- Word association and random word generation
- Mind mapping and listing ideas
- Group brainstorming techniques
- Synectics technique
- Online brainstorming techniques
- Online whiteboarding tools
- Virtual brainstorming sessions
- Collaborative mind mapping software
- Team activities
- Group decision making activities
- Debate activities and role-play scenarios
- Collaborative problem solving games
- Creative activities
- Creative writing exercises and storyboards
- Imagination activities and brainstorming sessions
- Visualization activities and drawing exercises
- Games and puzzles
- Crossword puzzles and Sudoku
- Logic puzzles and brain teasers
- Jigsaw puzzles and mazes
- Types of decisions
- Structured decisions
- Simple decisions
- Complex decisions
- Problem solving techniques
- Cause and Effect Diagrams: A Problem-Solving Technique
A comprehensive guide to understanding and utilizing cause and effect diagrams for problem solving and root cause analysis.

Cause and effect diagrams are a powerful problem-solving technique that can help you identify the root cause of any issue, from small everyday annoyances to complex organizational problems. By following a systematic process of gathering data, analyzing it and then developing solutions, cause and effect diagrams can be used to effectively tackle any problem that you may face. This article will provide an overview of the cause and effect diagram technique, outlining how it works and the steps involved in using it. We will also look at some examples of how it can be used to solve a variety of problems. When trying to solve a problem, it is important to break down all the possible causes.
A cause and effect diagram is a visual tool used to represent all the possible causes of a problem or event. It can be used to brainstorm different causes in order to identify the root cause of a problem. The process of creating a cause and effect diagram begins by identifying the problem or event, then listing all the possible causes that could be contributing to it. The causes can then be grouped together into categories.
For example, if the problem is a defect in a product, the categories might include “materials”, “suppliers”, “manufacturing process”, “transport”, etc. After the categories have been identified, arrows can be added to show the relationship between each cause and the effect. Once the cause and effect diagram is complete, it can be used to identify potential causes and solutions. By looking at the diagram as a whole, it is possible to identify which causes may have the most impact on the problem.
This can help narrow down potential solutions and make it easier to identify the root cause of a problem. There are several benefits of using cause and effect diagrams in problem-solving. First, they provide an organized way of looking at problems. By breaking down each component of the problem, it is easier to identify potential causes and solutions. Second, cause and effect diagrams can help individuals think more creatively about problems.
Benefits of Cause and Effect Diagrams
• they are useful for documenting problems and their solutions, which can be helpful when troubleshooting future issues., creating a cause and effect diagram.
Next, list all possible causes that could contribute to the problem or event. This includes both direct and indirect causes. Then, similar causes should be grouped into categories . This helps to narrow down the potential causes and makes the diagram easier to read.
After this, arrows should be added to show the relationship between each cause and the effect. Finally, the diagram should be reviewed as a whole to identify potential causes and solutions . Cause and effect diagrams can be an invaluable tool for problem solving and root cause analysis. By taking the time to create a diagram, individuals can better understand the various factors that may be contributing to a problem or event and identify potential solutions.
Cause and effect diagrams are an invaluable tool for problem solving and root cause analysis. By organizing problems into component parts, they allow individuals to think more creatively and identify potential causes and solutions more effectively. Furthermore, they provide a documented record of the problem and its solution for future reference. By following these steps, individuals can use cause and effect diagrams to effectively solve problems.

- Visualization Activities and Drawing Exercises
Learn more about visualization activities and drawing exercises, from problem-solving activities to creative activities.

- Questioning Assumptions: A Critical Thinking Skill
Understand the importance of questioning assumptions and learn to use it as an effective critical thinking skill when problem solving.

- Collaborative Mind Mapping Software
Learn about collaborative mind mapping software, the benefits of using it, and some of the best tools available.

- Exploring the SCAMPER Technique for Creative Problem Solving
Learn how to use the SCAMPER technique to come up with creative solutions to problems.
- Mind Mapping - Creative Problem Solving and Creative Thinking Techniques
- Using Analogies to Solve Problems
- Negotiation and Compromise
- Identifying Root Causes
- Value Innovation Techniques
- Brainwriting: A Creative Problem-Solving Technique
- Choosing the Right Career: Problem-Solving Examples
- Cost-benefit Analysis: A Guide to Making Informed Decisions
- Making Complex Decisions: A Comprehensive Overview
- Mind Mapping and Listing Ideas
- Finding Sustainable Energy Sources
- Debate Activities and Role-Play Scenarios
- Brainstorming: A Comprehensive Look at Creative Problem Solving
- Exploring Trial and Error Problem Solving Strategies
- Exploring Lateral Thinking: A Comprehensive Guide to Problem Solving Strategies
- Data Collection and Analysis - Problem Solving Skills and Research Skills
- Word Association and Random Word Generation
- Creative Writing Exercises and Storyboards
- Analyzing Arguments Logically
- Solving Relationship Issues
- Group Decision Making Activities
- Reducing Air Pollution Levels
- Thinking Outside the Box: An Overview of Individual Brainstorming Techniques
- SWOT Analysis: A Comprehensive Overview
Jigsaw Puzzles and Mazes: Problem Solving Activities for Fun and Learning
- Brainwriting: A Group Brainstorming Technique
- Simple Decisions - An Overview
- Idea Generation Techniques: A Comprehensive Overview
- Imagination Activities and Brainstorming Sessions
- Round-robin brainstorming: Exploring a Group Brainstorming Technique
- Five Whys Technique: A Comprehensive Analysis
- Design Thinking Techniques: A Comprehensive Overview
- Gantt Charting: A Primer for Problem Solving & Planning Techniques
- Preserving Natural Resources
- Paired Comparison Analysis: A Comprehensive Overview
- Analyzing Consequences: A Problem Solving Strategy
- Reducing Costs and Increasing Profits: A Problem Solving Example
- Interpreting Information: A Problem-Solving and Research Skills Primer
- Improving Customer Service Quality
- Collaborative Problem Solving Games: Exploring Creative Solutions for Teams
- Structured Decisions: An Overview of the Decision Making Process
- Critical Path Analysis: A Comprehensive Guide
- How to Explain Ideas Clearly
- Fault Tree Analysis: A Comprehensive Overview
- Logic Puzzles and Brain Teasers: A Comprehensive Overview
- Mind Mapping: A Creative Problem Solving Tool
- Force Field Analysis for Problem Solving and Decision Making
- Maximizing Efficiency and Productivity
- Exploring Brainwalking: A Creative Problem-Solving Technique
- Applying Existing Solutions for Problem Solving Strategies
- Virtual Brainstorming Sessions: A Comprehensive Overview
- Brainstorming Solutions: A Problem-Solving Guide
- Round-robin Brainstorming: A Creative Problem Solving Tool
- Exploring the Serendipity Technique of Creative Problem Solving
- Listening Skills: A Comprehensive Overview
- Exploring Synectics Technique: A Comprehensive Guide
- Recognizing Bias: A Problem Solving and Critical Thinking Skills Guide
New Articles

Which cookies do you want to accept?
Home PowerPoint Templates Diagrams 7 Step Problem Solving Process Diagram for PowerPoint
7 Step Problem Solving Process Diagram for PowerPoint

The 7 Step Problem Solving Process Diagram for PowerPoint is a semi-circular template design. It illustrates an iterative process cycle including chevron arrows. Each of these arrow shapes outlines a sequence of the problem-solving method in seven stages. The stages include problem definition, disaggregation, prioritizing, work plan, analysis, synthesis, and communication. These stages are also known as the 7 steps to bullet-proof problem-solving model. This process flow encapsulates all essential steps required to address an issue up to its resolution.
Finding and implementing a solution to any problem is a crucial skill required in all parts of life. It is considered one of the important job capabilities. The 7 steps process of problem-solving provides a foundation that is applicable for business as well as personal challenges. This process functions effectively with nearly all types of problem-solving tools and techniques.
The 7 Step Problem Solving Process Diagram for PowerPoint presents a semi-circle shape of connected chevron arrows. These arrows define the direction of the process sequence. The problem-solving diagram template can be used in educational/staff training and organizational problem-solving presentations. There are additional seven slides of the PowerPoint diagram template to carry detailed discussions about each stage. The users can customize colors and change the textual content of pre-design templates. The SlideModel diagram templates offer a 5 step version of problem solving process template. The users can choose from these templates based on the complexity of the problem and decision making strategies.
You must be logged in to download this file.
Favorite Add to Collection
Details (8 slides)

Supported Versions:
Subscribe today and get immediate access to download our PowerPoint templates.
Related PowerPoint Templates

4-Dimension Circular Diagram PowerPoint Template

Increasing Fluid Diagram PowerPoint Template

5-Step Cycle Flowchart Template for PowerPoint

4M Root Cause Analysis PowerPoint Template
- How to Use Ishikawa Diagrams to Solve Business Problems
- Learn Lean Sigma
- Root Cause Analysis
Do you want to solve business problems in an efficient manner? If this is the case, you should think about using Ishikawa Diagrams. Ishikawa Diagrams, also known as fishbone diagrams or cause-and-effect diagrams, are a visual tool that can help identify the root causes of a problem. As a result, they are an ideal solution for businesses looking to improve their processes and reduce errors.
We’ll look at how Ishikawa Diagrams can be used to solve business problems in this post. We’ll look at the anatomy of an Ishikawa Diagram and show you how to make one step by step. We’ll also look at real-world examples of business problems solved with Ishikawa Diagrams and the benefits gained by doing so. Finally, we’ll go over best practises for using Ishikawa Diagrams and how to avoid common pitfalls.
Whether you’re new to Ishikawa Diagrams or want to improve your problem-solving skills, this post will walk you through how to use this powerful tool to solve business problems.
Table of Contents
What is an ishikawa diagram.
Because of its appearance, the Ishikawa Diagram is also known as the fishbone diagram after its creator, Kaoru Ishikawa. The diagram is organised with a central spine and several branches that resemble fish bones. Each branch represents a possible cause category that contributes to the problem under consideration.
Because it is a versatile and widely used tool in problem solving and process improvement, an Ishikawa diagram is known by many different names. Here are some brief explanations for the various names:
Fishbone diagram: This name comes from the visual appearance of the diagram, which looks like a fish skeleton with the problem or effect at the head and the causes branching out like the bones of the fish.
Cause-and-effect diagram: This name reflects the diagram’s purpose, which is to aid in the identification of the root causes of a problem by mapping out the various factors that contribute to it. The diagram depicts the relationships between the causes and the effects, making it easier to determine where to focus improvement efforts.
Herringbone diagram: This is another name for the diagram’s appearance. The diagram’s branches resemble the bones of a herring, a type of fish.
While the names may be used interchangeably, they all refer to the same basic problem-solving and process-improvement tool.
An Ishikawa Diagram has six main branches, which are as follows:
- Personnel – This branch includes all human-related factors that may have an impact on the problem under consideration, such as training, communication, and teamwork.
- Process – This branch includes all of the steps and procedures involved in the process or activity, as well as the equipment, materials, and workflow.
- Machines – This branch includes all the physical equipment and machinery used in the process, including tools, machines, and technology.
- Materials – The raw materials and other inputs used in the process, such as supplies, ingredients, and components, are the focus of this branch.
- Environment – This branch includes all environmental factors that may affect the process, such as temperature, humidity, lighting, and noise.
- Measurement – This branch includes all metrics and measurements used to evaluate the process, such as quality standards, performance indicators, and statistical analysis.
Each of these branches is used to identify potential causes that may be contributing to the problem under investigation. For example, if a decrease in product quality is the issue, the Ishikawa Diagram can be used to identify the various factors that could be causing this problem, such as a lack of employee training, faulty equipment, or low-quality materials. The branches are used to identify as many potential causes as possible, which can then be further evaluated to determine the underlying cause of the problem.
The Ishikawa Diagram assists teams in gaining a better understanding of the problem being analysed and developing targeted solutions to address the root cause by identifying potential causes and organising them in a clear and concise manner.
How to Create an Ishikawa Diagram
Creating an Ishikawa Diagram is a simple process that begins with identifying the problem and breaking it down into its component parts. Here’s a step-by-step tutorial for making an Ishikawa Diagram:
- Step 1: Identify the problem and write it in a box at the top of the diagram.
- Step 2: To represent the main spine of the fishbone diagram, draw a horizontal arrow pointing to the problem box.
- Step 3: Draw a diagonal arrow for each of the diagram’s six main branches (People, Process, Equipment, Materials, Environment, and Measurement). Label each arrow with the name of the corresponding branch.
- Step 4: Determine the possible causes of the problem and document them on the appropriate branch. Create as many causes as you can and add them to the diagram.
- Step 5: If necessary, divide each cause into smaller sub-causes. Include these sub-causes in your diagram as well.
- Step 6: Determine the root cause of the problem by evaluating potential causes and sub-causes. The root cause is the underlying issue that is causing the problem being investigated.
- Step 7: Create and implement solutions to the root cause.
In addition to drawing an Ishikawa Diagram by hand, several software tools are available to help you create and collaborate on these diagrams. Among the most popular software tools are:
SmartDraw : This programme provides a variety of templates and tools for creating professional-looking Ishikawa Diagrams.
Lucidchart : This cloud-based software enables teams to work together in real-time to create Ishikawa Diagrams.
Creately : For creating Ishikawa Diagrams, this tool provides a variety of templates and customization options.
Creating Ishikawa Diagrams with software tools can save time and streamline the process of collaborating with team members. These tools also make it simple to share and export the diagram in a variety of formats, making it easier to include in presentations and reports.
Using Ishikawa Diagrams in Problem-Solving
Ishikawa Diagrams are a powerful problem-solving tool that can be used in root cause analysis. Teams can analyse the causes and develop solutions to address the root cause by identifying the various factors that contribute to a problem.
The process of determining the underlying cause of a problem rather than just addressing its symptoms is known as root cause analysis. This approach assists teams in developing more effective and long-term problem solutions.
To use an Ishikawa Diagram in root cause analysis, teams must first identify the problem and draw a fishbone diagram. The diagram’s six main branches (Personnel, Process, Machine, Materials, Environment, and Measurement) are used to identify potential problem causes. Teams can analyse the root cause by brainstorming and organizing these causes on the diagram.
Teams can use the “five whys” technique in addition to an Ishikawa Diagram to identify the root cause of a problem. The five whys technique is a method of drilling down into the root cause of a problem by asking “why” five times. The goal is for the team to keep asking “why” until they find the underlying root cause of the problem.
For example, if the issue is a product delivery delay, the five whys technique could be used as follows:
- Why was the product delivery delayed? – Because the shipment was sent to the wrong address.
- Why was it sent to the wrong address? – Because the shipping label was incorrect.
- Why was the label incorrect? – Because the person who prepared it didn’t check the address.
- Why didn’t they check the address? – Because they were in a rush to finish the task.
- Why were they in a rush? – Because they were given too many tasks to complete in a short amount of time.
In this example, the root cause of the product delivery delay is that the worker was assigned too many tasks to complete in a short period of time. By identifying the root cause, the team can develop solutions to the problem, such as allocating more time for tasks or more effectively delegating responsibilities.
To Summarize here is an overview of how Ishikawa Diagrams are used in root cause analysis follows:
Step 1: Brainstorm potential causes for each branch and write them on the diagram’s appropriate branch.
Step 2: Examine each possible cause to see if it is the root cause or a symptom of the problem.
Step 3: Use 5 Whys Analysis to ask “why” five times for each potential root cause identified to determine the underlying cause of the problem. Check out our 5 Whys Analysis Template to support this
Step 4: Once the root cause has been identified, develop and implement solutions to address it.
Here is an example of how a complete Ishikawa Diagram may look with potential problems identified on it.
To summarise, Ishikawa Diagrams are an effective problem-solving tool that can be combined with the five whys technique to identify the root cause of a problem. Teams can develop more effective and long-term solutions to improve their processes and operations by analysing potential causes and asking “why” to drill down into the underlying issue.
Examples of Business Problems Solved with Ishikawa Diagrams
Ishikawa Diagrams, also known as fishbone diagrams, have been used to solve a wide range of business problems. Here are some real-world examples of business problems solved with Ishikawa Diagrams:
Quality control issues in a manufacturing plant
A manufacturing plant was experiencing quality control issues with their products. The problem was identified using an Ishikawa Diagram, which helped the team to identify the potential causes of the problem. The diagram revealed that the issues were caused by a lack of training among the employees, poor machine maintenance, and inadequate raw materials. By addressing these issues, the plant was able to improve the quality of its products and reduce waste.
A call centre has a high employee turnover rate.
A call center’s ability to provide quality customer service was being hampered by high employee turnover. An Ishikawa Diagram was used to identify the problem, which assisted the team in determining the potential causes of the high turnover rate. According to the diagram, the problems were caused by low employee morale, insufficient training, and a lack of career development opportunities. The call centre was able to improve employee satisfaction and retention rates by addressing these issues.
Inventory management in a retail store is inefficient.
A retail store’s inventory management process was inefficient, resulting in excess inventory and stockouts. An Ishikawa Diagram was used to identify the problem, which assisted the team in determining the potential causes of the inefficiencies. According to the diagram, the problems were caused by inaccurate demand forecasting, insufficient inventory tracking, and poor communication among the store’s departments. The store was able to improve its inventory management process, reduce excess inventory, and prevent stockouts by addressing these issues.
The Ishikawa Diagram was used as a problem-solving tool in each of these examples to identify potential causes of the problem. The diagram enabled the teams to brainstorm and organise the various factors that could be contributing to the problem, allowing them to drill down to the root cause. The teams were able to implement more effective and long-term solutions to improve their processes and operations by addressing the root cause.
The advantages of using Ishikawa Diagrams in these scenarios include improved quality control, reduced waste, increased employee retention and satisfaction, and increased inventory management efficiency. The diagram enabled the teams to take a structured approach to problem-solving, allowing them to identify the root cause of the problem and develop more effective solutions.
Best Practice for Ishikawa Diagrams
Ishikawa Diagrams are a powerful problem-solving tool, but they must be used correctly to produce the desired results. Some best practises for using Ishikawa Diagrams in problem-solving processes are as follows:
- Clearly define the problem: Before you create an Ishikawa Diagram, you must first define the problem you are attempting to solve. This will aid your concentration and ensure that your diagram is relevant and effective.
- Involve a diverse team: Ishikawa Diagrams work best when used in a group setting. To ensure a well-rounded perspective, try to include a diverse group of people from various departments or areas of expertise.
- Brainstorm potential causes: Encourage team members to brainstorm all potential causes of the problem when creating the diagram. This will assist you in identifying all potential root causes and ensuring that your solutions are all-inclusive.
- Use clear and concise language: When labelling the branches of the diagram, use clear and concise language to ensure that everyone understands the meaning. Avoid using jargon or abbreviations that may be confusing to some team members.
- Prioritize potential causes: After identifying all potential causes, prioritise them based on their likelihood of contributing to the problem. This will allow you to concentrate your efforts on the most pressing root causes.
- Verify the root cause: Before implementing any solutions, test your hypothesis to determine the root cause of the problem. This will help you ensure that you are treating the underlying cause of the problem rather than just the symptoms.
Avoiding Common Mistakes When Using Ishikawa Diagrams
While Ishikawa Diagrams can be a useful problem-solving tool, there are some common errors that teams can make when creating and using them. Here are some errors to avoid:
- Jumping to conclusions: It is critical to avoid jumping to conclusions before identifying and evaluating all potential causes. Rushing to solutions without fully comprehending the underlying cause of the problem can result in ineffective and costly solutions.
- Excessive diagram complexity: Keep the diagram simple and focused on the problem at hand. Overcomplicating the diagram with too many branches or irrelevant information can make determining the true root cause of the problem difficult.
- Ignoring other sources of information: While Ishikawa Diagrams are a powerful tool, they should not be used as the sole source of information in problem-solving processes. Other data sources to consider include customer feedback, process data, and employee input.
Teams can effectively use Ishikawa Diagrams to identify and address the root causes of business problems by adhering to these best practises and avoiding common pitfalls.
Finally, Ishikawa Diagrams are a useful tool for solving business problems and determining the root causes of problems. Teams can effectively use Ishikawa Diagrams to find comprehensive solutions by following best practices such as clearly defining the problem, involving a diverse team, brainstorming potential causes, and prioritising root causes.
It’s critical to remember that Ishikawa diagrams should be used in conjunction with other sources of information to ensure a well-rounded approach to problem-solving. Teams can effectively leverage the power of Ishikawa diagrams in their problem-solving processes by avoiding common mistakes such as overcomplicating the diagram and jumping to conclusions.
Finally, using Ishikawa Diagrams to solve business problems can result in better processes, higher customer satisfaction, and a more efficient organisation. Teams can achieve greater success and propel their businesses forward by mastering this powerful tool.
- Ilie, G. and Ciocoiu, C.N., 2010. Application of fishbone diagram to determine the risk of an event with multiple causes . Management research and practice , 2 (1), pp.1-20.
- Radziwill, N., 2017. Creating ishikawa (fishbone) diagrams with R. Software Quality Professional , 20 (1), pp.47-48.
Daniel Croft
Daniel Croft is a seasoned continuous improvement manager with a Black Belt in Lean Six Sigma. With over 10 years of real-world application experience across diverse sectors, Daniel has a passion for optimizing processes and fostering a culture of efficiency. He's not just a practitioner but also an avid learner, constantly seeking to expand his knowledge. Outside of his professional life, Daniel has a keen Investing, statistics and knowledge-sharing, which led him to create the website learnleansigma.com, a platform dedicated to Lean Six Sigma and process improvement insights.
Free Lean Six Sigma Templates
Improve your Lean Six Sigma projects with our free templates. They're designed to make implementation and management easier, helping you achieve better results.
5S Floor Marking Best Practices
In lean manufacturing, the 5S System is a foundational tool, involving the steps: Sort, Set…
How to Measure the ROI of Continuous Improvement Initiatives
When it comes to business, knowing the value you’re getting for your money is crucial,…
8D Problem-Solving: Common Mistakes to Avoid
In today’s competitive business landscape, effective problem-solving is the cornerstone of organizational success. The 8D…
The Evolution of 8D Problem-Solving: From Basics to Excellence
In a world where efficiency and effectiveness are more than just buzzwords, the need for…
8D: Tools and Techniques
Are you grappling with recurring problems in your organization and searching for a structured way…
How to Select the Right Lean Six Sigma Projects: A Comprehensive Guide
Going on a Lean Six Sigma journey is an invigorating experience filled with opportunities for…
IMAGES
VIDEO
COMMENTS
To perform a cause-and-effect analysis, follow these steps. 1. Start with a problem statement. The problem statement is usually placed in a box or another shape at the far right of your page. Draw a horizontal line, called a "spine" or "backbone," along the center of the page pointing to your problem statement. 2.
Identify the people, information (data), and things needed to resolve the problem. Step. Description. Step 3: Select an Alternative. After you have evaluated each alternative, select the alternative that comes closest to solving the problem with the most advantages and fewest disadvantages.
1. Define the problem. Diagnose the situation so that your focus is on the problem, not just its symptoms. Helpful problem-solving techniques include using flowcharts to identify the expected steps of a process and cause-and-effect diagrams to define and analyze root causes.. The sections below help explain key problem-solving steps.
It visualizes the problem-solving process using a one-page document known as an A3 report. The A3 report provides an overview of the problem, data analysis, root causes, solutions, and results in a clear and concise manner. ... Process diagrams; The best data collection method will be determined by the problem being solved and the type of data ...
The diagram serves as a visual record of the problem-solving process, documenting the causes identified, solutions implemented, and their outcomes. This documentation enables teams to track progress and learn from previous experiences, fostering a continuous cycle of learning, improvement, and innovation.
Problem-Solving Flowcharts is a graphical representation used to break down problem or process into smaller, manageable parts, identify the root causes and outline a step-by-step solution. It helps in visually organizing information and showing the relationships between various parts of the problem. This type of flowcharts consists of different ...
The Problem-Solving Process. The process of problem-solving is a methodical approach that involves several distinct stages. Each stage plays a crucial role in navigating from the initial recognition of a problem to its final resolution. Let's explore each of these stages in detail. Step 1: Identifying the Problem. This is the foundational ...
A fishbone diagram is a problem-solving approach that uses a fish-shaped diagram to model possible root causes of problems and troubleshoot possible solutions. It is also called an Ishikawa diagram, after its creator, Kaoru Ishikawa, as well as a herringbone diagram or cause-and-effect diagram. Fishbone diagrams are often used in root cause ...
Overview of the Problem-Solving Mental Process. Problem-solving is a mental process that involves discovering, analyzing, and solving problems. The ultimate goal of problem-solving is to overcome obstacles and find a solution that best resolves the issue. The best strategy for solving a problem depends largely on the unique situation.
The problem-solving process typically includes the following steps: Identify the issue: Recognize the problem that needs to be solved. Analyze the situation: Examine the issue in depth, gather all relevant information, and consider any limitations or constraints that may be present. Generate potential solutions: Brainstorm a list of possible ...
A fishbone diagram (also known as an Ishikawa fishbone diagram) is an effective problem-solving tool. Instead of focusing on a quick fix, creating a fishbone diagram helps to identify the root cause of a problem and find a long-term solution. As a type of cause and effect diagram, the "fishbone" name comes from the diagram's resemblance ...
Problem solving diagrams. Mapping your way out of a problem is the simplest way to see where you are, and where you need to end up. Not only do visual problem maps let you plot the most efficient route from Point A (dysfunctional situation) to Point B (flawless process), problem mapping diagrams make it easier to see: The root cause of a dilemma.
Documentation: How How Diagrams serve as valuable documentation, allowing you to refer back to your problem-solving process and learn from past experiences. ## Step-by-Step Guide: Creating a How ...
Flow charts are simple diagrams that map out a process, so that you can easily communicate it to other people. You can also use them to define and analyze a process, build a step-by-step picture of it, and then standardize or improve it. To draw a flow chart, identify the tasks and decisions that you make during a process, and write them down ...
Here's how to create a fishbone diagram: In MindManager, go to the File menu, select New and then click into the Problem-Solving folder. There you'll find three templates for Fishbones, the manufacturing, service, and product analyses. Select a template. Enter the issue in the central topic. Next, either brainstorm potential causes and add ...
Draw the Fishbone Diagram, with the main cause at the head of the fish and the major categories as the bones. Image Source. 3. The benefits of using Fishbone Diagrams: Fishbone Diagrams offer several benefits, including: Better problem-solving and decision-making by identifying and analyzing the root causes of a problem or effect.
The eight disciplines (8D) model is a problem solving approach typically employed by quality engineers or other professionals, and is most commonly used by the automotive industry but has also been successfully applied in healthcare, retail, finance, government, and manufacturing. The purpose of the 8D methodology is to identify, correct, and ...
The Problem Solving Stages Diagram is a concept diagram design. The template shows a linear process flow diagram containing up to ten individual process cycles. Although there are various problem-solving techniques depending on the complexity of issue or corporate structure. Because some problems are small and can be resolved quickly while others are complex and need […]
The Fishbone Diagram, also known by various other names such as Ishikawa Diagram, Cause and Effect Diagram or 6Ms, is a visual tool used in problem-solving and root cause analysis.Originating from the quality management sector, it is used as a systematic approach to identify, explore, and display possible causes of a specific problem.
1. Cause and effect diagrams are a powerful problem-solving technique that can help you identify the root cause of any issue, from small everyday annoyances to complex organizational problems. By following a systematic process of gathering data, analyzing it and then developing solutions, cause and effect diagrams can be used to effectively ...
The 7 Step Problem Solving Process Diagram for PowerPoint is a semi-circular template design. It illustrates an iterative process cycle including chevron arrows. Each of these arrow shapes outlines a sequence of the problem-solving method in seven stages. The stages include problem definition, disaggregation, prioritizing, work plan, analysis ...
Here's a step-by-step tutorial for making an Ishikawa Diagram: Step 1: Identify the problem and write it in a box at the top of the diagram. Step 2: To represent the main spine of the fishbone diagram, draw a horizontal arrow pointing to the problem box.
Also called: cause-and-effect diagram, Ishikawa diagram. This cause analysis tool is considered one of the seven basic quality tools. The fishbone diagram identifies many possible causes for an effect or problem. It can be used to structure a brainstorming session. It immediately sorts ideas into useful categories.