

A Tasty Reading Project

22 comments

Erin those projects look amazing! I am so impressed! Be sure to tell you students I said they look like works of art! What an awesome way to show what you know! I am glad you found my blog at Teachingisagift. I love to share all my zany ideas with anyone who is willing to read them! Make sure you come back and link up with the Blog by Province Linky Party at http://teachingisagift.blogspot.ca/p/blog-by-province.html. While you are there be sure to download your Ontario Blogger button (just right click on the image and save image as...) Then you can upload it to your sidebar and link back to the original page. If you need any help let me know. There are lots of great canadian bloggers out there just waiting to meet you! Sidney Teachingisagift

Thank you for the kind words and the warm welcome, Sidney! We had lots of fun with these! I think I have the Ontario Blogger button set up correctly now! :) Erin

Wow! These projects look amazing! They are really making me hungry just looking at them! I am so happy that your kiddos had fun with them and that you were pleased with the results. Thanks so much for the bloggy shout out! :)
Thank YOU for the great product! :) Erin

I found you from The Peanut Gallery blog today. What a wonderful project! I'm a new follower. Hunter's Tales from Teaching
Thank you so much! :) Erin

These book reports are awesome - I will have to go and check out that resource. I can't believe the amount of effort and creativity that went into those. What grade do you teach? It's great meeting other Ontario bloggers! Looking From Third to Fourth
I couldn't believe the final products either! I knew that a couple of them would go all-out, because that's what they always do, but this... I had no idea!! I teach grade five - my FAVOURITE grade ever!

The children's projects are fabulous. I have to check out the product on TpT. I have been wanting to spice up summer reading for this year. I wonder if this would do it. Thanks for Sharing, Stacy @ http://new-in-room-202.blogspot.com
Thanks, Stacy! It was great fun! :)
Wow!! I teach math, but I have to say I enjoyed looking at these projects. My wheels are spinning right now trying to turn them into math projects.
Thank you, Brooke! It was fun to see what the kids came up with! Let me know if you come up with a way to use this for math... I'd be interested to hear how it goes! ~Erin
nice projects
Great project! I'm always looking for new ways to present book reports. Did the students do this on their own, with parents, or at school? Did they have to purchase their own materials?
Hi there, CCTeach! The students created these projects at home with any materials they chose. Some were as simple as paper inside of a pizza box. I'd recommend checking out the resource I mention at the beginning of the post - It includes everything you need to implement this in your classroom. :) Thanks for stopping by! Erin
hello! i wanted to recreate the cake book report, i am just LOVING the idea! can you please tell my measurements of the purple cake so i can buy it on amazon?? thanks!
Hi Farhiya, I have no idea what the measurements are. These are projects that my students completed six years ago, and they purchased the supplies themselves. Best of luck locating what you need! Erin
hey do you have a rubric so i can recreate the cake
Hi there! Thanks for stopping by! If you take another look at the post, you will see that this isn't my resource. There is a link at the top of the page to the listing on Teachers Pay Teachers. Best, Erin
Wonderful. Isimply love the idea.Beautiful way to inspire students. I WILL DO IT WITH MY STUDENTS IN GRADE 9. CHEERS Barbara
were is the instructions on how to make this?
Hi there! This is a resource for sale on Teachers Pay Teachers. You can find it by following the links in the post. Best, Erin
Connect with me!! I love reading your comments and will respond as soon as I can!
Note: Only a member of this blog may post a comment.

Elementary Resources

Shop More Resources

Popular Posts

Find More Here
- Character Education & Classroom Management
- Classroom Organization & Environment
- Guided Math
- Holidays and Special Days
- Teacher Organization
- Teaching Strategies
- Technology In The Classroom
- Wellness and Self-Care
Footer Social Icons
© 2024 Mrs. Beattie's Classroom . Felicity Template designed by Georgia Lou Studios . All rights reserved. | Disclosure and Privacy Policies
How to make a book cake?
How to make a book cake.
Creating a book-shaped cake can be a fun and unique way to celebrate a special occasion. Whether you’re an avid reader or simply want to impress your friends and family with a creative dessert, making a book cake is easier than you might think. With the right tools and techniques, you can create a stunning cake that resembles a real book. Here’s how to make a book cake that will wow your guests:
To start, you’ll need to gather your ingredients and supplies. For the cake itself, you can use your favorite recipe, whether it’s chocolate, vanilla, or another flavor. You’ll also need frosting, fondant, and food coloring to create the book’s cover and pages. Additionally, you’ll need a rectangular cake pan, a ruler, a sharp knife, and a cake board to assemble and display your cake.
Once you have everything you need, begin by baking your cake in a rectangular pan. After the cake has cooled, use a ruler to measure and mark the dimensions of the book’s pages on the top of the cake. Then, carefully use a sharp knife to cut along the markings, creating the rectangular shape of the book. You can also trim the edges to round them slightly, giving the cake a more authentic book-like appearance.
Next, it’s time to cover the cake with frosting and fondant. Use frosting to create a smooth base layer on the cake, and then roll out fondant to cover the entire cake, just like covering a real book with its cover. Use food coloring to add details such as the book’s title and spine, and use a ruler to create imprints that resemble the pages of a book.
Finally, add any additional decorations or details to complete the look of your book cake. You can use edible markers to write a personalized message or add intricate designs to the cover. Once you’re satisfied with the appearance of your cake, carefully transfer it to a cake board for easy serving and display.
Frequently Asked Questions
1. can i use any type of cake recipe to make a book cake.
Yes, you can use any cake recipe that you prefer to make a book cake. Whether it’s chocolate, vanilla, or another flavor, the key is to bake the cake in a rectangular pan to create the shape of the book.
2. Do I need to use fondant to cover the cake?
While fondant can give the cake a smooth and polished finish, you can also use frosting to cover the cake and add details. Fondant is a popular choice for creating intricate designs and details on the book cake.
3. Can I personalize the book cake with a specific title or design?
Absolutely! You can use edible markers, food coloring, or even piping techniques to add personalized details to the cover of the book cake. This is a great way to make the cake even more special for the occasion.
Chefs Resource Related Posts:
- How are pumpkin seeds shelled?
- Are Rosarita refried beans gluten-free?
- How do you fix a broken pumpkin?
- Can cats eat baked beans?
- How fast does pumpkin work for dog diarrhea?
- Can cats have refried beans?

About Julie Howell
Julie has over 20 years experience as a writer and over 30 as a passionate home cook; this doesn't include her years at home with her mother, where she thinks she spent more time in the kitchen than out of it. She loves scouring the internet for delicious, simple, heartwarming recipes that make her look like a MasterChef winner. Her other culinary mission in life is to convince her family and friends that vegetarian dishes are much more than a basic salad. She lives with her husband, Dave, and their two sons in Alabama.
Leave a Comment Cancel reply

Mary Catherine blog
Tips for a better life
How To Make A Book Cake Tutorial
Table of Contents
Making a book cake is a great way to show your love of reading, or to celebrate a special occasion such as a birthday or graduation. This tutorial will show you how to make a simple, yet stunning, book cake using just a few supplies.
You will need:
-1 cake mix (plus ingredients called for on the box) -1 9×13 inch pan -1 large book -1 serrated knife -1 offset spatula -1 piping bag -1 star tip
Bake the cake according to the package directions. Once it is out of the oven and cooled, use the serrated knife to level off the top of the cake.
Place the book on top of the cake, open to the page you would like to use as your design. Use the offset spatula to spread frosting around the outside edge of the book, being careful not to get any on the pages.
Now it’s time to get creative! Use the piping bag and star tip to pipe designs, quotes, or anything else you can think of around the edge of the book.
Allow the frosting to set for a few minutes, then carefully remove the book. Your beautiful book cake is now ready to enjoy!
Gathering the Necessary Materials for a Book Cake
When it comes to creating a cake that looks like a book, there are a few key things you’ll need to make sure you have on hand. By gathering all of the necessary materials before you begin, you can avoid any potential roadblocks and end up with a cake that looks just like the real thing!
Here’s what you’ll need to make a book cake:
-A cake pan in the size and shape of a book -Cake mix, frosting, and any other ingredients called for in your recipe -A sharp knife -A ruler or measuring tape -A piping bag or zip-top bag -A small offset spatula -Decorative icing, such as piping gel or fondant (optional)
Step 1: Preparing the Cake Pan
The first step in making a book cake is to prepare your cake pan. If you’re using a store-bought cake mix, you’ll want to make sure you have a cake pan that is the same size and shape as the one called for on the box. If you’re making a homemade cake, you can use any size or shape cake pan you like.
Once you have your cake pan, lightly grease it with cooking spray or butter. Then, line the bottom of the pan with parchment paper. This will help the cake release easily from the pan once it’s baked.
Step 2: Mixing and Baking the Cake
Now it’s time to mix and bake the cake! If you’re using a cake mix, simply follow the instructions on the box. If you’re making a homemade cake, mix the ingredients together according to your recipe.
Once the cake batter is ready, pour it into the prepared cake pan and bake it according to the recipe or cake mix instructions.
Step 3: Letting the Cake Cool
Once the cake is baked, let it cool completely before moving on to the next step. This is important, as a warm cake is much more likely to break when you’re trying to cut it.
Step 4: Trimming the Cake
Once the cake is cool, it’s time to trim it. Using a sharp knife, trim the cake so that it is level on top. Then, cut the cake in half horizontally.
Step 5: Adding the Frosting
Now it’s time to add the frosting! If you’re using a store-bought frosting, simply spread it on top of the cake using an offset spatula. If you’re making a homemade frosting, you’ll want to pipe it on using a piping bag or zip-top bag.
Start by adding a layer of frosting to the top of one half of the cake. Then, add the other half of the cake on top and frost the top and sides of the cake.
Step 6: Decorating the Cake (Optional)
If you want to decorate the cake to look like a real book, there are a few things you can do. First, you can pipe lines of piping gel or fondant on the top and sides of the cake to create the look of pages.
You can also use food coloring to tint the frosting or fondant and create different colors for the cover and pages of the book.
Finally, you can add any other decorations you like, such as fondant flowers or leaves.
And that’s it! Your book cake is now complete.
Preparing the Cake Batter
Assuming you have all the ingredients and equipment needed, let’s get started on this book cake tutorial!
1. Preheat your oven to 350 degrees F. Line a baking sheet with parchment paper and set it aside.
2. In a large bowl, whisk together the dry ingredients: all-purpose flour, baking powder, salt, and sugar.
3. In a separate bowl, whisk together the wet ingredients: eggs, milk, and vanilla extract.
4. Add the wet ingredients to the dry ingredients and mix until everything is well combined.
5. Pour the batter into the prepared baking sheet and spread it out evenly.
6. Bake the cake for 20-25 minutes, or until a toothpick inserted into the center comes out clean.
7. Allow the cake to cool completely before moving on to the next step.
Now that the cake is done, it’s time to start on the frosting!
1. In a large bowl, cream together the butter and sugar until light and fluffy.
2. Add the vanilla extract and mix until well combined.
3. Gradually add the confectioners’ sugar, mixing until the frosting is thick and creamy.
4. Spread the frosting over the cooled cake, using as much or as little as you like.
5. Decorate the cake with sprinkles, if desired.
And that’s it! Your book cake is now ready to enjoy.
Baking and Cooling the Cake
Making a book cake is a fun and unique way to show someone how much you care. Whether you’re making it for a birthday, anniversary, or just because, this cake is sure to impress. This tutorial will show you how to make a delicious and impressive book cake step by step.
Start by baking two 9×13 cakes. You can use any flavor you like, but we recommend a vanilla or chocolate cake. Once the cakes are baked, allow them to cool completely.
Next, you’ll need to cut one of the cakes in half horizontally. This will be the cover of the book. Set the other cake aside for now.
Now it’s time to start frosting. Spread a thin layer of frosting on the top and sides of the half cake. This will be the “glue” that will hold the two halves of the book together.
Place the other cake half on top of the frosted cake, and press down gently to adhere. Spread a thin layer of frosting on the top and sides of the cake.
Now it’s time to decorate! You can use any type of frosting and decorations you like. We went with a simple buttercream frosting and some edible pearls.
Start by piping a border around the edge of the cake. Then, using a piping bag or a spoon, add some pearls or other decorations to the center of the cake.
Your book cake is now complete! Serve and enjoy!
Carving the Cake into a Book Shape
Welcome to my blog post on how to make a book cake tutorial! This cake is perfect for any book lover in your life and is surprisingly easy to make!
Start by baking a cake of your choice in a rectangular pan. Once the cake is cooled, use a sharp knife to cut off the top and bottom crusts. Then, cut the cake horizontally into three equal sections.
Next, take the middle section of the cake and cut it in half lengthwise. These will be the pages of your book. Place the two halves side by side on a cutting board and use a knife to trim the edges so that they are flush with each other.
Now it’s time to start carving the cake into a book shape. Begin by rounding off the top and bottom corners of the cake. Then, use a knife to score a line down the center of the cake, being careful not to cut all the way through.
Next, use a sawing motion with your knife to cut along the scored line, angling the knife in towards the center of the cake as you go. Once you’ve cut through the cake, gently separate the two halves.
Now it’s time to add some details to your book cake. Use a knife to score lines into the top and bottom of the cake to create a realistic book spine. Then, use a piping bag fitted with a small round tip to pipe lines of icing across the pages of the book.
Finally, use a knife to score lines into the top and bottom of the cake to create a realistic book spine. Then, use a piping bag fitted with a small round tip to pipe lines of icing across the pages of the book.
Your book cake is now complete! Serve it at your next book club meeting or birthday party and enjoy!
Frosting and Decorating the Book Cake
Making a book cake is a fun and unique way to show your love of reading, or to celebrate a special occasion like a birthday or graduation. This tutorial will show you how to make a simple book cake, frost it, and decorate it with fondant accents.
-1 cake mix ( plus ingredients called for on the box) -1 tub of white frosting -1 package of black fondant -1 package of white fondant -1 package of red fondant -1 package of green fondant -1 package of blue fondant -1 package of yellow fondant -1 tube of black decorating gel -1 tube of white decorating gel
To make the book cake:
1. Preheat your oven to 350 degrees Fahrenheit.
2. Grease and flour two 8-inch cake pans.
3. Mix the cake according to the package directions.
4. Pour the cake batter evenly into the prepared pans.
5. Bake the cake for 28-30 minutes, or until a toothpick inserted into the center comes out clean.
6. Allow the cake to cool for a few minutes before removing it from the pans to cool completely on wire racks.
7. Once the cake is cooled, level off the tops so that they are nice and flat.
8. Place one cake layer on a plate or cake stand.
9. Spread a layer of frosting over the top.
10. Place the second cake layer on top.
11. Spread a thin layer of frosting over the top and sides of the cake. This is called a crumb coat and it will help to keep the cake crumbs from showing in your final frosting layer.
12. Place the cake in the fridge for about 30 minutes to allow the crumb coat to set.
13. Once the crumb coat is set, frost the cake with a thick layer of frosting. Use a spatula or knife to create a smooth, even surface.
14. Place the black fondant on a cutting board.
15. Use a rolling pin to roll it out into a thin sheet.
16. Cut the fondant into strips that are about 1/2-inch wide.
17. Place the strips around the edge of the cake, pressing them gently into the frosting.
18. Cut out small shapes from the colored fondants to decorate the front of the cake. We used flowers, but you can get creative and use whatever shapes you like!
19. Use the decorating gel to write a message on the front of the cake.
Your book cake is now ready to enjoy!
Adding Details and Embellishments
A book cake is a great way to show off your baking skills and impress your guests! This tutorial will show you how to make a simple book cake, and then how to add some amazing details and embellishments to really make it stand out.
The first step is to bake your cake. You can use any flavor or recipe you like, but we recommend a classic vanilla or chocolate cake. Once your cake is baked and cooled, you will need to level it off so that it is nice and flat. This will make it easier to decorate later.
Next, it’s time to start decorating! Begin by covering your cake with a thin layer of frosting. This will act as a “crumb coat” and will help to seal in any loose crumbs. Once your crumb coat is applied, you can start working on your design.
For a simple book cake, you will need to create a cover and some pages. For the cover, you can use fondant or gumpaste that has been rolled out and cut to size. Be sure to smooth out any wrinkles or creases. For the pages, you can either use more fondant or gumpaste, or you can cut strips of cake that are the same thickness as your cover.
Once you have your cover and pages, it’s time to start embellishing! You can use anything you like to decorate your book cake – from edible markers and food coloring to fondant cutouts and candy. Get creative and have fun!
Here are a few tips to keep in mind when decorating your book cake:
– Be sure to let your cake cool completely before you start decorating.
– If you are using fondant or gumpaste, be sure to knead it well and add a bit of shortening if it is too stiff.
– Use a sharp knife or exacto knife to cut clean lines when cutting out your fondant or gumpaste shapes.
– If you are using candy or other edible decorations, be sure to use a food-safe adhesive to keep them in place.
With these tips in mind, you are ready to create a beautiful and unique book cake!
Presenting and Serving the Book Cake
A book cake is a cake that is designed to look like an open book. They are often decorated with literary themes, and can be made to look like almost any book. Book cakes can be made using any type of cake, but are commonly made with pound cake or sponge cake.
If you’re looking to make your own book cake, there are a few things you’ll need to keep in mind. First, you’ll need to choose a cake recipe that you like. There are many different recipes out there, so take some time to find one that you think will taste good. Once you have your cake recipe, you’ll need to bake the cake.
When the cake is baked and cooled, you’ll need to level it off so that it’s nice and flat. You can do this by using a serrated knife to cut off the top of the cake. Once the cake is leveled, you’ll need to cut it into three equal parts.
Next, you’ll need to Stack the three pieces of cake on top of each other and then cut them into strips. These strips will be used to create the pages of the book cake. Once the strips are cut, you’ll need to stack them on top of each other and then cut them into squares.
Now it’s time to start decorating your book cake. You can use any type of icing or frosting that you like. If you want to get really creative, you can even use different colors of icing to create a marbled effect.
Once you’ve iced the cake, you’ll need to decorate the cover. You can use fondant or gum paste to create a realistic book cover. If you don’t want to use fondant, you can simply use a piece of cake that has been cut into a rectangular shape.
Now it’s time to put the finishing touches on your book cake. You can use candy or other small decorations to create the pages of the book. You can also use small plastic or metal book charms to decorate the cover.
Once your book cake is decorated, you’ll need to refrigerate it until you’re ready to serve it. When you’re ready to serve the cake, you can simply slice it and serve it like you would any other cake.
Tips and Tricks for a Professional-Looking Book Cake
Making a book cake is easier than you might think! With a few simple tips and tricks, you can create a stunning and professional-looking cake that is sure to impress.
Here are some tips to help you get started:
1. Choose the right cake recipe. A dense and moist cake is best for this type of cake. A pound cake or a Madeira cake are both good choices.
2. Make sure your cake is completely cooled before you begin decorating.
3. Use a sharp knife to level off the top of the cake so that it is nice and flat.
4. Cut the cake into three even layers.
5. Spread a thin layer of buttercream or jam between each layer.
6. Cut the cake into the shape of a book. You can use a template or just freehand it.
7. Cover the cake with a thin layer of buttercream or fondant. This will help to smooth out any imperfections and give the cake a nice finish.
8. Decorate the cake as desired. You can use fondant to create a book cover, or simply dust the cake with powdered sugar or cocoa powder.
With these tips in mind, you are sure to create a beautiful and impressive book cake that will be the talk of any party or event!

Mary Catherine White is a 29-year-old nutritionist who specializes in helping people eat healthier and feel better. She has a passion for helping others, and she firmly believes that good nutrition is the key to a happy, healthy life. Mary Catherine has a degree in nutrition from the University of California, Berkeley, and she has been working as a nutritionist for the past six years. She has experience helping people with a variety of nutritional needs, including weight loss, sports nutrition, and digestive health. In her free time, Mary Catherine enjoys spending time with her friends and family, cooking, and practicing yoga. She is a firm believer in the importance of a healthy lifestyle, and she hopes to help as many people as possible achieve their health and fitness goals.
View all posts
Related Posts
How to maintain your kitchen knives for longevity, nutritious hot dogs: balancing taste and wellness, privacy overview.
- 1. Book Report Projects
- 2. Projects For Novels & Picture Books
- 3. Seasons & Holidays
- 4. Powerpoint
- 6. Sticker Charts
Birthday Cake Book Report Project
Assembled Project Size: Width = 9 inches Height = 17 inches
Your students will have a great time planning a birthday party for the main characters of their books!
Students choose the location, guests, food, gifts, and the games played at the birthday party.
You can read more detailed information about this resource by clicking ==> HERE .
A Note About Your Purchase: You will be emailed a download link for the resource(s) that you purchase so that you can download, save, print, and use the resource(s) today!
A very DETAILED description about this resource set is provided below.
Birthday cake book report project templates, what's included.
This unique book report project will provide you with all of the teaching resources that your students will need to plan a birthday party for the main characters of their books.
Based on what your students have learned about their main characters, they have to choose a location, guests, food, gifts, and games that they will play at the birthday party.
Your students will find these unusual writing responses delicious and they will enjoy using their imaginations to plan a fun party for their main characters. When my students have finished their projects, I bring in a large birthday cake for the whole class and we all sing happy birthday to our main characters and enjoy a slice of birthday cake.
These finished birthday cake book report projects will make an eye catching bulletin board display inside your classroom.
This uniquely shaped book report project contains five templates that assemble into a tall birthday cake about the main character of the story. The finished project measures 9 x 17 inches .
Everything that you need to complete these birthday cake book report projects is included in this set of teaching resources. All that you will need is scissors , glue , tape , and coloring pencils .
There are 14 printable worksheets and template pages in this set of teaching resources, as well as a 5 page color bulletin board display banner .
Your students will have fun creating a project based on the main characters of their books by planning a birthday party for them, rather than writing typically boring character descriptions .
In addition, this set of reading resources includes 8 birthday balloons and a large Happy Birthday Cake that can be used as accent pieces for your classroom bulletin board display.
Birthday Cake Book Report Project Videos:
Watch these short videos to learn more about this fun book report project!
Note : Due to spelling differences in English (Examples: color/colour and favorite/favourite), there are two separate sets of worksheets and templates included in this set of teaching resources.
You can select the version ( U.S. or U.K. spelling rules) that contains the spelling that is used in the country where you live.
The worksheets and templates that are shown on this page use U.S. spelling rules .
Assembling Directions:
This set of teaching resources includes assembling directions on how to prepare and assemble this birthday cake book report project. Below is an example of the assembling directions worksheet.
Grading Rubric:
A book report grading rubric is included in this set of teaching resources.
The following areas are assessed on this grading rubric: content , word choice , organization , proofreading , and final presentation .
I believe that it is important for students to evaluate their own work , so my book report rubric contains an assessment section for both students and teachers.
When students evaluate their book report projects, they color in the faces on their grading rubric worksheets. When a teacher evaluates the projects, the teacher circles the small numbers inside each box on the printable worksheets.
Below is an example of my birthday cake book report grading rubric.
First Draft Worksheets:
I believe that the writing process is important and that teachers should use process writing whenever possible.
For this reason, my students never begin their book report projects by writing on their final draft birthday cake templates, instead they write on first draft worksheets.
Next, my students edit and revise their written work on their own, with a partner, or in individual writing conferences with me.
This birthday cake book report project is designed as four tiers of a cake . The tiers of the cake in this book report include:
- Top Tier: Drawing of the main character
- 2nd Tier: Title, author, and genre
- 3rd Tier: Draw a picture of the party and write about the main character, setting, plot, and conclusion
- Bottom Tier and Plate: Party location, guest list, food, gifts, games, and student's name and date
For the bottom tier of the birthday cake, students write about the location of the party and the guests, food, gifts, and games.
Students write about the main character, setting, plot, and conclusion in the second tier of the birthday cake. These 4 writing topics are assembled together to form a flip book that is stapled to the second tier of the cake.
Information about the title , author , and genre of the book is written in the third tier of the birthday cake. Students draw a picture in the top tier of the birthday cake and write their names and date on the plate.
This set of teaching resources contains two printable worksheets for students to write their first drafts on.
On my first draft worksheets, I have designed the writing line spaces to match the spaces allotted on the final draft birthday cake book report templates.
Black and White Birthday Cake Templates:
This book report project contains 4 templates that are assembled together to form the shape of a 4 tier birthday cake.
Below : Birthday Cake Black and White Templates 4 printable worksheets that are cut out and then glued together to form the shape of a birthday cake.
Above : Students cut out these 4 squares and staple them on the second tier of the birthday cake to create a flip book in that area.
Color Birthday Cake Templates:
When I am first introducing my students to a new book report project, I believe that it is important for them to have a visual example of what the completed project looks like. I always complete an example of this birthday cake book report project before I introduce this assignment to my students.
Before my students begin writing their first drafts , I show them my finished birthday cake project. This visual example immediately grabs my students' attention and they are excited to start working on this project from the very beginning. I have found that my students are engaged and use their best effort as they go through the steps of the writing process and complete this fun book report project.
My students also enjoy hearing about the book that I chose to do my book report project on. This is also a wonderful opportunity to share a book that I would like to encourage my students to read.
To save you time in coloring your example that you show to your students, I have included color birthday cake templates in this set of teaching resources. I display my finished birthday cake book report at the front of my classroom so that students can refer to it as they are completing their own projects.
Below : Birthday Cake Color Templates 4 printable worksheets that are cut out and then glued together to form the shape of a 4 tier birthday cake.
Free 5 Page Bulletin Board Display Banner:
I know that it takes teachers a lot of time to design and assemble their classroom bulletin board displays.
Many teachers spend their valuable time cutting out large display letters or making a banner at home on their own computers.
In order to help save you time in assembling a bulletin board display featuring your students' birthday cake book report projects, I have designed a 5 page banner that is included for free in this set of teaching resources.
If you have access to a laminating machine, I recommend that you laminate your banner so that it will be more durable and you can use it again in the future.
Below : Birthday Cake Book Report Banner 5 printable worksheets that are glued together to form a bulletin board display banner.
Free Bulletin Board Display Accent Pieces:
EXTRA FREE TEACHING RESOURCES #1: For each of the book report sets that are available on Unique Teaching Resources , I try to design some extra bulletin board accent pieces that will help you to decorate your classroom bulletin board display that features your students' book report projects.
This set of book report lesson plans includes a large birthday cake that says, "Happy Birthday to Our Main Characters!"
EXTRA FREE TEACHING RESOURCES #2: I have designed 8 birthday balloons for you to add as accent pieces on your bulletin board display. Tie a piece of string around the bottom of the balloons to make it appear as if the balloons are floating in the air.
I hope these free accent pieces help save you time in decorating your birthday cake bulletin board display.
You will be able to design a colorful and dynamic classroom bulletin board display using your students' finished birthday cake book report projects.
These birthday cake graphic organizers are a unique and fun way to get your students excited about completing a writing assignment about the books that they have read.
The writing responses that are required of your students will make them think and write about the main characters of their books in a challenging and engaging way.
In addition, this book report set includes birthday themed accent pieces to help you in decorating your bulletin board display.
I hope that your students have fun and are engaged in learning as they plan a birthday party for the main characters of the books that they have read.
Purchase this book report project below:
Go to Top of Page
25+ Book Report Projects:
==> Value Pack: Click Here <==
27 Book Report Projects
14 Free Projects
2. Most Popular Click on the graphics below to view each book report project.
3. character related click on the graphics below to view each book report project., 4. food templates click on the graphics below to view each book report project., 5. animals click on the graphics below to view each book report project., 6. nature click on the graphics below to view each book report project., 7. technology click on the graphics below to view each book report project., 8. buildings click on the graphics below to view each book report project., 9. transportation click on the graphics below to view each book report project., 10. other categories click on the graphics below to view each book report project., thank you for visiting this sunflower book report projects page..
Home › Book Report Projects › Birthday Cake Book Report Projects
Table of Contents
Click on the navigation bar above , or on the orange links below , to view the pages and resources on this website.
1. Reading
- Book Report Projects - Make Reading Fun With These Unique Templates!
- Projects For Favorite Books - EXTRA LARGE Group & Student Projects For Novels and Read Aloud Books
- Value Pack - 27 Book Report Projects
- Free Sight Word Flashcards - Fry - Dolch
- Newbery and Caldecott Book Lists
- Reading Overview - Book Report Tips
2. Writing
- Fun Creative Writing Templates
- Poetry Templates
- Printable Worksheets
- Writing Prompts For Jan - Dec
- Writing Overview
3. Other Subjects & Resources
- Powerpoint Lessons
- Sticker Charts
- Award Certificates
- Grammar
4. Resources For Months, Seasons & Holidays
- Back To School
- Peace Day (Sept. 21)
- October & Halloween
- November, Fall, & Thanksgiving
- December, January, & Winter
- February & Valentine's Day
- March & St. Patrick's Day
- April, May, & Spring
- Earth Day (April 22)
- Mother's Day - Father's Day
- June, July, & End of School Year
5. Monthly Creative Writing Prompts
- January - February - March
- April - May - June
- July - August - September
- October - November - December
- General Topics
6. FREE Downloads For Teachers
- List of FREE Teaching Resources
- FREE Printable Classroom Calendars
- FREE Bulletin Board Display Banners
- FREE Printables of Favorite Quotes
- FREE Sight Word Flashcards
- Bulletin Board Display Ideas
7. About This Site
- Contact Heidi - About Me
- Teacher Testimonials
- Frequently Asked Questions
- Copyright Policy - Privacy Policy
- FTC Disclosure - Disclaimer
Engage Your Students in Fun Reading Activities This Year More Than 25 Creative Book Report Projects to Choose From!
- VIEW ALL BOOK REPORT PROJECTS
- Cheeseburger - Wanted Poster
- Rocket - Monopoly Gameboard
- Dive Into Reading Fish - Sandwich
- Castle - Main Character Body
Extra Large Group Projects For Favorite Novels and Read Aloud Books
- VIEW ALL BOOK TITLES
- Charlie and the Chocolate Factory by Roald Dahl
- The Enormous Crocodile by Roald Dahl
- The Giving Tree by Shel Silverstein
- How the Grinch Stole Christmas by Dr. Seuss
- Shiloh by Phyllis Reynolds Naylor
Let's Stay Connected!
1. our facebook teaching community (129,000+ teachers), 2. our pinterest boards (40+ boards and 14,000+ followers).
Thank you for visiting my website.
Please be sure to check out the other pages on Unique Teaching Resources for a large variety of fun lesson plans that will engage your students in learning and save you valuable time.
Heidi McDonald
Creator and Site Manager
Unique Teaching Resources
Copyright Policy
Privacy Policy
FTC Disclosure
Copyright © Unique Teaching Resources 2009 - 2018
- Grades 6-12
- School Leaders
FREE Book Bracket Template. For March and Beyond!
42 Creative Book Report Ideas for Students
Inspire your students to share their love of books.
Responding to what you read is an important literacy skill. Reading about other people’s experiences and perspectives helps kids learn about the world. And although students don’t need to dive deeply into every single book they read, occasionally digging into characters, settings, and themes can help them learn to look beyond the prose. Here are 42 creative book report ideas designed to make reading more meaningful.
1. Concrete Found Poem

This clever activity is basically a shape poem made up of words, phrases, and whole sentences found in the books students read. The words come together to create an image that represents something from the story.
2. Graphic Novel
Have students rewrite the book they are reading, or a chapter of their book, as a graphic novel. Set parameters for the assignment such as including six scenes from the story, three characters, details about the setting, etc. And, of course, include detailed illustrations to accompany the story.
3. Book Snaps

Book Snaps are a way for students to visually show how they are reacting to, processing, and/or connecting with a text. First, students snap a picture of a page in the book they are reading. Then, they add comments, images, highlights, and more.
4. Diary Entry
Have your students place themselves in the shoes of one of the characters from their book and write a first-person diary entry of a critical moment from the story. Ask them to choose a moment in the story where the character has plenty of interaction and emotion to share in a diary entry.
5. Character To-Do List

This fun activity is an off-the-beaten-path way to dive deep into character analysis. Get inside the head of the main character in a book and write a to-do list that they might write. Use actual information from the text, but also make inferences into what that character may wish to accomplish.
6. Mint Tin Book Report

There are so many super-creative, open-ended projects you can use mint tins for. This teacher blogger describes the process of creating book reports using them. There’s even a free template for cards that fit inside.
7. Fictional Yearbook Entries
Ask your students to create a yearbook based on the characters and setting in the book. What do they look like? Cut out magazine pictures to give a good visual image for their school picture. What kind of superlative might they get? Best looking? Class clown? What clubs would they be in or lead? Did they win any awards? It should be obvious from their small yearbooks whether your students dug deep into the characters in their books. They may also learn that who we are as individuals is reflected in what we choose to do with our lives.
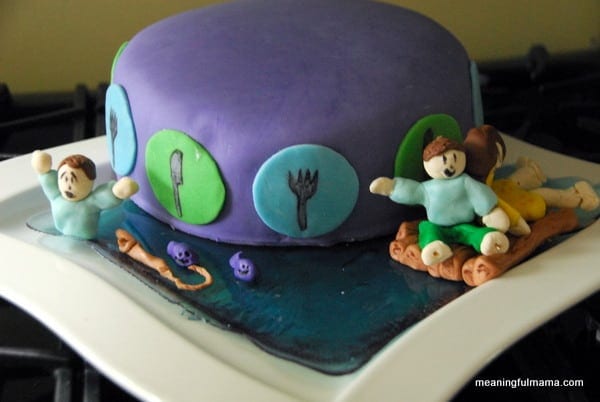
8. Book Report Cake

This project would be perfect for a book tasting in your classroom! Each student presents their book report in the shape of food. See the sandwich and pizza options above and check out this blog for more delicious ideas.
9. Current Events Comparison
Have students locate three to five current events articles a character in their book might be interested in. After they’ve found the articles, have them explain why the character would find them interesting and how they relate to the book. Learning about how current events affect time, place, and people is critical to helping develop opinions about what we read and experience in life.
10. Sandwich Book Report

Yum! You’ll notice a lot of our creative book report ideas revolve around food. In this oldie but goodie, each layer of this book report sandwich covers a different element of the book—characters, setting, conflict, etc. A fun adaptation of this project is the book report cheeseburger.
11. Book Alphabet
Choose 15 to 20 alphabet books to help give your students examples of how they work around themes. Then ask your students to create their own Book Alphabet based on the book they read. What artifacts, vocabulary words, and names reflect the important parts of the book? After they find a word to represent each letter, have them write one sentence that explains where the word fits in.
12. Peekaboo Book Report

Using cardboard lap books (or small science report boards), students include details about their book’s main characters, plot, setting, conflict, resolution, etc. Then they draw a head and arms on card stock and attach them to the board from behind to make it look like the main character is peeking over the report.
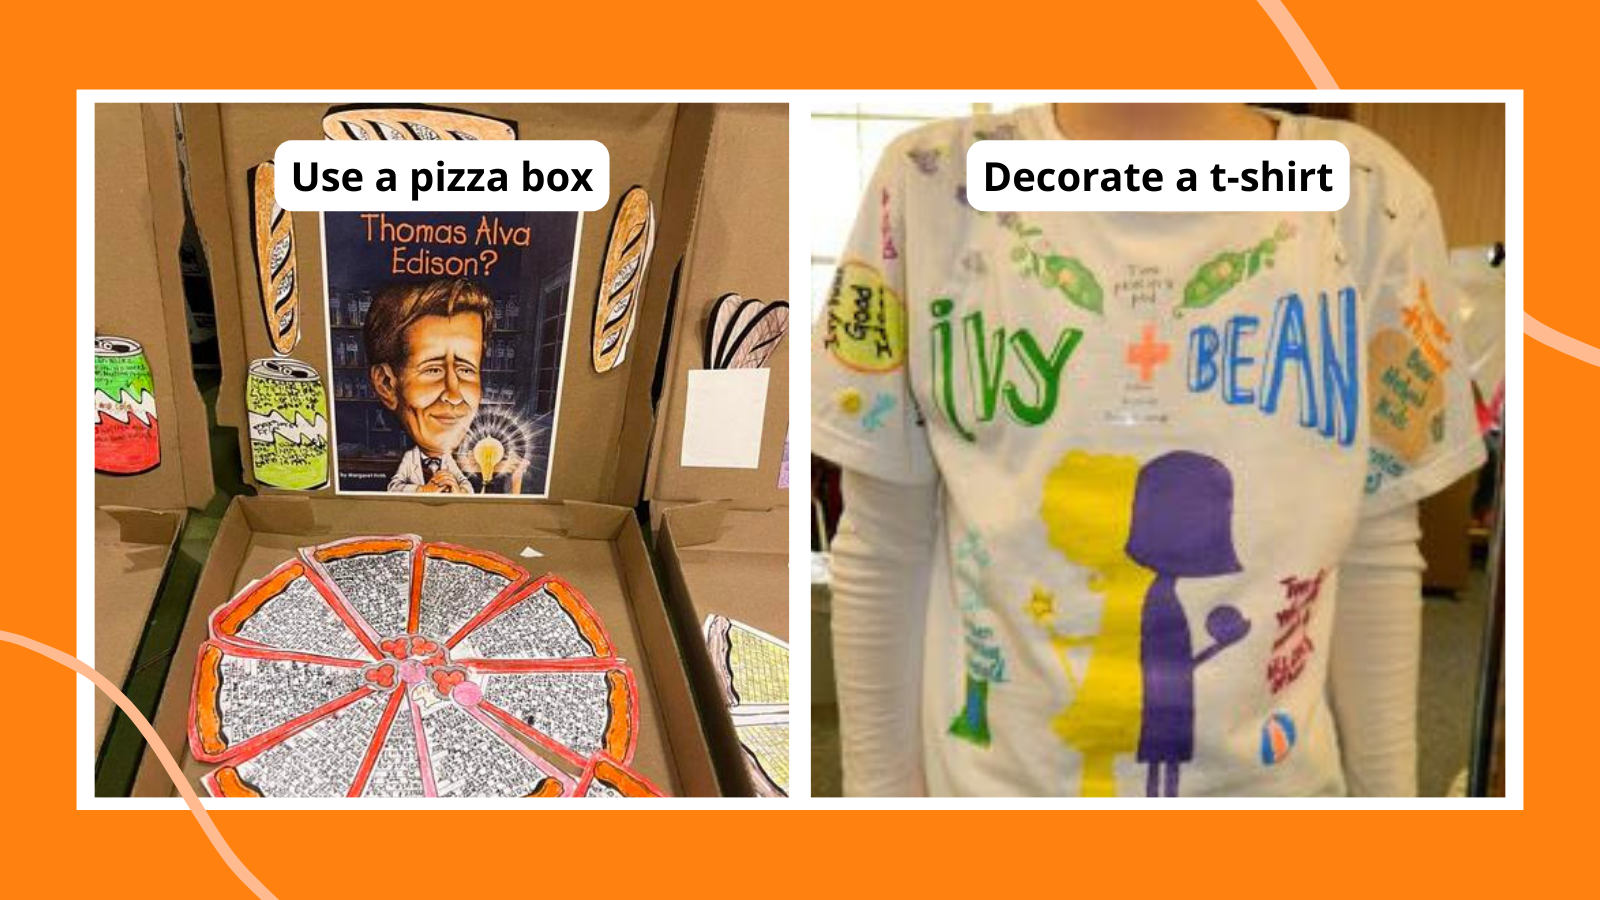
13. T-Shirt Book Report

Another fun and creative idea: Create a wearable book report with a plain white tee. Come up with your own using Sharpie pens and acrylic paint. Get step-by-step directions .
14. Book Jacket
Have students create a new book jacket for their story. Include an attractive illustrated cover, a summary, a short biography of the author, and a few reviews from readers.
15. Watercolor Rainbow Book Report
This is great for biography research projects. Students cut out a photocopied image of their subject and glue it in the middle. Then, they draw lines from the image to the edges of the paper, like rays of sunshine, and fill in each section with information about the person. As a book report template, the center image could be a copy of the book cover, and each section expands on key information such as character names, theme(s), conflict, resolution, etc.
16. Act the Part
Have students dress up as their favorite character from the book and present an oral book report. If their favorite character is not the main character, retell the story from their point of view.
17. Pizza Box Book Report

If you’re looking for creative book report ideas that use upcycled materials, try this one using a pizza box. It works well for both nonfiction and fiction book reports. The top lid provides a picture of the book cover. Each wedge of the pizza pie tells part of the story.
18. Bookmark
Have students create a custom illustrated bookmark that includes drawings and words from either their favorite chapter or the entire book.
19. Book Reports in a Bag

Looking for book report ideas that really encourage creative thinking? With book reports in a bag, students read a book and write a summary. Then, they decorate a paper grocery bag with a scene from the book, place five items that represent something from the book inside the bag, and present the bag to the class.
20. Reading Lists for Characters
Ask your students to think about a character in their book. What kinds of books might that character like to read? Take them to the library to choose five books the character might have on their to-be-read list. Have them list the books and explain what each book might mean to the character. Post the to-be-read lists for others to see and choose from—there’s nothing like trying out a book character’s style when developing your own identity.
21. File Folder Book Report

Also called a lap book, this easy-to-make book report hits on all the major elements of a book study and gives students a chance to show what they know in a colorful way.
22. Collage
Create a collage using pictures and words that represent different parts of the book. Use old magazines or print pictures from the Internet.
23. Book Report Triorama

Who doesn’t love a multidimensional book report? This image shows a 3D model, but Elisha Ann provides a lesson to show students how to glue four triangles together to make a 4D model.
24. Timeline
Have students create a timeline of the main events from their book. Be sure to include character names and details for each event. Use 8 x 11 sheets of paper taped together or a long portion of bulletin board paper.
25. Clothes Hanger Book Report Mobile

This creative project doesn’t require a fancy or expensive supply list. Students just need an ordinary clothes hanger, strings, and paper. The body of the hanger is used to identify the book, and the cards on the strings dangling below are filled with key elements of the book, like characters, setting, and a summary.
26. Public Service Announcement
If a student has read a book about a cause that affects people, animals, or the environment, teach them about public service announcements . Once they understand what a PSA is, have them research the issue or cause that stood out in the book. Then give them a template for a storyboard so they can create their own PSA. Some students might want to take it a step further and create a video based on their storyboard. Consider sharing their storyboard or video with an organization that supports the cause or issue.
27. Dodecahedron Book Report

Creative book report ideas think outside the box. In this case, it’s a ball! SO much information can be covered on the 12 panels , and it allows students to take a deep dive in a creative way.
28. Character Cards
Make trading cards (like baseball cards) for a few characters from the book. On the front side, draw the character. On the back side, make a list of their character traits and include a quote or two.
29. Book Report Booklets

This clever book report is made from ordinary paper bags. Stack the paper bags on top of each other, fold them in half, and staple the closed-off ends of the bags together. Students can write, draw, and decorate on the paper bag pages. They can also record information on writing or drawing paper and glue the paper onto the pages. The open ends of the bags can be used as pockets to insert photos, cut-outs, postcards, or other flat items that help them tell their story.
30. Letter to the Author
Write a letter to the author of the book. Tell them three things you really liked about the story. Ask three questions about the plot, characters, or anything else you’re curious about.
31. Book Report Charm Bracelet

What a “charming” way to write a book report! Each illustrated bracelet charm captures a character, an event in the plot, setting, or other detail.
32. Fact Sheet
Have students create a list of 10 facts that they learned from reading the book. Have them write the facts in complete sentences, and be sure that each fact is something that they didn’t know before they read the book.
33. Cereal Box TV Book Report

This book report project is a low-tech version of a television made from a cereal box and two paper towel rolls. Students create the viewing screen cut-out at the top, then insert a scroll of paper with writing and illustrations inside the box. When the cardboard roll is rotated, the story unfolds.
34. Be a Character Therapist
Therapists work to uncover their clients’ fears based on their words and actions. When we read books, we must learn to use a character’s actions and dialogue to infer their fears. Many plots revolve around a character’s fear and the work it takes to overcome that fear. Ask students to identify a character’s fear and find 8 to 10 scenes that prove this fear exists. Then have them write about ways the character overcame the fear (or didn’t) in the story. What might the character have done differently?
35. Mind Maps
Mind maps can be a great way to synthesize what students have learned from reading a book. Plus, there are so many ways to approach them. Begin by writing a central idea in the middle of the page. For example, general information, characters, plot, etc. Then branch out from the center with ideas, thoughts, and connections to material from the book.
36. Foldables

From Rainbows Within Reach , this clever idea would be a great introduction to writing book reports. Adapt the flap categories for students at different levels. Adjust the number of categories (or flaps) per the needs of your students.
37. Board games
This is a great project if you want your students to develop a little more insight into what they’re reading. Have them think about the elements of their favorite board games and how they can be adapted to fit this assignment. For more, here are step-by-step directions .
38. Comic strips

If you’re looking for creative book report ideas for students who like graphic novels, try comic strips. Include an illustrated cover with the title and author. The pages of the book should retell the story using dialogue and descriptions of the setting and characters. Of course, no comic book would be complete without copious illustrations and thought bubbles.
39. Timeline
Create a timeline using a long roll of butcher paper, a poster board, or index cards taped together. For each event on the timeline, write a brief description of what happens. Add pictures, clip art, word art, and symbols to make the timeline more lively and colorful.
40. Cereal Box
Recycle a cereal box and create a book report Wheaties-style. Decorate all sides of the box with information about the book’s characters, setting, plot, summary, etc.
41. Wanted Poster

Make a “wanted” poster for one of the book’s main characters. Indicate whether they are wanted dead or alive. Include a picture of the character and a description of what the character is “wanted” for, three examples of the character showing this trait, and a detailed account of where the character was last seen.
42. Movie Version
If the book your students have read has been made into a movie, have them write a report about how the versions are alike and different. If the book has not been made into a movie, have them write a report telling how they would make it into a movie, using specific details from the book.
What creative book report ideas did we miss? Come share in our We Are Teachers HELPLINE group on Facebook.
Plus, check out the most popular kids’ books in every grade..

You Might Also Like

Expand Your Readers’ Palates With a Book Tasting
A perfect way for kids to nibble on a book. Continue Reading
Copyright © 2023. All rights reserved. 5335 Gate Parkway, Jacksonville, FL 32256
- Skip to primary navigation
- Skip to main content
- Skip to primary sidebar
- Skip to footer
Book Report Cake
4 Comments · As an Amazon Associate I earn from qualifying purchases.
Wife of the perfect partner for me. Mother of Three. Lover of fun, creativity, cooking, adventure, puzzles, games, family but most importantly Jesus. I run the blog Meaningful Mama. The heart of my blog is the character development series for teaching kids. The icing on the top consists of parenting tips, crafts, recipes, cakes and more. Read more...
Great idea! And Emma is looking so mature and grown up!!
She’s totally growing up. She’s super smart and talented too. She’s a sweet girl.
What a wonderful way to share a book! The cake looks amazing!
I would love for you to link this post to Read.Explore.Learn on my blog!
Done. Thanks so much.

A Note on Copyright
Feel free to use ideas in your home and community. If you wish to share any posts or photographs from this site on your blog or website, you may use one picture with a link to the original post. Please do not repost, duplicate or re-write the whole tutorial or distribute printed content without written permission from the original author. Thank you!
Privacy Policy
- Active Kids
- Bible Lessons
- Character Building
- Math Activities
- Reading & Activities
- Science Activities
- Father’s Day
- Fourth of July
- Mother’s Day
- New Year’s
- St. Patrick’s Day
- Thanksgiving
- Valentine’s Day
- Main Course
- Play Recipes
- Home & DIY

Experience the world of cake decorating like never before with Cake Central Magazine!
When you purchase a digital subscription to Cake Central Magazine, you will get an instant and automatic download of the most recent issue.

How To Make A Book Shaped Cake
Decorating By torri27c Updated 21 Sep 2010 , 1:00pm by Shannon1129

I am need of knowing how to make a book cake all ideas are welcomed. A closed book.

Hello torri I don't know how but I found this for you good luck http://img.cakecentral.com/cake-decorating-ftopic-599871-0-days0-orderasc-.html

Here's a great tutorial: http://thefrostedcakencookie.blogspot.com/2009/05/graduation-cake.html
Thank you this really helped!
Thank you all for you help. I am up now trying this book cake out. I will post pictures when Im complete. Thanks again

Quote by @%username% on %date%
Newsletter Subscribe
Follow us on, login to cake central.
(if this is a private computer)
- Ask questions in the forums
- Add your photos, recipes & tutorials
- Save your favorites
- Comment on recipes, tutorials and photos
- Enter Contests and Win Prizes!
Yes please, register now!
Report This to Moderators?
Stacked Book Cake
A back to school cake , Asap science , Back to school , Book cake elements , Buttercream , Chocolate , Collection--novelty-cake-recipes , Fondant , Gumpaste , Recipes-export , Science of cakes , Seasonal , Simple syrup

- By How To Cake It
- Oct 8, 2016 0 Comments
- See more recipes
- Difficulty Level: Beginner
- Occasions: Back To School
Let's go bake to school! I tried to make the sometimes painful experience of going back to school just a little more fun by making a stack of textbooks out of CAKE! By using my ultimate chocolate cake recipe, Italian Meringue buttercream and fondant that I decorated with fun food pens and letters cut out of gumpaste, I created something I think ANY kid would be excited to dig into!

Ingredients
- 6lb portion of Yos Ultimate Chocolate Cake Recipe
- 8lb portion of Yos Ultimate Chocolate Cake Recipe
- Italian Meringue Buttercream
- Simple Syrup
Decorations
- Clear Piping Gel
- 4 1/2lbs White Fondant
- 1 1/2lbs Red Fondant
- Golden Yellow Icing Colour
- Lemon Yellow Icing Colour
- Royal Blue Icing Colour
- Violet Icing Colour
- Black Icing Colour
- Edible markers in Black, Pink, and Yellow
- Rainbow Dust Food Pens in Jet Black, Royal Blue , Red, Leaf Green , Orange
Learn More About Yo's Stacked Books Cake!
Prepare chocolate cake.
Prepare your chocolate cake batter. Bake your 6lb portion of batter in a 9 x 12 pan at 350 degrees for 1 hour and 20 minutes and your 8lb portion of batter in a 12 x 15 pans for 1 hour and 40 minutes, or until a cake tester comes out completely clean. Let cool completely in their pans.
Prepare Buttercream and Simple Syrup
Prepare your Italian Meringue Buttercream and your Simple Syrup. Set aside.
Level Cakes
Remove your 9 x 12 chocolate cake from the pan, and level it. This will be your largest book. Remove your 12 x 15 chocolate cake from the pan, and level it.
To turn your 12 x 15 cake into three book cakes, first cut the cake in half, vertically. Then cut one of these halves in half horizontally. This should leave you with one medium cake, and two small cakes.
Crumb Coat and Chill
Crumb coat and chill all of your cakes.
Prepare Fondant Book Sides
Roll out your white fondant, and cut into strips that will cover 3 sides of each cake. When three sides of all the books are covered, use a strip cutter, gently pressing and dragging it along white fondant to create page indents.
Dye Fondant and Cover Cakes
Colour 1 lb of white fondant with Wilton Lemon and Golden Yellow. Then colour 1lb of white fondant with Wilton Royal Blue and Violet Icing Colour. Give your cakes a book cover.
Create Book Titles
Use your various letter cutters and Tappits to create titles for your books.
Prepare Gumpaste
Roll a thin piece of gumpaste to the exact dimensions of the cover, let it dry overnight. Use food markers create a book cover on the gumpaste, placing on top of the cakes top layer.
Add Gumpaste School Supplies!
Dress up the cake by making school supplies out of gumpaste. You can shape rulers, pencils, erasers, and paper out of the gumpaste to place around your book cake!
Congratulations you did it!
#howtocakeit.
Your cart is empty.
Taxes and shipping calculated at checkout
- Jessica Harris Cakes
How To Make An Open Book Cake

Share this:
55 comments on “ how to make an open book cake ”.
Thanks so much for this tutorial. Just in time as I am about to attempt an open book cake for my nephew’s confirmation in 2 weeks. I will be sure and post a picture to show you mine. Thanks so much again
Very detailed and helpful! Thank you!
Love this post Jessica, thank you very much!
WOW! What a wonderful cake for a beautiful girl!
Fantastic! Thanks for sharing!!!!
Amazing job as always! Thank you not only for the tutorial (which I love), but also for sharing a little about your idea for a book themed party. Perfect for a book lover!
Cant wait to see the final cake!
This comment has been removed by the author.
Oops! Not sure what happened, but did not mean to delete my comment… Great tutorial! Look forward to seeing the finished cake!
Thanks so much for the tutorial! I can’t imagine how much time it takes you to put these together! They are always so wonderful! Keep up the good work!
Wow! What an amazing cake! Congratulations! Thank you for sharing! Kind regards, Jo – Numbers 6:24-25.
You are amazing and it looks like your daughter is following in your footsteps.
This is fantastic! Thank you so much for posting! I need to do one for next weekend and this tutorial is such a huge help!!
That is so amazing. I wanted to make a book cake a while back; I visualized something that looked like this and then chickened out when it came to making the curved pages. I went for a much simpler closed book instead. This makes me want to try it again. http://flourarrangements.org/2011/06/eating-your-words/
Amazing! I have done two open books cakes for a Holy communion and a baptism and I gotta tell you that it didn’t turn out anything like yours :). Thanks for taking the time to share your ideas with us. Can’t wait to see the finished product.
I did an open book cake recently, and I sure wish I could have read this post first! It turned out good, but not as awesome as yours! Mine was for a Harry Potter theme, and I dyed my fondant a very pale brown and left some marbelization in there to make it look like old parchment.
Great idea about the color!
Simply incredible!! Happy birthday sweet Miss R. Love you guys!
This cake is absolutely incredible! And I just love the entire book theme for a children’s party. Kudos to Mom!!!
You are great!
This looks very technical, thanks for showing us how to do it. I would love to take your craftsy class.
I need to find someone to make a cake book for! Thank you for the turorial.
Your tutorials are great. Thanks for the inspiration of not only the cake, but letting the birthday girl be a part of it. I can’t wait to see the finished cake. I did something similar last year when my daughter wanted a sleepover cake. She helped design it, and after I cut out fondant “girl” shapes, she used edible markers to make her friends. It came out great, but my favorite part was the time we spent on it.
Awsome tutorial. How many servings does this yield?
This tutorial is really good we can eassly make this cake. Is their any service to order cake online
This is really a great creative work. The idea is awesome. I am a big fan of cakes, first time i had seen such an innovative and different cake. Thanks for shearing this blog.
WOW! the book looks so real. Thank you for sharing once again your brilliance!
Hi Jessica, Love your tutorial!! you are awesome!! thanks for sharing with us!!
This is very nice tutorial. However I am not in this field. I never carved a cake before. Do you have this tutorial in video?
its my best friends birthday in a month and this is exactly what I was looking for, I will post a picture when Im done. also Im a little nervous never done a cake tis complicated before
Such a cool cake!! love it!
beautiful cake !! I like it
Wow looks amazing.ive seen alot of open book cakes but yours is really awesome.im going to make one this sunday for my pastors BDAY. Ill show a pic once its done…
Wow! Open book cake.. That sounds great and even looks awesome. Thanks for sharing.. cake online
did you ever post finished pics of the cake? I would love to see the images your daughter created!
Thank u for this, not sure how old it is, but it’s come in very handy for an order I’ve just received! Thanks a stack
How did you get the foam core to curve when you made the base for your cake. (the second picture)?
I actually didn’t get it to curve…I cut it out like that to have a curve in it. I hope that makes sense. I drew it in that shape, then cut it out of the foam core. Blessings!
Amazing. Thank you!! Where did you get your paper creasing tool?
Thank you! The tool I used to make the creases was just a metal ruler. You can use any sharp straight edge…even a knife. Have fun!
Thanks for the tutorial, Jessica! I just used it and the cake turned out great!!
Hi there Jessica..I was just browsing through the internet to get some ideas on a design for a 70th b/day cake for my namesake who will be turning 70 on 31st May.I just happen to come across your page..my namesake is a very religous lady,and i wanted to bake a bible shaped cake for her but do not know how it is done.Your step by step tutorial will be of great help to me as I will attempt this cake in the coming week.I really appreciate and thank you from the bottom of my heart..thank you for sharing your God given talent..God Bless.
Yay! Thanks for posting a comment! – and so happy you found me! May the Lord bless the works of your hands!
Thank you for your wonderful tutorial. I have never tried to use fondant before so was a little nervous about it. I made my own open book cake not as detailed as yours but it turned out pretty great.
Jessica thank you SO much for your fabulous tutorial.. it looks amazing. I have an order for an open book cake and this tutorial will make the world of difference. It was so lovely to meet you in Louisiana and find the person behind the beautiful cakes to be just as beautiful. I am making this cake for a couples wedding and I was wondering if I could bother you to ask how many you think it would serve (I’ll do the rest of the serves in a cutting cake if need be). Thank you so much for sharing your knowledge and inspiring me!!
Oh sweet friend! – it was a pleasure to meet you too! I wish I could help, but I’m not sure. When I need to know that, I actually look up Wilton’s serving chart for birthday cakes or wedding cakes and look there…square, rectangle or round…they have them all! This one was pretty small, so I’d say at most 6. I hope that helps!
Wow this tutorial is amazing! Greetings from the Netherlands. Oh and is there a picure yet from the endresult? Lots of love, Nathasja Tepper
never did see the final picture of the open book cake.
Thanks! this was helpful in evolving our ideas. Our’s turned out great for a son who is an avid teenage reader.
Thank you so much you are my favourite cake artist
You are SO kind! Thank you!
Hi Jessica, I just saw this tutorial and it is awesomeee!! Thank you soooo much!!! but, I was trying to figure out how to cut the foamcore to curve/bend like you did for the base? also, did you cover the spine of the book at the time you covered the whole book?? I hope you see my message and thank you again, this is an awesome tutorial!!! also, did you ever posted pics of the finished product??
I’m sorry it’s taken forever to respond. I just barely bent the foam core…just along the side of my kitchen counter. I cut the angled pieces of foam core so when I hot glued the larger, flatter pieces on it would curve just a bit…but honestly it’s more straight than curved. You can cut the cake to look really curved, but the foam core stays pretty straight. I actually don’t have after pics of the cake! I’m so sorry!!
Hello Jessica, i am so happy to come across your post.. a great help indeed. I dont have petal dust and planning to paint instead (the cake is due in 2 days). I am not getting the final picture of your cake.. would like to see it.
You have made it look easy.. lets see hpw it goes for me ???
Thanks a ton !
This is wonderful. It has made my attempt easy. Thank you so much
Leave a Reply Cancel reply
Premium quality icing for cake decorating and moulding
Book cake tutorial with karin klenner.
Say Hi on Facebook

Edibles needed
- One 7 x 9 inch cake*
- One 9 X 6 inch cake
- One10 x 6 inch cakes
- 3 x packs of 750 grams Bakels Pettinice for your book covers (any colour you like. See here for shades of brown.
- 1 x 750g pack of Bakels Pettinice in white or ivory
- Petal dusts for shading
- Piping gel (Ciccio cakes has a great recipe here) * tall as you need
Tools needed
- Cake boards the same size as your cake
- A large display board
- A ruler 3 sheets of firm OHP sheet or clear plastic
- Rolling tool
- Long knife for embossing Stamps if you want to add detailing
- Large staws or dowels for stabilizing
- Sharp blade for trimming fondant

See how I create my wood grain boards here:
I used a White 5 : 1 Chocolate ratio for the wood grain on the board. Colour mixing Pettinice is so easy. Click here to have a look at our colour ratio formulas for more shades of brown.

Cut and fill your cakes Ganache or buttercream your cakes trying to keep the edges as sharp as possible on one side. The other side can be rounded as this is where the spine of the book will be.
Fellow Pettinice Ambassador, Sharon Wee has created a Youtube video on how she creates sharp edged square cake foundations. You can watch it here .
At this point, it is easier to set up each individual book on it's own cake board and place it on top of baking paper to move it around the bench easier.

If stacking, start with your 10 x 6 inch cakes

With ganache layer. Keep bottom cake board.

Measure your edges so you know width and length you need to cover
Making the ‘pages’
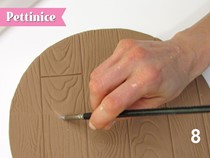
Measure the width and full length of the side of your book. For a seamless look, roll out a long white strip and adhere to the cake by wrapping around. There are three ways to give the fondant the look of having pages:
- Pressing a long ruler up against the fondant over and over creating lines
- Using a roller tool
- Use the back of a knife I usually let the icing firm up overnight at this point but if you don’t have time just move on to the next step.

Press back side edge of long knife to emboss pagesl

Or, you can use a roller tool to emboss look of pages
I usually let the icing firm up overnight at this point, but if you don’t have time just move on to the next step.
Making the book covers
Bottom covers. Roll out a thick rectangle of fondant and cut one complete straight edge. This straight edge will sit on the inside bottom book cover (see photos that follow).
Have this fondant on baking paper for top tiers, or directly onto your final cake board. Be sure to roll your shape larger than your cake. Brush this piece with piping gel. Place your ganached cake (with the cake board) on top, remember to leave the straight edge under the cake slightly so you can tuck the cover to meet in later.
Trim back the sides of the fondant book cover, leaving about a 5mm overlap.
You can add tylose to your fondant, however I have never needed to.

Roll out a thick rectangle of fondant which will be your bottom book cover, and put it on some baking paper .

Brush fondant with piping gel before placing book cake.

Trim outside of book cover 5mm from edge. The spine side of the cake will not stick out like this.
Measure up!
Measure the total width and length of your two remaining exposed sides. This will give you an idea of how big to roll your next piece of fondant for the cover.
Creating book cover and spine
Trim your fondant piece, remembering to add 5mm overlap around all sides. You can leave a bit more excess and trim down later, leaning on your plastic sheet as you trim.
IMPORTANT NOTE :
At this moment, you don’t want to adhere the fondant to the top of the cake. Wait to brush a bit of piping gel over the top of your cake just before the fondant will wrap around the spine. First, wrap your fondant around your cake leaving a small peep through the spine of the book and tuck it under your cake.
Grab your clear plastic sheet and pop under your top fondant. This will ensure your fondant dries straight giving your cake a cleaner more realistic look.
Trim any parts that have stretched or if you haven’t done already trim your book cover down, using your plastic sheet to stabilize. If your fondant is sticky you will need to put baking paper between the fondant and the clear sheet or at least a bit of corn flour so you can easily slide it out later.

Use plastic to stabilize fondant to the top so you can tuck fondant under the cake.

Piping gel only on spine first. Secure the tucked bottom, then work your way up. Remember to use baking paper to allow you to slide out your plastic after cover hardens.
It's all in the details
This is your chance to play and create your book details. Indent your cover and spine with a ruler and some cool rubber stamps if you have some. Repeat the same process with your other books ensuring they all still sit on baking paper so they can be easily moved later. Put aside and allow cakes to set.

Top view. Press up against plastic if you need to trim anymore fondant.

Using hard plastic sheet is my trick for drying these fondant book covers

Bottom view
Let these cakes sit overnight to give them a chance to harden up to get that clean look without floppy cover edges when it is time to stack.
Shades of AMAZING!
Now that your books have firmed up, you can add shading to the pages with a mix of black and brown petal dust and corn flour. Start off light and go darker. Paint your top cover and spine of your books with a mix of good quality vodka and petal dust or gel colours.

Mix black, brown and cornflour to customize your shade.

Slowly build your colour with dust.

Use a soft brush when using your dust.

Paint any additional details for your top cake.
Time to stack
Melt some chocolate and adhere your first book to your base board. Add your doweling or staws to you bottom and middle book, this will support the weight of the books you are going to stack. Again add chocolate to the top of your first book and place on your second book insuring it is slightly twisted so it looks more interesting. Add your last book.

Use melted chocolate as glue.

Mark your dowels for cutting.

I used four dowels per book. Off-set them if you plan on stacking diagonally.

3D stacked book cake

Karin Klenner owns Sweet Little Treat located in Hamilton, New Zealand. She says "I'm a mum to two little boys which are my world (and have been known to destroy my world by attacking the odd cake) and married to an amazing guy who, thank goodness, is very good with a drill because my favourite cakes to do are 3D sculpted cakes. I love doing animals especially."
Want to see more cake tutorials?

Daisy sugar flower tutorial with Lisa Templeton

How to make a snapper fish cake with Nina Blackburn
Succulent mini cake with Sharon Wee

How To Make A Book Cake Without Fondant: A Guide

Sharing is caring!
Last Updated on February 1, 2023
Today, we’re going to be taking a look at how to make a book cake without fondant. Book cakes are notoriously difficult to make, but they don’t have to be. Working with fondant can be quite tricky, so we decided to learn how to make a book cake without fondant, and now you can too! Book cakes are perfect for just about any occasion, especially if you have a fellow bookworm in your life. So how do you make a book cake without fondant? Let’s take a closer look.
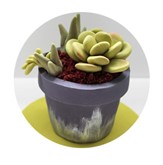
What is a Book Cake?
A book cake is exactly as it sounds, a cake that’s been shaped like a book. These work really when it comes to novelty cakes for a celebration or occasion. And an open-book cake is one of the easiest to work with. However, you can also make a stack of books, or a closed book too.
Book cakes are made simply by carving out a cake and then decorating it with either fondant or buttercream.

Ingredients in a Book Cake
You may be wondering what the ingredients are when it comes to a book cake. The truth is, the ingredients will vary depending on which recipe you’re following and which decoration you’re using. Our recipe contains the following:
- caster sugar
- self-raising flour
- cocoa powder
- baking powder
- vanilla extract
- icing sugar
- royal icing
Nutritional Information of a Book Cake
You may be curious as to the nutritional value of a book cake. Each whole cake contains the following:
- Calories: 8535
- Carbohydrates: 1080
- Protein: 72g
- Cholesterol: 1955mg
- Sodium: 4983mg
- Fiber: 14.9g
- Sugar: 854g
One thing’s for sure – don’t eat this cake alone, and enjoy it in moderation!
Do You Need Fondant When Making a Book Cake?
While fondant seems like a key ingredient, it doesn’t have to be! You can make a buttercream book cake or an iced book cake. Both work just as well as fondant and can be just as easy to work with. When it comes to making book cakes, there’s just one skill you need: patience!
How to Make a Book Cake Recipe
Let’s get down to the reason you’re here: how to make a book cake! Let’s take a closer look.
Ateco Reversible 2-Sided Revolving Cake Decorating Stand

Ingredients – How To Make A Book Cake Without Fondant
For the cake:.
- 300g of butter
- 300g of caster sugar
- 275g of self raising flour
- 75ml of milk
- 25g of cocoa powder
- 1/4 teaspoon of salt
- 3/4 teaspoon of vanilla extract
- 2/3 teaspoon of baking powder
For the decoration:
- 1 teaspoon of vanilla extract
- 560g icing sugar
- 225g of butter
- sugar flowers of your choice
Step 1: Bake the Cake
Gather the ingredients you need and preheat your oven to 340F. Grab a bowl and add the sugar and butter. Beat until light and creamy. Now add the eggs individually. Do not add the next egg until the previous one has been mixed. In another bowl, sift the baking powder, self-raising flour, cocoa powder, and salt. Once sifted, add the dry ingredients to the wet ingredients, along with the milk. Combine one last time with the vanilla essence. Pour the batter into a rectangle cake tin and bake for around 50 minutes in the center of your preheated oven. Leave to cool.
Step 2: Make the Buttercream
Before making the icing, sieve the icing sugar. In another bowl, cream your butter until it’s soft and smooth. Now you can gradually add the sifted icing sugar, being sure to whisk continually as you add. Now add the vanilla extract and mix one last time. You’re looking for a thick, stiff consistency.
Step 3: Carve the Cake – How To Make A Book Cake Without Fondant
The cake should be lying horizontally on it’s longer side when you start. Measure the cake with a ruler and make a line at the midway point, vertically, down the middle of the cake. On the surface of the cake, cut out a triangular wedge in the center. Ensure it is only around a quarter of the thickness of the cake. Now opposite that wedge (the bottom), slice a small triangle off. Next, cut the edges of the cake so they slant outwards; looking like an open book.
- It’s worth noting that if you don’t want to carve the cake, you can simply buy a book cake pan, which does the job for you.
Step 4: Frost the Cake
Using the buttercream, coat the entire top of the cake and smooth it out using a knife. For the edges, you’ll need a piping bag and star shaped nozzle. Pipe the icing onto the sides of the cake to create a stacked book design.
Step 5: Decorate the Cake
This section is open to interpretation and can be designed any way you wish. It’s simply designing the open pages. Start by piping some icing around the edges of the book for the cover. Now you can use icing to write a message, add your sugar flowers, and ice some leaves. The choice is entirely up to you – let your creative side run wild. Serve and enjoy!
Take Out Time to Also Read:
- How To Make A Bagel Soft: Our Top Tips
- Decorating A Cake With Fresh Flowers: 6 Stunning Options
Book Cake Ideas
If you’re unsure how to decorate your book cake, here are some ideas you may want to use:
- your favorite book, simply write the title (or even try to create the cover)
- spell book (you could even write a recipe in icing)
- school book
- journal/diary
- letter to a loved one
Do let us know if you have any more ideas.

Ingredients
- ▢ 300 g of butter
- ▢ 300 g of caster sugar
- ▢ 275 g of self raising flour
- ▢ 75 ml of milk
- ▢ 25 g of cocoa powder
- ▢ 1/4 teaspoon of salt
- ▢ 3/4 teaspoon of vanilla extract
- ▢ 2/3 teaspoon of baking powder
- ▢ 1 teaspoon of vanilla extract
- ▢ 560 g icing sugar
- ▢ 225 g of butter
- ▢ sugar flowers of your choice
Instructions
- Bake the Cake – Gather the ingredients you need and preheat your oven to 340F. Grab a bowl and add the sugar and butter. Beat until light and creamy. Now add the eggs individually. Do not add the next egg until the previous has been mixed. In another bowl, sift the baking powder, self-raising flour, cocoa powder, and salt. Once sifted, add the dry ingredients to the wet ingredients, along with the milk. Combine one last time with the vanilla essence. Pour the batter into a rectangle cake tin and bake for around 50 minutes in the center of your preheated oven. Leave to cool.
- Make the Buttercream – Before making the icing, sieve the icing sugar. In another bowl, cream your butter until it’s soft and smooth. Now you can gradually add the sifted icing sugar, being sure to whisk continually as you add. Now add the vanilla extract and mix one last time. You’re looking for a thick, stiff consistency.
- Carve the Cake – The cake should be lying horizontally on it’s longer side when you start. Measure the cake with a ruler and make a line at the midway point, vertically, down the middle of the cake. On the surface of the cake, cut out a triangular wedge in the center. Ensure it is only around a quarter of the thickness of the cake. Now opposite that wedge (the bottom), slice a small triangle off. Next, cut the edges of the cake so they slant outwards; looking like an open book.
- Frost the Cake – Using the buttercream, coat the entire top of the cake and smooth it out using a knife. For the edges, you’ll need a piping bag and star shaped nozzle. Pipe the icing onto the sides of the cake to create a stacked book design.
- Decorate the Cake – This section is open to interpretation and can be designed any way you wish. It’s simply designing the open pages. Start by piping some icing around the edges of the book for the cover. Now you can use icing to write a message, add your sugar flowers, and ice some leaves. The choice is entirely up to you – let your creative side run wild. Serve and enjoy!
Conclusion – How To Make A Book Cake Without Fondant
I hope this post has helped you to become more familiar with how to make a book cake without fondant. While it may seem challenging at first, making a buttercream book cake couldn’t be easier; especially if you use a book cake pan.
Do you have any tips or tricks when it comes to making a book cake without fondant? If so, please feel free to let me know in the comments below. Sharing is caring!

Creative Book Report | Cake Template with Assessment Rubric

Description
Questions & answers, jewel's school gems.
- We're hiring
- Help & FAQ
- Privacy policy
- Student privacy
- Terms of service
- Tell us what you think
404 Not found
- Share full article

Learn to Bake in 5 Easy Recipes
The best way to start making homemade sweets? Follow these basic instructions and tips.
Credit... Photographs by Joseph De Leo For The New York Times. Food Stylist: Monica Pierini.
Supported by

By Genevieve Ko
Genevieve Ko started baking when she was 8 and is the author of a baking book.
- Published March 18, 2024 Updated March 27, 2024
The poet Emily Dickinson was an avid baker, and, on the back of a recipe card for coconut cake, she wrote these opening lines :
The Things that never can come back, are several — Childhood — some forms of Hope — the Dead —
But while her gifts as a poet are clear here, she expresses the opposite of what baking can do. A birthday cake brings back the joy of childhood, maybe even raises hope, and baking beloved recipes from the deceased resurrects memories of them.
Even if the goal isn’t reclaiming what’s lost, the simple act of baking can conjure unexpected delight. When you’re preparing a meal and starting with salmon and potatoes , you end up with cooked salmon and potatoes. But when you’re baking, you start with a slew of powders, golden butter and an egg, and you end up with crackly-edged, chewy blondies.
Recipe: Birthday Cake Blondies

More easy bars: Easy Peanut Butter Fudge | Lemon Bars | Black Sesame Rice Krispies Treats
If you’re a beginner in the kitchen, baking is an ideal entry point. Unlike cooking, there’s no pressure to make food that’s meant to sustain, no urgency from step to step. You can go at your pace, and the process can even feel relaxing. These five foolproof recipes are the best place to start: They require only a handful of tools and ingredients — and no experience. They welcome other seasonings and flavors, and guarantee something tasty. Make them all to learn the basics of baking, or try any one that appeals to you. Not only are they easy, but they also offer the satisfaction of dessert and the wonder at having made it yourself.
Baking Supplies for Beginners
To make all five of these recipes, you need only:
• A sheet pan • An ovenproof skillet • An 8-inch square cake pan • Two bowls • A whisk • A silicone spatula • A set of dry measuring cups • A set of dry measuring spoons
Start with just a handful of tools.
You don’t have to invest in an expensive electric mixer, stacks of pans or a kitchen scale. Danielle Sepsy, the chef and owner of the Hungry Gnome Bakery , remembers a childhood of standing on a stool next to her grandmother Rosemarie Marullo, who scooped flour with a coffee cup. Ms. Sepsy doesn’t recommend trying this at home and uses a scale at her bakery, but said, “If you have trusty measuring cups on hand, you’re OK.”
In fact, you can use dry measuring cups for liquids even though it’s a little tricky to not spill with them. (Liquid measuring cups don’t work for measuring dry ingredients, though.)
Recipe: One-Bowl Chocolate Cake
More easy cakes: One-Bowl Carrot Cake | Flourless Chocolate Cake | Raspberry-Mochi Butter Cake | One-Bowl Molasses Chocolate Chip Cake
Shop for basic ingredients.
Baked goods can incorporate everything from chiles to miso , but their foundation requires only a small group of essentials. Baking can be traced back to ancient civilizations, but the sweets here come from the style that spread from Europe to America and the world, built on flour, baking powder, baking soda, sugar, salt, butter or oil, and, usually, eggs. Often, other dairy products or flavorings like vanilla extract and cocoa powder are used, and sometimes, not all of the basics are even necessary.
Recipe: Vegan Banana Bread
More easy quick breads: Lemon Blueberry Muffins | Cranberry Cornbread | Strawberry Spooncake
Bask in the precision.
Baking can be perceived as stressful because it requires following a recipe, but that’s what can make it feel calming. “I actually have a lot of anxiety, and I started baking because it gave me a sense of control,” Ms. Sepsy said. “If you follow the recipe exactly, it’ll result in exactly what you want.” Even though she now weighs ingredients to run her professional kitchen, she uses regular measuring cups at home because it makes baking “more stress-free and fun.”
For simple baked goods like these, it’s fine if you end up adding a little too much flour or don’t beat the eggs enough. As long as you’re mixing and baking sugar, fat and starches as described in the instructions, you’re going to end up with something delicious.
Recipe: Fruit Crumble
More easy fruity desserts: Blueberry Crisp | Lemon Bars | Apple Crisp
Yes, you can personalize baking recipes.
Some cooks don’t like baking because there doesn’t seem to be room for improvisation without risking a failure in the oven. Don’t mess with the base formula for the batter or dough, but do customize seasonings that don’t affect baking chemistry. Stir in different spices like cardamom or ras el hanout and add your choice of toppings or mix-ins. When making fruit desserts, use what’s in season (and on sale).
Recipe: Chunky Chocolate Cookies
More easy cookies: Peanut Butter Cookies | Oatmeal Chocolate Chip Cookies | Gochujang Caramel Cookies | No-Bake Cookies | Black Sesame Shortbread
Follow New York Times Cooking on Instagram , Facebook , YouTube , TikTok and Pinterest . Get regular updates from New York Times Cooking, with recipe suggestions, cooking tips and shopping advice .
Genevieve Ko is a deputy editor and columnist for the Food section and NYT Cooking, for which she also develops recipes. More about Genevieve Ko
More on Food and Dining
Keep tabs on dining trends, restaurant reviews and recipes..
Flamboyant displays of fake flowers at restaurants have turned into a maximalist design movement , with one man as a chief trendsetter.
Perloo, a supremely comforting one-pot rice dish , i s a Lowcountry staple with roots in West Africa.
Some of the greatest meals pair exalted wines with foods considered humble. Exploring beyond the conventional can be joyous, like the timeless appeal of Champagne and fried chicken.
For many Jamaicans, spice bun is a staple of Lent. But there’s nothing restrictive about this baked good , so named for its bold seasonings.
For Ecuadoreans, fanesca, a labor-intensive lenten soup served just during the lead-up to Easter, is a staple of Holy Week festivities.
Sign up for our “ The Veggie ” newsletter to get vegetarian recipes for weeknight cooking, packed lunches and dinner parties.
Eating in New York City
Once the pre-eminent food court in Flushing, Queens, for regional Chinese cuisines, the Golden Mall has reopened after a four-year renovation. A new one in Manhattan is on the horizon.
At Noksu, dinner is served below the street, a few yards from the subway turnstiles. But the room and the food seem unmoored from any particular place .
You thought Old World opulence was over ? A prolific chef gives it a new and very personal spin at Café Carmellini, Pete Wells writes.
Eyal Shani’s Port Sa’id challenges the conventional wisdom that you can’t get good food in a restaurant with a turntable.
Advertisement

How to Bake a Cake: The Ultimate Guide
A s Julia Child once said, "A party without a cake is just a meeting." And how true! Learning how to bake a cake, even a simple one, is your gateway to making any gathering—whether it's a birthday, graduation party or just a weeknight dinner—into a celebration.
You can make cakes at home easily. Just check out our essential techniques, cake recipes and must-have gear to get started. Soon, all your get-togethers will turn into occasions to celebrate.
How to Bake a Cake
At Taste of Home , we have hundreds of cake recipes in our library. These cakes require various techniques. However, the steps below outline how most classic cakes are made. Use this as a guide when you're getting ready to make a birthday cake or other special occasion dessert.
Step 1: Prep the cake pans
Start your cake by preparing your baking pans. For layered cakes, that means greasing and lining round cake pans.
To do this, use baking spray, butter or shortening to coat the inside of the pan. Then add a round parchment paper to the bottom of the pan and give that a quick coat of cooking spray.
This process ensures that the cake doesn't stick to the pans once it's baked. And, yes, our Test Kitchen recommends this step even with nonstick pans.
Step 2: Cream ingredients
To start the cake batter, pull out your stand mixer (a hand mixer works, too). Add the sugar and room-temp butter to the bowl and cream until light and fluffy—about 5 minutes.
Then add in the eggs one at a time, beating until well combined. If your recipe calls for extracts, this is the time to add them.
Taking your time at this stage allows your batter to achieve the right airy consistency later.
Test Kitchen Tip: Be sure to use room-temperature eggs and softened butter . Room-temp ingredients blend together much easier.
Step 3: Combine dry ingredients
Next, combine your dry ingredients. These will typically include flour or cake flour , baking soda, baking powder, salt and sometimes extras like cocoa powder or baking spices .
Step 4: Alternate wet and dry ingredients
It's time to start adding the dry ingredients to your creamed mix. Alternate adding the dry mix with any remaining wet ingredients until you have a smooth batter.
Wet ingredients can include milk, buttermilk , sour cream, yogurt or water.
Step 5: Portion out
With your batter finished, it's time to add it to the pans you prepared. For layer cakes, you can divide the batter by eye or use a kitchen scale to make sure the batter is split between the pans perfectly.
Whatever method you use, know that it is important for the amount of batter in each pan to be as equal as possible. This makes baking the cakes evenly much easier.
Step 6: Bake and cool
After dividing your cake into individual pans, pop the pans into the oven and bake for the minimum recommended time according to the recipe.
When the time is up, check if the cake is done . You can do this by tapping the top of the cake. If the cake doesn't spring back to your touch, it needs more time. If it springs back when tapped, it's baked. You can also test the cake with a toothpick. The cake is fully baked when the pick comes away with a few moist crumbs or no crumbs at all.
Once baked, remove the pans from the oven and allow them to cool on a wire rack for 10 to 15 minutes. Then invert the pans and lift them away from the cakes. Peel away the parchment and allow the cakes to cool completely before frosting.
Step 7: Frost
When the layers are finally cool, you can frost the cake . There are plenty of types of frosting out there to choose from, but our Test Kitchen suggests you try a classic American buttercream for your first batch. This frosting is simple to make and exceptionally delicious.
To frost, first add a generous scoop of frosting on top of the first layer of cake and smooth with an offset spatula. Repeat until you've stacked all the layers.
Then give the whole cake a very thin coat of icing. This is called a crumb coat and it helps to contain crumbs. Chill the cake in the fridge or freezer for about 10 minutes, then finish frosting by adding swoops of buttercream with a spatula.
How to Decorate a Cake
One of the great joys of decorating a cake is that you can do as much or as little as you like.
For sheet cakes and single-layer cakes, all you have to do is swirl your favorite frosting on top with an offset spatula. Then you can scatter sprinkles, chocolate curls or even crushed cookies over the top.
Layer cakes require a bit more effort. Be sure to make plenty of buttercream to sandwich between each layer of cake. Stack the layers and cover in icing. You can then use a piping bag fitted with different pastry tips to create intricate designs. If that's not your style, try a ganache drip , edible flowers or just a very festive cake topper.
Types of Cake
There are lots of kinds of cake out there—and we're not just talking about flavor! Cakes vary widely in the techniques used to make them, ingredients, proportions and presentation. Here are some of our favorite types of cake.
These are the cakes we know and love. A tall, layered cake is what makes birthday parties so special. Layer cakes are simply cakes that are stacked high and sandwiched with frosting or other fillings.
Layer cakes can be frosted and decorated on the outside or even kept naked (minimal frosting on the outside reveals the layers inside). These cakes are the ultimate celebration desserts and can be made in any flavor combination.
Not every celebration calls for a towering layer cake. That's where sheet cakes come in.
Sheet cakes are baked in a sheet pan or 13x9 pan and topped with a single layer of frosting. They are equally delicious as their stacked counterparts but take less time and are easier to decorate. Like layer cakes, sheet cakes come in all sizes and flavors.
Pound cakes get their name from the traditional weight of ingredients used to make them: equal parts butter, flour, sugar and eggs.
Pound cakes tend to be dense and moist. You'll often see pound cakes baked up in loaf pans or decorative fluted tube pans. Since these cakes tend to be light on decoration, they make for great everyday bakes. Make one for dessert and have it the next day for breakfast.
Bundt cakes are named for the type of pan used to bake them. Bundt pans , also called fluted cake pans, are decorative molds that typically have a hole in the center.
To make these molded cakes, you can use a variety of cake recipes. Our Test Kitchen recommends opting for recipes specifically formulated for these decorative cake pans or cake recipes with heavier batters like pound cake. Avoid recipes for angel food cakes, chiffon cakes or boxed cake mixes.
Perhaps the best part about baking Bundts (other than that they are absolutely delectable) is that they don't require a lot of fuss to finish. Once you remove a Bundt cake from its pan , decorate it with a simple glaze or a bit of confectioners' sugar. Learn how to make chocolate glaze for doughnuts in your kitchen.
Angel Food Cake and Chiffon Cake
If you're searching for a light and airy cake, look for angel food cake and chiffon cake recipes. These cakes get their light texture and volume from whipped egg whites. These cakes are also baked in a tube pan, giving them a distinctive shape.
Because these cakes are so delicate, they're often served up simply without much frosting. Fresh fruit and homemade whipped cream heaped on the side is optional but highly encouraged.
Cake rolls are a great way to serve cake a little differently. Cake rolls are made up of a light sponge cake and rolled up with the filling of your choice—jelly, frosting or even ice cream. You can leave cake rolls plain, dust them with a bit of confectioners' sugar or frost them—it's all up to you.
Mastering the swirl can seem tricky, but if you follow our guide for how to make a cake roll , you should have no trouble.
Coffee Cake
Coffee cakes are, simply, cakes intended to be eaten alongside coffee or tea. They're commonly made in tube pans or fluted cake pans (though you'll see them made in 13x9 pans and even round cake pans at times).
These cakes are served unadorned—no frosting needed! Also, they tend to be a bit less sweet since they're meant more as a snack or breakfast than a dessert.
Cake Baking Tips
Whether you're a master baker or just have a favorite boxed cake mix (hey, we do!), there are always some tips to brush up on before baking so you get the best possible results.
How do you make cake moist?
Cakes get moisture from all sorts of ingredients. Some cakes, like our Test Kitchen's favorite vanilla cake , rely upon sour cream for moisture. Other recipes may call for buttermilk, yogurt or even applesauce. All these ingredients add moisture to your cake, so be sure not to scrimp on them. If a cake calls for a full cup of sour cream, be sure to add it.
Also, don't overbake your cake! All the moisture-adding ingredients in the world won't do you any good if you leave the cake in the oven for too long.
How do you fix dry cake?
Sometimes, despite your best efforts, your cake ends up dry. You might end up with a dry cake if you accidentally add too much flour or overbake it.
You can fix a dry cake by adding a simple syrup wash or milk soak the way Christina Tosi does . Consider transforming a dry cake into a trifle , too. Adding creams, fruits and more can add moisture and flavor to a dry cake.
How can you tell when cake is done?
The toothpick test is the easiest way to test a cake. Insert the pick into the center of the cake. If it comes away sticky or covered in batter, the cake needs more time in the oven. If the toothpick comes out of the cake with a few moist crumbs, it's baked through.
If you can't find a toothpick, get creative! Try a bamboo skewer or a sharp paring knife. If you don't have anything to pierce your cake with, try pressing the top of the cake. If it springs back, it's ready to come out of the oven.
What oven rack should you bake cakes on?
Just like when baking cookies , you should use the middle rack to bake your cakes. You don't want the cake too close to the heating elements on the bottom or top of the oven. Using the middle rack ensures your cake will be cooked evenly.
How do you cut a cake?
To cut a cake , dip your knife in hot water, then wipe it dry. The warm blade will cut cleanly through all the layers to reveal a gorgeous slice. Be sure to wipe it clean between slices.
How do you store cake?
After you've enjoyed your cake, you might find yourself with some leftovers. Cakes are best eaten within a week and stored in a cake keeper or cake dome. If the frosting is heat-sensitive (think Swiss meringue buttercream, cream cheese or whipped cream), keep that cake in the fridge.
You can freeze cakes as well—frosted or unfrosted. Just be sure to wrap them tightly in plastic wrap or seal them in an airtight bag or container.
The post How to Bake a Cake: The Ultimate Guide appeared first on Taste of Home .

- Side Hustles
- Power Players
- Young Success
- Save and Invest
- Become Debt-Free
- Land the Job
- Closing the Gap
- Science of Success
- Pop Culture and Media
- Psychology and Relationships
- Health and Wellness
- Real Estate
- Most Popular
Related Stories
- Health and Wellness This small California city is home to America's longest-living people—they follow 8 simple rules, says nutritionist
- Health and Wellness People on this island in Italy live to 100—here's a look at their diet for longevity
- Health and Wellness Harvard-trained brain expert: 4 key foods I try to eat every day to stay sharp and fight Alzheimer's
- Health and Wellness Fiber is one of the most important, overlooked nutrients, doctor says
- Health and Wellness I've studied longevity habits for 20 years: What I eat every day
My family’s from the Greek island of longevity, where people often live to 100: The 12 foods we always eat

On Ikaria, the Greek island where people "forget to die," as one centenarian told longevity expert Dan Buettner , is one of a handful of Blue Zones around the globe where people live an inordinately long time.
In 2009, Greek physicians and researchers found that 13% of Ikarians in their study were over 80, compared to about 1.5% of the global population and about 4% in North America and Europe. People on the island were 10 times more likely to live to 100 than Americans .
I have deep family roots on Ikaria, and for almost two decades, I've been running a cooking school out of the kitchen and garden of my village home. My pantry is culled from the traditions of the Mediterranean: chock-full of all the things that have long given food its flavor in this part of the world.
Here's what's in an Ikaria-inspired pantry:
Beans and legumes
These are among the seminal ingredients of the Ikarian way of eating. Adding them to your everyday meal plan is proven to increase longevity and can help you phase meat out of your diet. Try:
- Broad beans (aka, fava beans)
- Gigantes (giant beans)
I couldn't imagine my life or kitchen without garlic! It's the ultimate flavor-packing, health - providing natural ingredient. There's a virtual pharmacopeia of goodness in every clove.
Modern-day Ikarians swear by it. My daughter makes a preventive infusion of raw garlic, mountain or sage tea, ginger, and honey, which she consumes when the temperature drops or she feels a cold coming on — advice taken from our friend, Yiorgos Stenos, 91.
Garlic makes almost everything taste better. It sweetens up as it softens and cooks, lending an almost caramelized flavor to so many different foods.
Whole grains are an integral part of the Ikaria diet. Here are a few different types to keep on hand:
- Pasta, especially whole wheat pasta and gluten-free, high-protein, bean-based pastas, such as chickpea and lentil pastas
On Ikaria, myriad herbs grow wild and most of us can grow a few pots of fresh herbs at home, even if it's just on the windowsill. I use herbs with abandon in many of my recipes.
Most families have a cupboard packed with dried herbs, the therapeutic qualities of which are contained in the knowledge passed down from generation to generation. Basic dried herbs include:
Nuts are an important ingredient in many of my plant-based recipes and traditionally are an important ingredient in Greek regional cooking. They grow abundantly throughout the country.
Here are a few of the most popular — and healthiest:
- Sesame seeds and tahini
Olives have been a staple in the Greek diet since prehistoric times, and they're one of the many preserves I always keep stocked.
In Greece, they're traditionally eaten on their own or in salads. I love to pair them with pantry staples like beans or pasta and other grains.
Olive oil is the defining food of the Mediterranean diet and an absolute must in the pantry.
Many of the health benefits associated with the Mediterranean diet, and, by extension, the Ikaria diet, are attributed to the health properties of olive oil . I only use extra virgin oil, which simply means the oil is unrefined.
On Ikaria, many people, myself included, use sea salt that collects in the small natural salt basins that have formed along the island's rocky coastline over eons. It tastes better than regular table salt, which comes from mines and is heavily processed.
This is one of my personal favorites. Consuming honey daily is one of the longevity secrets of the islanders. Honey is antibacterial , rich in antioxidants including flavonoids , and — unlike white sugar or artificial sweeteners — helps the body to regulate blood sugar levels . Many people here eat a spoonful every morning.
You can add a liberal drizzle to your tea or a breakfast smoothie bowl, or whisk it into dressings.
Dried fruits
Figs and raisins are two dried fruits I always have on hand to use in all sorts of savory dishes, especially in salads and rice dishes.
Yogurt is a fermented food that has been part of the culinary tapestry of the Eastern Mediterranean for thousands of years. The traditional yogurt on Ikaria is produced with goat's milk and has a delicious sour flavor and creamy texture.
If goat's milk yogurt isn't to your liking, you might prefer the Greek yogurt commonly found in American supermarkets, which is similarly rich in probiotics.
Feta and similar cheeses
Almost all the cheese Ikarians make and eat is produced with goat's milk or sheep's milk, like feta. Much of it is naturally fermented.
Over the years of teaching mostly Americans who come to my classes, I've had many guests who are lactose intolerant but are able to enjoy the island's traditional goat's milk cheeses and even a glass or two of fresh goat's milk without a problem.
Diane Kochilas is the host and co-executive producer of " My Greek Table ," runs the Glorious Greek Cooking School on her native island Ikaria, and is the author of 18 books on Greek cuisine, including most recently, " The Ikaria Way: 100 Delicious Plant-Based Recipes Inspired by My Homeland, the Greek Island of Longevity ."
Want to make extra money outside of your day job? Sign up for CNBC's new online course How to Earn Passive Income Online to learn about common passive income streams, tips to get started and real-life success stories. Register today and save 50% with discount code EARLYBIRD.
Plus, sign up for CNBC Make It's newsletter to get tips and tricks for success at work, with money and in life.

From " The Ikaria Way: 100 Delicious Plant-Based Recipes Inspired By My Homeland, the Greek Island of Longevity ," by Diane Kochilas, Copyright © 2024 by the author, and reprinted with permission of St. Martin's Publishing Group.
- Skip to main content
- Keyboard shortcuts for audio player
Cash-strapped Trump is now selling $60 Bibles, U.S. Constitution included
Rachel Treisman

Then-President Donald Trump holds up a Bible outside St. John's Episcopal Church in Washington, D.C., during a controversial 2020 photo-op. Brendan Smialowski/AFP via Getty Images hide caption
Then-President Donald Trump holds up a Bible outside St. John's Episcopal Church in Washington, D.C., during a controversial 2020 photo-op.
Former President Donald Trump is bringing together church and state in a gilded package for his latest venture, a $60 "God Bless The USA" Bible complete with copies of the nation's founding documents.
Trump announced the launch of the leather-bound, large-print, King James Bible in a post on Truth Social on Tuesday — a day after the social media company surged in its trading debut and two days after a New York appeals court extended his bond deadline to comply with a ruling in a civil fraud case and slashed the bond amount by 61%.
"Happy Holy Week! Let's Make America Pray Again," Trump wrote. "As we lead into Good Friday and Easter, I encourage you to get a copy of the God Bless The USA Bible."

Consider This from NPR
Why trump's persecution narrative resonates with christian supporters.
The Bible is inspired by "God Bless the USA," the patriotic Lee Greenwood anthem that has been a fixture at many a Trump rally (and has a long political history dating back to Ronald Reagan). It is the only Bible endorsed by Trump as well as Greenwood, according to its promotional website .
The Bible is only available online and sells for $59.99 (considerably more expensive than the traditional Bibles sold at major retailers, or those available for free at many churches and hotels). It includes Greenwood's handwritten chorus of its titular song as well as copies of historical documents including the U.S. Constitution, Declaration of Independence and Pledge of Allegiance.
"Many of you have never read them and don't know the liberties and rights you have as Americans, and how you are being threatened to lose those rights," Trump said in a three-minute video advertisement.
"Religion and Christianity are the biggest things missing from this country, and I truly believe that we need to bring them back and we have to bring them back fast."

'You gotta be tough': White evangelicals remain enthusiastic about Donald Trump
Trump critics on both sides of the aisle quickly criticized the product, characterizing it as self-serving and hypocritical.
Conservative political commentator Charlie Sykes slammed him for "commodifying the Bible during Holy Week," while Democratic Sen. Amy Klobuchar of Minnesota critiqued him for "literally taking a holy book and selling it, and putting it out there in order to make money for his campaign."
Trump says the money isn't going to his campaign, but more on that below.
Klobuchar added that Trump's public attacks on others are "not consistent with the teachings of the Bible," calling this "one more moment of hypocrisy." Tara Setmayer, a senior adviser for anti-Trump Republican PAC the Lincoln Project, called it "blasphemous ."
And former Rep. Liz Cheney, a Republican from Wyoming, trolled Trump with a social media post alluding to his alleged extramarital affairs.
"Happy Holy Week, Donald," she wrote. "Instead of selling Bibles, you should probably buy one. And read it, including Exodus 20:14 ."
Christianity is an increasingly prominent part of his campaign
Trump has made a point of cultivating Christian supporters since his 2016 presidential campaign and remains popular with white evangelicals despite his multiple divorces, insults toward marginalized groups and allegations of extramarital affairs and sexual assault.
And his narrative of being persecuted — including in the courts — appears to resonate with his many Christian supporters.
Trump has increasingly embraced Christian nationalist ideas in public. He promised a convention of religious broadcasters last month that he would use a second term to defend Christian values from the "radical left," swearing that "no one will be touching the cross of Christ under the Trump administration."
He made similar comments in the Bible promotional video, in which he warned that "Christians are under siege" and the country is "going haywire" because it lost religion.

What to know about the debut of Trump's $399 golden, high-top sneakers
"We must defend God in the public square and not allow the media or the left-wing groups to silence, censor or discriminate against us," he said. "We have to bring Christianity back into our lives and back into what will be again a great nation."
Trump himself is not known to be particularly religious or a regular churchgoer. He long identified as Presbyterian but announced in 2020 that he identified as nondenominational .
A Pew Research Center survey released earlier this month found that most people with positive views of Trump don't see him as especially religious, but think he stands up for people with religious beliefs like their own.
Trump said in the promotional video that he has many Bibles at home.
"It's my favorite book," he said, echoing a comment he's made in previous years. "It's a lot of people's favorite book."
The Impact Of Christian Nationalism On American Democracy
Trump's relationship to the Bible has been a point of discussion and sometimes controversy over the years.
In 2020, amid protests over George Floyd's murder, he posed with a Bible outside a Washington, D.C., church, for which he was widely criticized. U.S. Park Police and National Guard troops had tear-gassed peaceful protesters in the area beforehand, seemingly to make way for the photo-op, though a watchdog report the following year determined otherwise .
That same year, a clip of a 2015 Bloomberg interview, in which Trump declines to name his favorite — or any — Bible verse resurfaced on social media and went viral.
Bible sales are unlikely to solve Trump's financial problems
An FAQ section on the Bible website says no profits will go to Trump's reelection campaign.
"GodBlessTheUSABible.com is not political and has nothing to do with any political campaign," it says.
However, the site adds that it uses Trump's name, likeness and image "under paid license from CIC Ventures LLC."
Trump is listed as the manager, president, secretary and treasurer of CIC Ventures LLC in a financial disclosure from last year.

Here's what happens if Trump can't pay his $454 million bond
Trump's sales pitch focuses on bringing religion back to America.
"I want to have a lot of people have it," he said at one point in the video. "You have to have it for your heart and for your soul."
But many are wondering whether Trump has something else to gain from Bible sales while facing under mounting financial pressure.
There's his presidential reelection campaign, which has raised only about half of what Biden's has so far this cycle. Trump acknowledged Monday that he "might" spend his own money on his campaign, something he hasn't done since 2016.
There's also his mounting legal expenses, as he faces four criminal indictments and numerous civil cases. Trump posted bond to support a $83.3 million jury award granted to writer E. Jean Carroll in a defamation case earlier this month, and was due to put up another $454 million in a civil fraud case this past Monday.

Trump is on the verge of a windfall of billions of dollars. Here are 3 things to know
His lawyers had said last week that they had approached 30 companies for help making bond, but doing so was a "practical impossibility" — prompting New York's attorney general to confirm that if Trump did not pay, she would move to seize his assets . On Monday, the appeals court reduced the bond amount to $175 million and gave Trump another 10 days to post it.
Trump has evidently been trying to raise money in other ways.
The day after the civil fraud judgment was announced, he debuted a line of $399 golden, high-top sneakers , which sold out in hours . The company behind his social media app, Truth Social, started trading on the Nasdaq exchange on Tuesday, which could deliver him a windfall of more than $3 billion — though he can't sell his shares for another six months.
- Donald J. Trump
- sales pitch
- Christianity
- Election 2024
- Entertainment
- Newsletters
- Photography
- Personal Finance
- AP Buyline Personal Finance
- Press Releases
- Israel-Hamas War
- Russia-Ukraine War
- Global elections
- Asia Pacific
- Latin America
- Middle East
- March Madness
- AP Top 25 Poll
- Movie reviews
- Book reviews
- Personal finance
- Financial Markets
- Business Highlights
- Financial wellness
- Artificial Intelligence
- Social Media
Trump is selling ‘God Bless the USA’ Bibles for $59.99 as he faces mounting legal bills
Former President Donald Trump, now the presumptive 2024 Republican nominee, released a video on his Truth Social platform on Tuesday urging supporters to buy the “God Bless the USA Bible,” inspired by country singer Lee Greenwood’s patriotic ballad.
FILE - President Donald Trump holds a Bible as he visits outside St. John’s Church across Lafayette Park from the White House, June 1, 2020, in Washington. Trump is now selling Bibles as he runs to return to the White House. The presumptive Republican nominee released a video on his Truth Social platform Tuesday urging his supporters to purchase the “God Bless The USA Bible.” (AP Photo/Patrick Semansky, File)
- Copy Link copied
NEW YORK (AP) — Former President Donald Trump is now selling Bibles as he runs to return to the White House.
Trump, who became the presumptive Republican nominee earlier this month, released a video on his Truth Social platform on Tuesday urging his supporters to buy the “God Bless the USA Bible,” which is inspired by country singer Lee Greenwood’s patriotic ballad. Trump takes the stage to the song at each of his rallies and has appeared with Greenwood at events.
“Happy Holy Week! Let’s Make America Pray Again. As we lead into Good Friday and Easter, I encourage you to get a copy of the God Bless the USA Bible,” Trump wrote, directing his supporters to a website selling the book for $59.99.
The effort comes as Trump has faced a serious money crunch amid mounting legal bills while he fights four criminal indictments along with a series of civil charges. Trump was given a reprieve Monday when a New York appeals court agreed to hold off on collecting the more than $454 million he owes following a civil fraud judgment if he puts up $175 million within 10 days. Trump has already posted a $92 million bond in connection with defamation cases brought by the writer E. Jean Carroll , who accused Trump of sexual assault.
“All Americans need a Bible in their home, and I have many. It’s my favorite book,” Trump said in the video posted on Truth Social. “I’m proud to endorse and encourage you to get this Bible. We must make America pray again.”
Billing itself as “the only Bible endorsed by President Trump!” the new venture’s website calls it “Easy-to-read” with “large print” and a “slim design” that “invites you to explore God’s Word anywhere, any time.”
Besides a King James Version translation, it includes copies of the U.S. Constitution, the Bill of Rights, the Declaration of Independence and the Pledge of Allegiance, as well as a handwritten chorus of the famous Greenwood song.
The Bible is just the latest commercial venture that Trump has pursued while campaigning.
Last month, he debuted a new line of Trump-branded sneakers , including $399 gold “Never Surrender High-Tops,” at Sneaker Con in Philadelphia. The venture behind the shoes, 45Footwear, also sells other Trump-branded footwear, cologne and perfume.
Trump has also dabbled in NFTs, or nonfungible tokens, and last year reported earning between $100,000 and $1 million from a series of digital trading cards that portrayed him in cartoon-like images, including as an astronaut, a cowboy and a superhero.
Donald Trump is facing four criminal indictments, and a civil lawsuit. You can track all of the cases here .
He has also released books featuring photos of his time in office and letters written to him through the years.
The Bible’s website states the product “is not political and has nothing to do with any political campaign.”
“GodBlessTheUSABible.com is not owned, managed or controlled by Donald J. Trump, The Trump Organization, CIC Ventures LLC or any of their respective principals or affiliates,” it says.
Instead, it says, “GodBlessTheUSABible.com uses Donald J. Trump’s name, likeness and image under paid license from CIC Ventures LLC, which license may be terminated or revoked according to its terms.”
CIC Ventures LLC, a company that Trump reported owning in his 2023 financial disclosure, has a similar arrangement with 45Footwear, which also says it uses Trump’s “name, likeness and image under paid license from CIC Ventures LLC, which license may be terminated or revoked according to its terms.”
A Trump spokesperson and God Bless the USA Bible did not immediately respond to questions about how much Trump was paid for the licensing deal or stands to make from each book sale.
Trump remains deeply popular with white evangelical Christians , who are among his most ardent supporters, even though the thrice-married former reality TV star has a long history of behavior that often seemed at odds with teachings espoused by Christ in the Gospels.
When he was running in 2016, Trump raised eyebrows when he cited “Two Corinthians” at Liberty University, instead of the standard “Second Corinthians.”
When asked to share his favorite Bible verse in an interview with Bloomberg Politics in 2015, he demurred.
“I wouldn’t want to get into it. Because to me, that’s very personal,” he said. “The Bible means a lot to me, but I don’t want to get into specifics.”
When he was president, law enforcement officers aggressively removed racial justice protesters from a park near the White House, allowing Trump to walk to nearby St. John’s Church, where he stood alone and raised a Bible. The scene was condemned at the time by the bishop of the Episcopal Diocese of Washington.
Before he ran for office, Trump famously hawked everything from frozen steaks to vodka to a venture named Trump University, which was later sued for fraud .
IMAGES
COMMENTS
Check out my new cake designing software called Cakenote - https://www.cakenote.com-----Learn how to make a book cake in this full length free tutorial by...
For the full tutorial please visit: https://cakedecoratinginstructor.com/cake-tutorial-bookcakeSome of the decorating tools I use=====Mixe...
Created by The Peanut Gallery, the Book Buffet looked to be a super-fun way of presenting a book report. I assigned the project after Christmas. We spent time as a class checking out the instruction package and looking at the sample ideas that were included.
Use frosting to create a smooth base layer on the cake, and then roll out fondant to cover the entire cake, just like covering a real book with its cover. Use food coloring to add details such as the book's title and spine, and use a ruler to create imprints that resemble the pages of a book. Finally, add any additional decorations or details ...
Start by baking a cake of your choice in a rectangular pan. Once the cake is cooled, use a sharp knife to cut off the top and bottom crusts. Then, cut the cake horizontally into three equal sections. Next, take the middle section of the cake and cut it in half lengthwise. These will be the pages of your book.
This book report project contains 4 templates that are assembled together to form the shape of a 4 tier birthday cake. 4 printable worksheets that are cut out and then glued together to form the shape of a birthday cake. the second tier of the birthday cake to create a flip book in that area.
15. Watercolor Rainbow Book Report. This is great for biography research projects. Students cut out a photocopied image of their subject and glue it in the middle. Then, they draw lines from the image to the edges of the paper, like rays of sunshine, and fill in each section with information about the person.
She was excited to ask for my help, and I was thrilled to be able to help her. We had a lot of fun. My sister took my kids and her other daughter to the park. Emma and I went to work on her cake. She had a design in mind that she had drawn out. She had read "Everything on a Waffle," by Polly Horvath. I have to give a shout out to her ...
Baking the cake. Preheat oven to 170 degrees Celsius. Beat butter and granulated sugar till soft and creamy. Add eggs, one at a time, beating well after each addition. In another separate bowl, sift flour, cocoa powder, baking powder and salt 3 times.
By Jackie tutorial. Cakes for Show demonstrates step-by-step how to make book shaped cake covered in fondant. I made this book cake for a Graduation party. I began with a 12" square cake. How To Make Fondant Graduation Cake Toppers.
1. Take one open book as reference and trace a template with a paper. We would need a rectangular cake filled with your favorite filling. Place the template to start to make the shape of the book. 2. crumb coat the cake with buttercream. 3. Once the cake is chilled with cover with fondant and with the tool we add the pages creases.
How to make a book cake. I use my book cake to create a Harry Potter themed cake, but with this basic cake decorating tutorial you can learn how to create a ...
Pinch the edges to square them up. Tuck in carefully with the putty knife or use water on top of strip to "glue it to the back cover and gently butt it up to the "pages" all around the bottom of cake. The bottom "cover" is just strips (1/4 inch wide) applied along the bottom white part of the pages.
Prepare Chocolate Cake. Prepare your chocolate cake batter. Bake your 6lb portion of batter in a 9 x 12 pan at 350 degrees for 1 hour and 20 minutes and your 8lb portion of batter in a 12 x 15 pans for 1 hour and 40 minutes, or until a cake tester comes out completely clean. Let cool completely in their pans.
Make sure to leave at least 1/4″ gap all around the board so you have a place to add frosting in order to create a crumb coat. Place your templates and begin using them to carve down the cake or to add frosting where you are a little low.
Start off light and go darker. Paint your top cover and spine of your books with a mix of good quality vodka and petal dust or gel colours. Mix black, brown and cornflour to customize your shade. Slowly build your colour with dust. Use a soft brush when using your dust. Paint any additional details for your top cake.
Measure the cake with a ruler and make a line at the midway point, vertically, down the middle of the cake. On the surface of the cake, cut out a triangular wedge in the center. Ensure it is only around a quarter of the thickness of the cake. Now opposite that wedge (the bottom), slice a small triangle off.
This resource contains two sets (colored and blackline) of seven worksheet templates for the different tiers of this cake project. The seven tiers can be glued together to form a towering cake book report. It also comes with task sheets and a grading rubric. A finished cake book report project will make a colorful and exciting bulletin board ...
Artist Tina Sebàs shows off her baking and decorating skills, by taking us through a step-by-step tutorial, as she creates a book cake replica of the novel S...
How to use cardboard to make a pretty birthday cake book report4th Grade HomeworkDon't forget to like and subscribe!!!Thank you for watching!!
Help your students make the books come alive with these 35 creative book report craft. By mint tins to cereal boxes go T-shirts. Ideas, Inspiration, and Giveaways for Teachers
Diese uniquely shaped book report project contains five layout is assemble with a tall day cake about the core character of the story. Who finished project measures 9 x 17 inches.. Get the you need to complete these your cake book report projects is included inbound like set out teaching money. All that you will need is scissors, glue, tape, and coloring pencils.
Not only are they easy, but they also offer the satisfaction of dessert and the wonder at having made it yourself. Baking Supplies for Beginners. To make all five of these recipes, you need only ...
To frost, first add a generous scoop of frosting on top of the first layer of cake and smooth with an offset spatula. Repeat until you've stacked all the layers.
Grains. Whole grains are an integral part of the Ikaria diet. Here are a few different types to keep on hand: Bulgur. Farro. Pasta, especially whole wheat pasta and gluten-free, high-protein, bean ...
Former President Donald Trump is bringing together church and state in a gilded package for his latest venture, a $60 "God Bless The USA" Bible complete with copies of the nation's founding ...
Trump is selling 'God Bless the USA' Bibles for $59.99 as he faces mounting legal bills. Former President Donald Trump, now the presumptive 2024 Republican nominee, released a video on his Truth Social platform on Tuesday urging supporters to buy the "God Bless the USA Bible," inspired by country singer Lee Greenwood's patriotic ballad.
I made this book cake for a Graduation party. I began with a 12" square cake.Making Graduation cake toppers video - https://youtu.be/dP-biYrxxGkMusic - Medit...