- Photography School
- Photo Processing
- Genres and Topics

Learn the What, Where and How of Photographing Motorcycles at Every Speed

Like every genre, motorcycle photography has its specifics: you have to choose the right place, composition, and equipment. But above all you have to think about your own safety. That’s why we have a few basic tips for you on how to take impressive photos of even the fastest motorcycles.
There are two basic kinds of motorcycle photography:
- on the road,
- and at the track.
Photographing Motorcycles on the Road
For photography on the road, safety comes first.
If you’re standing at the edge of a curve, you can take great pictures, but you’re also in a quite dangerous place. If the rider falls, that’s always an explosive situation, and it’s not good to be in the way of the bike. The results can be fatal.
Think about your subject’s safety, too. For you to get the ideal picture, they will usually have to ride past you several times. So pick a spot where there’s not a lot of traffic.
Or time your shoot based on traffic. Consider doing it in the evening—the roads will be emptier, and the setting sun will improve your photo.
And don’t forget that your motorcyclist will also need room to turn their bike before and after the shot.
Photographing Motorbikes at the Track
You can also take your pictures from the stands. But in that case, forget about racing circuits . At these, the stands are so far from the track that you’ll hardly be able to photograph anything.
However, if for example you’re at a motocross track or a road-racing track, where spectators sit much closer, you can take interesting pictures even from the spectator zone. And often better photos than the accredited photographers will be taking.
Yet you might still want to stand in a better spot outside of that zone. Then the simplest route is to contact a newspaper and offer to take pictures for a race gallery for them. After that you can ask the organizer for accreditation.
Definitely don’t try to sneak or break into these non-public spots. It’s unsafe. Because of the dangers near the track, accredited photographers sign liability papers and are instructed on safe behavior in their spots.
A Considered Composition
Plan your composition around more than just the bike. Do you want a pic of a chopper barreling towards you down a tree-lined road, or of a showy swerve on a curve?
Think about the time of day and the position of the sun as well before you choose your spot.
And it’s also important for your subject to truly be a good rider! Photos from the curves will always look better with a pro than with a novice. Fortunately, finding pros at the races is easy.

Use a Real Camera
You’ll want to go for the longer focal lengths when photographing motorcycles. It also pays to have a fast autofocus and a decent lens speed.
So forget about using a smartphone or a basic compact. Although an ultrazoom is the best choice of all, ideally you’ll want at least an APS-C DSLR , or an appropriate camera with similar technology (e.g. a compact with exchangeable lenses), and two lenses to go with it.
Basic Lenses Will Do
When you’re starting out, two basic zooms are enough—one with a range of 17–50 mm, the other a 70–300 mm telephoto. But meanwhile you’ll have to expect decreased lens speeds at the long end. So if you take your motorcycle photography seriously, it’s best to go for a 70–200/2.8.
On the other hand you’ll often be standing very far from the bikes, and for that a 300 mm lens will come in handy. Fortunately an APS-C will help you out here through its crop factor . A full-frame camera is a sub-par choice unless your kit includes lenses with lengths of 300 mm and up.
I personally use fairly cheap gear, and it’s not the barrier that some say it is. Sure, things will go great with a 300mm 2.8 lens and a camera that shrugs at ISOs of 1000+, but you can take nice pictures with cheaper gear too.
And you may already have the above gear at home, saving you a shopping trip. Still… you might want to buy a monopod. It will definitely come in handy with long lenses.
How to Shoot
You’ve picked your spot and your gear, so now let’s get started.
Generally it’s good to start in the semi-automatic shutter priority mode and gradually work your way towards full manual. When you’re photographing motorcycles in motion, there are two basic angles that you’ll be moving around between.
Side Shots (and Similar Shots)
For side shots, you’ll mainly need a wide lens and a relatively slow exposure.
Choose your focal length based on the distance, and your speed based on the motorcycle’s speed at your spot. There are some places where 1/100 s or longer is enough for an impressive photo, and others where you’ll struggle for sharpness even at 1/500 s. Here you’ll just have to practice.
Also don’t forget that on a moving motorcycle, the wheels are spinning and so is the chain set, and sometimes the clutch can be seen spinning too. It’s definitely no problem if their motion can be seen in your picture too. But it’s all a matter of taste.

When you’re photographing motorcycles in motion from the side, you also have the option of panning. This technique gives you a blurred background while the rider and the bike stay sharp. It makes your picture feel more dynamic.
When you’re panning, you take advantage of the bike’s motion by focusing on it and then following it in your viewfinder. To get the best effect here, focus on the cycle’s center. Press the trigger in all the way when the side of the bike is facing straight at you. Feel free to use a one-point center focus. That will be the easiest at first.
When you’re taking pictures at the track, take advantage of the fact that every racer will ride past your camera several times. Start with faster speeds (just to be sure), and then keep reducing the speed for as long as the shots stay sharp.
Your aperture choice is important too. For panning you want to use a high f-stop. Don’t be afraid to go even as high as f/8 or f/11.

Frontal Shots
The second option is a shot more or less from the front. More or less… practically nobody wants to stand directly in front of a moving motorcycle. Note that the longer your lens, the narrower the angle in which you can photograph the bike. Long lenses will change your perspective as well.
If you do go long, choose a low f-stop to make your subject “pop,” and take full advantage of a fast lens.
But remember, the shallow depth of field here cuts both ways. If you focus on the front of a bike, its rider may be blurry. It’s individual, but I’ve had the best luck with always sticking at two f-stops over the minimum.
You’ll want to work with fast exposures too. The bike may be heading towards you as fast as 60–70 m/s. So if you choose a shutter speed of around 1/100 s, it will travel over half a meter during the shot. Often in extra-fast segments you’ll get good use out of speeds as fast as 1/2000 s.
Cameras need some time to focus as well. So fast lenses with ultrasonic focusing and fast cameras that have advanced focusing systems are an advantage.

Manual Focus at These Speeds?
Sure—Try It. I’ve found that in especially tough conditions, it pays to focus on a point manually, use pre-focusing in the camera settings, and then shoot without automatic focusing.
The disadvantage is that you can’t react to unusual events and you’re focusing on one spot.

Watch Out for Slow, Small Cards
If multiple riders are leaving the gate in a row, or you want pictures from the race’s start, then you need to pump out lots of shots in sequence. So you’ll want a big, fast memory card. Until you’ve gotten the hang of things, it will be nothing special to shoot 1,000 pictures and throw away 950.
One other thing: once you have one decent picture, think up a new idea for the next one fast. Otherwise you risk filling up your card with near-duplicates.

JPEG or RAW?
You can of course shoot to JPG, and that does mean you’ll rarely fill up your card. But RAW is a very good choice. Just remember, though, that it makes fast cards a necessity.
RAW will make it easier to edit your photos in Zoner Photo Studio X . But more on that some other time.
Don’t Fear the Chopper
If you’re level-headed and you don’t run risks, there’s nothing to fear. Just try out the advice here, and you’ll definitely get rolling fast. After that you just need to practice.
The advantage of this genre is that it doesn’t demand the kind of patience that, say, animal photography does. And you don’t even have to get up early to catch rocks in the morning mist, like you would for landscape photography !
Receive our weekly newsletter to stay on top of the latest photography trends
Subscribe to receive the best learn.zoner.com has to offer
By confirming the subscription, you consent to the processing of your personal data for receiving newsletter. Learn more in our privacy policy.
15. March 2018
Author Milan Kubin
If you enjoyed this article, you may also like…, learn to show landscapes’ magic in your photos, four reasons to shoot square, 9 tips for getting creative with exposure time, comments (1).

Stephen Frye
- October 25, 2022 at 22.31
Excellent article. Applies to all forms of motorsports, not just motorcycles.
Leave a Reply Cancel reply
Your email address will not be published. Required fields are marked *
- Beginner Tips
- Composition
- Mastering Your Camera
- Cheatsheets
- Working With Light
- Your Photo Business
- Advanced Edits
- Basic Edits
- Creative Edits
- Organizing Photos
- Presenting Your Photos
- Accessories
- Flashes and Lights
- Architecture
- Astrophotography
- Macro Photography
- Night Photography
- Other Topics
- Product Photography
- Street Photography
- Photographer Stories
- Photography News
- Account Settings
Classifieds
Bike reviews, product reviews.
- Best Motorcycle Cameras
- Best Motorcycle Earplugs
- Best Motorcycle Oil
- Best Leather Jackets
- Best Winter Gloves
- Best Sportbike Tires
- GPS Buyers Guide
- Adventure Touring
- On-Off-Road
- Sport-Touring
- Touring Scooter
- Harley-Davidson
- Royal Enfield
New Rider's Hub
Top stories.

Motorcycle Photography: 9 Ways To Get The Perfect Shot

The trick is in how you manage time and space
Human beings are predisposed to collect pictures of their exploits. From back in the time of cave dwellers with their wall art to oil painting to the camera obscura to film to today with our digital cameras, we have an innate desire to create physical manifestations of our memories, and while we now carry important photos in phones instead of our wallets, this need to capture moments and try to relive them later seems to be undergoing a heretofore unseen level of growth.
Unfortunately, most of these images are quick grabs without much – or any – thought put into the process and how to make the image as visually pleasing as possible. They are just frozen slices of time. But they can be so much more.

If you’re one of those people who has spent almost as much time looking at the photos as you have reading the text of motorcycle publications, then maybe you’d like to try your hand at photographing motorcycles, too. You really can start doing it with almost any DSLR you may happen to have. Who knows, you may find a new hobby to go alongside your love of riding motorcycles. After all these years, I have no regrets for transporting cameras for many thousands of miles on my back, in tank bags, or panniers. It was well worth the effort.
Finally, before we move on to the photography tips, I would be remiss if I didn’t point out that the act of shooting motorcycles often requires multiple passes back and forth in front of the camera. Remind your riders to do it safely, even if it means riding down the road a quarter mile or more to a pull out. Believe it or not, the most dangerous thing we do as motojournalists is make U-turns on winding two lane roads. Visibility is limited, and often the road is quite narrow, which makes turning around a challenge on big bikes. Be safe out there. (Another option is to hang out in a corner on a popular road and shoot everyone who comes by.)
1. It’s about the technique, not the camera
Don’t get me wrong, there’s a reason why professional photographers spend a small fortune on camera gear, and you can run up a bill of more than $10,000 in the blink of an eye. Still, for the motorcycle and camera enthusiast, you don’t have to have the latest and greatest gear or the biggest sensor to capture stunning motorcycle photos. For example, during six of my seven years at MO , I was using an 8.2 megapixel camera. (My iPhone had 50% more megapixels for years.) Many of the photos used in this article were shot with a camera that was 13 years old when I retired it last Fall.

So, what do you need for motorcycle action photography? If you’re just taking shots of your bike sitting still in beautiful locations, any digital camera will do. Capturing action is what challenges your camera’s capabilities. First, quick autofocus is essential. Being able to move the focus point around the frame will be a plus because it allows you to be creative with your framing. Although I started shooting motorcycles with a camera that could only shoot six frames per second, eight to ten FPS is a pretty common starting point in cameras today.
Sensor size is another feature to consider. Both full frame and cropped sensor cameras have their strengths and weaknesses, but for someone starting out in motorsports photography, a 1.6 crop sensor will give you a longer reach with your lenses. They also have the benefit of typically being less expensive than full frame cameras.

And now to megapixels. Yes, having more megapixels allows you to crop into your images further. However, as I learned when I jumped from 8.2 mp to the 45 mp of the Canon R5 , having more resolution also meant that there was more detail pointing out the flaws in my technique. Then again, when the photos are sharp, they are amazing. Personally, I think anything from 12-20 mp is fine for most uses. In fact, I know of many pro action photographers who are using 20 mp with results that I aspire to.
Finally, the question of DSLR or mirrorless. With a DSLR, you are actually looking through the lens, thanks to a mirror that flips out of the way when the photo is captured. Mirrorless cameras have the sensor exposed to light when turned on, and the photographer has an electronic viewfinder for framing while shooting. Viewfinder lag is the biggest issue facing mirrorless cameras, and naturally, the more expensive ones have the least lag. While mirrorless is certainly the future of digital photography, camera manufacturers are making the best DSLRs ever, right now. So, there is nothing wrong with using a DSLR.

That’s the basics, but we could go way off into the weeds discussing mechanical versus electronic shutter (and it’s rolling shutter effect) or the best cameras for shooting in low light or RAW versus jpeg. If you get into motorcycle photography, you’ll eventually go there. Trust me.
2. Use a long lens, mostly
In my motorcycle photography kit, I have three zoom lenses: 24-70mm, 70-200mm, and 100-500mm. However, the vast majority of my photos are taken with the 70-200mm, which is just about perfect for standing on the side of the road to capture passing bikes. Being able to step back away from your subject makes it easier to pan with it because you don’t have to rotate your body as far or as fast as the bike passes in front of you. For head-on shots, a longer lens allows you to compress the background, giving it a more graphic look. Also, longer lenses have a shallower depth of field to blur the areas of the frame that are not specifically in focus – something I do quite a bit in beauty shots.
Don’t get me wrong, there are plenty of uses for wider focal lengths. While I typically use a wide lens for more scenic, landscape shots featuring a motorcycle parked in a spectacular location, a wide lens can also be used for action. It’s just significantly harder to capture. When the bike is featured large in the frame, you have to be very close to it, and when it is small in the frame, the slightest miscue with your pan can diminish the bike’s sharpness considerably. Also, it’s fun to be able to distort how things appear in a wide lens by putting the subject extremely close to the lens and letting it’s tendency to accentuate distances play out.

Using a super-telephoto lens also brings its own set of challenges, the biggest of which is that, at the long end of the zoom range, tracking the subject can be a challenge. That’s why if you watch professional photographers at the race track, you’ll see them supporting their big glass on a monopod. For my purposes, I tend to use the 200-300mm the most with my longest lens, saving the really long millimeters for special circumstances.
I lean heavily on technological aids, like monopods and image stabilization, when shooting with longer lenses. The ability to minimize errant movement of the lens can’t be downplayed, particularly in pan shots.

3. Freeze the action
Although we call it still photography, that is really a misnomer. As photographers, we are really dealing with differing slices of time in our exposures. The higher the shutter speed, the smaller the slice of time represented within the image and, hence, the greater the appearance of stillness. The manipulation of the appearance is where photographic skill comes into play. With enough light, you could shoot everything at 1/2000 of a second and get consistently sharp images of motorcycles. Unfortunately, they’d be pretty boring. Everything would look like it is standing still, and the biggest attraction of motorcycling, it’s dynamism, would be left out. So, the trick – and the fun – of shooting bikes is the management of the stillness and movement within the frame.

When shooting head-on or front three-quarter shots (or rear shots, too), you want the bike to be as crisp as possible. However, use too high a shutter speed, and you’ll completely freeze the tire tread or brake discs, destroying the sense of motion. Use too slow a shutter speed, and the photo may appear just the slightest bit soft. This is where the creative dance with the subject matter takes place. For street action, I typically shoot these shots from 1/800 sec to 1/1200 sec, depending on the closing speed.
4. Blur the action
Pan shots are a different challenge. Here, you’re trying to keep the motorcycle sharp but have the background and the moving parts of the bike blurred. To do this, you lower the shutter speed. However, since you’re shooting a larger slice of time in which the subject is (presumably) moving across the frame, you have to pan the camera to keep the bike in the exact same place in the frame, a simple idea, but it is maddeningly complex in practice. Pan shots are where the photographers who have surgeon-like steadiness in their hands can excel and mere mortals (and people like me who have very shaky hands) can only dream. Still, if I can shoot pan shots, even with my essential tremor , you can, too. It just takes practice.

On the street (track shooting usually requires higher shutter speeds), start at around 1/320 sec, acquire focus early, pan with the subject, and actuate the shutter just before the rider reaches the point where you want to take the shots. In the beginning, you’re going to shoot way more shots than you need, and most will have a focus or motion-blur issue. Initially, your hit/miss ratio will be disheartening. Don’t worry, you’ll get there.
Gradually, you’ll want to start lowering your shutter speed to bring progressively more blur into your shots. Note: Your rider doesn’t need to be traveling particularly fast to make it look like they’re flying. You do it with a slow shutter speed, which photographers call dragging the shutter.

Here’s a trick to make action shots easier: enable back button focusing, which means you separate the focus function from the shutter release. You’ll find this in the custom settings on your camera, and it allows you to use your thumb on one of the buttons on the rear of the camera to begin autofocus, freeing your index finger to only actuate the shutter. This will initially mess with your head, but it’s much easier to use two fingers rather than trying to hold the shutter release down halfway while you pan.
5. Highlight your subject
You want to find ways to make your subject stand out from the background. Think about it. That’s what you’re doing with the blur in pan shots. While whole books have been written on this topic, some basic tricks can be used to bring the viewer’s eye to your subject. The first is the depth of field, or how much of your photo is in focus. With a wide aperture (how far the iris in your lens is open), the area in the frame that is in focus gets smaller. The focal length of the lens also plays a role, which is why I frequently use 200 mm and f/2.8 as my settings for beauty shots of a motorcycle’s profile, making it tack sharp and everything else soft. (Remember, the smaller the number of the f-stop, the larger the aperture opening in the lens.)

Focus isn’t the only way to make the photo’s subject stand out. Having the brightly lit bike and rider in front of a dark background or silhouetting them against the sky are just two ways to use light to your advantage. One of my favorite ways to draw attention to the motorcycle is to use graphic elements within the frame. A curving double-yellow line or the shape of objects on the background can frame the motorcycle within the image’s borders, making the subject stand out.

6. Consider the background
This point is really just an extension of the previous one. Nobody wants to see a telephone pole sticking out of their motorcycle’s seat or a big piece of garbage in the road. Unfortunately, like when you first started riding, the newer you are at this kind of photography, the more of your concentration is eaten up with just managing camera settings. As you get more comfortable shooting bikes, your vision will widen to see so many more things.

7. Crop for composition
I always give myself a little breathing room in my framing when I shoot. Even though I often do it in camera, sometimes I want to give a shot a little more (or less) Dutch angle to make the shot more dynamic. Also, sometimes I see the shot quite differently in post processing than I do in the moment of capturing the image. Other times, a dramatic crop can take a surprising capture and make it something dramatic. The amount of cropping you can do is dependent on the resolution of your camera, so you’ll need to learn the amount of breathing room you can give before you compromise image quality.

8. Post processing is your friend
When you first start shooting motorcycle action, you’re going to generate hundreds, if not thousands, of image files. You’re going to need a way to view and cull your files, or you’ll get overwhelmed by them. Although there are other, less expensive (or free) asset management and image editor applications out there, Adobe has, in my opinion, the strongest pairing with Lightroom and Photoshop for your average recreational shooter. You can have access to both of them for about $120 per year. Although Adobe is really pushing the cloud-based version of Lightroom, I recommend Lightroom Classic to keep all your files on your desktop/laptop.

With Lightroom or another asset management system, you can quickly look through your photos from a day’s shoot, mark the ones you want to keep, and move on to color correcting, cropping, spot removal, and other massaging of the pixels. Remember, they are called RAW files for a reason. The files are just a starting point for what the finished photo will look like.
As with motorcycling, there is always something new to learn in image processing. Over time, you’ll find that your definition of what a properly post-processed photo looks like will change. That means you’re getting more accomplished. Oh, and always backup all your photos after a shoot.
Once you become proficient in Lightroom, you may want to try your hand at a deeper level of retouching in Photoshop. Go for it!
9. Be careful. It’s addicting!
While I have been interested in photography all my life, digital photography opened the world to me because making mistakes (and learning from them) doesn’t cost anything, unlike film processing in the past. Much of becoming a competent shooter is simply clicking the shutter many, many times and learning from the results. Photography has brought me closer to motorcycling, and my friends have benefited by receiving photos of themselves looking like wing-footed deities (as Burns would say).
Happy shooting!

Like most of the best happenings in his life, Evans stumbled into his motojournalism career. While on his way to a planned life in academia, he applied for a job at a motorcycle magazine, thinking he’d get the opportunity to write some freelance articles. Instead, he was offered a full-time job in which he discovered he could actually get paid to ride other people’s motorcycles – and he’s never looked back. Over the 25 years he’s been in the motorcycle industry, Evans has written two books, 101 Sportbike Performance Projects and How to Modify Your Metric Cruiser, and has ridden just about every production motorcycle manufactured. Evans has a deep love of motorcycles and believes they are a force for good in the world.
More by Evans Brasfield
Join the conversation
thank you, hold still, say cheese.
Evans: What ISO settings do you use most often? You didn't include this info in the photo captions.
As primarily a landscape and macro shooter, we usually use the lowest ISO setting possible for the available light. I've been getting some action pointers from a couple of sports photographers and they use high(er) ISO settings to get the shutter speeds they need to stop the action. Is this what you do as well?
- See 1 previous
In daylight, I mostly shoot ISO 100. In most instances that has me covered. Late in the day, I start to bump the ISO up. With my R5, I’ve started using auto ISO in shutter priority in those situations since it handles low light better. Still, it’s rare for it to even get as high as ISO 400 in most instances. (Although I have to bump up the ISO more frequently with my 100-500 because it’s only f/4.5-7.1. My 70-200 is f/2.8.) When it comes to freezing action in front or front three-quarters shots, I try to stay away from using super high shutter speeds on bikes with treaded tires because you want them to blur some. On bikes with slicks, that isn’t as much of an issue. Did that answer your question?
Yes, it does. It's very helpful. Thanks so much for your quick response, Evans.

Find your Motorcycle
Specs classifieds, popular articles.

2025 Triumph Daytona 660 Review – First Ride

2024 Moto Guzzi V85 TT, TT Travel and Strada Review – First Ride

Guilty Pleasures – Question of the Day

2024 Honda CBR600RR – First Look

2024 Honda NX500 – First Look
You may also be interested in.

Indian Vs Harley: Five Ways to Pick the Motorcycle That's Right for You

Small-Displacement Renaissance – Question of the Day

Small Adventure Bike, Big Adventure Dreams

The 390 Adventure Project – Day One in the Dirt

MO March Giveaway: GoPro HERO12 Black

2024 Kawasaki Ninja 7 Hybrid – First Look

Friday Forum Foraging: Behold The Autocycle!

How to Set Up Your Motorcycle Controls to Fit

2024 Triumph Daytona 660 – First Look

Where In The World: A Week In Spain Testing Hypermotards and Dukes

2024 KTM 1390 Super Duke R EVO Review – First Ride

Buying a New Vs. Used Motorcycle

Friday Forum Foraging: A 1930 Indian Four Time Capsule

Ducati Introduces Factory MX Team and Desmo450 MX Prototype

2024 CFMOTO 800NK Review

2024 Moto Guzzi V85 Range – First Look

2024 KTM 990 Duke – First Look

2024 Suzuki GSX-S1000GX+ Review – First Ride
- Student Successes
- My Learning
How to Take Motorcycle Photos: A Complete Guide

You can also select your interests for free access to our premium training:
Motorcycles are the epitome of cool, rugged, and edgy from the beautiful paint jobs to the unique construction. Bikes grant photographers the opportunity for one-of-a-kind imagery with a fresh aesthetic. Here is our guide on how to bring out the best in your motorcycle photography!
Equipment for Motorcycle Photography
What kind of camera do you need for motorcycle photography.

Which Lens Will Give You the Best Bike Shots?

What Lens Accessories Do You Need

Shooting Motorcycles in a Studio Setting

Photographing Motorcycles in an Outdoor or Organic Setting

6 Tips for Motorcycle Photography
Here are some useful tips and tricks to keep in mind when taking motorcycle pictures.
6. Use a Shot List

5. Composition and Perspective

4. How to Shoot Matte Bikes
If you’ve ever tried to photograph a matte texture , you’ve encountered the frustrations. If a matte bike comes into your studio, you’ll be letting out a gasp! Matte texture diffuses light. Cameras rely on light to bring out details, focus, and exposure. The trick here is to play with lighting and contrast as much as you can. Do what you need to ensure that the bike doesn’t get too dark/light, or get lost in the background. Use reflectors or diffusers to bounce the light how you want to highlight the surface as best you can!
3. Express the Bike’s Personality

2. Shoot Motorbikes in an Appropriate Background

1. High-Speed Action Shots
High-speed racing photography is an exciting part of taking pictures of motorcycles. You need to shoot with a breakneck shutter speed to freeze the action (1/1000th at least. I like to shoot at 1/3000th and faster). There are a few other things you can do to get sharp images as well. First, change your focus mode to Continuous Focus Mode (AI Servo for Canon users or AF-C for Nikon users). This mode allows your camera to lock onto your subject and follow the bike as it moves. You can ensure that you get the right shot by setting your camera to burst mode . This is where you take several photographs in a row while pressing down on the shutter. Shoot with a fast shutter speed to freeze the action. The only way to get cool sequences is by shooting in burst mode ! Check out our full shutter speed article for more info!
Motorcycles are a whole lot of fun to photograph! Take these tips with you to your next motorcycle photography shoot and make some chrome magic happen. Special note: All of the motorcycles featured are from El Diablo Moto Shop in Eagle Rock, California.
Popular Content
How to photograph your motorcycle

Riders love to photograph their travels and their motorcycle and share them on social media, but so many of the photos really don’t do justice to the location or bike.
So we asked long-time rider and photographer Phil Wood for his tips.
Your motorbike
Make sure you give your bike some TLC before you head out for a photo shoot. No one wants to see a build-up of road grime or mud on your bike, unless it’s a dirt bike and you are getting some action shots.
Give it a really good detail so that everything shines the way it should. Don’t forget the radiator grill if is has one. These are a magnet for dirt and it really stands out in photos.
When you get to your location, give it a quick wipe down with a soft cloth to remove any bugs that wanted a ride or dirt on the tyres.
Photographic gear
You don’t need an expensive DSLR to take a good photograph of your bike. A basic DSLR will do the job with a good lens. Some point-and-shoot cameras will also cover the task well .
Most modern smartphones also take photos that are more than adequate enough to get a great shot of your bike. But they are still limited in what they can achieve even with good editing software.
If you don’t own a DSLR, try to borrow one for the day.

For lenses, I would recommend a wide angle to get some more of the background to tell a story and if you have a telephoto, you can get a long distance shot and blur out the background a little more.
Telephoto lenses can be used for the detail shots of the bike without going out and buying a macro lens. You can get some great shots just using the kit lenses that might come with your camera without spending thousands of dollars.
Choose a background that suits your bike. A cafe racer or bobber would look good with a wall behind it. Maybe some street art on the wall would look good having some contrast with the bike.
A tourer with some rolling hills or a campfire in the background adds a story.
These are the things that set the mood for the photograph and tell a story.
Try not to have things in the background that will distract you from the subject.
Use the aperture setting if it’s available to blur the background a little so that your bike will stand out more in the photograph.

You can get a nice blurred background while the bike stays in focus. It’s not an easy thing to master, but once you get the hang of it, you will be glad you did it.
You can use your garage as a pop-up studio and get some good shots in there. Find a wall or something to use as a backdrop (large roll of paper, wallpaper, big print etc) and you can set your bike up for the perfect shot. The advantage of this would be you have complete control over the light and conditions.
Framing the photograph
You want your bike to stand out and there are so many things you can do to help this happen. Try taking some shots from low down or from above to give a different perspective. You might get a few stains on your jeans or shirt, but the results can be amazing.
Most shots of bikes you see in magazines etc are from a different perspective that you have from just walking down the street.
You will often see people looking over a bike and getting right up close and personal with it. They are getting the best angles to see the details and this is what you want to get with your photos.

When you are getting a shot of the whole bike, try and leave some space around it in the photo. Don’t shoot it so all you see is the bike and not the setting as this will not tell the story that you want to convey.
When taking a front-on shot, turn the front wheel so you can see more rim than tyre.
Night shots
Sometimes you might want to get a photograph of your bike with the city or the harbour in the background. People even get the Milky Way in the background but this is something that takes a lot of practice and skill to achieve.
Get to your night location early and be sure to check that it is OK to be there as some areas are out of bounds to bikes. Ask the local council or authority for permission to do a photo shoot on that location.
Set your camera up on a tripod as you will be using a longer exposure than normal. It could be up to 1 -2 mins to let enough light in to get a good exposure.
Have your aperture opened up to let more light in (smaller the number, bigger the aperture). You can use a flash to light up your bike but there is the risk it will overexpose the bike and underexpose the background.
Set up the bike in the best way to showcase it and try different angles to get some details in the background. Take a torch or some sort of light source to shine on the bike while the shutter is open and this will highlight your bike while keeping the background well exposed.
You, the rider
How many times do you see a photograph of a bike and its rider? Try getting some nice portrait shots of you, a mate or the wife/ girlfriend on the bike.
It sounds cheesy but looks great.
You could be standing behind the bike or next to it, leaning on the handlebars or just sitting on it. Just try and get some different shots from different angles and the poses are all up to your imagination.
About the author
Phil Wood is aged 51 and has been riding for 35 years.
His first bike was a Honda CB175 and he has had a lot of bikes since then.
“I love touring this great land and there is nothing better than a bike to do it on,” he says.

Cameras he uses are Nikon D700, D300 and D7000 with a variety of lenses.
“My first choice for lenses is the 24-70 f 2.8 from Tamron. Clear and sharp. I would also use Tamron 70-200 f2.8 to help me blur the background on longer shots and to help me get some detail shots. For wide angle shots I use a Tokina 11-16 f2.8.”
You can see more of Phil’s photography on his website , Facebook page and Instagram account .
aim for a 45 degree angle. it will look more aggressive and professional. don’t place the motorcycle in the center of the image. instead put it slightly right or left.
Phil (Woody, Puck) has photographed many of our events for us and I cannot thank him enough. It is great to see him put this article up and some really good advice. He is always happy to pass on knowledge and help those of us that don’t quite have the eye for one reason or another.
Great write up Phil and look forward to seeing you at many more events keeping what we love real for us and others.
difference between first 2 photos tells it all
Just look at the pics in Motorbikewriter & you’ll see how to take bike shots.
Comments are closed.
wBW is an A07 Online Property
- Advertising
- Privacy Notice
- Review Policies
- Terms and Conditions
- 1-800-611-FILM
- Photography
Learn How To Take Amazing Motorcycle Photography
There is perhaps no better way of capturing the beauty and power of a motorcycle than by photographing them in action. Whether it’s MotoGP, Superbikes or Speedway, motorcycle racing can provide great opportunities for truly fantastic pictures, but capturing bikes when they are travelling close to 200mph is no easy task and it requires skill, patience and some decent equipment.

For a photographer, motorcycle racing provides a fantastic challenge and is one of the most exhilarating forms of photography . It’s also a daunting and challenging discipline to get to grips with, but the following top tips on how to do motorcycle photography will have you shooting great race pictures in no time.
Motorcycle Racing Photography: A How To Guide
When it comes to photographing bikes at high speed on a racetrack, there are two essentials: a fast shutter speed and a decent zoom.
It isn’t really possible to get good results with your average point and shoot digital camera, as most have such a delay from when you press the shoot button to when they actually take the shot that you’d have missed all the action. While a few budget models do permit fast action shooting and have some modicum of optical zoom, a decent SLR (single-lens reflex) is pretty much a prerequisite for capturing on track action.

To boost your chances of getting a sharp image it is preferable to use an SLR with a fast drive mode, but you can get good results without, and as will be explained, not all images need to be in focus.
Ideally, a lens with some form of image stability (IS) will make things easier, but you can make do without one. When choosing a zoom, the bigger the better, especially as these days spectators tend to be a good distance from the track.
If you see professional photographers at motorcycle racing events, you’ll see some really huge zoom lenses enabling them to get right into the action. If you’re just starting out at photography school you’ll probably be restrained by your budget, but it’ll pay dividends to get the largest zoom you can afford.
You need also to ensure you have plenty of storage and a memory card that can keep up with the fast shutter speeds you’ll be using. A decent 400x card with 16GB-32GB of space should do it.
The Best Place for the Shot
Before you take any shots, you need to get a feel for how the bikes move around the track. Obviously, it is going to be a lot easier to capture bikes going round a hairpin at 50mph than traveling on a high-speed straight at 180mph.

Furthermore, knowing where the best action is going to take place will help you get better shots. Overtakes tend to happen at the end of long straights, while standing near a chicane or S bend will often give great results when the bikes are bunched up close, as it will enable you to show them in different lean angles.
The Art of Panning
Because the bikes are moving, you are going to need to get a handle on panning. Panning is simply following the bikes and taking shots whilst the camera is moving; This can be quite difficult to get the hang of, especially with a large zoom lens, and there really isn’t a magic bullet solution except to practice as much as possible and as often as you’re able.
You can, of course, use a tripod, but this will be pretty cumbersome to carry around on race day.
The Sniper Shot
One technique the professionals use is the “sniper shot.”
This entails breathing out steadily as you pan and shoot. By letting out a continuous exhale, your hands will be at your stillest when you pan, preventing any wobble. Give it a try next time you have to capture any kind of high-speed photography or a handheld shot that requires precision, and you’ll be surprised at the difference it can make.
Motion and Camera Settings
When it comes to camera settings, even subtle changes can give vastly different results.

For the beginner, a good wide aperture with a 1/1000 second shutter speed will get fairly sharp pictures and enable you to let off a volley of shots on each pan. However, using this stop motion technique will not present much of an effect of speed.
To achieve a good sense of motion, you need to try playing with motion blur. Blur can create a really good sense of speed in a picture, but you don’t want to overdo it, otherwise it will be difficult to make out what exactly it is you’ve photographed.
We’ve covered the best practices of this technique in a previous post , but in a nutshell, the key to getting blur is to slow the shutter speed down. A setting of 1/250 second should give just enough blur to a shot without obscuring the whole image.
The Golden Rule: Experiment!
Playing with different angles, settings and positioning yourself at different corners can create unlimited possibilities for great motorcycle racing photographs. Try using motion blur on a slow corner when the bikes are bunched up, and you’ll get the lead bikes in sharp focus and the tail-enders in motion blur. Alternatively, use the stop motion technique and full zoom on the end of a straight and you’ll be amazed at the amount of detail you’ll be able to capture, from tire smoke, to even the decal stickers on the rider’s helmet.

In short: play around, have fun experimenting, and enjoy the race!

- Accessories
- Tips & Tricks
Motorcycle photography guide
- 22 September 2020 1 July 2021

Motorcycle photography is a great hobby that can help you develop skills behind the lens. Sometimes these skills can transfer into other types of photography. Whilst these days everybody has a camera at their fingertips, a mobile phone does not give the same flexibility as a proper body and lens camera.
What type of camera do I need?
For static shots, phone cameras can be great. They have a small footprint for tucking into pockets. But they lack a viewfinder and easily adjustable zoom and focus settings like on a camera body and lens. This makes it awkward for fast-moving subjects, like racing or road shooting.

A great way to start is by picking up a beginner-level DSLR. A used body suitable for beginners like the Canon 5D or a 7D can be bought for a few hundred pounds. These may come with a lens. Failing that most phone cameras have a ‘Pro’ mode which allows adjustment of shooting settings, which is great for practice.
Is the Ducati V4S the perfect road bike?
After picking up your camera, learning about the exposure triangle, is very important in action-packed shooting, particularly with motorcycles.
What is the Exposure Triangle?
Exposure refers to how bright the image is. We don’t want a photo that’s so bright you can’t see the subject, but not enough light we don’t know what’s going on.

Exposure is made up of three (technically 4) elements of how the camera works.
BMW’s new M Endurance chain eliminates the need for chain lub e
Firstly, we have an aperture setting. If you look at how a DSLR takes a photo, the aperture determines the focal distance (how crisp or blurry the subject is). Aperture is measured in “F-stops”, basically, what ratio of the hole is open compared to closed.

f/1.4 lets in the most light, but objects in the distance appear blurry, whilst f/8.0 will have most of the image clear and crisp.
Getting the light right
Aperture plays into the exposure triangle because the size of the hole determines how much light hits the sensor taking the photo. A lower f-stop allows more light in, therefore giving a brighter image.

Shutter Speed is the second major component of the exposure triangle. This is how fast the camera will “take the photo”. Shutter speed is important important in motorcycle photography because the effect between settings is drastic on the outcome of the photo.
Check our easy guide to cleaning your motorcycle
A faster shutter speed makes the image look frozen in time. A slower shutter speed brings in some motion blur, wheel blur, and background blur.

Higher shutter speeds influence the exposure triangle by limiting the amount of time light has to enter the camera. A shutter speed of 1/60 is 1 60th of a second. Usually, anything lower than this results in a significant blur.
Get good at juggling!
The problem comes with trying to balance the aperture for focus, shutter speed and for the action you’re trying to photograph, and ISO (the next bit) for quality.
Metzeler’s brand new M9RR tyres tested on the R 1
ISO is tricky to describe, but if you’ve ever taken a photo in the dark you might have seen ISO in action. ISO can be described as “how sensitive the camera sensor is to light” although this is a very, very basic description.

A high ISO is used when the ambient lighting is dark. However, if there’s not enough light coming in normally, you’ll start to see grainy artefacts in the blacks and shadows of your photos. The basic rule of ISO is to keep it as low as possible, essentially, 100 or below on most cameras.
Not sure if your disc lock is Thatcham approved? Check out o ur Security guide here
Studio photographers get around this by using studio lights, but stood next to the side of a racetrack makes it difficult to use studio lights! The last component of the exposure triangle is lighting. The key is to use whatever lighting you do have to its maximum.
You can always try and find the perfect lighting, but without a good light source, your images might end up gloomy, dark and pixelated from the ISO straining. Remember it is often easier to make an image darker in post-production than to add light.
Simple photography tricks
Automatic mode.
Something I genuinely hate is people not learning how to get out of “green square, point and click mode” (automatic mode). This was even a factor when purchasing my phone, as I sometimes want full control over my image, even before I edit it in any software. The green square mode is ok in one situation and when used properly.
Here’s how: On the first photo of the shoot, use auto mode. Review the photo and look at the setting the camera decided it wanted to use.
For more tips and advice, or to show off your skills, check this group!
Now, go into full manual mode (usually M mode) and copy the settings the auto mode said to use. Adjust these settings based on your lighting preferences, the level of zoom and focus you have (such as increasing or decreasing aperture) and shutter speed for the object you’re photographing.
If you can get away with 1 maybe 2 steps underexposed at a push, but the correct shutter speed and aperture. You can always brighten the images in post. Don’t rely on auto mode for shooting all the time.
If you do that, you never have to learn how to actually take a photo, and it just becomes an expensive point and click with an expensive lens on the end.
Is this the best bike mod ?
How to hold a camera and lens correctly
I used to hold the lens awkwardly but you want to hold the camera in a position that’s stable and allowing you to adjust the settings on the lens. This gives you a stable position, its easier to bear the weight of the lens, and allows you to change your focus or zoom.
Langen motorcycle releases a brand new road legal 2stroke
Do this by placing your left hand (lens support and adjusting hand) underneath the camera, not to the side as shown below:

Buy the nifty fifty for your camera
There’s a reason why Canon 50mm prime f1.8 lenses are so cheap. Everybody gets one; everybody likes them. They’re great for portrait photos whilst also being extremely compact and small to carry around.
If you don’t know, a prime lens has a fixed focal length, so the nifty fifty is a 50mm focal length. Some lenses are zoom lenses and have a scale, such as a 24mm-70mm or a 100mm-300mm.

The nifty fifty is usually better quality than the bog-standard 24mm-70mm f/4.2 lens you get with the camera and is a great learning tool. Due to the restrictions of a prime lens, you have to take framing and setting up your photo into consideration more.
It lacks the zoom feature, so you have to work around that, usually by moving further away or closer to the subject. Some of our best photos have been taken on a 50mm lens, so despite being cheap they’re also great to use and work with.

Motorcycle photography is a learning experience.
Just with everything, photography is a learning game. One of the best and worst instances I have of this is taking a photo of the 2017 Suzuki GSX750. I thought the photo was great until I showed it to a professional. I had learned about getting my zoom and focus right, getting the bike perfectly lined up and looking good.
Ever heard one of these? Check out our motorcycle myth-busting guide
The professional found one big problem with my photo, which I can never unsee now. Check the image below and see if you can spot it.

It ruined what I had deemed to be one of my best photos to date, but I learned from it. Never stop critiquing your own work. There are always ways to improve, whether that be on the day doing the shoot.
Ducati’s new Hypermotard 950 RVE promises a lot, but can it live up to the hype?
How you position your bike, the context and framing of your bike, and how you edit your photo afterwards.
Learn Lightroom and basic photoshop.
Photoshop gets a bad rep. We see fake photos being thrown around all the time, but it can be great in removing unwanted obstructive and distracting items in your photos.
(We did this for one of the photos on this page, see if you can guess which photo had a bollard removed, we bet you can’t tell!).
Lightroom is Adobe’s management, organization, and basic editing suite. It can be used to edit the attributes of your photo (brightness, colouring, contrast, etc.) but doesn’t have the manipulation power of Photoshop.
Most of our photos are ran through Lightroom, where bad photos are flagged up and removed, and the good ones get cropped, adjusted, and exported. It’s a really easy tool to learn and can take a boring and drab photo into something amazing after a few clicks.
Does your bike need some love? Do some simple maintenance with the help of our maintenance made easy guide
Rule of thirds….sometimes
The rule of thirds is based on dividing your image into three rows and columns and trying to get the interesting parts of your photo to line up with the intersections. Some cameras have this built in to help you, but this is usually done when cropping in editing software.
Sometimes though, you don’t want to follow the rule of thirds. Seeing the same styled image all the time is boring. Having a photo with a unique perspective and angle can be great.
Never stop thinking out the box!

Sometimes skill is more important than equipment
One of my favourite series on youtube was back when a photography media company challenged professional photographers to use toy cameras and get high-quality photos.
Here’s one of the videos:
It’s not their gear which makes them pro, it’s how their mind works to position and set up their photos.
Are you a culprit of one of these? See if you do something every biker hates!
Buy extra CF/SD cards, multiple batteries and a bag to carry it all in
One of the biggest problems I’ve encountered is either running out of battery or running out of memory. Without either, your shoot can be completely ruined.
You can get the good quality (not-cheapo) brand batteries for most DSLR’s at places like Curry’s PC world or online, I’d only go with the brand of camera you have, or a well known/respected battery maker like Duracell.
Not everything from the ’90s was terrible! We compare some 1990’s vs 2019 leathers
Get 2 or 3 spare CF or SD cards (depending on your camera), you can usually get good deals on pairs of 8GB storage online, so it’s always worth loading up on a few smaller cards to have handy.
Bike positioning is key for motorcycle photogrpahy
Similar to framing, getting your bike looking good for the shoot is also important. The typical convention is “wheel straight forwards”, which is simple, yet effective. The next general rule is using 45 degree angles to complement the bike, be it 45 degrees from the nose of the bike or the side of the bike.

The next step in this is to always photograph the left-hand side of the bike where possible. This means the empty space is filled by the exhaust, whereas if you photographed the right side of the bike, there’s an empty gap and you miss showing off that gurgling end can.
Did you enjoy this? Show us your results on Twitter !

4 motorcycle photography tips from a professional shooter
On your bike! Michelle Szpak explains how she developed a passion for motorbikes into a photography career

• The best flash triggers for your camera • Perfect the strobist look with off-camera flash photography • How to use flash for your photography: Off-camera flash • How to shoot motorsports with a monopod
"Passionate" and "artistic" are just a couple of the words that Michelle Szpak’s clients use to describe her motorcycle photography. Michelle has been a professional photographer since 2006, but says it has been a crazy journey to find her niche in the photography world.
Michelle’s career started in the same way as that of many photographers, with weddings and portrait work. She acquired her first family portrait studio in 2009, but it took until 2013 for her to start photographing motorcycles. Michelle is a keen motorcyclist herself but, until a fellow biker asked if she would photograph him and his bike, it had never crossed her mind to bring this love into her photography. That shoot sparked a creativity and passion for change and something new.
In 2014 Michelle found herself experiencing exhaustion and burnout. The studio was not where her passion was; it was no longer the right thing for her, so by the end of December Michelle closed her studio and moved to the coast (her lifelong dream). Sometimes, a breakdown can lead to the most amazing things.

Now Michelle gets to travel the UK and in 2020 was persuaded to add car photography to her work. She is an industry ambassador for The Flash Centre and Elinchrom , and loves nothing more than taking everyday locations and turning them into the dramatic images she is known for (not forgetting lying in puddles or lakes, and doing anything and everything to get the shot).
“Lighting a motorcycle is like lighting a person,” she says. “You highlight the lines, the curves that make them unique. If there is one thing I have learnt over the years, it’s that mindset, passion and energy are more important than business techniques. Being who you are as a photographer, being creative and passionate and believing in yourself form a big part of being successful.”
Check out more of Michelle's automobile images via Instagram .

01. Soften the light
"If you are going to use flash, avoid hard light – bare bulbs or flashguns are going to leave highlight spots on the bike," says Michelle. "You want the flash to be soft and create lines and shapes on the bike or car. A stripbox is a great tool for automotive photography, as it creates beautiful lines."
• Best flash diffusers, softboxes and modifiers

02. Remember that it's all about the bike
"Make sure that the bike is the star of the image! It’s great finding amazing locations, but do not lose the point of the photo; busy and distracting backgrounds will draw you away from the bike. Watch out for bright spots or highlights in the background taking your eye off the bike."

03. Try to find great angles
"Play with different angles while you’re shooting motorbikes. I often get low on the ground (many a time in puddles and mud). This can help you stay out of any reflections from the bike and will also make the bike more prominent in the image."

04. Watch your reflections
"This may seem an obvious point, but I see it a lot. When you photograph any automotive subject, be aware of what is reflecting in the vehicle. Check everywhere, even headlights. Avoid seeing yourself or your light stands in the bike – otherwise this will mean there’s more editing to do."
Best professional cameras Best lighting kits Best camera for sports photography
Thank you for reading 5 articles this month* Join now for unlimited access
Enjoy your first month for just £1 / $1 / €1
*Read 5 free articles per month without a subscription
Join now for unlimited access
Try first month for just £1 / $1 / €1
Get the Digital Camera World Newsletter
The best camera deals, reviews, product advice, and unmissable photography news, direct to your inbox!

Digital Camera World is one of the leading authorities on camera and photography news, reviews, techniques, tutorials, comparisons, deals and industry analysis. The site doesn't just specialize in cameras, but all aspects of photography, videography and imaging – including camera phones, gimbals, lenses, lighting, editing software, filters, tripods, laptops, printers, photo books, desks, binoculars and more.
Whether you're using, looking to buy or trying to get the most out of a compact camera, action camera, camera drone, cinema camera, beginner camera or professional camera, Digital Camera World has a roster of experts with combined experience of over 100 years when it comes to cameras, photography and imaging.
Meet the DCW team
Related articles


- Reviews Home
- Motorcycle Reviews
- Product Reviews
- Racing News Home
- Road Racing
- Features Home
- Advanced Riding
- Motorcycle Track Guides
- Buying Advice
- Sell Your Bike
5 tips for photographing your motorcycle
You're proud of it - so take a photo to be proud of too

HOW many times have you been scouring your favourite magazines, websites, forums, Facebook groups and Instagram accountS and seen an awesome photograph of a bike and realised you haven’t got a sweet photo of your own machine?
If you’ve ever been inspired to go out a get a that’s inspired you to capture your pride and joy in a way that does justice to your pride of ownership?
With high-level photography equipment becoming ever more affordable and accessible, it’s easier than ever to lay your hands on cameras and lenses that can provide the sharpness, clarity, detail and performance once reserved for professional snappers.
Taking a sweet shot of your bike doesn’t have to be difficult and with this simple guide you’ll be on the way to getting a great shot of your bike – the kind of photo that have you replacing the family portrait in the lounge with the beauty of your bike.
1. Location, location, location
Location is paramount.
There’s no hard and fast rule when it comes to choosing a location for your bike photo but picking the right one will help the overall result.
Different backgrounds will suit different bikes and can make or break the style of photo you hope to achieve. An urban setting can really suit a modern retro bike, but some brutal, blocky and ominous council estate architecture could also prove just the thing to get a mean and moody shot of a super bike.
Generally, an uncluttered backdrop works well because it means the bike is competing for the viewer’s attention - it could be a field, a wall, some metal shutters or an empty road.
Think about what part of your bike you want to photograph. You could take a side-on shot, a front-on photo or a picture that focuses on one particular detail or area you like.
Play around with angles and experiment to get something you like – try getting low to the ground and pointing your camera up towards the bike, stand over it and shooting downwards, or focus on particular details like the welding on the exhaust, or the way front fairing comes to a point. With a bit of experimenting you’ll find out what you like and what works for you bike and the type of photo you want.
3. Aperture
For the purpose of this guide, that basically means that the area outside of what you’re focusing on will be out of focus, meaning the part of the scene you are focusing on will stand out and look sharp against the backdrop.
Achieving a shallow depth of field is easy enough, you just need to put your camera into aperture priority mode (look for an A or Av on a dial or in the menu) and select a low aperture number (f1.8 or lower) to get the most striking depth of field effect.
4. Shutter speed
You're most likely to need to play with different shutter speeds if you’re photographing a moving bike.
If that’s what you’re after, put your camera into shutter priority mode (Tv or S on the dial or in the menu). Try starting with a shutter speed of 1/500 or 1/1000 (of a second) – which should be fast enough to freeze a moving object like a bike (depending on how fast it’s going and how far away you are).
If you’re photographing a moving bike, you can either freeze it by keeping your camera still as you take the shot, or blur the background by tracking it through the viewfinder. Again, you’ll find out what works for you with a bit of experimentation.
You'll need to give some thought to lighting.
If shooting using natural light, the best times of day are in the morning and evening, when the sunlight is softer, and when its red glow will light your bike in a more interesting way. Shooting in the middle of the day is fine, but the sunlight will be brighter and harsher – which could mean a flatter, less dynamic looking image and lots of shadows.
Don’t be afraid to use a flash, just be aware that it could reflect off metal parts and shiny plastic, which won’t look good. Pointing your flash upwards could help here and using a diffuser will help soften it.
And don’t be afraid of the dark – shooting in low light can create a moody, cinematic effect that draws attention to specific areas of the bike.

- Privacy Policy
curated by Karl Taylor
- All Photography Essentials Classes
- Free Introduction to Photography
- Travel Photography
- Landscape Photography
- Creative Photography Techniques
- Photography Equipment
- Compact Camera Photography
- All Lighting Classes
- Lighting Theory and Equipment
- Using Lighting Modifiers
- Lighting Comparison Visualiser
- All Portrait Classes
- Natural-Light Portraits
- One-Light Portraits
- Two-Light Portraits
- Three-Light Portraits
- Four-Light Portraits
- Creative Portraits
- Business Portraits
- Environmental Portraits
- All Fashion Classes
- Introduction to Fashion Photography
- Studio Fashion Photography
- On-Location Fashion Photography
- Beauty Photography
- Fashionscape
- Fashion Extras
- All Food Photography Classes
- Food Styling and Photography
- Still Life Photography
- Working to a Brief
- All Product Photography Classes
- Introduction to Product Photography
- Bottle and Beverage Photography
- Food Photography and Styling
- Liquid and Splash Photography
- Cosmetics Photography
- Jewellery Photography
- Packshot Photography
- Electronics Photography
- Automotive Photography
- Sports Equipment Photography
- Flat Lay Photography
- Accessories Photography
- All Post-Production Classes
- Photoshop Tools and Techniques
- Photoshop for Photographers
- Advanced Photoshop for Photographers
- Fashion and Beauty Post-Production
- Product Post-Production
- Compositing Using Photoshop
- Frequency Separation
- Lightroom CC for Photographers
- Lightroom 4 for Photographers
- Photoshop Retouching with CS
- Post-Production Extras
- All 3D CGI Classes
- 3D CGI Terminology
- Blender 3D Basics
- Blender 3D: Product CGI
- Photography vs Blender 3D Shootouts
- Introduction to Cinema 4D
- All Filmmaking Classes
- Introduction to Filmmaking
- Filmmaking Methods
- Advanced Filmmaking
- Professional Filmmakers
- All Makeup Artistry Classes
- Makeup Artistry Fundamentals
- Makeup Artistry Masterclasses
- All Business Classes
- Your Photography Business
- Photography Marketing
- Contracts and Legal
- Planning and Workflow
- Professional Insights
- Upcoming Live Workshops
- Live Photoshoots
- Live Special Guests
- Live Photo Critiques
- Live Working to a Brief
- Latest Classes and Coming Soon
- Weekly Challenge
- Competitions
- Get Certified With LEVELS
- Contact and Support
- FREE Photography Course
- Meet the Team
Only $19 per month
Motorbike Photo Shoot
Learn how to photograph motorbikes in the studio, live photography workshop, recorded live on 19th december 2019 - now available on replay, - how to photograph a motorbike in the studio, - planning & preparation, - lens choice & equipment, - step-by-step lighting examples, - tips for photographing reflective surfaces, - control multiple lights, - ask your questions, overcoming the challenges of motorcycle photography.
When it comes to photographing motorbikes, there are a number of challenges you can expect to face. Whether you’re working outdoors on location, or in a more controlled studio environment, these steel speedsters are no easy subject.
Some of the challenges you may experience include:
- Composing your image
- Lighting reflective & matte surfaces
- Controlling light
- Selecting the right modifiers
- Determining the best background
I demonstrate how to overcome each of these challenges in this live show, explaining my thought process and creative decisions as I work through this step-by-step demonstration.
As I explain how to overcome each of these challenges, you’ll realise that the key thing to keep in mind (for any product shoot) is that a careful, logical approach is required. If you remember that, you’ll soon realise that even a complex shoot such as this can be simplified into two main steps.
1. Determine your angle & focal length
Studio shots of motorbikes are most commonly done at a three quarter side angle or front on. One of the goals for any type of product photography is to highlight key features of the products, and this is no different. It’s important that your shooting angle allows you to highlight key features of the bike, whether it be the hand grips, exhaust system or brake disks.
Shooting variables such as, the amount of studio space available, the camera format you are using and the perspective of the shot, will effect the choice of lens. It is not possible to list one single lens that would be appropriate in all cases when shooting motorbikes. That being said, anything less than 50mm lens wouldn’t be an ideal choice as it would probably cause distortion.
2. Lighting
Motorcycle photography is similar to car photography in that it generally involves some form of large, gradient lighting from above, as well as fill lighting for the side panels and pockets of light to highlight key features.
There’s many different ways you could choose to light a motorcycle, from plain white backgrounds to dark shots with rim lighting. For this shot I’ll be aiming to create a dramatic, moody image on a grey background.
From the placement of my lights to my choice of modifiers, I walk you through each step of my lighting setup to help you understand how to control your light and achieve the exact result you want.
These points cover just some of the most important aspects of motorbike photography. Other things to consider include preparing for the shoot, background choice and post production. Throughout this show I show you everything you need to know to get the best possible result. To see the start to finish shoot, watch the full show on replay .
Recommended content:
Classic car shoot on location, zenith watch product shoot, high-end headphones product shoot, live workshop – legs eleven.
Where can I find the post production video of this amazing motorcycle shoot?
Hi, the Black Motorbike (Honda Fireblade) shoot will be published around end of June and the post production on it around mid July.
Leave a Comment Cancel reply
You must be logged in to post a comment.
- FREE Introduction to Photography
- All Food Photography and Styling Classes
- Photography Briefs
- Photoshop For Photographers
- 3D CGI Terminology A-Z
- Introduction Cinema 4D
- Members Discounts
- Meet the team
- Accessories
- Camera Reviews
- Become a Photographer
- Photo Editing
- Photography 101
- Photography Tips
- Astrophotography
- Travel Photography
- Livestreaming & YouTube
- Video Cameras
- Video Lenses
- Video Monitors
- Video Lighting
- Streaming Accessories
- Videography
- Audio for Video
- Microphones
- Desktop & Laptop
- Console Gaming
- iPads & Tablets
- Televisions
- Camera News
- Adorama Business
- Adorama Rentals
- 800.223.2500
A Guide to Motorcycle Photography

Speed, power, adrenaline, freedom, the open road, and adventure. Capturing the spirit of motorcycle photography is all about being able to convey the thrilling aspects of riding a motorcycle. In this guide, we’ll be going over the essential elements of creating captivating motorcycle photography, why it’s important to have the right gear, how to scout the best locations, the best camera settings and compositions, and some simple tips for bringing everything together.
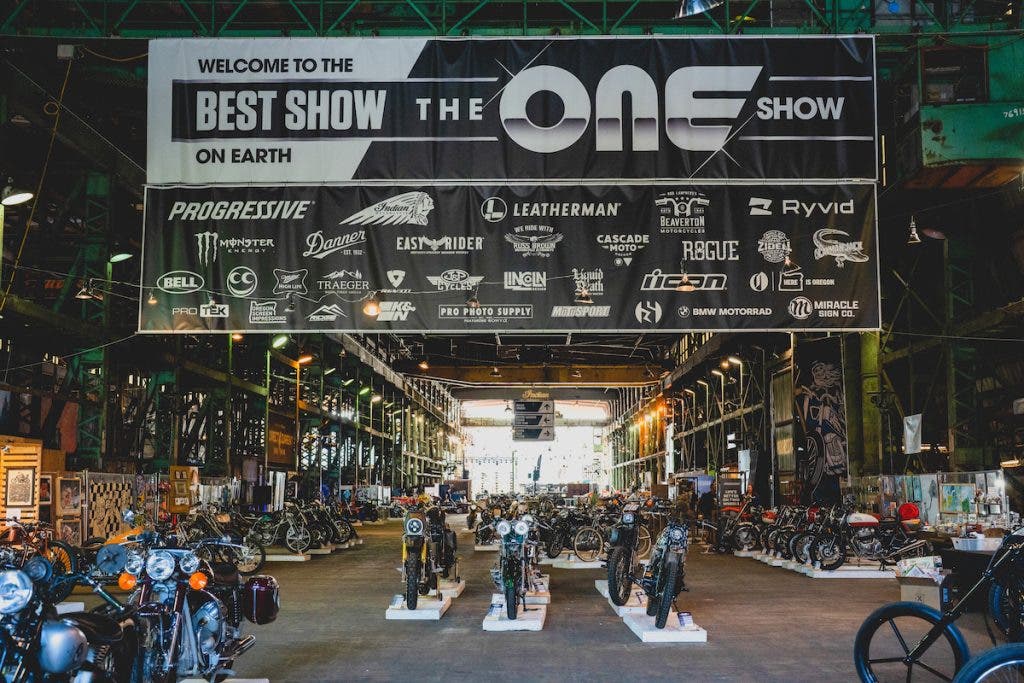
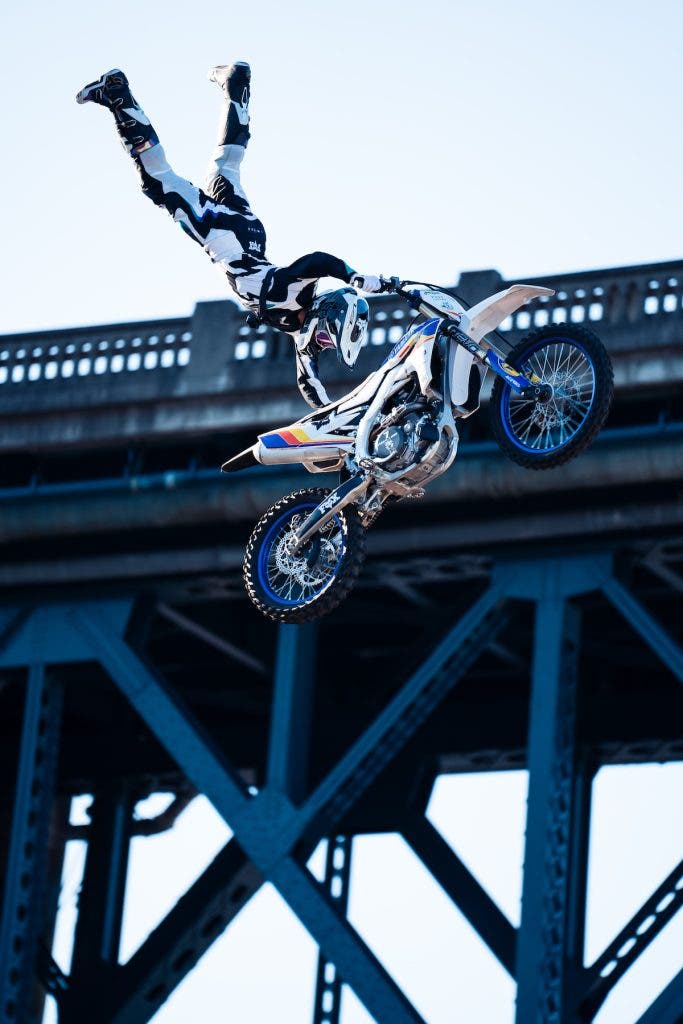
I personally had the opportunity to attend the acclaimed One Motorcycle Show in Portland Oregon recently, where I experienced the inspiring energy of the motorcycle community, the smell of burning rubber, and the thrill of seeing beautiful custom motorcycles performing at the highest levels.
What Lenses (and Other Gear) to Use
Given the fast-paced nature of motorcycle photography, I typically have a versatile list of gear that allows me to capture a wide range of images. My main camera body is the Sony Alpha 1 Mirrorless Camera . It allows me to freeze action at any moment with it’s amazing 30 FPS burst rate in stills. I can capture decisive moments with ease and, with 50 megapixels of resolution in each image, I have plenty of room to crop my images in post-production.
In order to get the fastest and most accurate autofocusing performance from my Sony A1, I always pair my camera up with Sony’s amazing lineup of high-performance G Master lenses. My gear bag usually consists of 2-3 zoom lenses, and a couple of prime lenses.
Zoom Lenses
The essential zoom lenses for my motorcycle photography shoots are the Sony 16-35mm f2.8 G Master , Sony 24-70mm f2.7 G Master Mark II , and Sony 70-200mm f2.8 G Master Mark II . These lenses not only offer maximum burst rates, but also have super fast and accurate focus motors and razor sharp optics that can resolve high-resolution sensors like my Sony A1.
Prime Lenses
In addition to the G Master zoom lenses that offer me the versatility of having multiple focal lengths in a single lens for fast-paced action, I also like to pack a few prime lenses for deliberate use cases. My prime lenses give me the ability to create beautiful images that isolate and accentuate elements of a motorcycle with shallow depth of field , the ability to gather more light in low-light situations, and cleaner and sharper images overall as a result of having wide apertures and ultra-sharp optics. The three main prime lenses that I use for motorcycle photography are the Sony 35mm f1.4 G Master , Sony 50mm f1.2 G Master , and Sony 135mm f1.8 G Master .
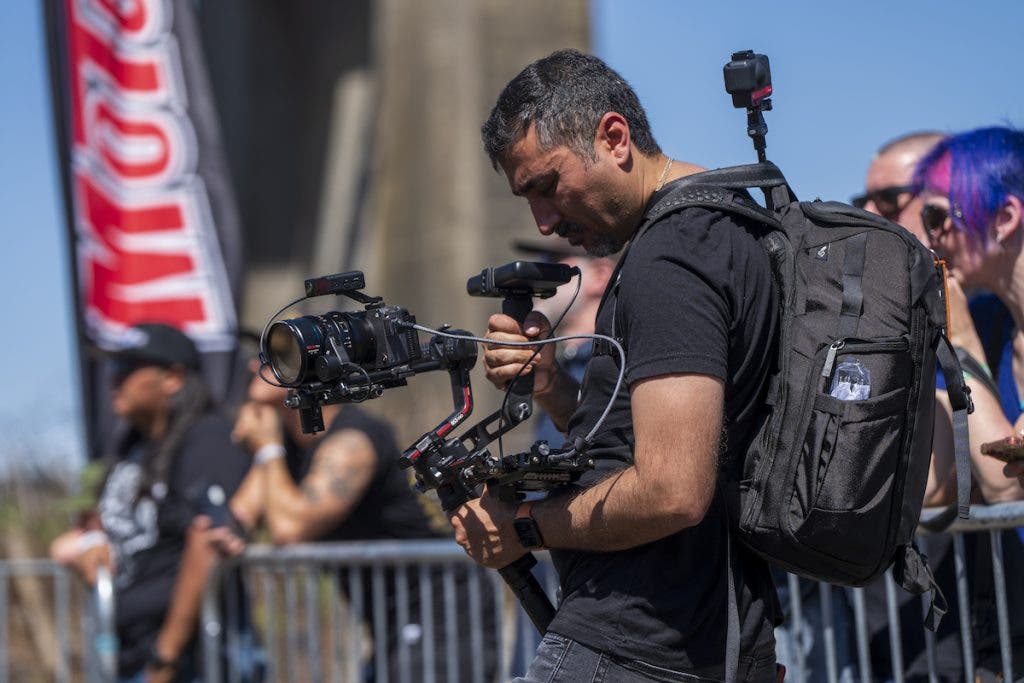
For motorcycle shoots where I’m planning to also capture video, I’ll typically pack my video gear and accessories, which include my DJI RS3 Pro Gimbal , Vanguard ALTA PRO 2V 263CVP Video Tripod , and a set of Tiffen Glimmer Glass and Black Pro Mist filters for cinematic diffusion.
Where to Shoot Motorcycles
It’s important to have your overall creative vision for motorcycle photography clearly defined prior to the planning and scouting of your locations. Careful consideration is important because your choice in locations is typically informed by your creative vision for the type of final image you want to create.
For example, if you want an image that shows a motorcycle in action, it’s pretty obvious that you’ll want to consider outdoor locations that will allow you to capture a motorcycle in motion. Having clearly defined goals for the creative vision of your final motorcycle images will make it easier for you to plan your locations according to the types of images that you’re wanting to create.
With that in mind, the two main settings that you can choose for capturing compelling motorcycle photography are outdoor environments, and studio, or indoor environments.
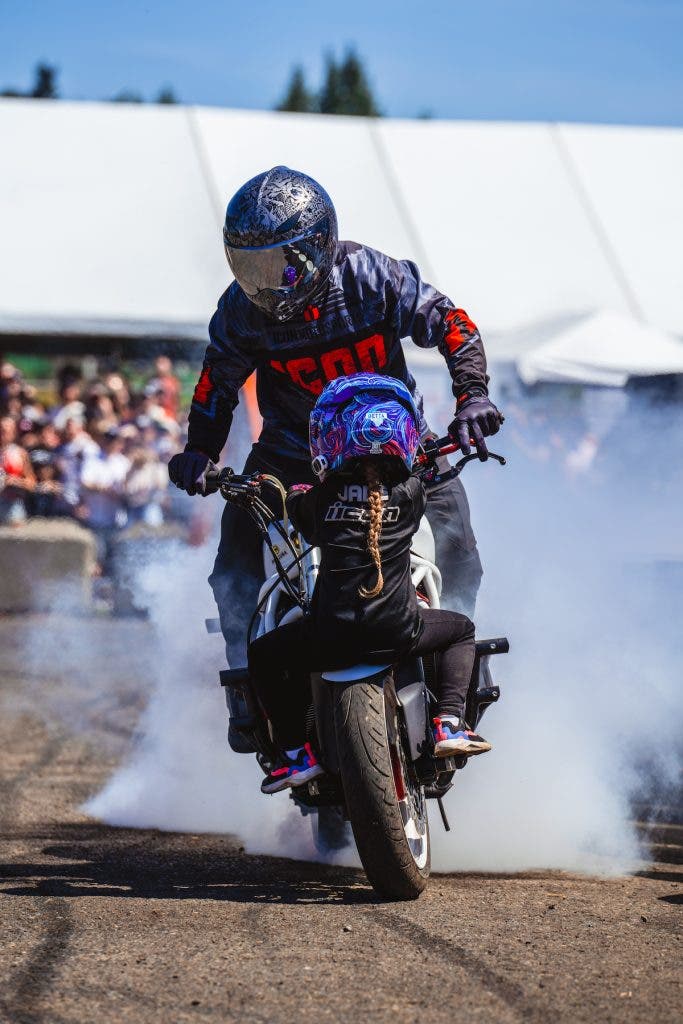
As we’ve already discussed, shooting in outdoor environments is ideal for capturing motorcycle photos that are all about movement and agility. It provides a number of opportunities for creating dynamic photos, including rolling shots that emphasize motion blur , and images that freeze action during high speed maneuvers like jumps, burnouts, etc.
On the other hand, shooting in an indoor studio setting allows you to be deliberate about a number of factors, including lighting, composition, and even backdrops. This is ideal when you want to achieve a specific look based on how you light the scene or place the motorcycle. This is also helpful for lifestyle photos when you want to incorporate various products into the shoot that speak to a specific audience or demographic.
By being able to control the various inputs that go into creating your final images, you’ll be able to create motorcycle photos that are intentional and controlled. This allows you to tell detailed and specific stories that would be difficult to tell in a rapidly changing and uncontrolled outdoor environment. You are able to avoid any changes in lighting, weather, and other natural elements that are beyond your control.
Best Camera Settings
Choosing the best camera settings for motorcycle photography follows the same concept as choosing the best locations. The camera settings you choose are largely based on the types of final images that you want to create, your creative style, and environmental factors like lighting and movement.
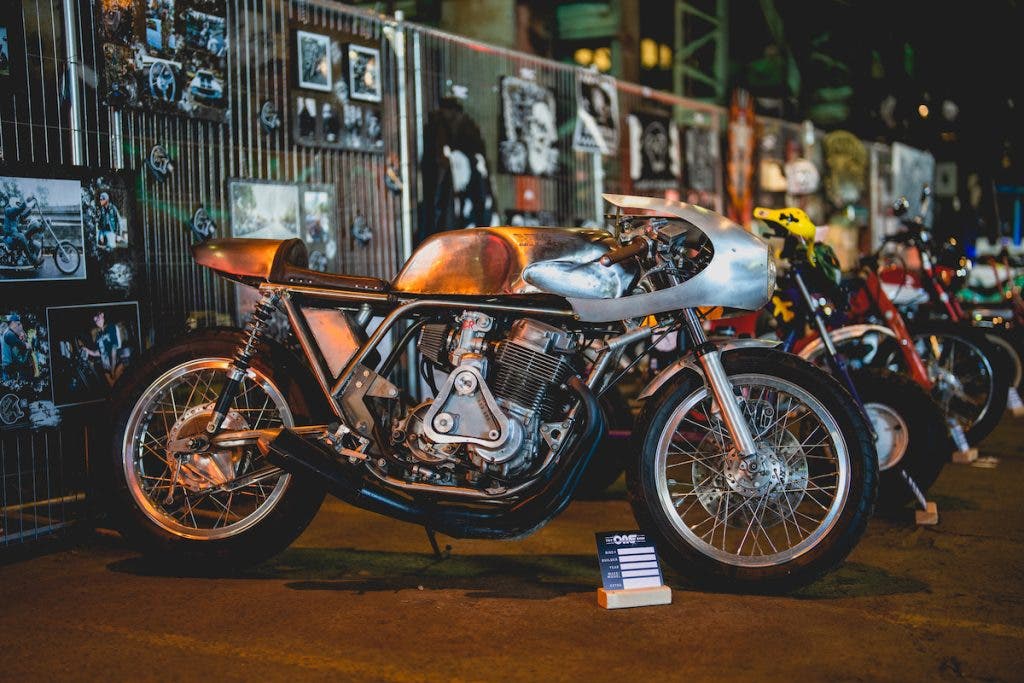
For example, if you’re looking to capture the details of a motorcycle, you’ll want to shoot with a wide aperture like f1.4. That setting will enable better subject isolation, render smoother bokeh , and result in cleaner images. This is thanks to the improved ISO performance from having the increased light gathering capabilities of wider apertures.
In contrast, if you want to include as much detail as possible in your photos, the obvious choice is to shoot with a narrow aperture like f8-f11. That setting will result in more of the motorcycle being in focus, but will also results in more noise in your image. This is due to the reduction in light gathering capability and the resulting higher ISO values from choosing a narrow aperture. These camera setting trade-offs tend to impact your creative process because you’ll need to consider them in advance and make deliberate decisions on the types of images that you want to capture.
Shutter Speed
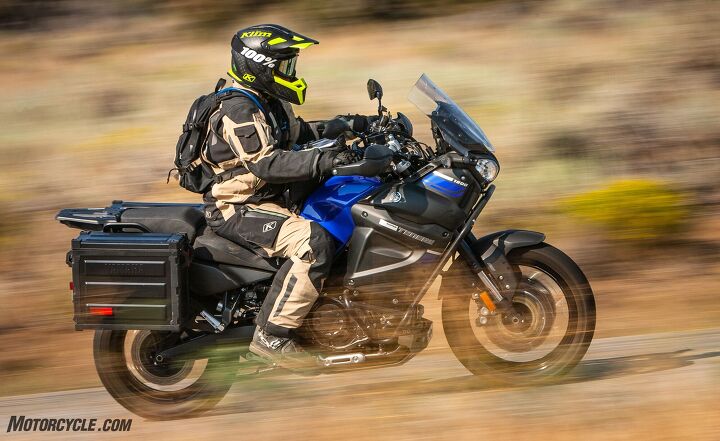
Your choice of shutter speed has a big impact on the type of motorcycle photos that you can create as well. For example, if you’re looking to convey the sense of speed and motion, you can choose a slower shutter speed like 1/60th or slower, and pan your camera in-stride with a passing motorcycle. That will result in what’s known as a “shutter drag” photo, which has a unique look that emphasizes motion blur, and gives the image a sense of speed and movement. See the top, featured image of this article for an example.
What Angles Work Best
When it comes to choosing the best angles to showcase your motorcycle photos, you’ll want to consider your composition within the context of the story that you’re looking to tell with your images. For example, if you’re looking to capture details on the rear seat of a motorcycle, you’ll likely be shooting from an overhead angle that clearly showcases the details on the seat.
If you want to convey a sense of power and strength, you can shoot from a low angle, pointing back up and towards the motorcycle. This gives the motorcycle a larger appearance, accentuating it’s sense of size and power.
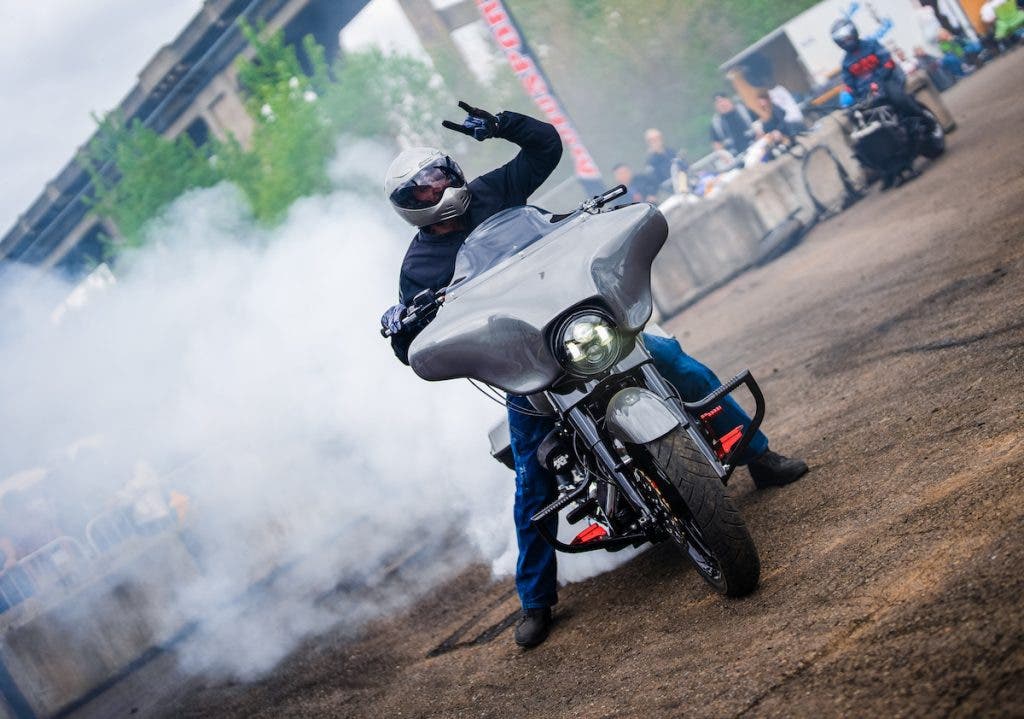
Shooting from eye-level is another great angle for motorcycle photography. It can create immersive and compelling images that make your audience feel as though they are in the rider’s seat, especially if you can capture the moment from the rider’s perspective.
Another great angle for motorcycle photography is the side profile. This angle is great for capturing the overall shape and design of the motorcycle. By shooting the side profile with a wider focal length, you can get a better overall view of it’s curves, colors, materials, and other design elements that would otherwise be obscured with different angular composition.
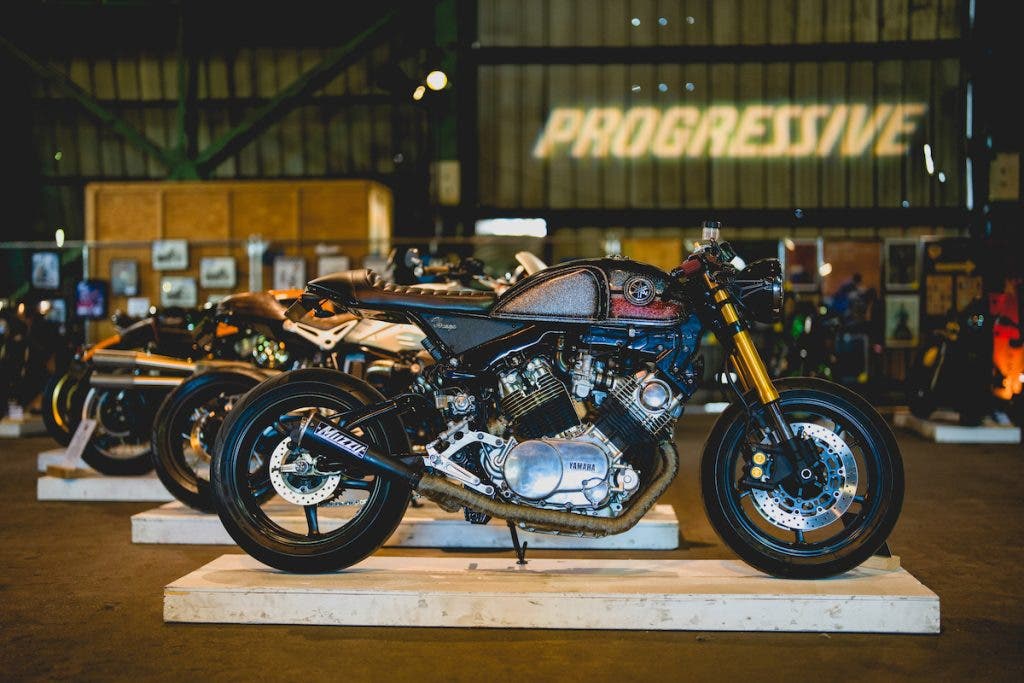
Tips for Motorcycle Photography
If you’re just starting out with motorcycle photography, there are some helpful and simple tips you can follow to ensure that you’re successful in creating captivating images.
Familiarize Yourself
The most important thing you can do is to try and familiarize yourself with the intricacies of the motorcycle culture. The more you know about the different types of motorcycles and the communities of enthusiasts that enjoy riding them, the better you’ll understand the culture, and the better you’ll be able to create compelling images that engage those communities.

There are also many sub-cultures within the community of motorcycle enthusiasts. They include riders that enjoy motocross, building custom choppers, riding sport bikes, racing drag bikes, cruising Harley Davidson’s, and more. Each of these groups appreciates motorcycles in a completely different way, so the more you immerse yourself and understand their individual cultures, the better you’ll be able to capture the essence of their lifestyle, and ultimately garner their attention with your motorcycle photography.
Plan and Prepare
Another important tip is something that we’ve touched on several times throughout this guide, which is to ensure that you carefully plan and prepare for your motorcycle photography in advance. Start by deciding on the types of stories that you want to tell. Then, you can devise a plan that takes all of the most important elements of your images into consideration. Having a deliberate emphasis on organization and research will make it easier to choose the right settings and gear to tell compelling visual stories.
Stay Versatile
Finally, be sure to capture a mix of different types of images so you can tell a well-rounded story with your photography. Focus on shooting everything from close-up details, to wide-angle shots, to action shots , and shots with a rider on the motorcycle. Having a diverse set of different types of images will be more engaging, and further guide you towards what you enjoy photographing the most, whether that be the people, the products, or simply just the motorcycles themselves.
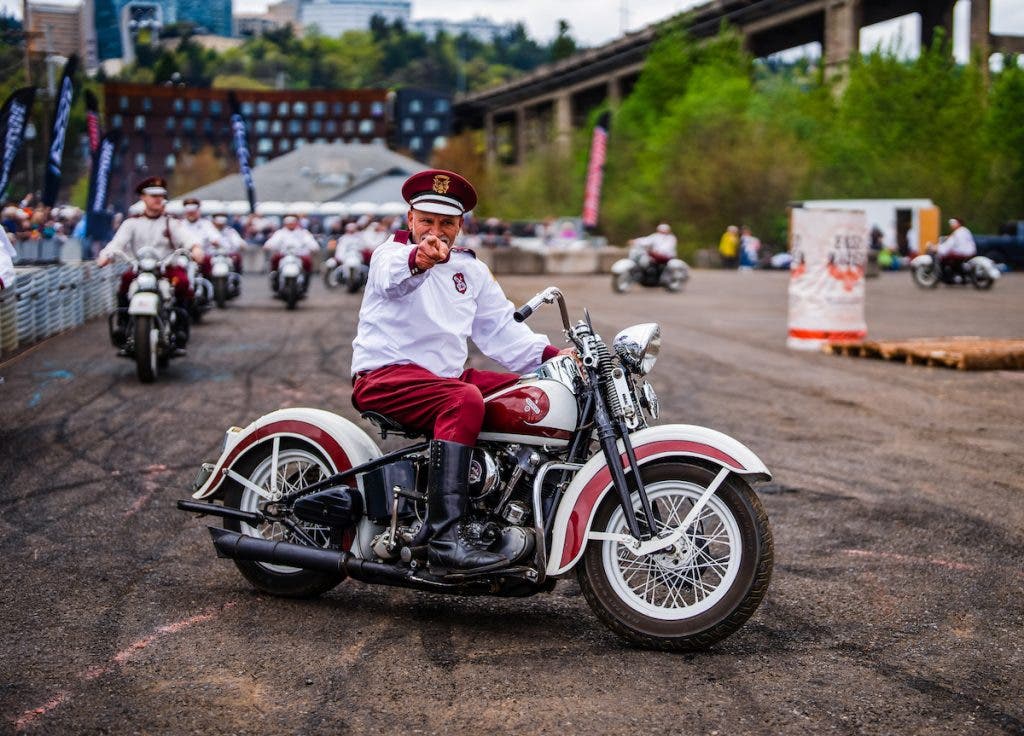
Conclusion
To create interesting and captivating motorcycle photography, try to focus on capturing images that include all of the elements that we’ve covered in this guide within your finished images. Look to tell the story of a captivating moment by conveying a sense of excitement through your choice of focal lengths , compositional angles, deliberate aperture and shutter speed choices, and combine all of those elements with a stylistic edit that brings it all together.
Don’t be afraid to experiment and find your creative style with motorcycle photography. Every image is an opportunity to captivate your audience. Try new angles, different camera settings, and various lenses until you find the perfect combination. All of these elements help capture the essence of the motorcycles and communities of riders that you’re photographing.
Reza Malayeri
You might also like.
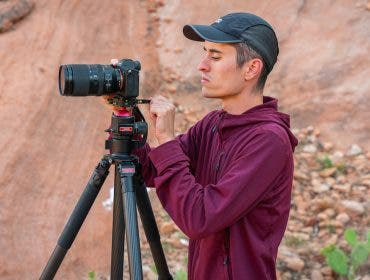
3Pod Everest T3 & T5 Carbon Fiber Tripods: Hands-On Review
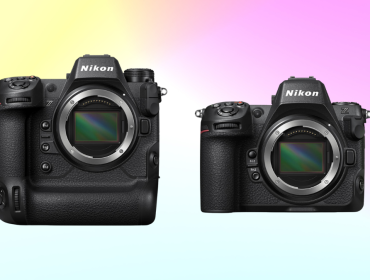
Nikon Z8 vs Nikon Z9: What to Know

Best Video Tripods in 2023

iPhone Rigs: What to Know and What to Buy
- Eye on the Tropics
- Trending Now (Opens in new window)
- Central Florida Spotlight
- Entertainment
- Politics and Elections
- Space and Technology
- Central Florida Gets Real
- 9 in Your Neighborhood
- Hour by Hour
- Watch Live: WFTV Now
- WFTV 24/7 News
- Weather 24/7
- The $pend $mart Stream
- Law & Crime
- Curiosity NOW
- 9 Investigates
- Back to School (Opens in new window)
- Steals and Deals (Opens in new window)
- TV 27 Community Connection
- Forever Family
- Uplifting News (Opens in new window)
- Health & Wellness
- Care Connect
- WFTV's Law Talk
- Home Experts
- Central Florida Guide (Opens in new window)
- The Daily Two
- Health Wellness (Parrish Healthcare)
- Advertise With Us
- Meet Our Team
- Submit a Tip (Opens in new window)
- WFTV Mobile Apps (Opens in new window)
- Newsletter Sign-up (Opens in new window)
- WFTV Listings
- TV 27 TV Listings
- Jobs at WFTV/WRDQ (Opens in new window)
- WFTV Member Help
- Visitor Agreement
- Privacy Policy
- Share Your Pics!
Father faces charges after calling to complain about child’s homework, police say
:quality(70)/cloudfront-us-east-1.images.arcpublishing.com/cmg/YG767QAIZJCQBGDKIR66CENPZM.jpg "photo motorbike homework")
Too much homework? FILE PHOTO: A father who told school officials that his child got too much homework ended up facing charges. (romrodinka/Getty Images/iStockphoto)
OXFORD, Ohio — A father in Ohio was upset over the amount of homework that his elementary school-aged son received and his repeated complaints ended with him facing charges.
>> Read more trending news
Oxford (Ohio) police said that Adam Sizemore called his child’s school repeatedly to complain about the amount of work that was being sent home. The calls started on Feb. 29.
The school’s resource officer spoke to the angry father, telling him not to call again, noting that Sizemore’s speech was slurred. The officer asked Sizemore if he was intoxicated, with Sizemore allegedly saying he was “high,” the “ Today ” show reported. The verbal assault continued, the officer wrote in the police report. He said he hung up on Sizemore after warning him he could face charges.
Two officers visited Sizemore’s home but he didn’t answer the door. When one returned to the school, Sizemore was still calling, but eventually spoke to the school’s principal, demanding that his son did not get any homework. The principal hung up when he said Sizemore started swearing.
Sgt. Adam Price told the “ Today ” show that the school has kindergarten through fifth grade.
“This is a K-5 school so there is not an abnormal amount of homework,” Price said.
The next day, police said in the report, Sizemore started calling again and threatened the principal, saying the educator “better put his big boy pants on,” WXIX reported.
Eventually, Sizemore started calling the police department, not once, not twice, but according to Price, “18 times roughly,” WXIX station reported.
Sizemore tried to get the dispatchers’ names, which they would not provide. He also wanted to talk to the police chief but was only getting voicemail.
WXIX listened to the call recordings, transcribing one:
Dispatcher: “Leave a voicemail if he doesn’t answer.”
Sizemore: “I’m being very nice.”
Dispatcher: “Well, then come to the police department and we’ll call the chief in, and you can talk to him in person but I’m not calling him on the phone.”
Sizemore: “He can come to my [explictive] house. I pay for him. He can come to my house.”
Police did go to his house and arrested him, charging Sizemore with two first-degree misdemeanors for telecommunications harassment and a fourth-degree misdemeanor for menacing.
Sizemore left “ Today ” a voicemail, saying that “most” of the accusations against him are false.
“I’m a single dad of a boy and a girl and I’m just trying to do the best I can and that’s all I can do,” Sizemore said in his defense. “People make mistakes.”
- Husband of ‘Selling Sunset’ actress Christine Quinn arrested on assault charge
- Mattel Adventure Park to open in Kansas in 2026 with Barbie Beach House, Hot Wheels roller coasters
12-year-old girl safe after being abducted at gunpoint; suspect dead
- ‘It’s me’: Man accused of robbing bank caught while waiting at bus stop
- Woman loses hand after passing out while using hair dryer
© 2024 Cox Media Group
:quality(70)/cloudfront-us-east-1.images.arcpublishing.com/cmg/FRT7LU7H2FGZHNVUIJQK25QDEA.jpg "photo motorbike homework")
State-chartered plane from Haiti to land at Orlando Sanford International Airport
:quality(70)/cloudfront-us-east-1.images.arcpublishing.com/cmg/TSTU3MJS3JARFLMQHODNCRKRVE.jpg "photo motorbike homework")
Construction worker dies after falling down 20-foot shaft in Orange County
:quality(70)/cloudfront-us-east-1.images.arcpublishing.com/cmg/CTQ4NVXUDRCU5EFSD5TNT2H7EY.jpg "photo motorbike homework")
Photos: Most popular dog breeds
:quality(70)/cloudfront-us-east-1.images.arcpublishing.com/cmg/HJRUT7BDDZD2LFW3ET5CP3RK2Q.png "photo motorbike homework")
Deputies: Georgia couple found asleep, surrounded by alcohol, as kids wander away on Daytona Beach
:quality(70)/cloudfront-us-east-1.images.arcpublishing.com/cmg/67SISYPSQJDG5BSQBSEJO4C23A.jpg "photo motorbike homework")
Current Weather
Mount pleasant.
Latest Weathercast
Interactive Radar
50-year-old victim of motorcycle crash identified by Charleston County Coroner's Office
by Ian Kayanja

MOUNT PLEASANT, S.C. (WCIV) — A 50-year-old died in a motorcycle accident on Patriots Point Road, the Charleston County Coroner's Office said Wednesday.
Miguel Farina died from blunt force injuries sustained during the single-motorcycle accident that occurred around 10 p.m. on March 15, the coroner's office said.
The Mount Pleasant Police Department is continuing to investigate the collision.
READ MORE: "Motorcyclist dies in single-vehicle crash in Mount Pleasant."

The 50 best photo spots in Moscow
Navigate forward to interact with the calendar and select a date. Press the question mark key to get the keyboard shortcuts for changing dates.
Navigate backward to interact with the calendar and select a date. Press the question mark key to get the keyboard shortcuts for changing dates.
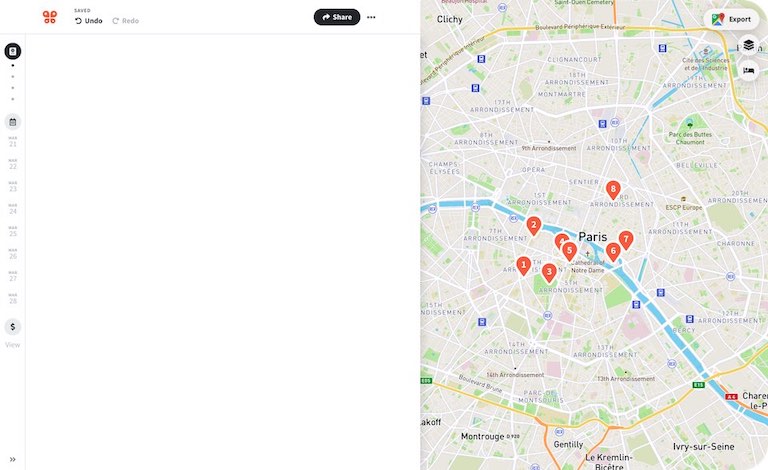
1 The Moscow Kremlin
2 Red Square

3 Gorky Central Park of Culture and Leisure
4 st. basil's cathedral, 5 bolshoi theatre.

Track your travel spending and split costs with friends
Plan your trip. Keep your budget organized. Split the cost between tripmates. Wanderlog does it all.

Don’t forget to pack anything
Stay organized with a to-do list, packing list, shopping list, any kind of list.

16 Grand Kremlin Palace
17 state historical museum, 18 public museum of the moscow metro, 19 cafe pushkin, 20 armoury chamber, 21 vorob'yevy gory, 22 all-russian exhibition center, 23 moscow zoo, 24 alexander garden, 25 sokolniki park.

All travel reservations in 1 place
Never dig through your emails again — access all your flights, lodging, and any reservations in 1 place.

26 Muzeon Park of Arts
27 ostankino television tower, 28 patriarch's ponds, 29 neskuchny garden, 30 museum of soviet arcade games, 31 dormition cathedral, 32 the carlton, moscow, 33 monument to minin and pozharsky, 34 gulag history museum, 35 annunciation cathedral.
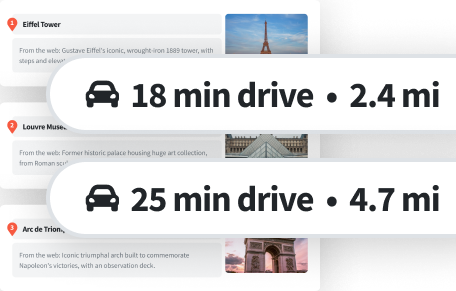
Perfect for road trips
See time and distance between places, and optimize your route to get the most of your day.

36 Russian State Library
37 winzavod, 38 museum of the history of vodka, 39 komsomolskaya, 40 moscow state university, 41 poklonnaya hill, 42 arbat st, 44 ostrov mechty (dream island), 45 moskva river.
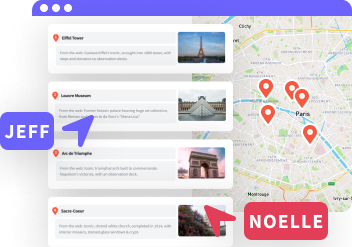
Collaborate with friends in real time
Plan along with your friends with live syncing and collaborative editing.

46 Business district "Moscow Silk"
47 vorob'yevy gory, 48 memorial eternal flame, 49 street adventure, 50 underground gallery, top searches in moscow, popular road trips from moscow, what's the weather like in moscow.
It depends on when you visit! We've compiled data from NASA on what the weather is like in Moscow for each month of the year: see the links below for more information.
- Weather in Moscow in January
- Weather in Moscow in February
- Weather in Moscow in March
- Weather in Moscow in April
- Weather in Moscow in May
- Weather in Moscow in June
- Weather in Moscow in July
- Weather in Moscow in August
- Weather in Moscow in September
- Weather in Moscow in October
- Weather in Moscow in November
- Weather in Moscow in December
All road trips from Moscow
- Moscow to London drive
- Moscow to Paris drive
- Moscow to St. Petersburg drive
- Moscow to Berlin drive
- Moscow to Prague drive
- Moscow to Amsterdam drive
- Moscow to Budapest drive
- Moscow to Vienna drive
- Moscow to Istanbul drive
- Moscow to Florence drive
- Moscow to Venice drive
- Moscow to Stockholm drive
- Moscow to Milan drive
- Moscow to Krakow drive
- Moscow to Copenhagen drive
- Moscow to Warsaw drive
- Moscow to Helsinki drive
- Moscow to Munich drive
- Moscow to Brussels drive
- Moscow to Tallinn drive
- Moscow to Riga drive
- Moscow to Oslo drive
- Moscow to Turin drive
- Moscow to Hamburg drive
- Moscow to Vilnius drive
- Moscow to Yaroslavl drive
- Moscow to Nizhny Novgorod drive
- Moscow to Kyiv drive
- Moscow to Tula drive
- Moscow to Bruges drive
Explore nearby places
- Likino-Dulevo
- Ivanteyevka
- Orekhovo-Zuevo
- Semyonovskoye
- Ivanovskoye
- Rumyantsevo
- Dzerzhinsky
- Sovkhoz Imeni Lenina
- Dolgoprudny
All related maps of Moscow
- Map of Moscow
- Map of Danki
- Map of Shatura
- Map of Likino-Dulevo
- Map of Uspenskoye
- Map of Gorskoye
- Map of Ivanteyevka
- Map of Reutov
- Map of Domodedovo
- Map of Peresvet
- Map of Vorobyovo
- Map of Bronnitsy
- Map of Orekhovo-Zuevo
- Map of Moskovsky
- Map of Semyonovskoye
- Map of Izmaylovo
- Map of Nikolskoye
- Map of Ivanovskoye
- Map of Marfino
- Map of Govorovo
- Map of Nagornoye
- Map of Mosrentgen
- Map of Bratsevo
- Map of Rumyantsevo
- Map of Mytishchi
- Map of Putilkovo
- Map of Razvilka
- Map of Khimki
- Map of Dzerzhinsky
- Map of Sovkhoz Imeni Lenina
- Map of Dolgoprudny
Moscow throughout the year
- Moscow in January
- Moscow in February
- Moscow in March
- Moscow in April
- Moscow in May
- Moscow in June
- Moscow in July
- Moscow in August
- Moscow in September
- Moscow in October
- Moscow in November
- Moscow in December
Looking for day-by-day itineraries in Moscow?
Get inspired for your trip to Moscow with our curated itineraries that are jam-packed with popular attractions everyday! Check them out here:
- 1-Day Moscow Itinerary
- 2-Day Moscow Itinerary
- 3-Day Moscow Itinerary
- 4-Day Moscow Itinerary
- 5-Day Moscow Itinerary
Best attractions in nearby cities
- Top things to do and attractions in Khimki
Best restaurants in nearby cities
- Where to eat: the best restaurants in Mytishchi
- Where to eat: the best restaurants in Khimki
- Itinerary + map in one view
- Live collaboration
- Auto-import hotels and reservations
- Optimize your route
- Offline access on mobile
- See time and distance between all your places
Father arrested after continuously calling school about child’s homework, police say
OXFORD, Ohio ( WXIX /Gray News) - A father’s growing frustrations about the amount of homework his child’s school was assigning led to him being arrested.
Adam Sizemore is accused of repeatedly calling his child’s school to complain about the amount of homework, according to police in Oxford, Ohio.
Criminal complaints filed against Sizemore claim he threatened the school principal, saying he “better put his big boy pants on.”
When the school stopped answering Sizemore’s call, detectives say he started calling their police department.
“He calls dispatch, I think it was 18 times, roughly,” said Oxford Police Detective Sgt. Adam Price.
In the audio records from the police department, Sizemore can be heard becoming frustrated that dispatchers are not telling him their names.
He was audibly frustrated that he kept getting the chief of police’s voicemail and that he can’t speak with him directly.
“He can come to my f****** house. I pay for him. He can come to my house,” Sizemore was heard saying in a transcript of one of the calls.
After repeated calls, Sizemore did not get the chance to speak with the chief, but he did get to speak with officers.
In other audio recordings, a dispatcher told Sizemore that they would send out officers after his repeated calls to the department.
“That ultimately ended when we took him into custody for telecommunications harassment as well as a menacing charge,” Price explained.
Sizemore was charged with two first-degree misdemeanors for telecommunications harassment, according to the criminal complaint. The menacing charge he faces is a fourth-degree misdemeanor, the complaint also shows.
Copyright 2024 WXIX via Gray Media Group, Inc. All rights reserved.

Teacher who resigned after her OnlyFans page was discovered says new employer fired her for violating social media policy

BWL: Power restored to Lansing residents after massive outage

PHOTOS: Sedan found submerged in Grand River; Lansing dive teams on the scene

Vienna Twp. murder victim identified as Congressman Kildee’s brother

Mom gets life without parole in death of young daughter who she left alone while she went on vacation
Latest news.

‘He was just such a good person’: Man dies with his beloved horse in crash

‘Sometimes there’s literally no warning’: Being prepared for a tornado

Court action on Texas’ migrant arrest law leads to confusion at the US-Mexico border

12-year-old boy got drunk after Outback Steakhouse accidentally served him a daiquiri

Biden touts government investing $8.5 billion in Intel’s computer chip plants in 4 states
- Tiếng Việt lớp 1
- Tiếng Việt 2
- Tiếng Anh lớp 2
- Tiếng Việt lớp 3
- Tiếng Anh 3 (Sách McMillan)
- Tiếng Việt lớp 4
- Tiếng Anh 4 (Sách McMillan)
- Tiếng Việt lớp 5
- Tiếng Anh 5 (Sách McMillan)
- Tiếng Anh 6 (Sách Pearson)
- Tiếng Anh 7 (Sách Pearson)
- Tiếng Anh 8 (Sách Pearson)
- Tiếng Anh 9 (Sách Pearson)
- Tiếng Anh 10 (Sách Pearson)
- Tiếng Anh 11 (Sách Pearson)
- Tiếng Anh 12 (Sách Pearson)
Unit 2: My home (Part 1) – Bài tập Tiếng Anh 6 mới
Unit 2 my home.
A. PHONETICS
I. Put the words into THREE groups (/s/, /z/ and /iz/)
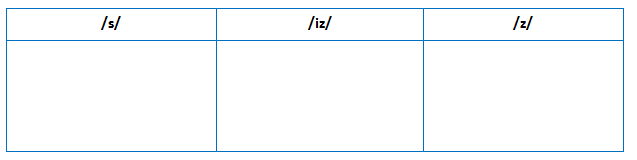
II. Choose the word whose underlined part is pronounced differently from that of the others.
B. VOCABULARY & GRAMMAR
I. Circle the odd one out.
II. Choose the best answer.
1. How many windows ___________in your class?
2. They often play soccer in the ___________ .
3. Which word has three syllables?
4. Those ___________pens and pencils.
5. ___________meadows on the way.
6. Is this your favorite class? ___________
7. There are five people in___________ family.
8. Tell me something ___________ your family.
9. Go and ___________ a bath!
10. Close the door ___________ ; it’s cold in here.
11. My house is opposite ___________the park.
12. Which word has four syllables?
13. How ___________ money do you want?
14. ___________ do they work? – They work in a big hospital.
15. What are those? ___________ CDs.
16. What’s the date today? – It is___________ June.
17. How many windows are there in your house? – ___________six.
18. ___________is Phong? – He’s in the living room.
19. Which verb adds _es in the third person?
20. ___________ a clock in your room?
III. Complete the sentences with There is or There are.
1. ___________thirty-five students in my class.
2. ___________nice posters in our classroom.
3. ___________green curtains in his room.
4. ___________six children in the room.
5. ___________a sofa in the living room.
6. ___________dishes on the floor.
7. ___________a ceiling fan in the bedroom.
8. ___________some pictures in my room.
9. ___________a big window in the living room.
10. ___________two sinks in my bathroom.
IV. Fill in the blanks with in, on, at, behind, in front of, from… to
Ex: I play games in the afternoon.
1. They often go swimming ___________ Sunday.
2. The meeting will last___________7 a.m___________ 5 p.m.
3. She will be 13___________ her next birthday.
4. We are playing chess___________ the moment.
5. It’s often rainy___________ July.
6. My birthday is___________ September 3rd.
7. The party will start___________ seven o’clock___________ the evening.
8. He was born___________ April 2002.
9. The dog is___________ the shelf.
10. Our teacher is___________ the blackboard.
V. Fill in the blanks with is, are, isn’t, aren’t, do, does, where.
1. We___________ staying at my cousin’s house in Vung Tau.
2.___________ they have the right things for the kitchen?
3. Where ___________you live, Phong?
4. ___________does your uncle live?
5. How many rooms ___________there in the hotel?
6. There___________ any chairs in the kitchen. We need five chairs.
7. Which house ___________you want to live in? A town house or a country house?
8. There___________ any furniture in my bedroom. I need many things.
9. In my house, there___________ four bedrooms.
10. What___________ Mrs.Brown need for the living room?
I. Read the passage carefully and answer the questions below.
Hoa’s family lives in a beautiful house in the country. There are manyflowers in front of her house. Behind the house, there is a well. To the right of the house, there is a rice-paddy and to the left of the house, there are tall trees. It’s very quiet here and Hoa loves her house very much. Hoa’s father is a worker. He works in a big factory. Everyday, he travels to work by motorbike. He works in his factory from Monday to Friday. He doesn’t work on Saturdays and Sundays. Questions:
1. Does Hoa live in town?
…………………………………………………………………………………………………….
2. What are there in front of her house?
3. Is there a paddy field to the right of the house?
4. What does Hoa’s father do?
5. How does he travel to work?
6. When does he work in the factory?
II. Read and choose the best answer.
I live in a house near the sea. It is …………….. (1) old house, about 100 years old and …………….. (2) very small. There are two bedrooms upstairs …………….. (3) no bathroom. The bathroom is down stairs …………….. (4) the kitchen. There is a living room where there is a lovely old fire place. There is a garden …………….. (5) the house. The garden …………….. (6) down to the beach and in Spring and Summer …………….. (7) flowers everywhere. I like sitting alone …………….. (8) my dog, Rack, but we have a lot of visitors. My city friends often stay with …………….. (9) I love my house for …………….. (10)reasons: the garden, the flowers in Summer, the fire in winter, but the best thing is the view from my bedroom window.
>> Tải về file pdf TẠ I Đ ÂY.
Xem thêm :
Answer key Unit 2 My home – Bài tập Tiếng Anh 6 mới tại đây.
Unit 2: My home (Part 2) – Bài tập Tiếng Anh 6 mới tại đây.
Related Posts

Đáp án Đề luyện thi học sinh giỏi Tiếng anh 6 – Đề 02 – Năm học 2018-2019

Chuyên đề 3. Lời nói tường thuật (REPORTED SPEECH) – Chinh phục đề thi vào 10 môn Anh (part 1)

What are you reading ? – Part 1 – Bài tập Tiếng Anh 5
- Unit 1: My New School (Part 2) - Bài tập Tiếng Anh 6 mới - hoc360.net | Hoc360.net
- Answer key Unit 1 (My New School) - Bài tập Tiếng Anh 6 mới | Hoc360.net
Bình luận Cancel reply
Bài mới nhất.
- Bài tập Đại số 9: Liên hệ giữa phép nhân chia và khai phương
- Bài tập đại số 7: Nhân chia số hữu tỉ
- Bài tập Toán 6: Số phần tử của một tập hợp. Tập hợp con
- Bài tập Toán 5: Luyện tập tính toán phân số
- Bài tập Toán 4: Đọc và viết các số có 7 chữ số trở lên
Comments mới nhất
- Top 18 Toán Hình Học Lớp 5 Update on 29 Đề Toán Hình Lớp 5 – Ôn Tập Toán Lớp 5 Hiệu Quả
- 123 on Luyện tập toán lớp 2 trang 164
- Dạng toán tính tuổi - giải toán tiểu học - Hoc360.net - C2captientlhp.edu.vn on Đề kiểm tra học kì 1 môn toán 8 – Thcs Vinschool năm 2018 – 2019
- hãy giải chi tiết on Hướng dẫn giải bài tập khai phương một thương. Chia hai căn thức bậc hai – Toán bồi dưỡng lớp 9 – Đại số
- fake on Trình bày suy nghĩ “Tốt gỗ hơn tốt nước sơn – Đề và văn mẫu 8
- Uncategorized
- Góc học tập
- Tin tuyển sinh
- Giải Tiếng Anh 6
- Đáp án Tiếng Việt
- Góc Học trò
- Tiếng Anh 8 nâng cao
- Sách Bài tập Vật lý 6
- Khoa học Xã hội
- Giải Tiếng Anh 9
- giáo dục công dân lớp 7
- tài liệu toán 4
- Tập làm avwn lớp 4
- Tập làm văn lớp 4
- Tài liệu văn học
© Hoc360.net . All rights reserved.
Email: [email protected]
Mobile: 09026788686
Địa chỉ: Số nhà 20 ngõ 140 Tôn Thất Tùng, Phường Khương Thượng, Quận Đống Đa, Thành phố Hà Nội
Moscow city tour by motorbike
- Best price guarantee.
- We speak your language.
- All our motorbikes are completely safe.
- Choose us – you will not get bored – promise
Best Price Guarantee
If you find similar services at a lower price, inform us about the alternative proposal and we will make the best offer.

Motorbike city tour in Moscow
Red Square, Bolotnaya Square, Observation platforms of the capital and much more. We will pick you up from home, take you to the most beautiful places of the city. If desired, plunge into the world of the motorcycle culture of the capital, drink refreshing biker tea in one of the themed moto bars.
City tour (day / night).
The tour includes: Moscow Kremlin, Red Square, St. Basil’s Cathedral, Bolotnaya Square, Moscow Boulevard Ring, Chistye Prudy, Vysoko-Petrovsky Monastery, Patriarch’s Ponds, ul. Arbat, Museum-estate of L.N. Tolstoy, State Museum AS Pushkin.
Duration the program is counted for 1,5 hours (26 km).
Moscow day tour
The tour includes: Moscow Kremlin, Red Square, St. Basil’s Cathedral, Bolotnaya Square, Moscow Boulevard Ring, Chistye Prudy, Vysokopetrovsky monastery, Patriarch’s Ponds, ul. Arbat, Museum-estate of L.N. Tolstoy, State Museum AS Pushkin, Novodevichy Women’s Monastery, Kutuzovsky Prospect, view of the Moscow-City Shopping Center.
Duration the program is counted for 2,5 hours (36 km).
Night "Biker" Excursion
For the sophisticated or just deciding to learn more about the international biker culture, listen to biker traditions, signs, as well as plunge into the world of motorcycle nightlife. The tour includes: Moscow Kremlin, Observation Platform near the Moscow-City Shopping Center, Bike Center “Sexton”.
Duration the program is counted for 1,5 hours (29 km).
For the sophisticated or just deciding to learn more about the international biker culture, listen to biker traditions, signs, as well as plunge into the world of motorcycle nightlife/ – we made a route 54 km long: Moscow Kremlin, Observation Platform near the Moscow-City Shopping Center, Bike Center “Sexton”, Observation deck on the Sparrow Hills, Biker Bar “Night Train”.
For the sophisticated or just deciding to learn more about the international biker culture, listen to biker traditions, signs, as well as plunge into the world of motorcycle nightlife – we made a route of 65 km: Moscow Kremlin, Red Square, St. Basil’s Cathedral, Marsh Square, Observation deck near the Moscow-City International Business Center, Bike Center “Sexton”, Observation deck on Sparrow Hills, Moscow State University Building, Biker Bar “Night Train”.
Duration the program is counted for 3,5 hours (65 km).
*Additional services:
Services of a professional photographer for photographs in the process of moving motorcycles (the photographer rides a passenger on another motorcycle) – 3500rub / hour
Attention. The number of participants is limited. Book your tour in advance!
Please prove you are human by selecting the truck .
Frequently asked Questions
Are there any restrictions on participation?
– By weight: not more than 90 kg for sport bikes and not more than 110 kg for grand tourists (Goldwing);
– All pilots are prohibited to take passengers in a state of alcoholic or drug intoxication;
– The volume of luggage (handbags, backpacks, etc.) is not more than 15 liters. Larger volume of baggage – must be reported in advance (for the carriage of goods a number of motorcycles are foreseen);
– It is strictly forbidden to ride without a helmet. (helmet provided);
Is it safe?
Our equipment is completely safe regardless of the chosen route and kind of entertainment. We also recommend that you have insurance in force in the territory of the Russian Federation.
We are always in touch
2024 tanksdriving.com
- St. Petersburg
- Shooting AK-47
- Bazooka tour
- Snowmobiles
- Reindeer sledding
- Russian Troika
- Photo with a bear
- 1-day Vladimir and Suzdal
- Patriot Park
- Monino Aviation Museum
- RKK Energia
- Moscow Metro Tour
- Forum «ARMY-2024»
- Tank biathlon
2018 Primetime Emmy & James Beard Award Winner
In Transit: Notes from the Underground
Jun 06 2018.
Spend some time in one of Moscow’s finest museums.
Subterranean commuting might not be anyone’s idea of a good time, but even in a city packing the war-games treasures and priceless bejeweled eggs of the Kremlin Armoury and the colossal Soviet pavilions of the VDNKh , the Metro holds up as one of Moscow’s finest museums. Just avoid rush hour.
The Metro is stunning and provides an unrivaled insight into the city’s psyche, past and present, but it also happens to be the best way to get around. Moscow has Uber, and the Russian version called Yandex Taxi , but also some nasty traffic. Metro trains come around every 90 seconds or so, at a more than 99 percent on-time rate. It’s also reasonably priced, with a single ride at 55 cents (and cheaper in bulk). From history to tickets to rules — official and not — here’s what you need to know to get started.
A Brief Introduction Buying Tickets Know Before You Go (Down) Rules An Easy Tour
A Brief Introduction
Moscow’s Metro was a long time coming. Plans for rapid transit to relieve the city’s beleaguered tram system date back to the Imperial era, but a couple of wars and a revolution held up its development. Stalin revived it as part of his grand plan to modernize the Soviet Union in the 1920s and 30s. The first lines and tunnels were constructed with help from engineers from the London Underground, although Stalin’s secret police decided that they had learned too much about Moscow’s layout and had them arrested on espionage charges and deported.
The beauty of its stations (if not its trains) is well-documented, and certainly no accident. In its illustrious first phases and particularly after the Second World War, the greatest architects of Soviet era were recruited to create gleaming temples celebrating the Revolution, the USSR, and the war triumph. No two stations are exactly alike, and each of the classic showpieces has a theme. There are world-famous shrines to Futurist architecture, a celebration of electricity, tributes to individuals and regions of the former Soviet Union. Each marble slab, mosaic tile, or light fixture was placed with intent, all in service to a station’s aesthetic; each element, f rom the smallest brass ear of corn to a large blood-spattered sword on a World War II mural, is an essential part of the whole.
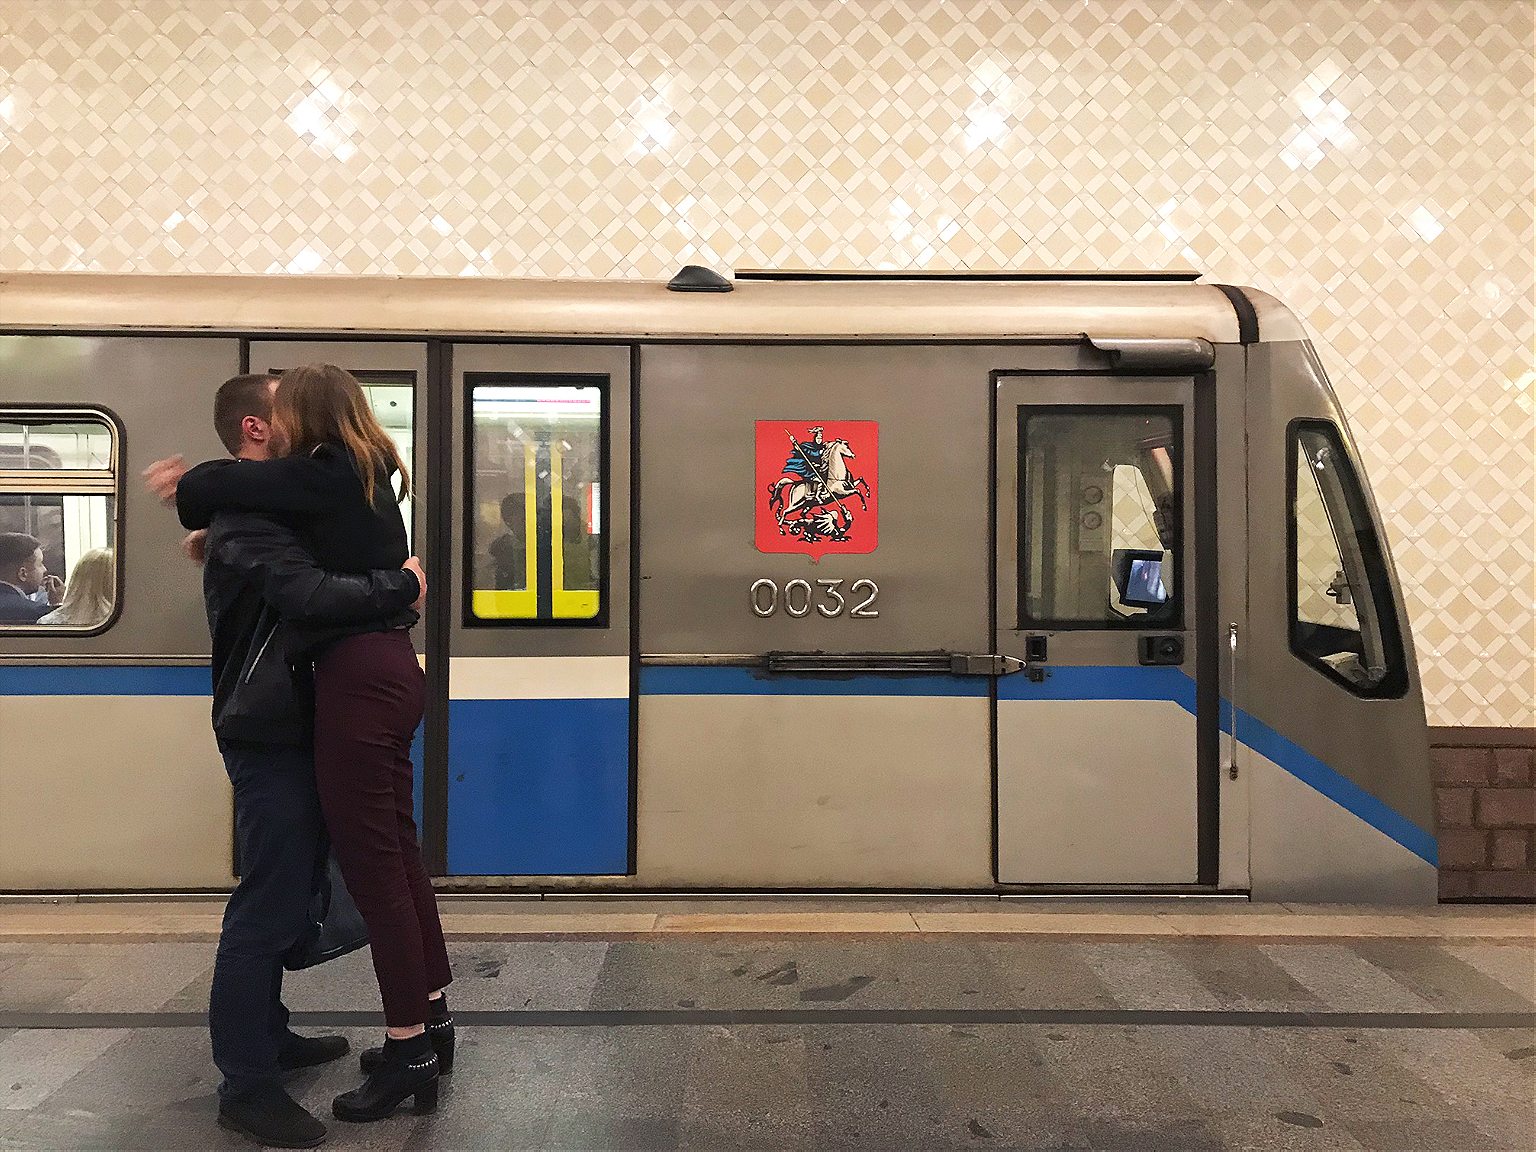
The Metro is a monument to the Soviet propaganda project it was intended to be when it opened in 1935 with the slogan “Building a Palace for the People”. It brought the grand interiors of Imperial Russia to ordinary Muscovites, celebrated the Soviet Union’s past achievements while promising its citizens a bright Soviet future, and of course, it was a show-piece for the world to witness the might and sophistication of life in the Soviet Union.
It may be a museum, but it’s no relic. U p to nine million people use it daily, more than the London Underground and New York Subway combined. (Along with, at one time, about 20 stray dogs that learned to commute on the Metro.)
In its 80+ year history, the Metro has expanded in phases and fits and starts, in step with the fortunes of Moscow and Russia. Now, partly in preparation for the World Cup 2018, it’s also modernizing. New trains allow passengers to walk the entire length of the train without having to change carriages. The system is becoming more visitor-friendly. (There are helpful stickers on the floor marking out the best selfie spots .) But there’s a price to modernity: it’s phasing out one of its beloved institutions, the escalator attendants. Often they are middle-aged or elderly women—“ escalator grandmas ” in news accounts—who have held the post for decades, sitting in their tiny kiosks, scolding commuters for bad escalator etiquette or even bad posture, or telling jokes . They are slated to be replaced, when at all, by members of the escalator maintenance staff.
For all its achievements, the Metro lags behind Moscow’s above-ground growth, as Russia’s capital sprawls ever outwards, generating some of the world’s worst traffic jams . But since 2011, the Metro has been in the middle of an ambitious and long-overdue enlargement; 60 new stations are opening by 2020. If all goes to plan, the 2011-2020 period will have brought 125 miles of new tracks and over 100 new stations — a 40 percent increase — the fastest and largest expansion phase in any period in the Metro’s history.
Facts: 14 lines Opening hours: 5 a.m-1 a.m. Rush hour(s): 8-10 a.m, 4-8 p.m. Single ride: 55₽ (about 85 cents) Wi-Fi network-wide
Buying Tickets
- Ticket machines have a button to switch to English.
- You can buy specific numbers of rides: 1, 2, 5, 11, 20, or 60. Hold up fingers to show how many rides you want to buy.
- There is also a 90-minute ticket , which gets you 1 trip on the metro plus an unlimited number of transfers on other transport (bus, tram, etc) within 90 minutes.
- Or, you can buy day tickets with unlimited rides: one day (218₽/ US$4), three days (415₽/US$7) or seven days (830₽/US$15). Check the rates here to stay up-to-date.
- If you’re going to be using the Metro regularly over a few days, it’s worth getting a Troika card , a contactless, refillable card you can use on all public transport. Using the Metro is cheaper with one of these: a single ride is 36₽, not 55₽. Buy them and refill them in the Metro stations, and they’re valid for 5 years, so you can keep it for next time. Or, if you have a lot of cash left on it when you leave, you can get it refunded at the Metro Service Centers at Ulitsa 1905 Goda, 25 or at Staraya Basmannaya 20, Building 1.
- You can also buy silicone bracelets and keychains with built-in transport chips that you can use as a Troika card. (A Moscow Metro Fitbit!) So far, you can only get these at the Pushkinskaya metro station Live Helpdesk and souvenir shops in the Mayakovskaya and Trubnaya metro stations. The fare is the same as for the Troika card.
- You can also use Apple Pay and Samsung Pay.
Rules, spoken and unspoken
No smoking, no drinking, no filming, no littering. Photography is allowed, although it used to be banned.
Stand to the right on the escalator. Break this rule and you risk the wrath of the legendary escalator attendants. (No shenanigans on the escalators in general.)
Get out of the way. Find an empty corner to hide in when you get off a train and need to stare at your phone. Watch out getting out of the train in general; when your train doors open, people tend to appear from nowhere or from behind ornate marble columns, walking full-speed.
Always offer your seat to elderly ladies (what are you, a monster?).
An Easy Tour
This is no Metro Marathon ( 199 stations in 20 hours ). It’s an easy tour, taking in most—though not all—of the notable stations, the bulk of it going clockwise along the Circle line, with a couple of short detours. These stations are within minutes of one another, and the whole tour should take about 1-2 hours.
Start at Mayakovskaya Metro station , at the corner of Tverskaya and Garden Ring, Triumfalnaya Square, Moskva, Russia, 125047.
1. Mayakovskaya. Named for Russian Futurist Movement poet Vladimir Mayakovsky and an attempt to bring to life the future he imagined in his poems. (The Futurist Movement, natch, was all about a rejecting the past and celebrating all things speed, industry, modern machines, youth, modernity.) The result: an Art Deco masterpiece that won the National Grand Prix for architecture at the New York World’s Fair in 1939. It’s all smooth, rounded shine and light, and gentle arches supported by columns of dark pink marble and stainless aircraft steel. Each of its 34 ceiling niches has a mosaic. During World War II, the station was used as an air-raid shelter and, at one point, a bunker for Stalin. He gave a subdued but rousing speech here in Nov. 6, 1941 as the Nazis bombed the city above.
Take the 3/Green line one station to:
2. Belorusskaya. Opened in 1952, named after the connected Belarussky Rail Terminal, which runs trains between Moscow and Belarus. This is a light marble affair with a white, cake-like ceiling, lined with Belorussian patterns and 12 Florentine ceiling mosaics depicting life in Belarussia when it was built.
Transfer onto the 1/Brown line. Then, one stop (clockwise) t o:
3. Novoslobodskaya. This station was designed around the stained-glass panels, which were made in Latvia, because Alexey Dushkin, the Soviet starchitect who dreamed it up (and also designed Mayakovskaya station) couldn’t find the glass and craft locally. The stained glass is the same used for Riga’s Cathedral, and the panels feature plants, flowers, members of the Soviet intelligentsia (musician, artist, architect) and geometric shapes.
Go two stops east on the 1/Circle line to:
4. Komsomolskaya. Named after the Komsomol, or the Young Communist League, this might just be peak Stalin Metro style. Underneath the hub for three regional railways, it was intended to be a grand gateway to Moscow and is today its busiest station. It has chandeliers; a yellow ceiling with Baroque embellishments; and in the main hall, a colossal red star overlaid on golden, shimmering tiles. Designer Alexey Shchusev designed it as an homage to the speech Stalin gave at Red Square on Nov. 7, 1941, in which he invoked Russia’s illustrious military leaders as a pep talk to Soviet soldiers through the first catastrophic year of the war. The station’s eight large mosaics are of the leaders referenced in the speech, such as Alexander Nevsky, a 13th-century prince and military commander who bested German and Swedish invading armies.
One more stop clockwise to Kurskaya station, and change onto the 3/Blue line, and go one stop to:
5. Baumanskaya. Opened in 1944. Named for the Bolshevik Revolutionary Nikolai Bauman , whose monument and namesake district are aboveground here. Though he seemed like a nasty piece of work (he apparently once publicly mocked a woman he had impregnated, who later hung herself), he became a Revolutionary martyr when he was killed in 1905 in a skirmish with a monarchist, who hit him on the head with part of a steel pipe. The station is in Art Deco style with atmospherically dim lighting, and a series of bronze sculptures of soldiers and homefront heroes during the War. At one end, there is a large mosaic portrait of Lenin.
Stay on that train direction one more east to:
6. Elektrozavodskaya. As you may have guessed from the name, this station is the Metro’s tribute to all thing electrical, built in 1944 and named after a nearby lightbulb factory. It has marble bas-relief sculptures of important figures in electrical engineering, and others illustrating the Soviet Union’s war-time struggles at home. The ceiling’s recurring rows of circular lamps give the station’s main tunnel a comforting glow, and a pleasing visual effect.
Double back two stops to Kurskaya station , and change back to the 1/Circle line. Sit tight for six stations to:
7. Kiyevskaya. This was the last station on the Circle line to be built, in 1954, completed under Nikita Khrushchev’ s guidance, as a tribute to his homeland, Ukraine. Its three large station halls feature images celebrating Ukraine’s contributions to the Soviet Union and Russo-Ukrainian unity, depicting musicians, textile-working, soldiers, farmers. (One hall has frescoes, one mosaics, and the third murals.) Shortly after it was completed, Khrushchev condemned the architectural excesses and unnecessary luxury of the Stalin era, which ushered in an epoch of more austere Metro stations. According to the legend at least, he timed the policy in part to ensure no Metro station built after could outshine Kiyevskaya.
Change to the 3/Blue line and go one stop west.
8. Park Pobedy. This is the deepest station on the Metro, with one of the world’s longest escalators, at 413 feet. If you stand still, the escalator ride to the surface takes about three minutes .) Opened in 2003 at Victory Park, the station celebrates two of Russia’s great military victories. Each end has a mural by Georgian artist Zurab Tsereteli, who also designed the “ Good Defeats Evil ” statue at the UN headquarters in New York. One mural depicts the Russian generals’ victory over the French in 1812 and the other, the German surrender of 1945. The latter is particularly striking; equal parts dramatic, triumphant, and gruesome. To the side, Red Army soldiers trample Nazi flags, and if you look closely there’s some blood spatter among the detail. Still, the biggest impressions here are the marble shine of the chessboard floor pattern and the pleasingly geometric effect if you view from one end to the other.
Keep going one more stop west to:
9. Slavyansky Bulvar. One of the Metro’s youngest stations, it opened in 2008. With far higher ceilings than many other stations—which tend to have covered central tunnels on the platforms—it has an “open-air” feel (or as close to it as you can get, one hundred feet under). It’s an homage to French architect Hector Guimard, he of the Art Nouveau entrances for the Paris M é tro, and that’s precisely what this looks like: A Moscow homage to the Paris M é tro, with an additional forest theme. A Cyrillic twist on Guimard’s Metro-style lettering over the benches, furnished with t rees and branch motifs, including creeping vines as towering lamp-posts.
Stay on the 3/Blue line and double back four stations to:
10. Arbatskaya. Its first iteration, Arbatskaya-Smolenskaya station, was damaged by German bombs in 1941. It was rebuilt in 1953, and designed to double as a bomb shelter in the event of nuclear war, although unusually for stations built in the post-war phase, this one doesn’t have a war theme. It may also be one of the system’s most elegant: Baroque, but toned down a little, with red marble floors and white ceilings with gilded bronze c handeliers.
Jump back on the 3/Blue line in the same direction and take it one more stop:
11. Ploshchad Revolyutsii (Revolution Square). Opened in 1938, and serving Red Square and the Kremlin . Its renowned central hall has marble columns flanked by 76 bronze statues of Soviet heroes: soldiers, students, farmers, athletes, writers, parents. Some of these statues’ appendages have a yellow sheen from decades of Moscow’s commuters rubbing them for good luck. Among the most popular for a superstitious walk-by rub: the snout of a frontier guard’s dog, a soldier’s gun (where the touch of millions of human hands have tapered the gun barrel into a fine, pointy blade), a baby’s foot, and a woman’s knee. (A brass rooster also sports the telltale gold sheen, though I am told that rubbing the rooster is thought to bring bad luck. )
Now take the escalator up, and get some fresh air.
R&K Insider
Join our newsletter to get exclusives on where our correspondents travel, what they eat, where they stay. Free to sign up.
21 Things to Know Before You Go to Moscow
Featured city guides.
IMAGES
VIDEO
COMMENTS
And it's also important for your subject to truly be a good rider! Photos from the curves will always look better with a pro than with a novice. Fortunately, finding pros at the races is easy. A side view of a motorcycle from the outside of a curve. Photographed from outside the barrier, about 15 meters from the track.
Trust me. 2. Use a long lens, mostly. In my motorcycle photography kit, I have three zoom lenses: 24-70mm, 70-200mm, and 100-500mm. However, the vast majority of my photos are taken with the 70-200mm, which is just about perfect for standing on the side of the road to capture passing bikes.
Pair that with a tall tripod, and you have an overhead lighting arrangement. 1. The three-light setup: Position one softbox overhead and two softboxes on either side of the bike. You may place the two side softboxes at either a three-quarter position or to the side of the bike. It depends on the look you want.
Ask the local council or authority for permission to do a photo shoot on that location. Set your camera up on a tripod as you will be using a longer exposure than normal. It could be up to 1 -2 mins to let enough light in to get a good exposure. Have your aperture opened up to let more light in (smaller the number, bigger the aperture).
Mototcycle photography has to be about the motorbike. Composition, camera angle, location and light are key. In PT2 we'll do some post production and photogr...
Subscribe Now:http://www.youtube.com/subscription_center?add_user=ehowArtsandCraftsWatch More:http://www.youtube.com/ehowArtsandCraftsPhotographing motorcycl...
Mike heads to Snetterton race circuit with our very own Amanda Leeming to brush up on his motorsport photography skills and to capture the high-octane action...
Bad motorcycle photo - VFR800 bifurcated with poles. In the motorcycle photo above (a VFR800 I checked out years ago), there are poles bifurcating the motorcycle at various points. And a busy plant. It's really quite annoying because the motorcycle is a beautiful stock VFR800F in Honda's beautiful tri-colour scheme, but the photo sells it ...
The Golden Rule: Experiment! Playing with different angles, settings and positioning yourself at different corners can create unlimited possibilities for great motorcycle racing photographs. Try using motion blur on a slow corner when the bikes are bunched up, and you'll get the lead bikes in sharp focus and the tail-enders in motion blur.
All these photos were taken on a Canon 50mm f1.8 prime lens Motorcycle photography is a learning experience. Just with everything, photography is a learning game. One of the best and worst instances I have of this is taking a photo of the 2017 Suzuki GSX750. I thought the photo was great until I showed it to a professional.
03. Try to find great angles. "Play with different angles while you're shooting motorbikes. I often get low on the ground (many a time in puddles and mud). This can help you stay out of any reflections from the bike and will also make the bike more prominent in the image." (Image credit: Michelle Szpak) 04.
4. Shutter speed. You're most likely to need to play with different shutter speeds if you're photographing a moving bike. If that's what you're after, put your camera into shutter priority mode (Tv or S on the dial or in the menu). Try starting with a shutter speed of 1/500 or 1/1000 (of a second) - which should be fast enough to freeze ...
If you remember that, you'll soon realise that even a complex shoot such as this can be simplified into two main steps. 1. Determine your angle & focal length. Studio shots of motorbikes are most commonly done at a three quarter side angle or front on. One of the goals for any type of product photography is to highlight key features of the ...
Zoom Lenses. The essential zoom lenses for my motorcycle photography shoots are the Sony 16-35mm f2.8 G Master, Sony 24-70mm f2.7 G Master Mark II, and Sony 70-200mm f2.8 G Master Mark II.These lenses not only offer maximum burst rates, but also have super fast and accurate focus motors and razor sharp optics that can resolve high-resolution sensors like my Sony A1.
Here are the basic steps: Get your motorcycle photo-ready, and choose a location. Set your expectations for the final product. Find a photographer who can capture your vision. Complete your photoshoot. If submitting your motorcycle to a site for a feature, send in your best work.
In this photography tutorial for beginners I show you how to photograph your motorbike with the help of Simon B. I share with you the best angles and light...
FILE PHOTO: A father who told school officials that his child got too much homework ended up facing charges. (romrodinka/Getty Images/iStockphoto) By Natalie Dreier, Cox Media Group National ...
MOUNT PLEASANT, S.C. (WCIV) — A 50-year-old died in a motorcycle accident on Patriots Point Road, the Charleston County Coroner's Office said Wednesday. Miguel Farina died from blunt force ...
Architecture itself is pretty. Mikhail Rybin — Google review. Novodevichy Convent, also known as Bogoroditse-Smolensky Monastery , is probably the best-known cloister of Moscow. Its name, sometimes translated as the New Maidens' Monastery, was devised to differ from the Old Maidens' Monastery within the Moscow Kremlin.
OXFORD, Ohio (WXIX/Gray News) - A father's growing frustrations about the amount of homework his child's school was assigning led to him being arrested.Adam Sizemore is accused of repeatedly ...
Photo by Lemmy. I got my copy. You can pick one up, too, if you want. $48.88 is cheap tuition. Nothing replaces practice, but practice is less dangerous with a firm grasp of the theory behind it. And I'm happy because now when someone asks me how to get started in learning to work on motorcycles, I have a simple and easy answer. Honda's ...
I. Read the passage carefully and answer the questions below. Hoa's family lives in a beautiful house in the country. There are manyflowers in front of her house. Behind the house, there is a well. To the right of the house, there is a rice-paddy and to the left of the house, there are tall trees.
For the sophisticated or just deciding to learn more about the international biker culture, listen to biker traditions, signs, as well as plunge into the world of motorcycle nightlife - we made a route of 65 km: Moscow Kremlin, Red Square, St. Basil's Cathedral, Marsh Square, Observation deck near the Moscow-City International Business Center, Bike Center "Sexton", Observation deck on ...
Freedom is living a moment that may be. Adventure is finding it. Welcome to our channel! We create fun and informative videos about motorcycles, photography, and adventure! We are three pro ...
Photo by: By Liubov Butakova. Keep going one more stop west to: 9. Slavyansky Bulvar. One of the Metro's youngest stations, it opened in 2008. With far higher ceilings than many other stations—which tend to have covered central tunnels on the platforms—it has an "open-air" feel (or as close to it as you can get, one hundred feet under).
JetPhotos.com is the biggest database of aviation photographs with over 5 million screened photos online! "Moscow City Spotters" spotting group on JetPhotos Photos